Chocolate & Walnut Sourdough Bread Recipe
This post may contain affiliate links.
Attentional all chocolate lovers!
This chocolate sourdough bread recipe has your name on it!
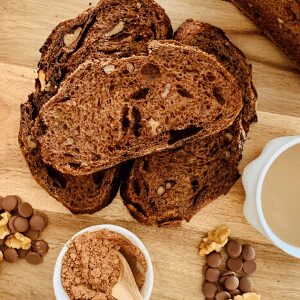
The delicious combination of rich chocolate and crunchy walnuts will have you wanting another slice!
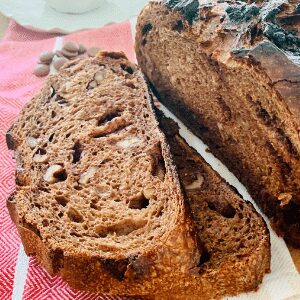
The flavor of this chocolate sourdough bread might surprise you. It is chocolate - however it's not super sweet.
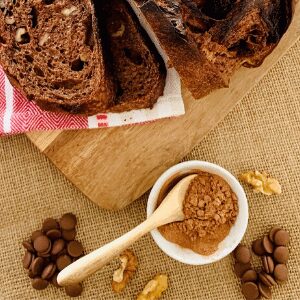
It gets it's richness from the addition of raw cacoa powder and Belgian chocolate chips. Additional texture is added with some crunchy walnuts. Together they form an unbeatable flavor combination.
This chocolate sourdough bread recipe is extremely versatile and can be used for a myriad of chocolate sourdough flavor combinations. You'll find lots of ideas further down the page.

Serving Ideas for Chocolate & Walnut Sourdough
Chocolate and walnut Sourdough bread can be served in so many different ways. It's perfect served with your favorite butter, honey or even a decadent caramel or chocolate spread. You might also like to use chocolate sourdough as the basis for a bread and butter pudding or even a decadent french toast. It would even be at home on a grazing plate or cheese platter.
Flavor Variations For Chocolate Sourdough
Chocolate is a fantastic base flavor for sourdough bread - and while it pairs perfectly with walnuts, there are a tonne of other chocolate based flavor combinations that you might like to try. You can use the recipe below as a base and just add whatever else you'd like. Here are some ideas:
- Chocolate, Apricot and Walnut (just add 50g of chopped dried apricots to the recipe below).
- Chocolate and Cranberry (take out the walnuts, add 50 to 100g of dried cranberries).
- Chocolate and Hazelnut (take out the walnuts, add 50g roasted hazelnuts).
- Chocolate, Cranberry and Walnut (just addd 50g of dried cranberries).
- Chocolate and Cherry (take out the walnuts, add 50 to 100g of dried or glace cherries).
- Chocolate, Orange and Pecan (take out the walnuts, add 50g of candied orange peel and 50g of roasted pecans).
- White Chocolate and Macadamia (take out the walnuts and Belgian chocolate chips and add 50g of roasted macadamia nuts and 100g of white chocolate chips).
If you prefer a plain sourdough loaf, you'll find a simple recipe here.
How to Make Chocolate & Walnut Sourdough
There is nothing too complicated about this recipe. The main thing to remember is to add your raw cacao powder and instant coffee (if you're using it) to your water before you add it to the flour. This will ensure that the flavor is evenly distributed through your sourdough bread.
Coffee Granules are optional
You don't have to use the instant coffee granules if you don't want to - it's totally optional. They actually don't add too much of a coffee flavor to the bread. The coffee just adds a richness to the chocolate flavor of the bread.
Walnuts
You can choose to crush your walnuts a little if you want to or you can leave them whole. I find they are a little easier to distribute if they are broken up a little.
Chocolate Chips
You can really use any kind of chocolate chips that you'd like to. I like the flavor of Belgian chocolate but any that you have will be ok. I find that adding the chocolate chips is enough sweetness without having to add additional sugar to the bread.
Baking Sourdough
If you need to create a sourdough starter (which you'll need for this bread) you'll find simple instructions here.
You'll find some useful tips on improving your oven spring here.
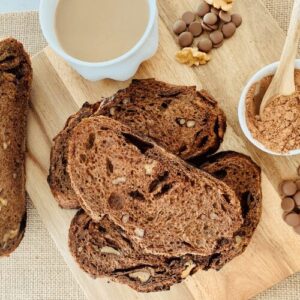
Chocolate Walnut Sourdough Bread Recipe
Equipment
- Mixing Bowl
- Digital Scales
- Banneton
- Dutch Oven
Ingredients
- 50 g Sourdough Starter active and fed
- 500 g Bread Flour
- 380 g Water
- 10 g Salt
- 20 g Raw Cacao Powder
- 50 g Belgian Chocolate Chips
- 50 g Walnuts
- 20 g Instant Coffee Granules optional
Instructions
- Mix the raw cacao powder and instant coffee together with the 380g of water and mix until it's all dissolved.
- Weigh out your sourdough starter and then add the water mixture from step 1 into a large ceramic or glass bowl. Mix the water and starter together briefly. Then add your flour and salt and mix together with the end of a wooden spoon. The dough will be fairly shaggy and only just brought together.Cover your bowl with cling film or a damp tea towel and let it sit for around 1 hour. It's ok if it's a little longer.
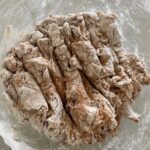
- Forming Up Your Dough:After the dough has been through autolyse, you need to bring it together into a ball. You'll notice that the dough is fully hydrated after soaking up all the liquid. It will be fairly sticky but as you bring it into a ball, it will become smoother and shinier.Work your way around the bowl, grabbing the dough from the outside and stretching it up and over itself until a smooth ball is formed. You shouldn't need more than 20-25 folds to form the ball, you might need less.
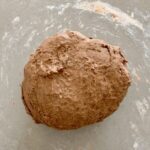
- Once the dough has formed into a smooth ball, pop the cling film back on and let it rest in the bowl for around 30 minutes.
- Stretching and Folding:Over the next few hours, you need to create some structure for you dough by stretching and folding. Aim to do around 4-6 sets of stretches and folds. For each set, stretch the dough up and over itself 4 times as you rotate the bowl. You'll find it gets easier to do at each set as the gluten in your dough develops.Around your second or third set of stretch and folds, you'll need to add your chocolate chips and walnuts. Don't worry if they aren't evenly distributed in the first set of stretch of folds you do with them - they will distribute over the next few sets.
- Bulk Ferment:Once you've finished your stretch and folds, place the cling film or damp tea towel back over your dough and let it rest and ferment.
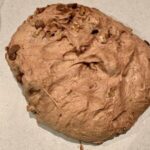
- Shaping Your Dough:Once your dough has finished its bulk ferment, it's time to form it back into a ball and give it some shape and surface tension. You'll need to flour your counter top with some rice flour for this (I like to add some raw cacao powder to my rice flour for this recipe).Shape your dough into a boule or batard. I think this recipe works well as a boule.Once you're happy with the shape, place your dough into your banneton or bowl, ensuring that you've liberally floured whatever you are using.

- Cold Ferment:Now your dough is in it's shaping container, cover it loosely with a plastic bag or damp tea towel and place it into the fridge.Try to leave it for a minimum of 5 hours, up to a maximum of 36 hours. The longer you leave it, the better your bread will be.
- Getting Ready To Bake:Once you're ready to bake your sourdough, you'll need to preheat your oven to 230C/450F. Place your Dutch Oven into the oven when you turn it on so that it gets hot. Try to preheat for around 1 hour to ensure your oven is super hot - but you know your oven, so just adjust this time if you need to.Leave your dough in the fridge until the very last minute.
- Bake Your Sourdough:When your oven is at temperature, take your sourdough out of the fridge. Gently place it onto a piece of baking paper or parchment paper.Gently score your bread with a lame, clean razor blade or knife. A cross is sufficient, but you can get as artistic as you like.
- Carefully take your Dutch Oven out of the oven. Place the sourdough into the pot using the baking paper as a handle. Put the lid on and place into the hot oven. If you want you can spritz your dough with extra water before you put the lid on.
- BAKE TIME:Bake your sourdough for 30 minutes at 230C/450F lid on plus10 to 15 minutes at 210C/410 lid off

- Once the time has elapsed, remove your sourdough from your Dutch Oven. Turn off your oven and place the sourdough back into the oven, directly on your oven rack. Let it cool in here with the door ajar for 1-2 hours.This will ensure that it is completely cooked through and you don't have any doughy bits.
Notes
- Notes on Sourdough Starter
This recipe is based on you having an active starter that you have fed a few hours before starting your bake. For information on whether your starter is ready, go here.
- Notes on Stretch & Folds
If you are going to do the stretch & folds on your bench top, spray your surface with water mist rather than using flour.
- Notes on Bulk Fermentation:
If your home is warm then your dough will ferment a lot faster and could be done in as little as a few hours. If it's colder, it will take longer, possibly overnight. I would recommend that you try to do your first few bulk ferments during daylight hours so that you can watch your dough closely.
Once you're more familiar with the process - and the temperature of your home - you will be able to do overnight ferments.
You will know your dough is ready to move to the next stage when it has *just* doubled in size. It will be fairly wobbly and full of bubbles. You should be able to see large air bubbles under the surface of the dough.
You don't want to let it go any further than doubled as it will be over fermented. If you want to do an overnight ferment, but your home is warm, consider using a little less starter (ie 25g).
Less starter means your dough will take longer to ferment and you will reduce the risk of over fermenting your dough. You'll find more information on these topics here:
When is my bulk ferment finished?
What is the difference between cold ferment and bulk ferment?
Why does the amount of starter matter?
- Notes on Baking
If you're worried about the base of your bread burning, place a baking sheet on shelf underneath your Dutch Oven - it works! If you're worried about your bread not being cooked all the way through, turn the oven off and place your dough straight onto the oven rack. Leave the door ajar and let your bread rest there for a few hours. Remember not to cut into your loaf too soon - you'll need to let it cool for at least a few hours (4-6 is best).


Can you omit the instant coffee? If so do you mix like regular sourdough bread recipe, starter water, salt flour ext.??
Thank you
Can I add dates to this bread
yes you can 🙂
Could there be an addition of sugar if we wanted it to be sweeter? If so how much?
you could add up to 50g if you like.
If I’m using a chocolate starter how much cocoa powder should I use? Still the same as this recipe calls for?
yes same amount xo
How far apart should your stretch and folds be?
Can you add bananas to this? If so, at what step, and how much would you add? (Mushy, ready to bake bananas)
I wouldn't recommend adding banana no, it doesn't bake up well in a sourdough bread like this. If you have mushy bananas, I would recommend making sourdough banana muffins or sourdough banana bread.
Can you use regular flour instead of bread flour? Or can I follow the original sour dough recipe and add chocolate?