Best Sourdough Spelt Bread Recipe [spelt flour sourdough]
This post may contain affiliate links.
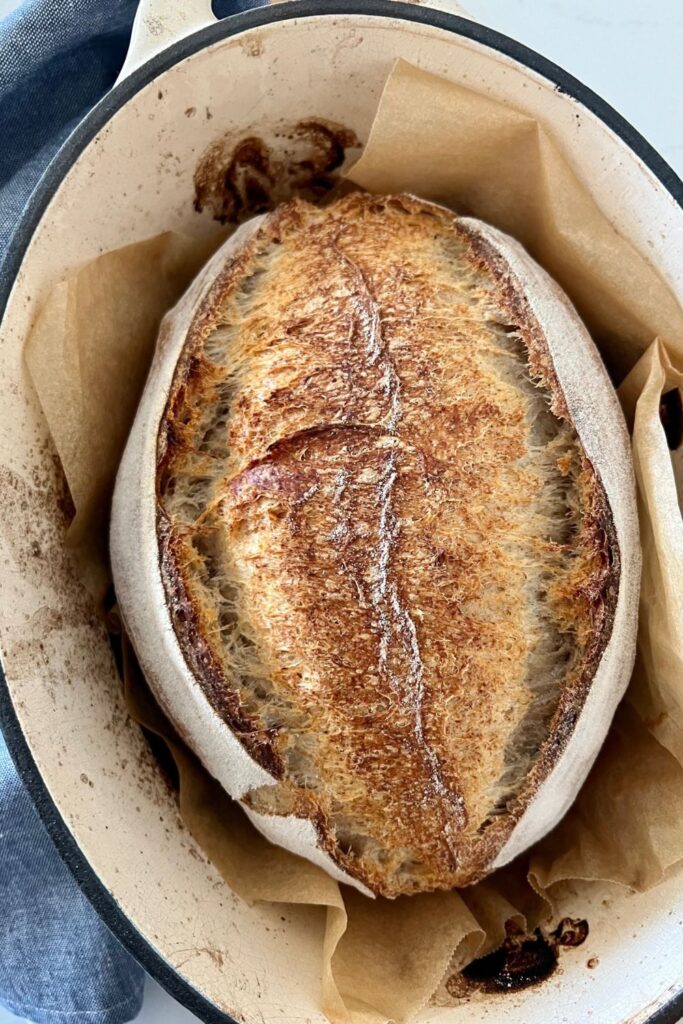
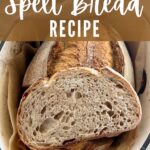
This sourdough spelt bread recipe is perfect for introducing spelt into your sourdough bread making routine. You can use white spelt flour or whole grain spelt flour, or a combination of both if you prefer.
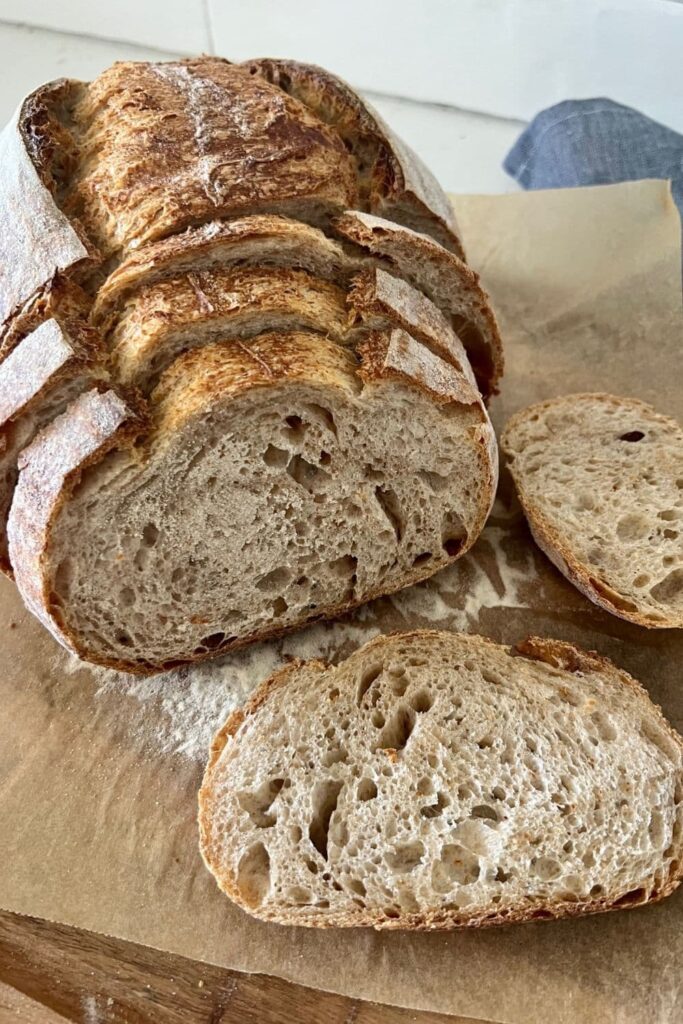
This gorgeous homemade spelt sourdough bread packs a powerful sourdough punch, with all the flavor from the sourdough fermentation process and goodness of spelt grains. I have used a blend of white spelt and whole grain spelt for an extra depth of flavor, but you can use only white spelt if you'd prefer.
If you enjoy baking with spelt flour and wild yeasts, you might like to try spelt flour in these sourdough recipes - sourdough discard pancakes, sourdough pumpkin waffles or even these sourdough brownies.
What is spelt flour and how is it different from bread flour?
Spelt flour is a different species of wheat to that of bread flour or all purpose flour. It's official name is Triticum Spelta and it is slightly higher in protein, yet lower in gluten. It is lower in insoluble fibre, making it easier to digest than regular varieties of wheat. Despite it being slightly higher in protein, spelt flour creates a softer loaf with a sweet, nutty flavor. You can read more about the specifics of spelt flour here.
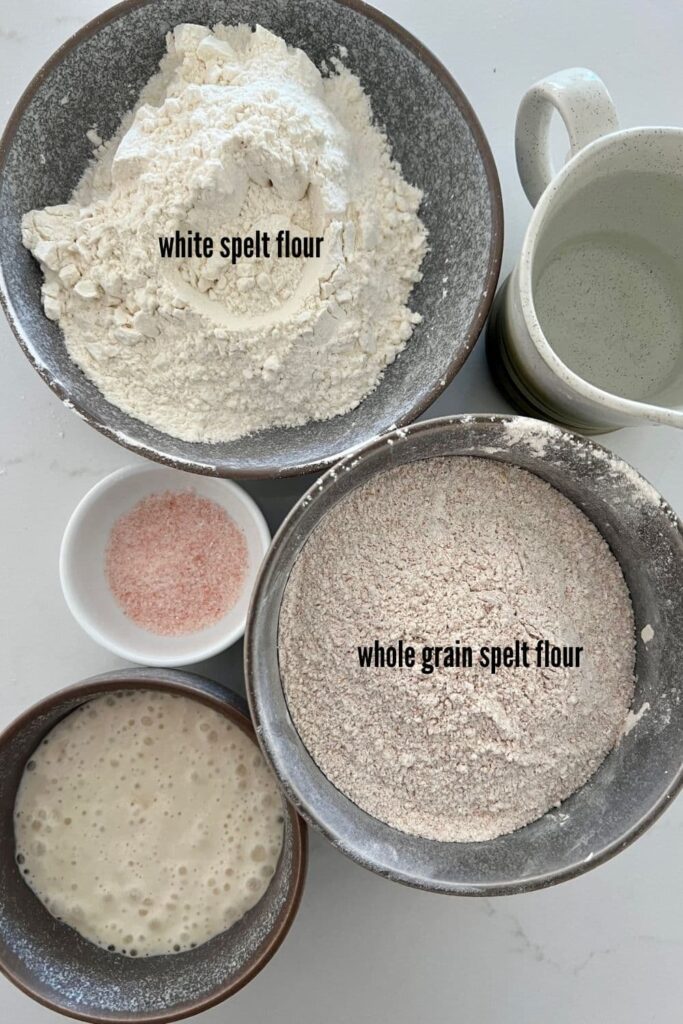
There are two types of spelt flour - white spelt, where only the endosperm is processed and whole grain spelt, where the entire grain is processed, giving a coarser more nutrient dense flour.
Is spelt sourdough bread healthy?
Spelt sourdough bread is a healthy choice because it is easier to digest than regular white bread, contains less gluten and also has other minerals and vitamins present that may not be present in other forms of white bread.
When it comes to sourdough, spelt sourdough is not necessarily more healthy than sourdough made with bread flour, however for some people, spelt can be easier to digest and therefore healthier for their own dietary needs.
You can also use organic spelt flour if you prefer.
Is sourdough spelt bread low FODMAP?
According to Monash University, spelt bread prepared using traditional sourdough methods is considered low FODMAP. You could have up to 2 slices of spelt sourdough bread, so long as it's been fermented using a sourdough starter and has no added commercial yeast.
FODMAP refers to a group of carbohydrates whose presence in the diet is thought to contribute to the symptoms of irritable bowel syndrome. These are fermentable oligosaccharides, disaccharides, monosaccharides and polyols.
According to Monash University, it is the often the processing of these carbohydrates that affects the levels in certain foods. The slow fermentation process that occurs when making sourdough bread is able to lower the FODMAPs present in the final bread.
You can find the Monash University study here, as well as more information referring to FODMAPs here.
Please note that this advice is of a general nature only and you should refer to a medical professional if you want to include sourdough bread or spelt sourdough bread into your diet, FODMAPs or otherwise.
Does spelt sourdough bread have gluten?
While spelt flour is lower in gluten than regular all purpose or bread flour, it still contains gluten, so is not suitable for those needing to follow a gluten free diet, such as people with celiac disease.
When used in sourdough bread, a long fermented spelt sourdough bread would have less gluten then a spelt bread that has not gone through the sourdough fermentation process. But spelt is NOT gluten free. It's just lower in gluten.
You can read more about gluten in sourdough bread here.
Does it matter if I use white spelt or wholegrain spelt?
It doesn't really matter, however I have found that I get a better result when using a blend of white and whole grain spelt flours. When I have baked sourdough bread using only whole grain spelt flour, I did not get the oven spring or open crumb I was looking for. Whole grain spelt sourdough bread tends to be heavier in texture than when I use some white spelt alongside it.
In this recipe, I have used 350g of white spelt and 150g of whole grain spelt. This was the sweet spot for getting a good oven spring with a lovely whole grain spelt flavor.
Do I have to use a spelt sourdough starter to make spelt sourdough bread?
You don't necessarily have to use a spelt based sourdough starter to make this spelt sourdough bread recipe. If you need to use spelt flour for health reasons, it would be better for your sourdough starter to be made with spelt flour.
You can easily start feeding your sourdough starter with spelt flour to ensure the health benefits. It will take a few days for your sourdough starter to get used to a different flour, but it will recover.
Alternatively, you could create a levain specifically for making this loaf of sourdough spelt bread.
How To Make Spelt Sourdough Bread
Making spelt sourdough bread follows the same basic principles as baking sourdough bread with bread flour. However, because spelt flour is a softer flour than bread flour, we need to make some allowances, such as reducing the hydration, to ensure that the dough comes together into a successful loaf of sourdough bread.
My simple sourdough recipe is around 71% hydration. This spelt sourdough bread is around 64% hydration to make it easier to work with. You can see how I calculated the hydration here.
You may need to add more water, depending on the ratio of white spelt to wholegrain spelt you use.
Autolyse - Premixing The Dough
Weigh out your active sourdough starter and water into a large mixing bowl.
Mix the water and starter together briefly. Then add your spelt flour and salt and mix whole lot together to form a shaggy dough (I use a jar spatula or dough scraper to do this).
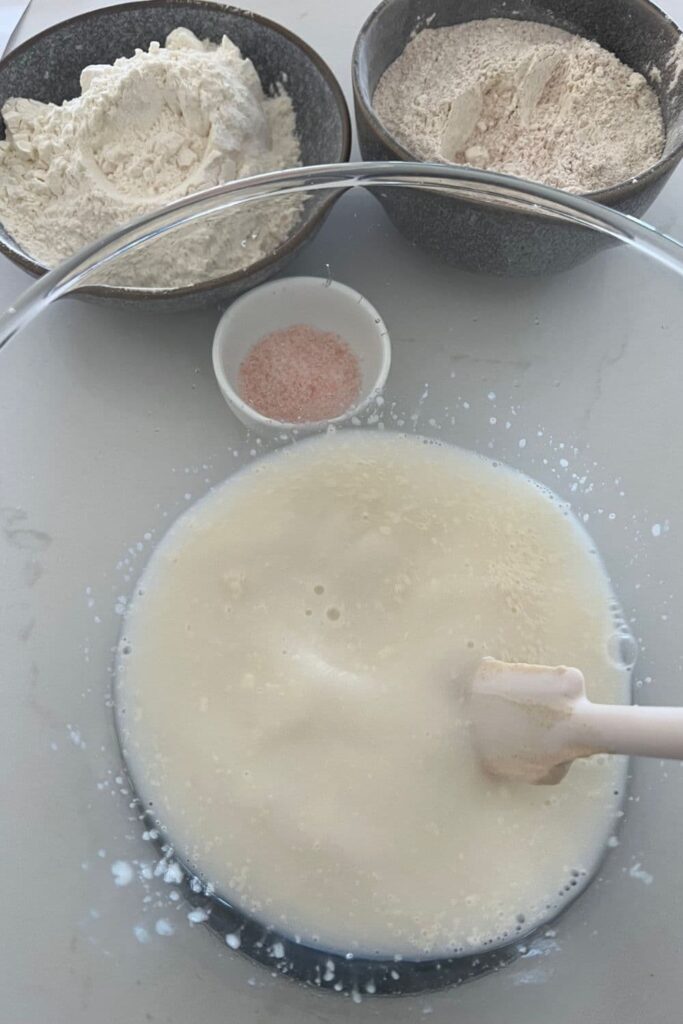
The dough will be fairly shaggy and only just brought together. If it really seems very dry, then you can add a splash more water (this may be the case with using extra whole grain spelt flour.
Cover your bowl with an elastic food cover or damp kitchen towel and let it sit for around 1 hour.
This process is called the "autolyse" and allows your flour to soak in all the water and become hydrated.
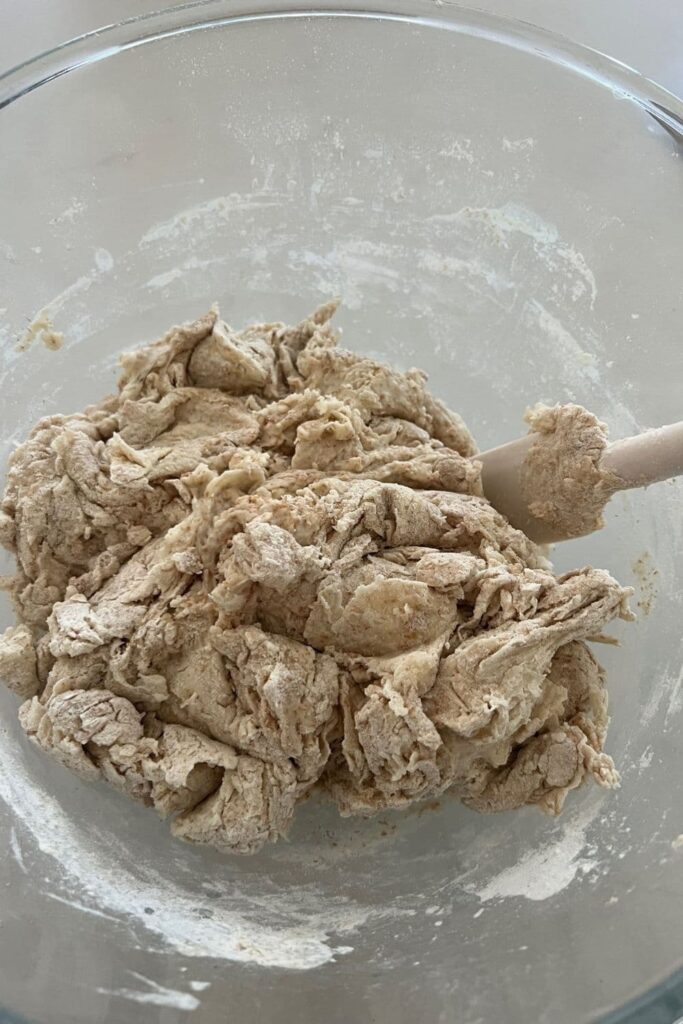
Forming Up The Dough
After the dough has been through autolyse you need to bring it together into a ball. Work your way around the bowl, grabbing the dough from the outside, stretching it up and over itself, into the centre, until a smooth ball is formed. You shouldn't need more than about 20-30 stretches to form the ball.
You'll notice that the dough is fully hydrated after soaking all the water up. It will be fairly sticky but as you bring it into a ball, it will begin to strengthen.
Once the dough has formed into a ball, pop the cover back on and let it rest for 30 minutes.
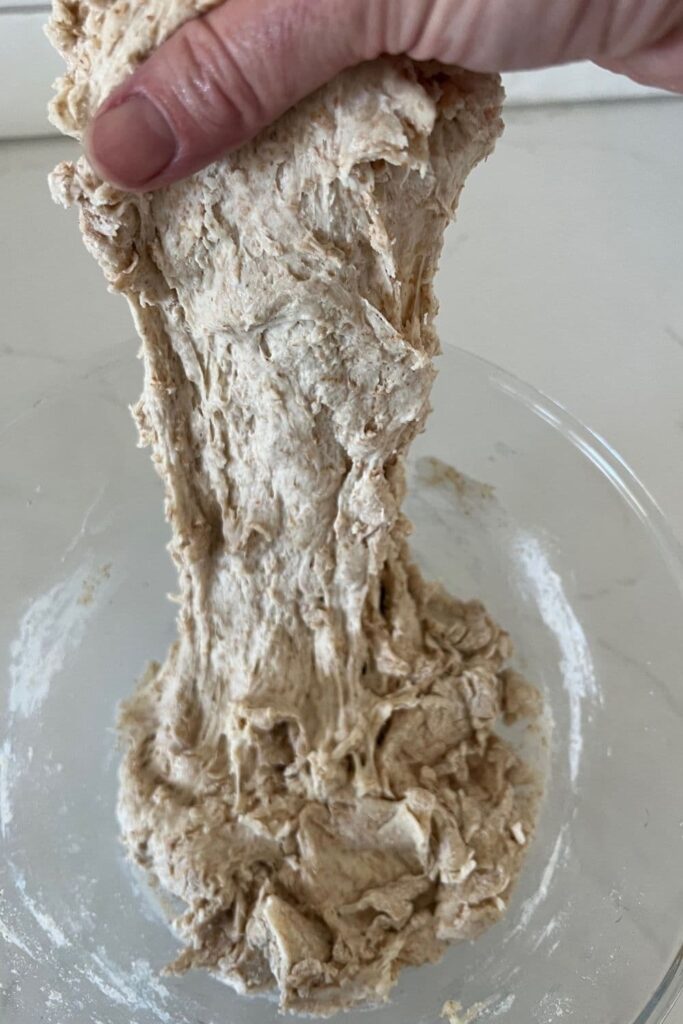
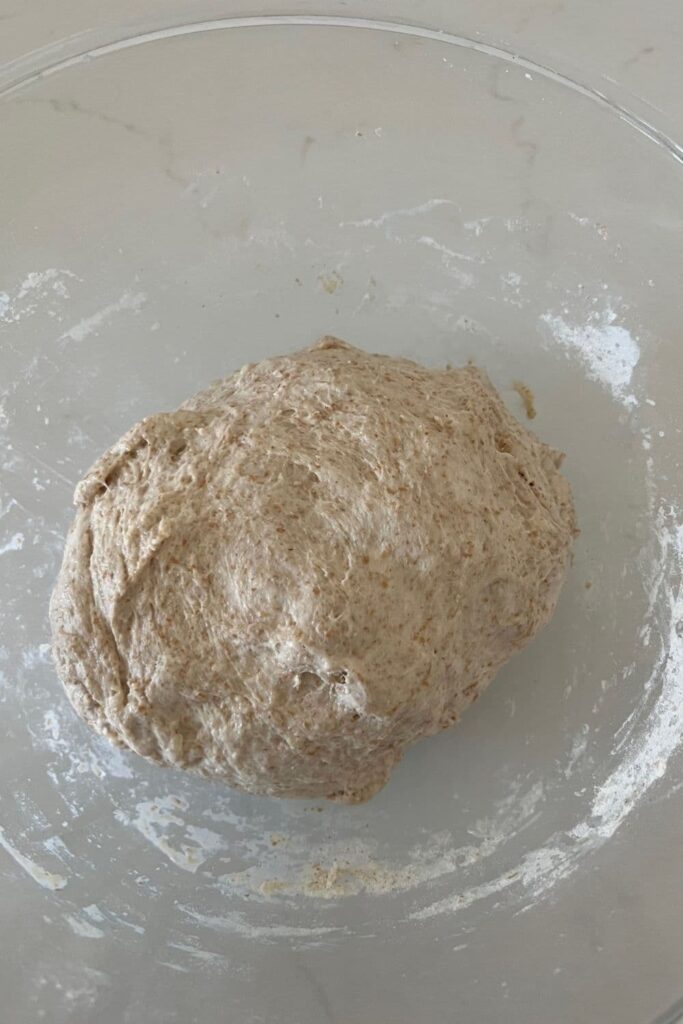
Stretch & Fold - Creating Structure
Over the next few hours you need to create some structure for your dough by "stretching and folding".
Aim to do around 4-6 sets of stretches and folds.
For each set, stretch the dough up and over itself 4 times. Leave around 15 minutes in between each set. Again you do not have to be exact with time, but you need to do at least 4 sets over 2 hours.
You can read more about stretching and folding sourdough here.
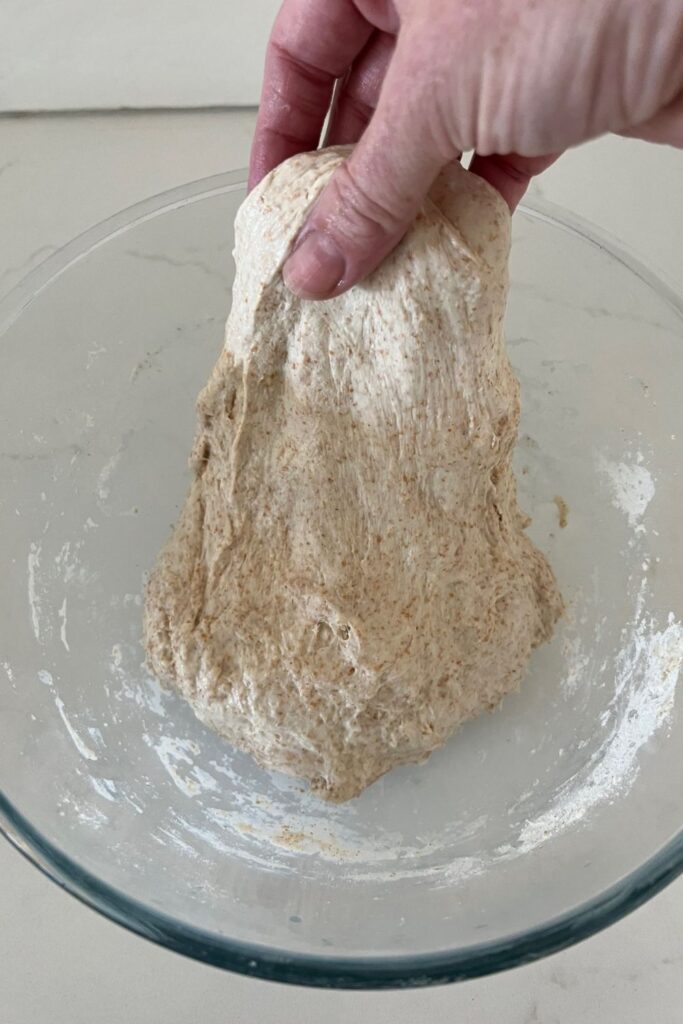
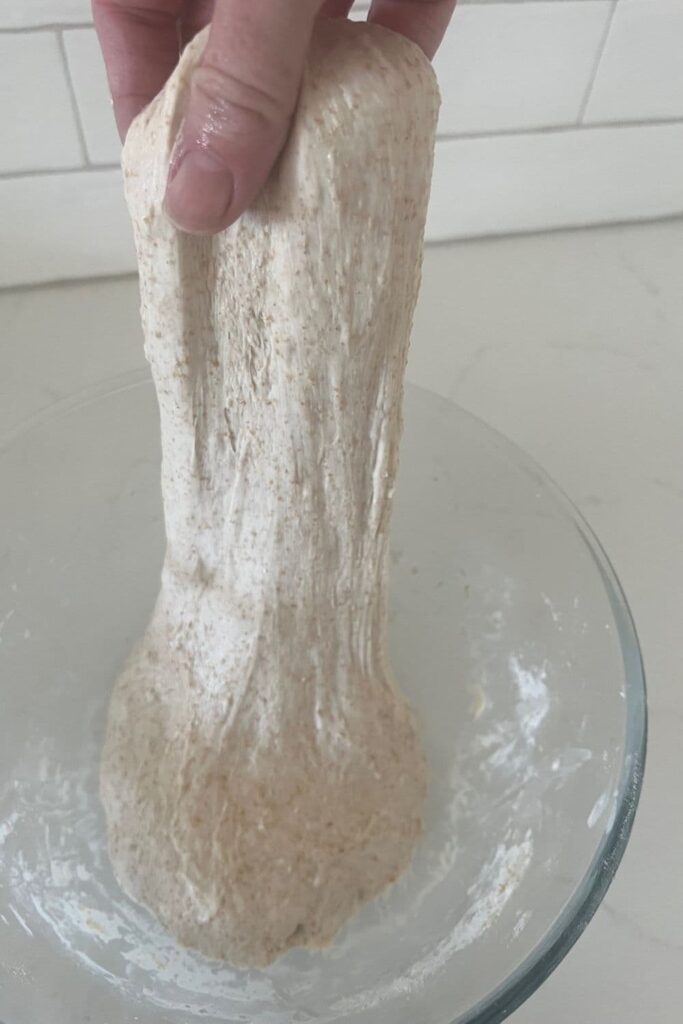
Bulk Ferment
Once you've finished your stretch and folds, place the cover back over your dough and let it rest and ferment (a plastic cover is a better option for this stage). You want the dough to double.
You can read more about understanding when bulk fermentation is finished here.
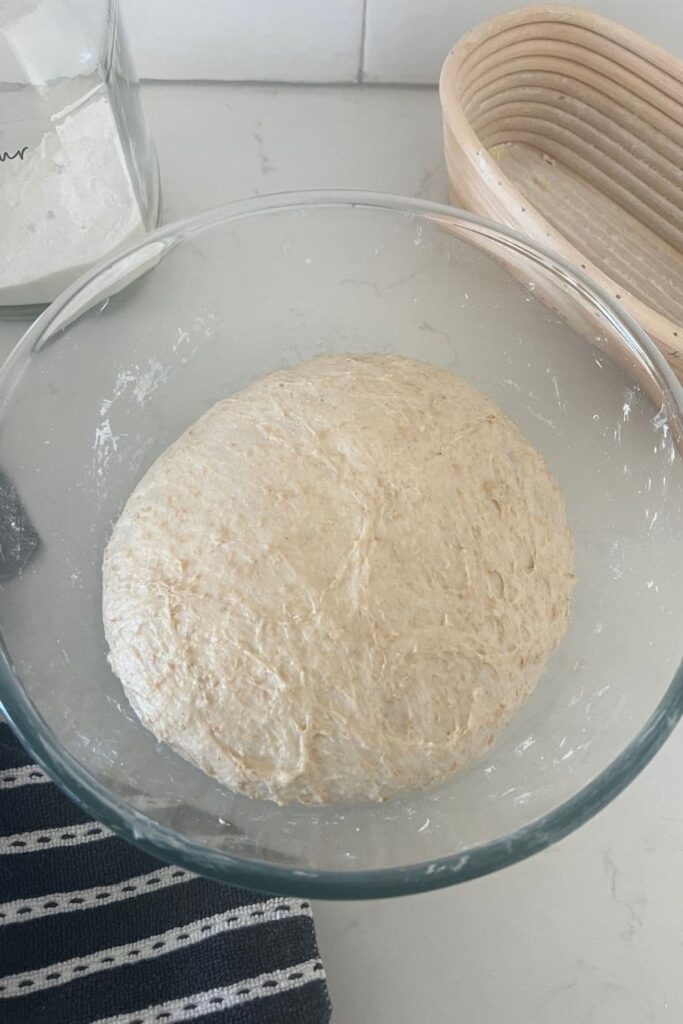
Shaping The Dough
Once your dough has finished it's first ferment, it's time to shape it into either a boule or a batard. I have chosen to shape my spelt sourdough bread into a batard for this loaf.
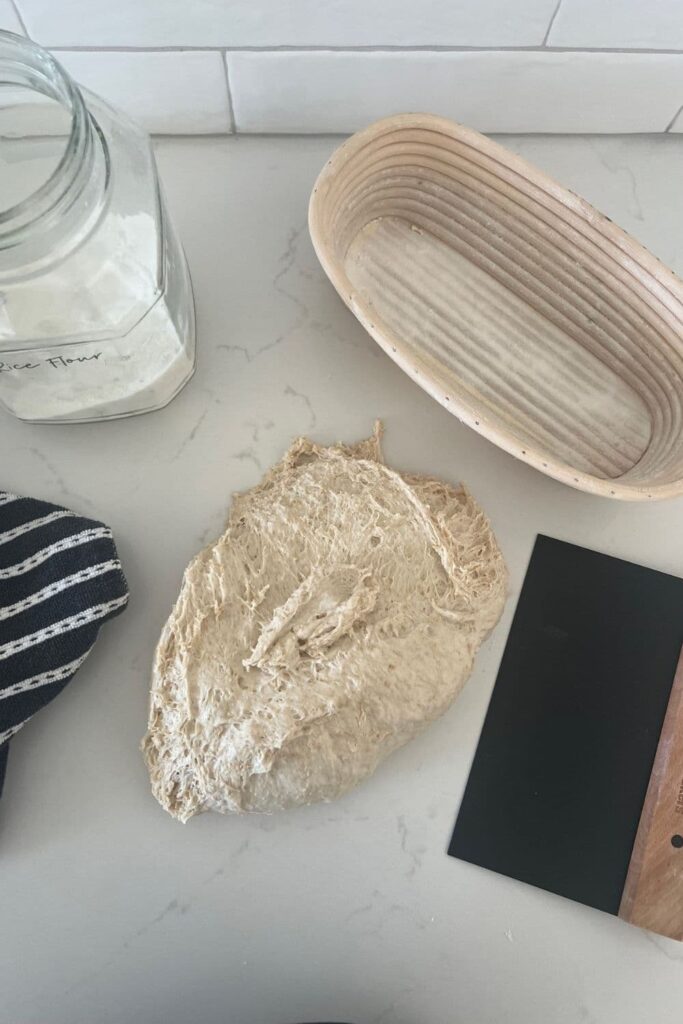
You'll need to flour your counter top with rice flour for this (we use rice flour because it has no gluten). Try to be quite sparing with the rice flour, you only need a very light dusting.
Use a silicone dough scraper to gently ease the dough out of the bowl. You want it to land upside down on your counter so that the smooth top of the dough is on the countertop and the sticky underside is facing up. This will make it easier to shape.
You can see how I shape dough into a batard here.
You will need a banneton to put your dough into. If you do not have a banneton or proofing basket, you'll find some ideas for alternatives here.
Whatever you're using needs to be liberally floured with your rice flour. If you're using a banneton - liberally sprinkle it with rice flour. If you're using a cloth or tea towel, rub the flour into it to ensure it becomes non stick.
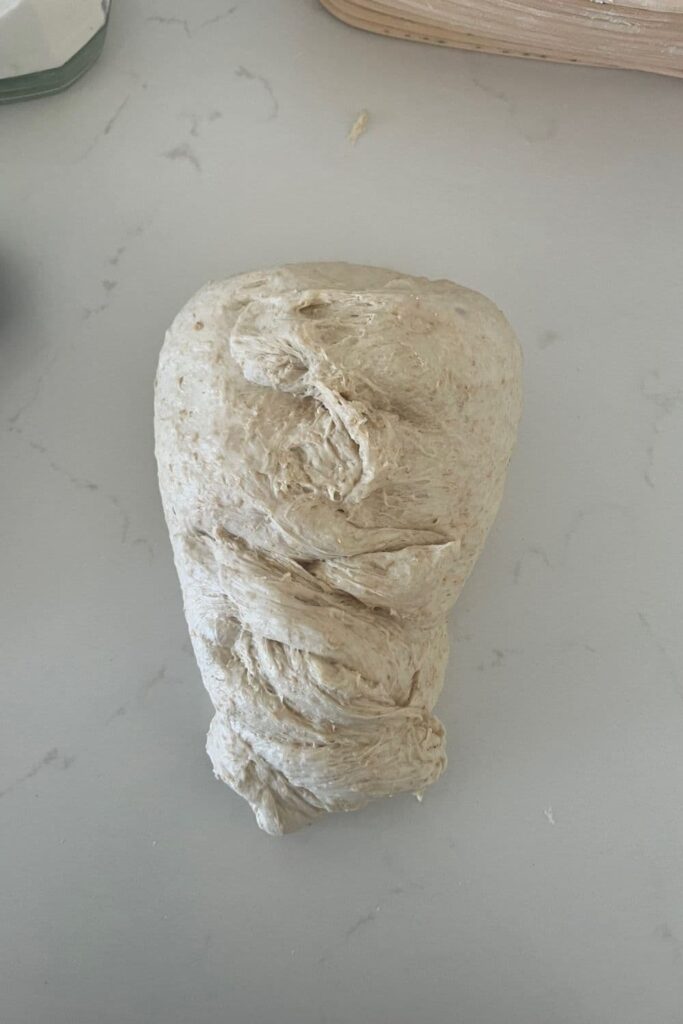
Placing Into A Banneton
Once the dough is shaped into a tight ball, place it into your banneton smooth side down, so your seam is on the top - this way the top of your dough will get the pretty lines from the banneton.
If you're using a cloth or tea towel in a bowl it's ok to put your dough with the smooth side up. Just make sure the dough is tight.
Lift your dough around the edges to pop a little more rice flour if you feel it needs it. Just try to handle the dough as little as possible and be really gentle as you really want to preserve all the gases and air bubbles that have formed during your bulk ferment.
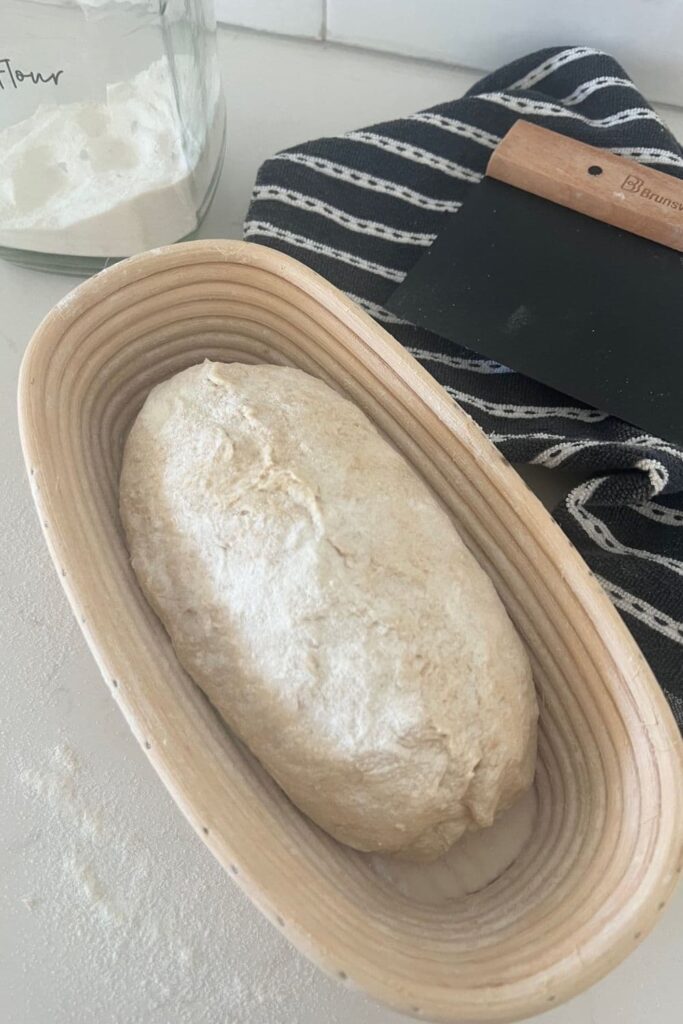
Cold Ferment
Now the dough is in its "shaping container" cover it loosely with a plastic bag or damp tea towel and place into the fridge.
I use a large plastic bag to cover it - I just reuse it each time.
Try to leave it in the fridge for a minimum 5 hours up to a maximum of around 36 hours. The longer you leave it the better your bread will be! A longer cold ferment creates beautiful blisters on your crust and a deeper sourdough flavour. It will also ensure your dough forms a skin which makes it easier to score.
Preparing To Bake
Once you're ready to bake your sourdough, you'll need to preheat your oven to 230C/450F.
Place your Dutch Oven into the oven when you turn it on so it gets HOT. Try to preheat for around 1 hour to ensure your oven is super hot - but you know your oven so just adjust this time if you need to.
Leave your dough in the fridge until the very last minute - placing a cold dough into a hot oven will give you a great "spring".
Bake Time!
Now it's time to bake!
When your oven is at temperature, take your sourdough out of the fridge. Gently place it onto a piece of parchment paper.
Make sure that you make the baking paper big enough to use the edges as a handle to lower to dough into your Dutch Oven.
Gently score your bread with a lame, clean razor blade or knife. At minimum a large cross is sufficient, but you can get as artistic as you like. You can find my full guide on how to score sourdough bread here.
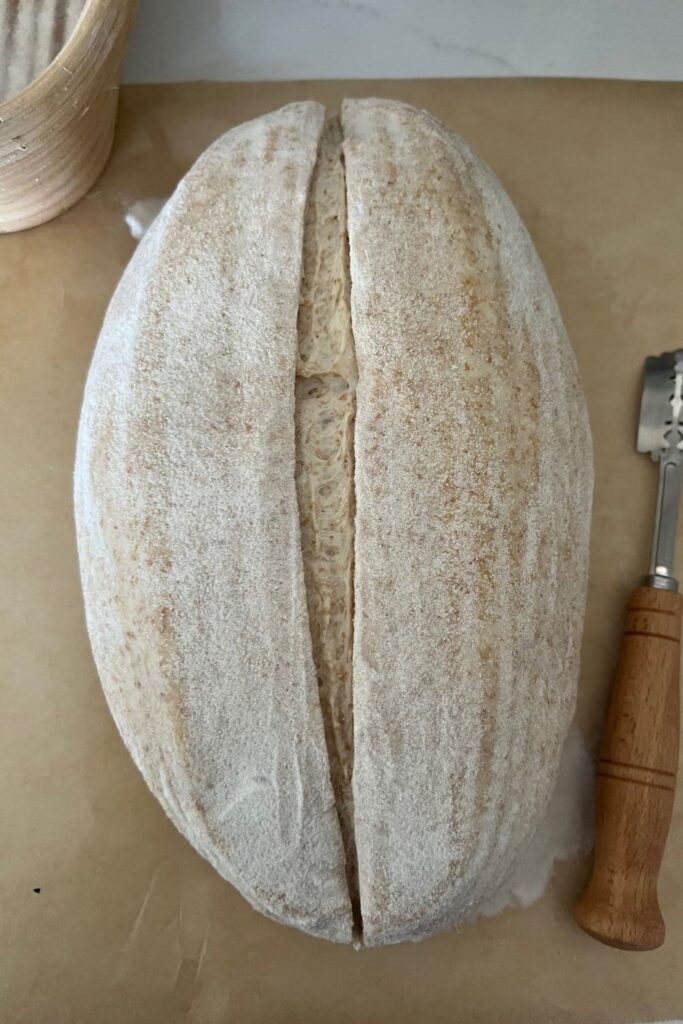
Carefully take your dutch oven out of the oven. Place the sourdough into the pot using the baking paper as a handle. Put the lid on and place into the hot oven.
If you want to you can spritz your dough with extra water before you put the lid on.
BAKE TIME:
30 Minutes with the lid on at 230C/450F plus
10-15 Minutes with the lid off at 210C/410F
Finishing The Bake
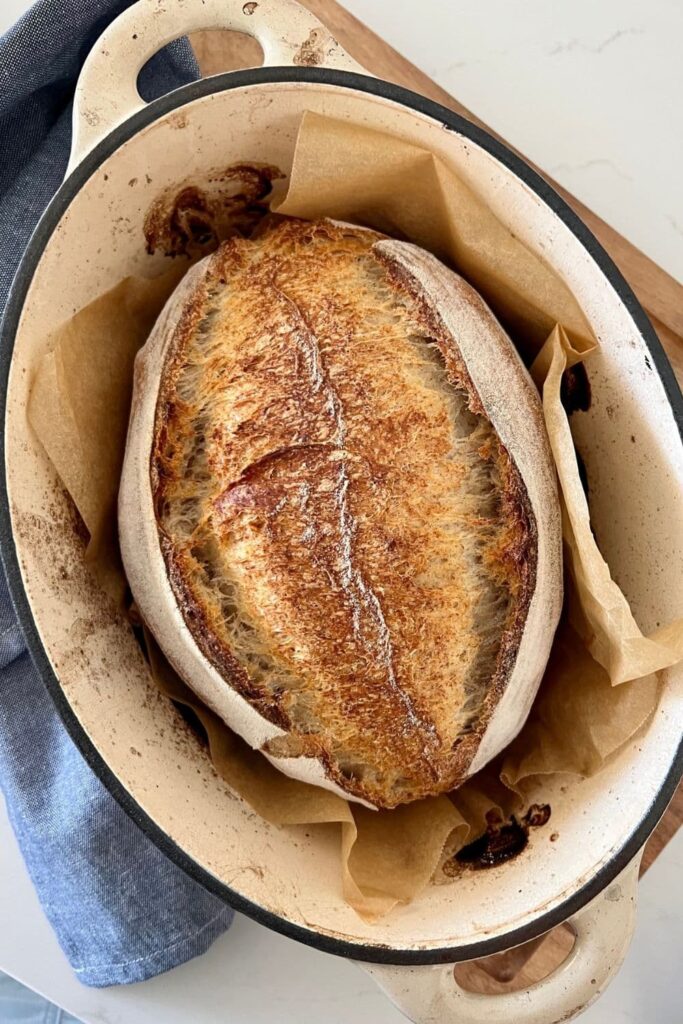
When you remove your dough from the oven, carefully remove it from the dutch oven as soon as possible and place on a wire rack to cool.
Can I use other ancient grains to make this spelt sourdough bread?
Spelt is considered an ancient grain, along with other flours like emmer and einkorn flour. You can substitute these ancient grain flours for spelt in this recipe if you prefer. These ancient grain flours behave in a similar way to spelt flour so the water ratios will work well for them too.
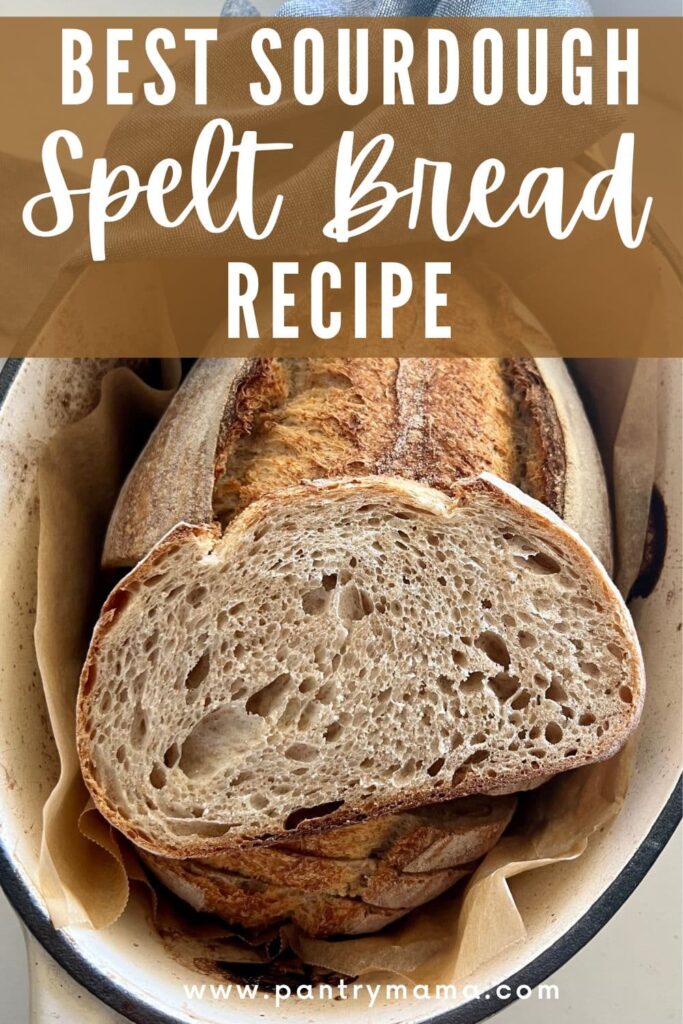
Spelt Sourdough Bread Recipe
Equipment
- Mixing Bowl
- Digital Scales
- Banneton
- Dutch Oven
Ingredients
- 100 g Sourdough Starter (Fed and Bubbly)
- 350 g Spelt Flour (white)
- 150 g Whole Grain Spelt Flour
- 300 g Water (you may need slightly more if you use more whole grain spelt)
- 10 g Salt (increase or decrease according to your taste)
Instructions
- Autolyse - Premixing The DoughWeigh out your sourdough starter and water into a large mixing bowl.Mix the water and starter together briefly. Then add your spelt flour and salt and mix whole lot together to form a shaggy dough (I use a jar spatula or dough scraper to do this).The dough will be fairly shaggy and only just brought together. If it really seems very dry, then you can add a splash more water (this may be the case with using extra whole grain spelt flour.
- Cover your bowl with an elastic food cover or damp kitchen towel and let it sit for around 1 hour. This process is called the "autolyse" and allows your flour to soak in all the water and become hydrated.
- Forming Up The DoughAfter the dough has been through autolyse you need to bring it together into a ball. Work your way around the bowl, grabbing the dough from the outside, stretching it up and over itself, into the centre, until a smooth ball is formed. You shouldn't need more than about 20-30 stretches to form the ball. You'll notice that the dough is fully hydrated after soaking all the water up. It will be fairly sticky but as you bring it into a ball, it will begin to strengthen.
- Once the dough has formed into a smooth ball, pop the cover back on and let it rest for 30 minutes.
- Stretch & Fold - Creating StructureOver the next few hours you need to create some structure for your dough by "stretching and folding". Aim to do around 4-6 sets of stretches and folds. For each set, stretch the dough up and over itself 4 times. Leave around 15 minutes in between each set. Again you do not have to be exact with time, but you need to do at least 4 sets over 2 hours.
- Bulk FermentOnce you've finished your stretch and folds, place the cover back over your dough and let it rest and ferment (a plastic cover is a better option for this stage).See notes below for more info on this step.
- Shaping The DoughOnce your dough has finished it's first ferment, it's time to shape it into either a boule or a batard. I have chosen to shape my spelt sourdough bread into a batard for this loaf.You'll need to flour your counter top with rice flour for this (we use rice flour because it has no gluten). Try to be quite sparing with the rice flour, you only need a very light dusting.Use a silicone dough scraper to gently ease the dough out of the bowl. You want it to land upside down on your counter so that the smooth top of the dough is on the countertop and the sticky underside is facing up. This will make it easier to shape.You can see how I shape dough into a batard here.You will need a banneton to put your dough into. If you do not have a banneton, then a bowl or basket lined with a floured tea towel is perfectly fine. Make sure your bowl isn't too big though, you want your dough to retain some shape.Whatever you're using needs to be liberally floured with your rice flour. If you're using a banneton - liberally sprinkle it with rice flour. If you're using a cloth or tea towel, rub the flour into it to ensure it becomes non stick.
- Placing Into A BannetonOnce the dough is shaped into a tight ball, place it into your banneton smooth side down, so your seam is on the top - this way the top of your dough will get the pretty lines from the banneton. If you're using a cloth or tea towel in a bowl it's ok to put your dough with the smooth side up. Just make sure the dough is tight.Lift your dough around the edges to pop a little more rice flour if you feel it needs it. Just try to handle the dough as little as possible and be really gentle as you really want to preserve all the gases and air bubbles that have formed during your bulk ferment.
- Cold FermentNow the dough is in its "shaping container" cover it loosely with a plastic bag or damp tea towel and place into the fridge. I use a large plastic bag to cover it - I just reuse it each time. Try to leave it in the fridge for a minimum 5 hours up to a maximum of around 36 hours. The longer you leave it the better your bread will be! A longer cold ferment creates beautiful blisters on your crust and a deeper sourdough flavour. It will also ensure your dough forms a skin which makes it easier to score.
- Preparing To BakeOnce you're ready to bake your sourdough, you'll need to preheat your oven to 230C/450F. Place your Dutch Oven into the oven when you turn it on so it gets HOT. Try to preheat for around 1 hour to ensure your oven is super hot - but you know your oven so just adjust this time if you need to.Leave your dough in the fridge until the very last minute - placing a cold dough into a hot oven will give you a great "spring".
- Bake Time!Now it's time to bake!When your oven is at temperature, take your sourdough out of the fridge. Gently place it onto a piece of parchment paper. Make sure that you make the baking paper big enough to use the edges as a handle to lower to dough into your Dutch Oven.Gently score your bread with a lame, clean razor blade or knife. At minimum a large cross is sufficient, but you can get as artistic as you like. You can find my full guide on how to score sourdough bread here.Carefully take your dutch oven out of the oven. Place the sourdough into the pot using the baking paper as a handle. Put the lid on and place into the hot oven. If you want to you can spritz your dough with extra water before you put the lid on.BAKE TIME:30 Minutes with the lid on at 230C/450F plus10-15 Minutes with the lid off at 210C/410F
- Finishing The BakeWhen you remove your dough from the oven, carefully remove it from the dutch oven as soon as possible and place on a wire rack to cool.
Notes
- Notes on Flour: This recipe is written using white spelt flour and whole grain spelt flour. You can use them in combination like this if you wish. If you don't mind using some bread flour, you could use up to 250g of bread flour in this recipe to give your dough better oven spring. It's fun to experiment with flour ratios. I recommend using no more than 150g of whole grain spelt in this recipe, whether you're using bread flour or white spelt flour to blend it with.
- Notes on Sourdough Starter: This recipe is based on you having an active starter that you have fed a few hours before starting your bake. For info on how to make a sourdough starter, go here. For more information on increasing or decreasing the amount of sourdough starter you use, go here.
- Notes on Stretch & Folds: If you are going to do the stretch & folds on your bench top, spray your surface with water mist rather than using flour. You can leave the dough in the bowl if you want to. Wet your hands to stop the dough sticking - although it shouldn't be too sticky. It will get less sticky as you do your stretches and folds. For more information on how to do stretch and folds, go here.
- Notes on Bulk Fermentation: If your home is warm then your dough will ferment a lot faster and could be done in as little as a few hours. If it's colder, it will take longer, possibly overnight.
I would recommend that you try to do your first few bulk ferments during daylight hours so that you can watch your dough closely.
Once you're more familiar with the process - and the temperature of your home - you will be able to do overnight ferments. You will know your dough is ready to move to the next stage when it has *just* doubled in size. It will be fairly wobbly and full of bubbles. You should be able to see large air bubbles under the surface of the dough.
You don't want to let it go any further than doubled as it will be over fermented.
If you want to do an overnight ferment, but your home is warm, consider using a little less starter (ie 25g).
Less starter means your dough will take longer to ferment and you will reduce the risk of over fermenting your dough. You'll find more information on these topics here:
When is my bulk ferment finished? What is the difference between cold ferment and bulk ferment? Why does the amount of starter matter?
- Notes on Baking: If you're worried about the base of your bread burning, place a baking sheet on shelf underneath your Dutch Oven - it works! If you're worried about your bread not being cooked all the way through, turn the oven off and place your dough straight onto the oven rack. Leave the door ajar and let your bread rest there for a few hours. Make sure you don't close the door or your sourdough will sweat and you'll get a wrinkly, soggy crust. Remember not to cut into your loaf too soon - you'll need to let it cool for at least a few hours (4-6 is best).
![Sourdough Guinness Beer Bread [perfect for St Patrick's Day]](https://www.pantrymama.com/wp-content/uploads/2024/01/SOURDOUGH-GUINNESS-BREAD-4-1-768x1152.jpg)
