Buttermilk Sourdough Bread
This post may contain affiliate links.
Buttermilk sourdough bread is a great way to use up buttermilk from making your own butter.
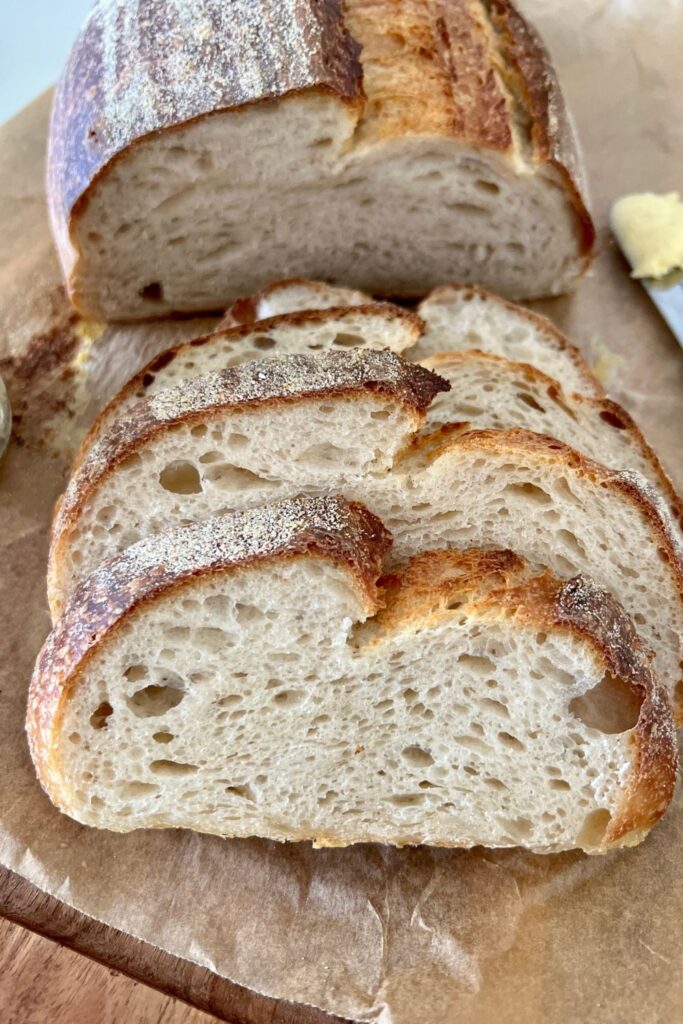
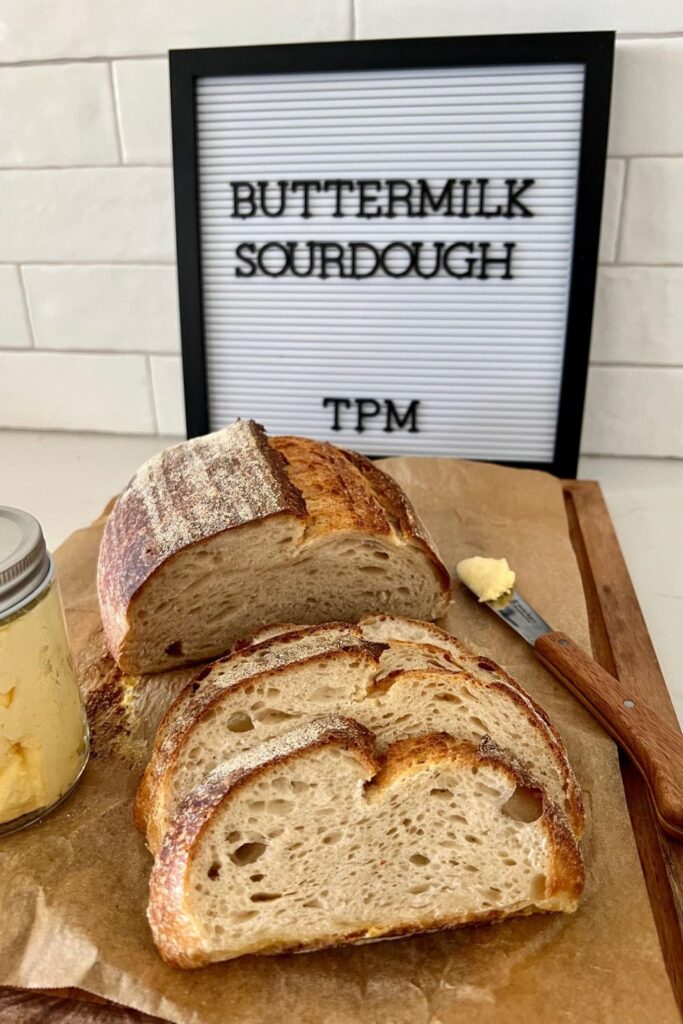
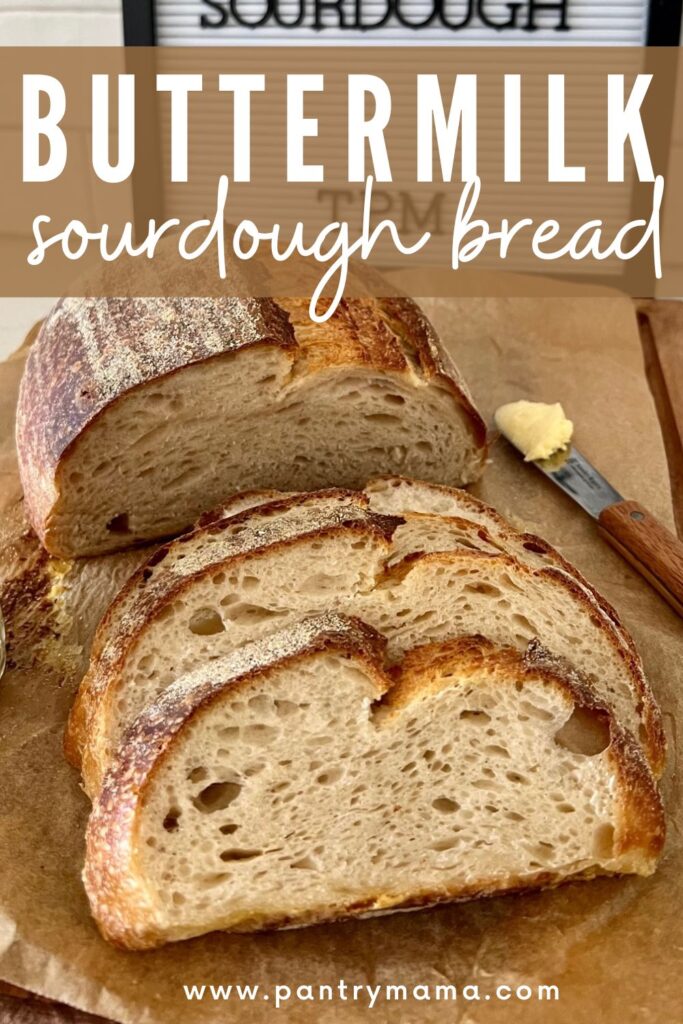
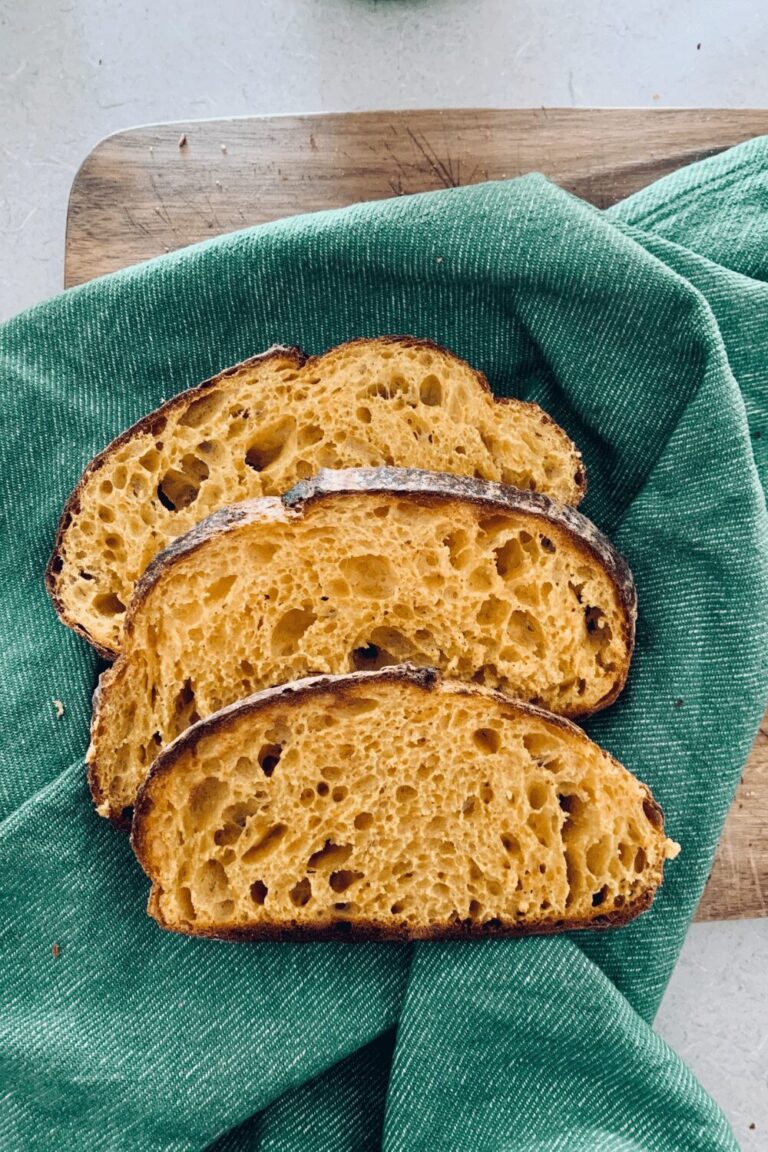
Adding buttermilk to sourdough bread increases the fat content in the bread giving you a velvety soft crumb and a more complex, sour flavor. It also gives you a golden, chewy crust that smells amazing as its baking.
You can use store bought buttermilk or utilise the leftover buttermilk from making butter or even cultured butter. When developing this recipe, I have used buttermilk leftover from making my own butter, which contains more residual butter fat than store bought buttermilk.
You'll need an active sourdough starter to make this delicious bread. If you have lots of buttermilk on hand after baking this recipe, you might also like to make these no wait sourdough waffles, sourdough Irish soda bread, sourdough biscuits or these chocolate chunk sourdough muffins. You might also enjoy this sourdough farmhouse white sandwich loaf!
What Effect Does Buttermilk Have on Sourdough?
Buttermilk has a similar effect on bread than using full cream milk in sourdough, however it has added butter fats which act much like an oil.
The resulting bread has a softer crumb than traditional sourdough and an increased tangy flavor. It will also stay fresher longer because of the fats imparted by the buttermilk.
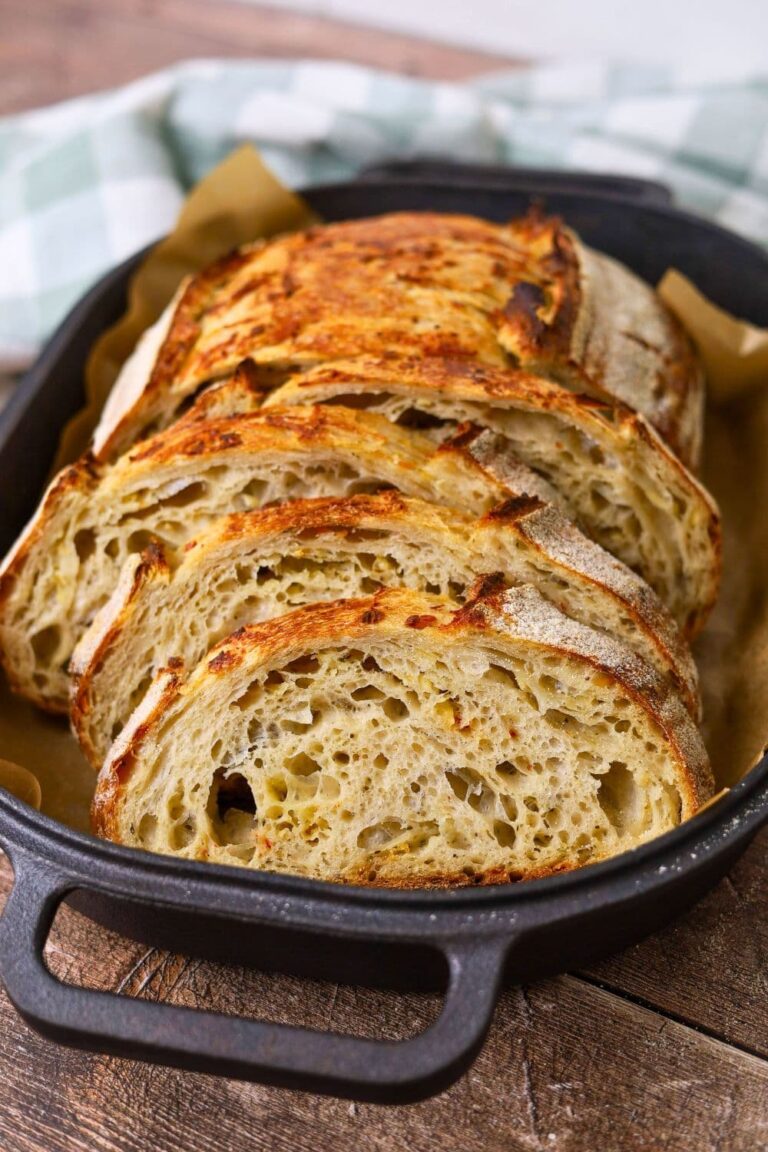
I have found that the buttermilk gives the loaf of sourdough a thinner, but chewier crust. It's really lovely and just a bit different than traditional sourdough because of the added fats.
If you enjoy this sourdough buttermilk bread, you might also enjoy this sourdough whey bread.
Crusty Loaf or Sandwich Loaf?
This buttermilk sourdough bread is super versatile. The dough is silky smooth and elastic and so easy to work with.
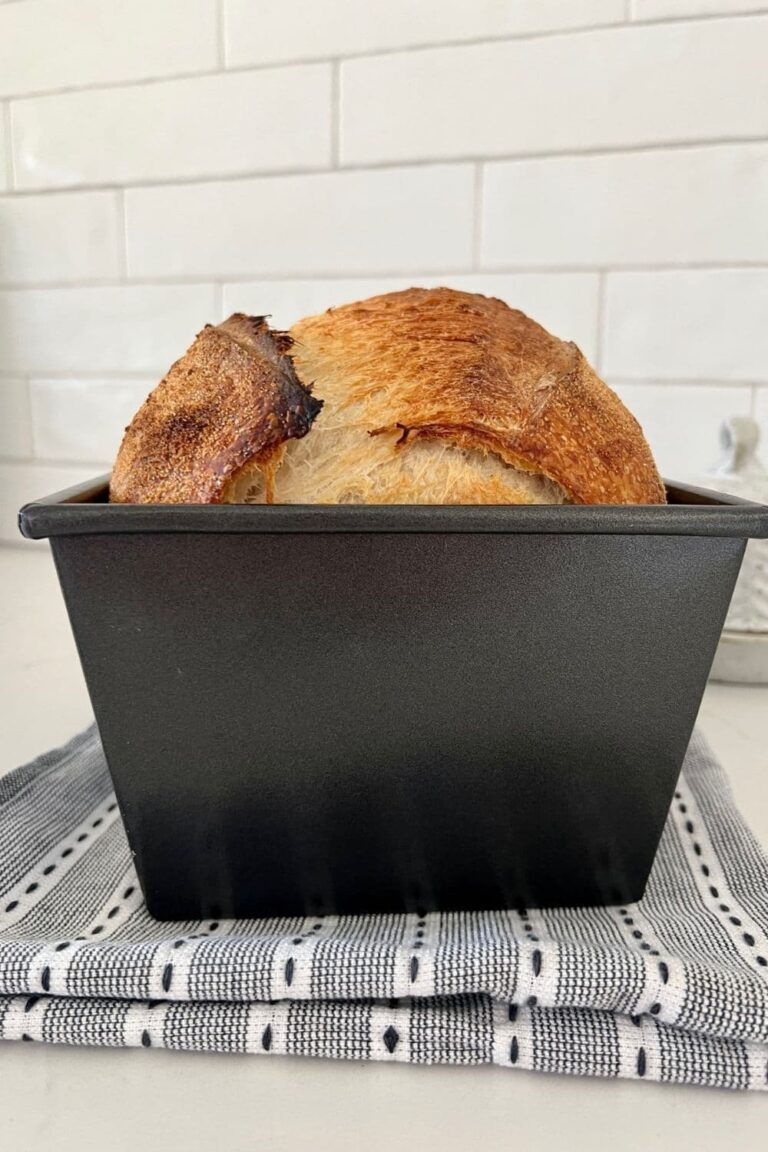
I love making this into a crusty batard, but it works equally well when baked in a loaf pan to make a soft sandwich loaf. The buttermilk gives you a tighter crumb than you would be used to with traditional sourdough bread, making it perfect for sandwich loaves.
If you're making this as a sandwich loaf, I highly recommend brushing the crust with melted butter once it's baked for an extra soft crust.
How To Make Sourdough Buttermilk Bread
Essentially making sourdough buttermilk bread requires you to swap out the water for buttermilk.
I think a little water is still important, so I have chosen to use 300g of buttermilk and 50g of water for this recipe. If you have a bit less than 300g of buttermilk, you can make up the difference with water. For example you could use 200g of buttermilk and 150g of water for a total of 350g of liquid.
Ideally, both the buttermilk and water should be at room temperature.
Premix the Dough (Autolyse)
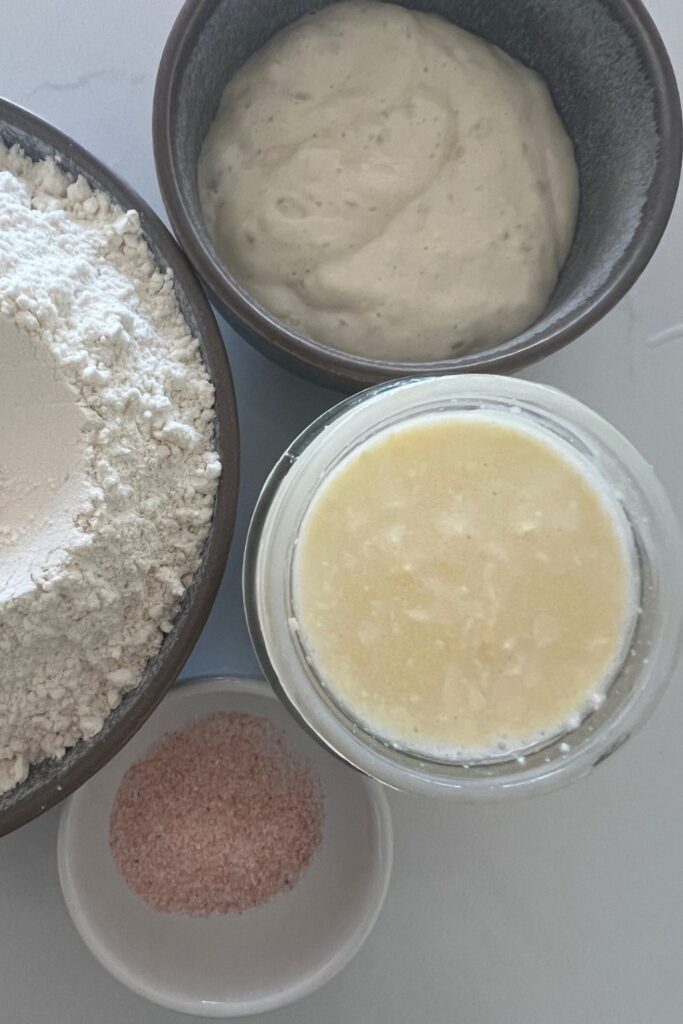
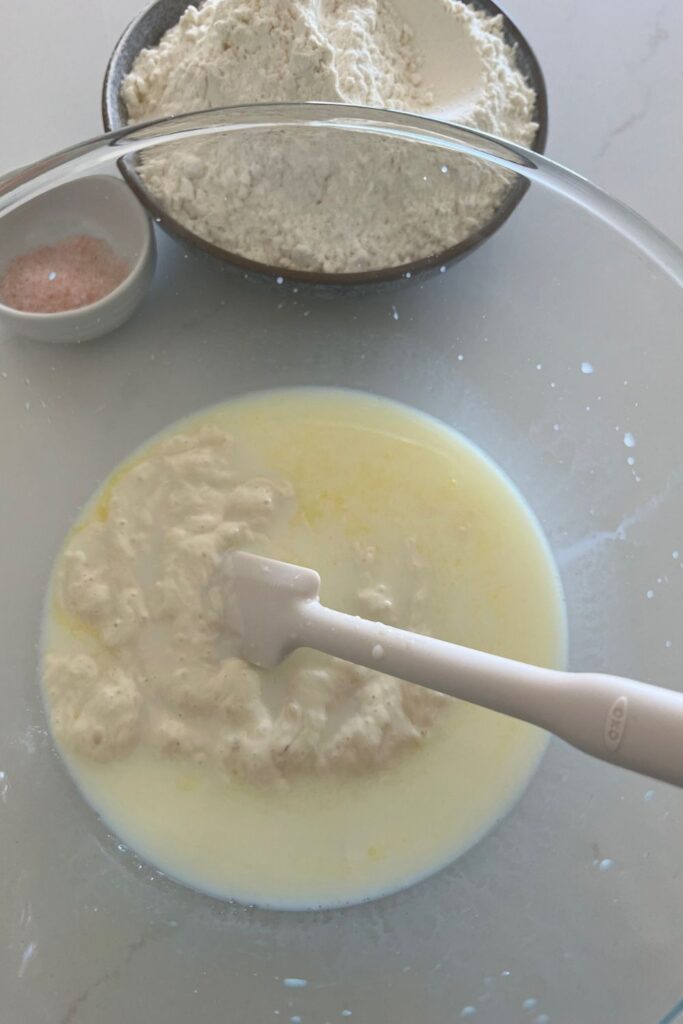
- Weigh out your sourdough starter, buttermilk and water into a large mixing bowl and mix together briefly.
- Now add your flour and salt and mix whole lot together to form a dry dough.
- Cover your bowl with cling film or a damp tea towel and let it sit for around 1 hour.
Forming up the Dough
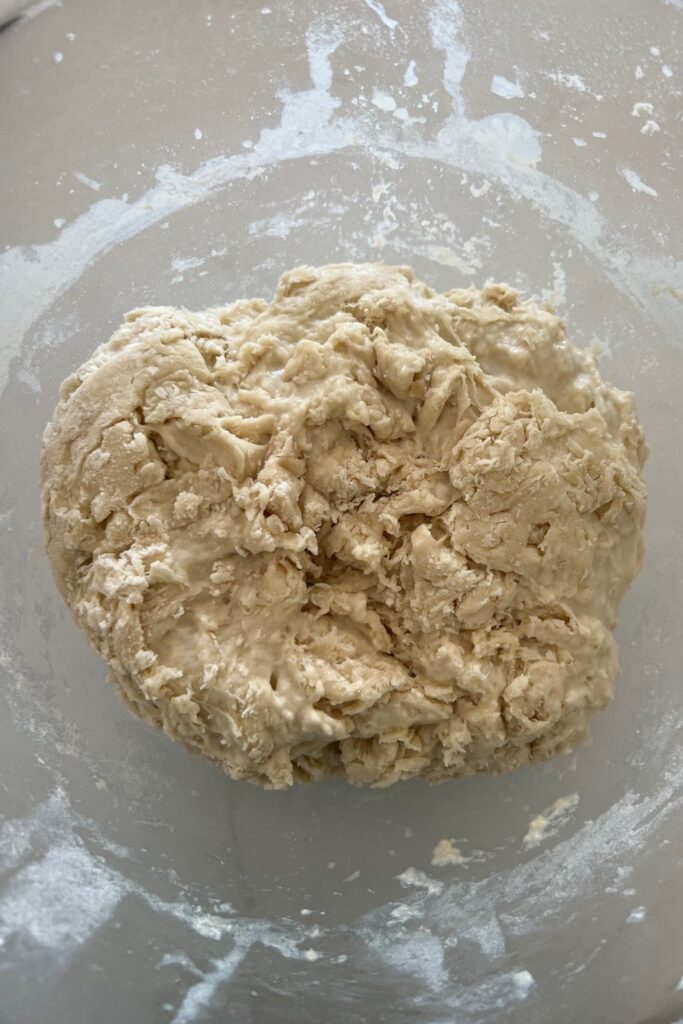
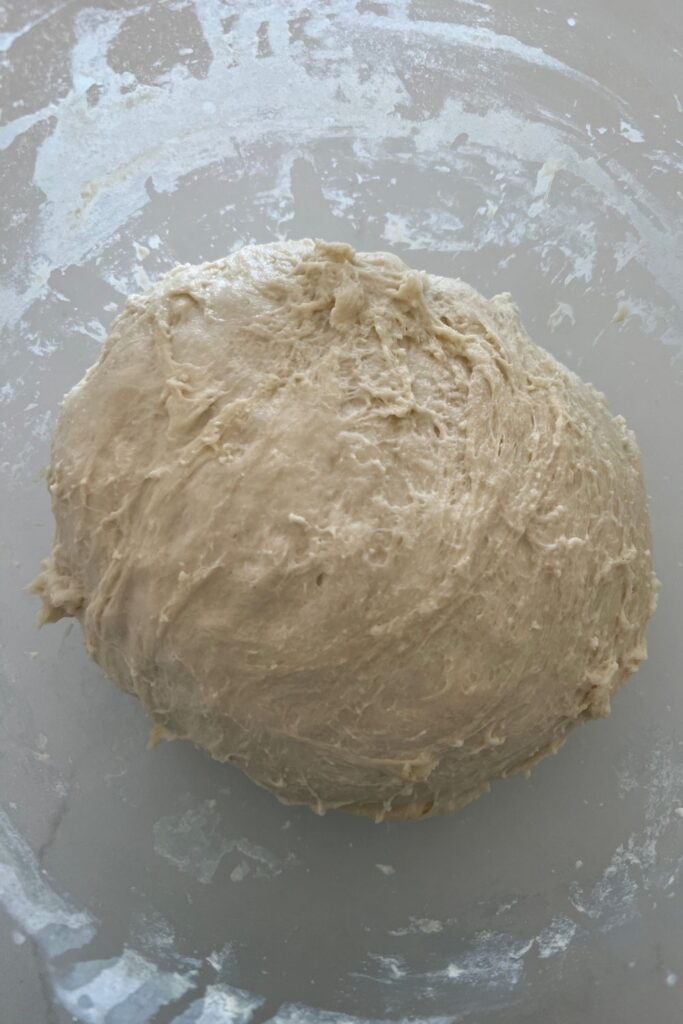
- Bring the dough together into a ball. Pull the edges of the dough into the centre until it's smoother and more formed.
- You'll notice that the dough is fully hydrated after soaking all the water up. It will be fairly sticky but as you bring it into a ball, it will become smoother and shinier.
- Once the dough has formed into a smooth ball, pop the cling film back on and let it rest for 30 minutes.
Stretch and Fold Phase
- Over the next few hours you need to create some structure for your dough by "stretching and folding".
- Aim to do around 4-6 sets of stretches and folds.
- For each set, stretch the dough up and over itself 4 times. Leave around 15 minutes in between each set. Again you do not have to be exact with time, but you need to do at least 4 sets over 2 hours.
Bulk Fermentation
- Once you've finished your stretch and folds, place the cling film or damp tea towel back over your dough and let it rest and ferment (a plastic cover is a better option for this stage).
Shape the Dough
- Once your dough has finished it's first ferment, it's time to shape it into either a boule or a batard (use these instructions for shaping a sourdough sandwich loaf).
- You'll need to flour your counter top with rice flour for this (we use rice flour because it has no gluten). Try to be quite sparing with the rice flour, you only need a very light dusting.
- Use a silicone dough scraper to gently ease the dough out of the bowl. You want it to land upside down on your counter so that the smooth top of the dough is on the countertop and the sticky underside is facing up. This will make it easier to shape.
- You want to pull the edges of the dough into the centre and then flip it over so that the sticky side is now underneath. Using the stickiness, gently pull the dough into a tight ball.
- You will need a banneton to put your dough into. If you do not have a banneton, then a bowl or basket lined with a floured tea towel is perfectly fine. Make sure your bowl isn't too big though, you want your dough to retain some shape.
- Whatever you're using needs to be liberally floured with your rice flour. If you're using a banneton - liberally sprinkle it with rice flour. If you're using a cloth or tea towel, rub the flour into it to ensure it becomes non stick.
Put Dough Into The Banneton
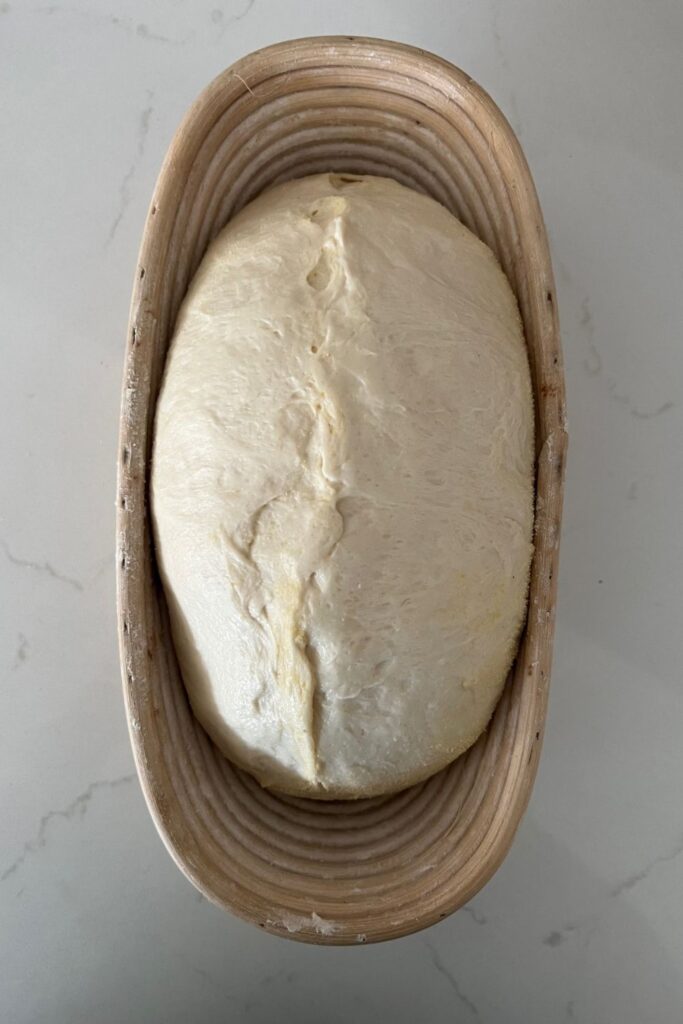
- Once the dough is shaped into a tight ball, place it into your banneton smooth side down, so your seam is on the top - this way the top of your dough will get the pretty lines from the banneton.
- If you're using a cloth or tea towel in a bowl it's ok to put your dough with the smooth side up. Just make sure the dough is tight.
- Lift your dough around the edges to pop a little more rice flour if you feel it needs it. Just try to handle the dough as little as possible and be really gentle as you really want to preserve all the gases and air bubbles that have formed during your bulk ferment.
Proofing
- Now the dough is in its "shaping container" cover it loosely with a plastic bag or damp tea towel pop it into the fridge for cold fermentation or proofing.
Prepare To Bake Your Dough
- Once you're ready to bake your sourdough, you'll need to preheat your oven to 230C/450F. While your oven is preheating, place your sourdough in the freezer.
- Place your Dutch Oven into the oven when you turn it on so it gets hot. Try to preheat for around 1 hour to ensure your oven is super hot - but you know your oven so just adjust this time if you need to.
Bake Your Sourdough Bread!
- Now it's time to bake!
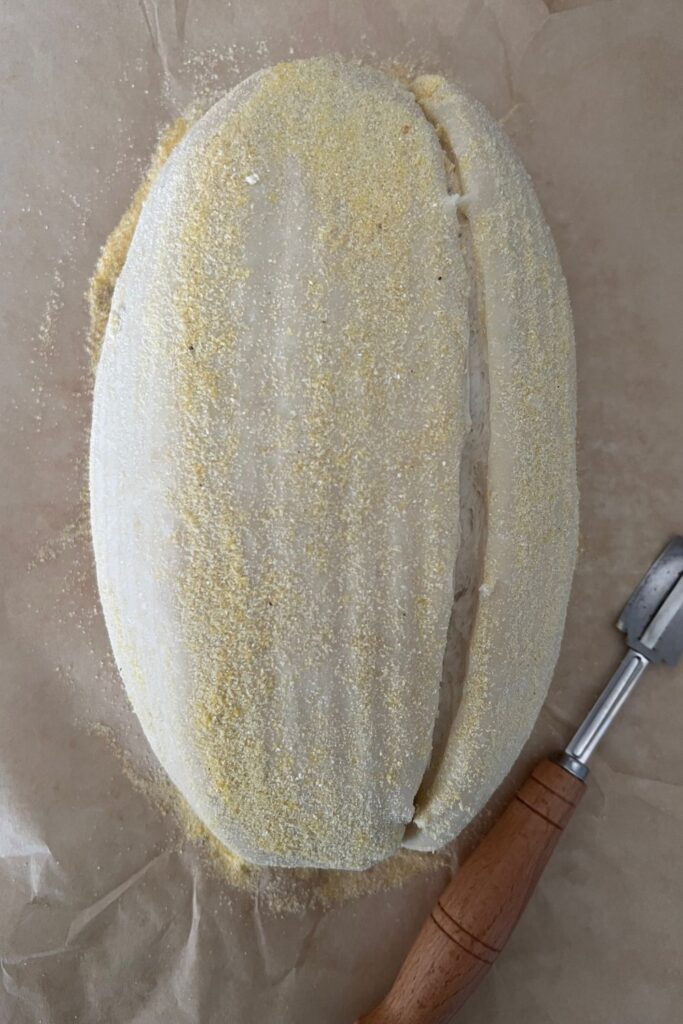
- When your oven is at temperature, gently tip your sourdough out of the banneton and onto a piece of parchment paper.
- Make sure that you make the baking paper big enough to use the edges as a handle to lower to dough into your Dutch Oven.
- Gently score your bread with a lame, clean razor blade or knife. At minimum a large cross is sufficient, but you can get as artistic as you like. You can find my full guide on how to score sourdough bread here.
- Carefully take your dutch oven out of the oven. Place the sourdough into the pot using the baking paper as a handle. Put the lid on and place into the hot oven.
- If you want to you can spritz your dough with extra water before you put the lid on.
Bake Time
- 30 Minutes with the lid on at 230C/450F plus
- 10-15 Minutes with the lid off at 210C/410F
Let Your Bread Cool
- When you remove your dough from the oven, carefully remove it from the dutch oven as soon as possible and place on a wire rack to cool.
What To Eat With Sourdough Buttermilk Bread?
This sourdough bread can be eaten like any other sourdough bread.
You can choose to make it as a boule or as a sandwich loaf.
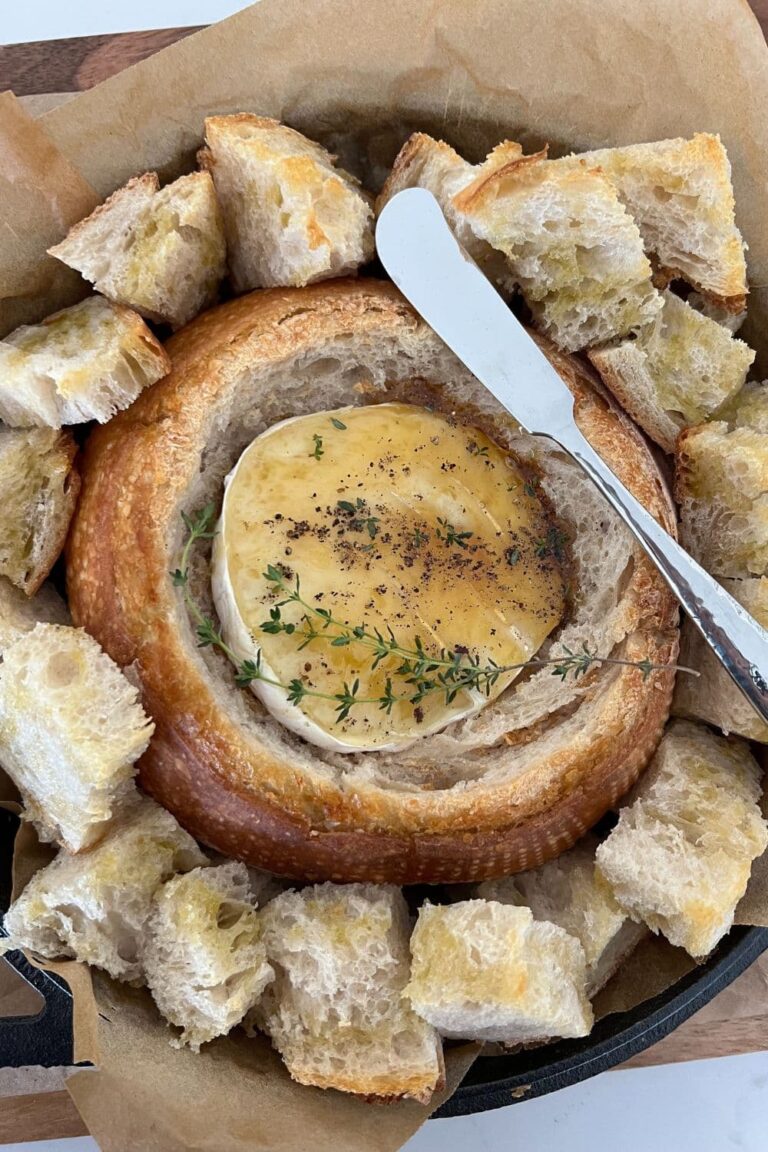
It's delicious served fresh with cultured butter, peanut butter or even this whipped honey cinnamon butter.
Frequently Asked Questions
Sourdough buttermilk bread has a more tangy flavor than regular sourdough bread, particularly if you use cultured buttermilk. It's not a bad sour flavor though, it's quite a complex, rounded sour flavor that is just lovely.
Traditionally buttermilk bread will be made with commercial yeast so it's actually different to sourdough bread (which is made using a sourdough starter). Buttermilk bread made with yeast will still have a tangy flavor, but not as much as sourdough buttermilk bread.
Buttermilk is used in all kinds of bread because of the deeper flavor it brings. The fats in buttermilk also create a softer crumb and crust.
Buttermilk Sourdough Bread Recipe
Equipment
- Mixing Bowl
- Digital Scales
- Banneton
- Dutch Oven
Ingredients
- 500 g Bread Flour
- 300 g Buttermilk (room temperature)
- 50 g Water (room temperature)
- 100 g Sourdough Starter (can be reduced to 50g)
- 12 g Salt
Instructions
PREMIX THE DOUGH
- Weigh out your sourdough starter, buttermilk and water into a large mixing bowl and mix together briefly.
- Now add your flour and salt and mix whole lot together to form a dry dough.
- Cover your bowl with cling film or a damp tea towel and let it sit for around 1 hour. This process is called the "autolyse" and allows your flour to soak in all the water and become hydrated. You can see how the dough has changed in this photo.
FORMING UP THE DOUGH
- Bring the dough together into a ball. Pull the edges of the dough into the centre until it's smoother and more formed.You'll notice that the dough is fully hydrated after soaking all the water up. It will be fairly sticky but as you bring it into a ball, it will become smoother and shinier.
- Once the dough has formed into a smooth ball, pop the cling film back on and let it rest for 30 minutes.
STRETCH & FOLD PHASE (STRENGTHENING PHASE)
- Over the next few hours you need to create some structure for your dough by "stretching and folding". Aim to do around 4-6 sets of stretches and folds. For each set, stretch the dough up and over itself 4 times. Leave around 15 minutes in between each set. Again you do not have to be exact with time, but you need to do at least 4 sets over 2 hours.
BULK FERMENTATION (RISE PHASE)
- Once you've finished your stretch and folds, place the cling film or damp tea towel back over your dough and let it rest and ferment (a plastic cover is a better option for this stage). It is safe to let sourdough buttermilk bread ferment overnight at room temperature.
SHAPE THE DOUGH
- Once your dough has finished it's first ferment, it's time to shape it into either a boule or a batard. You'll need to flour your counter top with rice flour for this (we use rice flour because it has no gluten). Try to be quite sparing with the rice flour, you only need a very light dusting.Use a silicone dough scraper to gently ease the dough out of the bowl. You want it to land upside down on your counter so that the smooth top of the dough is on the countertop and the sticky underside is facing up. This will make it easier to shape.You want to pull the edges of the dough into the centre and then flip it over so that the sticky side is now underneath. Using the stickiness, gently pull the dough into a tight ball.You will need a banneton to put your dough into. If you do not have a banneton, then a bowl or basket lined with a floured tea towel is perfectly fine. Make sure your bowl isn't too big though, you want your dough to retain some shape.Whatever you're using needs to be liberally floured with your rice flour. If you're using a banneton - liberally sprinkle it with rice flour. If you're using a cloth or tea towel, rub the flour into it to ensure it becomes non stick.
PUT DOUGH INTO THE BANNETON
- Once the dough is shaped into a tight ball, place it into your banneton smooth side down, so your seam is on the top - this way the top of your dough will get the pretty lines from the banneton. If you're using a cloth or tea towel in a bowl it's ok to put your dough with the smooth side up. Just make sure the dough is tight.Lift your dough around the edges to pop a little more rice flour if you feel it needs it. Just try to handle the dough as little as possible and be really gentle as you really want to preserve all the gases and air bubbles that have formed during your bulk ferment.
COLD PROOFING (COLD FERMENTATION)
- Now the dough is in its "shaping container" cover it loosely with a plastic bag or damp tea towel and pop it in the fridge for cold fermentation. You can leave it here for a minimum of 5 hours.
PREPARE TO BAKE YOUR DOUGH
- Once you're ready to bake your sourdough, you'll need to preheat your oven to 230C/450F. While your oven is preheating, place your sourdough in the freezer.Place your Dutch Oven into the oven when you turn it on so it gets hot. Try to preheat for around 1 hour to ensure your oven is super hot - but you know your oven so just adjust this time if you need to.
BAKE YOUR SOURDOUGH BREAD!
- Now it's time to bake!When your oven is at temperature, gently tip your sourdough out of the banneton and onto a piece of parchment paper. Make sure that you make the baking paper big enough to use the edges as a handle to lower to dough into your Dutch Oven.Gently score your bread with a lame, clean razor blade or knife. At minimum a large cross is sufficient, but you can get as artistic as you like. You can find my full guide on how to score sourdough bread here.Carefully take your dutch oven out of the oven. Place the sourdough into the pot using the baking paper as a handle. Put the lid on and place into the hot oven. If you want to you can spritz your dough with extra water before you put the lid on.BAKE TIME:30 Minutes with the lid on at 230C/450F plus10-15 Minutes with the lid off at 210C/410F
LET YOUR BREAD COOL
- When you remove your dough from the oven, carefully remove it from the dutch oven as soon as possible and place on a wire rack to cool.
Notes
- Notes on Buttermilk: I have used buttermilk from making my own butter so it still had a bit of butter floating around. This increases the fat content and provides a softer crust than using store bought buttermilk.
- Notes on Flour: This recipe is written using strong Bread Flour. Bread flour has a higher protein content than All Purpose flour. If you choose to use All Purpose flour you may have a different result because of this. You can read more about the differences between All Purpose Flour and Bread Flour here.
- Notes on Sourdough Starter: This recipe is based on you having an active starter that you have fed a few hours before starting your bake. For info on how to make a sourdough starter, go here.
- Notes on Stretch & Folds: If you are going to do the stretch & folds on your bench top, spray your surface with water mist rather than using flour. You can leave the dough in the bowl if you want to. Wet your hands to stop the dough sticking - although it shouldn't be too sticky. It will get less sticky as you do your stretches and folds. For more information on how to do stretch and folds, go here.
- Notes on Bulk Fermentation: If your home is warm then your dough will ferment a lot faster and could be done in as little as a few hours. If it's colder, it will take longer. You will know your dough is ready to move to the next stage when it has *just* doubled in size. It will be fairly wobbly and full of bubbles. You should be able to see large air bubbles under the surface of the dough.
You don't want to let it go any further than doubled as it will be over fermented.
You'll find more information on these topics here:
When is my bulk ferment finished? What is the difference between cold ferment and bulk ferment? Why does the amount of starter matter?
- Notes on Baking: If you're worried about the base of your bread burning, place a baking sheet on shelf underneath your Dutch Oven - it works! If you're worried about your bread not being cooked all the way through, turn the oven off and place your dough straight onto the oven rack. Leave the door ajar and let your bread rest there for a few hours. Make sure you don't close the door or your sourdough will sweat and you'll get a wrinkly, soggy crust. Remember not to cut into your loaf too soon - you'll need to let it cool for at least a few hours (4-6 is best).


What if you want to make baguettes in open baguette pans instead of covered Dutch oven? What do you do differently? Thanks
This was so easy to do and a great way to use up some buttermilk that had gone past its date. The bread came out beautifully - the crumb was very soft and almost pillowy. The crust was softer than most sourdoughs and still had a little chewiness. The flavor was wonderful - my grandkids, who aren’t as crazy about sourdough, loved this. Thank you!
Update: I’ve made this several times but yesterday I didn’t have buttermilk so I subbed plain yogurt (whole milk) instead and it turned out great!!
The buttermilk gave this bread a great flavor.
I followed it exactly and tuned out a perfect loaf @ 6000 feet in elevation (Colorado Rocky Mountains).
I'll bake it a smidge longer when setting the crust nest time but other than that this recipe's a winner.
Can you still use a KitchenAid instead of stretch and folds?
I made it. I loved it. I will be making it again and again.
I'm just getting into bread baking and this was my second attempt at sourdough. Followed the directions (almost--used cornmeal instead of rice flour) to the letter. Turned out perfect. Delicious and beautiful. Thanks Kate. Great recipe.
Seriously the best loaf yet. Tastes just like it came out of a bakery!
Can I make this in a pullman loaf instead of dutch oven?
Can I make this without a Dutch oven?
You can make it in a loaf pan. This article should help. 🙂
I don’t see anything about how long to let the bulk ferment go? I’m winging it this time around, but a time estimate would be nice.
I love this recipe AND if you don’t have buttermilk on hand you can use plain yogurt! Works great!
Hi Kate,
I was just wondering if i can use Organic KEFIR in place of the buttermilk.
Thank you
I bet that would work!
Are u saying to freeze the bread for an hour while pre- heating oven?
Use this recipe for my regular sourdough loaf, works every time and now growing in confidence is getting even better, Thanks
I made this bread yesterday with my homemade buttermilk . I baked the loaf today and they are the softest loaves with wonderful flavor . Thank you for sharing this recipe !