This post contains affiliate links. Please see our disclosure policy.
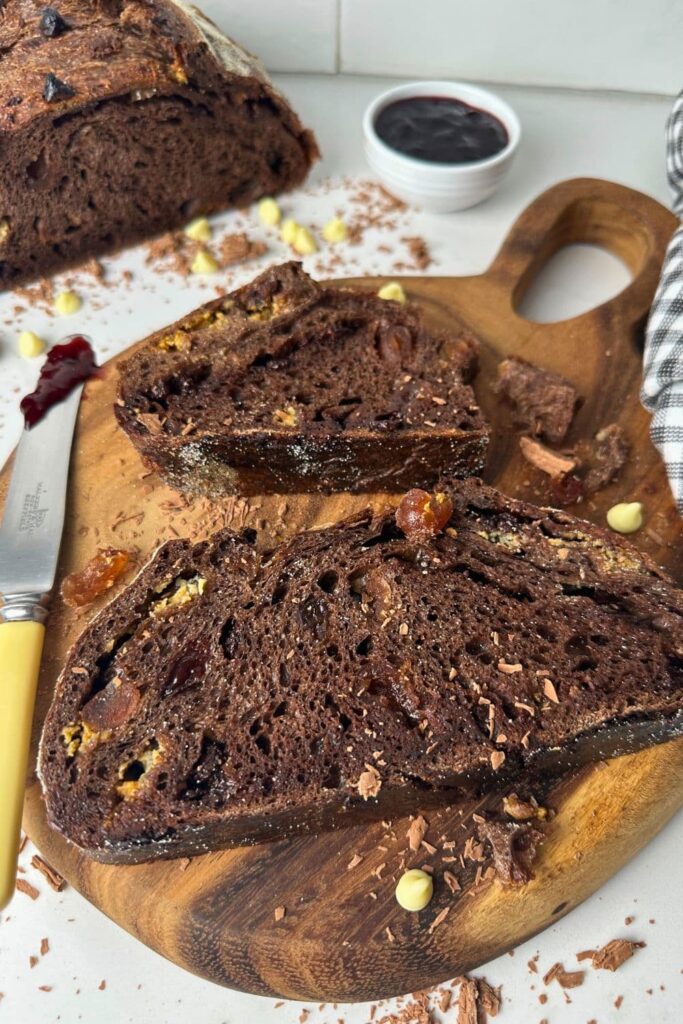
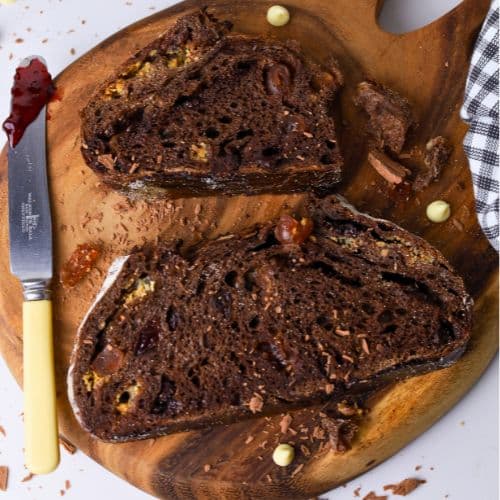
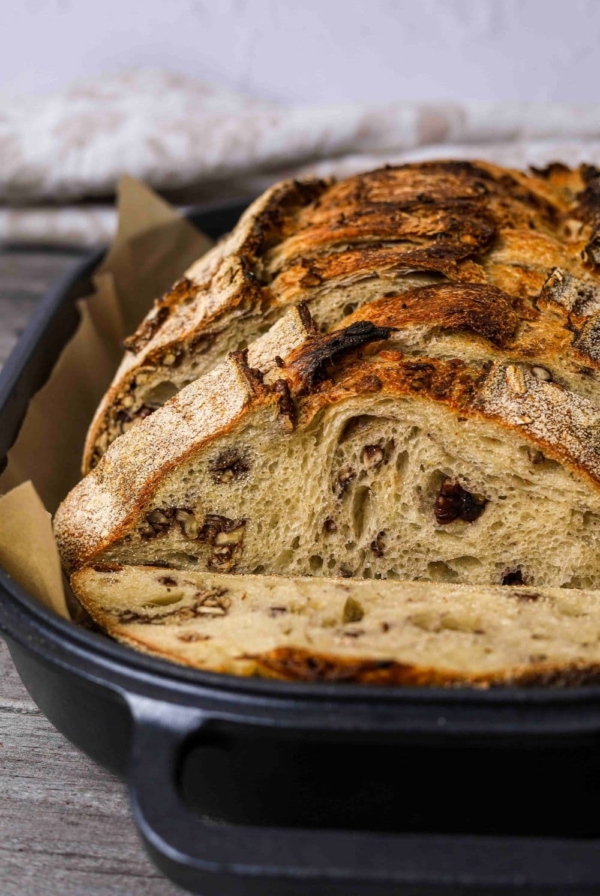
This chocolate cherry sourdough bread is made with rich cocoa powder, loads of chocolate chips and sweet glace cherries to create an indulgent loaf of sourdough bread that you can enjoy at any time of day! While this really does lean towards a dessert style bread, there’s no rule saying you can’t serve it for breakfast!
I made this sourdough chocolate cherry loaf to celebrate Valentine’s Day with my family (and my sourdough starter of course). You might also enjoy other chocolate sourdough recipes like this sourdough discard chocolate loaf and this plain sourdough chocolate loaf.
Why You’ll Love This Recipe!
Sweet Flavor Profile – This chocolate cherry sourdough bread is loaded with chocolate and cherries and definitely has a sweet flavor profile.
Something a little different – Sourdough bread is generally thought of as a savory bread, so this brings something a little different to the table.
Ingredients
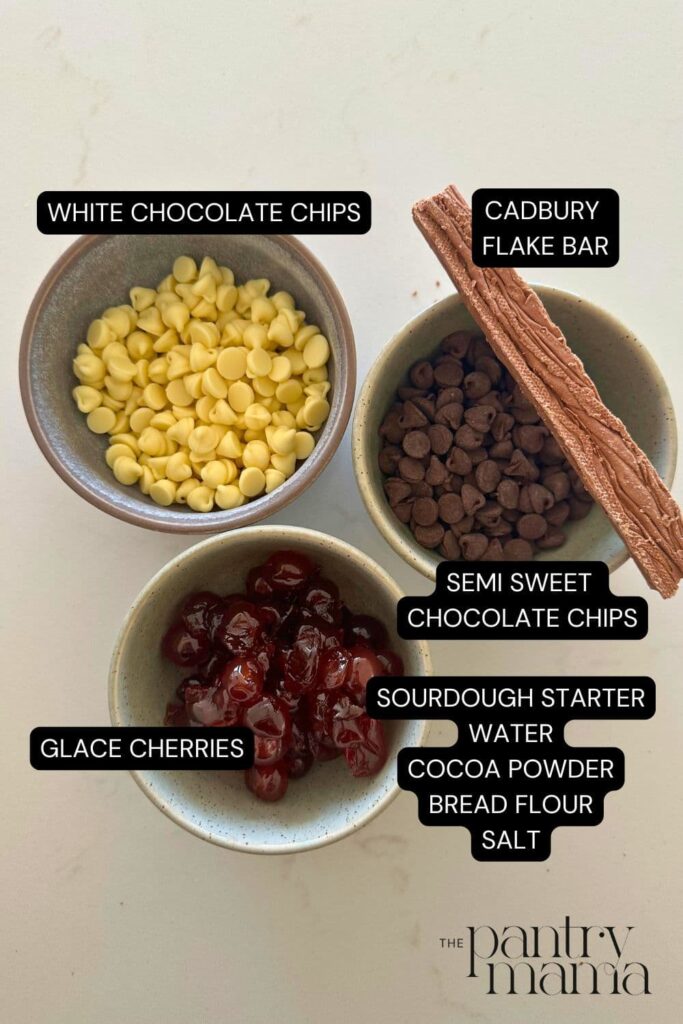
- Sourdough Starter – you’ll want to make sure your sourdough starter is fed and bubbly before you start! I’ve used a 100% hydrated sourdough starter. You can adjust the amount of sourdough starter used in the recipe if you prefer, but I’ve found that 100g is a good amount to use with the cocoa powder. You can also use a chocolate sourdough starter for this too if you prefer, but using a regular sourdough starter is just fine too (as I’ve done in this post).
- Water – I’ve increased the water a little for this recipe due to the cocoa powder.
- Bread Flour – bread flour works best for this recipe, especially because using honey makes the dough quite wet, so don’t opt for all purpose flour for this recipe.
- Salt – I’ve used 10g of salt, but you can increase or decrease this depending on your own personal taste.
- Cocoa Powder – I haven’t used anything special here, just basic grocery store cocoa powder. You can use whatever you have on hand. I’ve mixed it with the flour to make it easier to combine with all the other ingredients and give you a smoother dough.
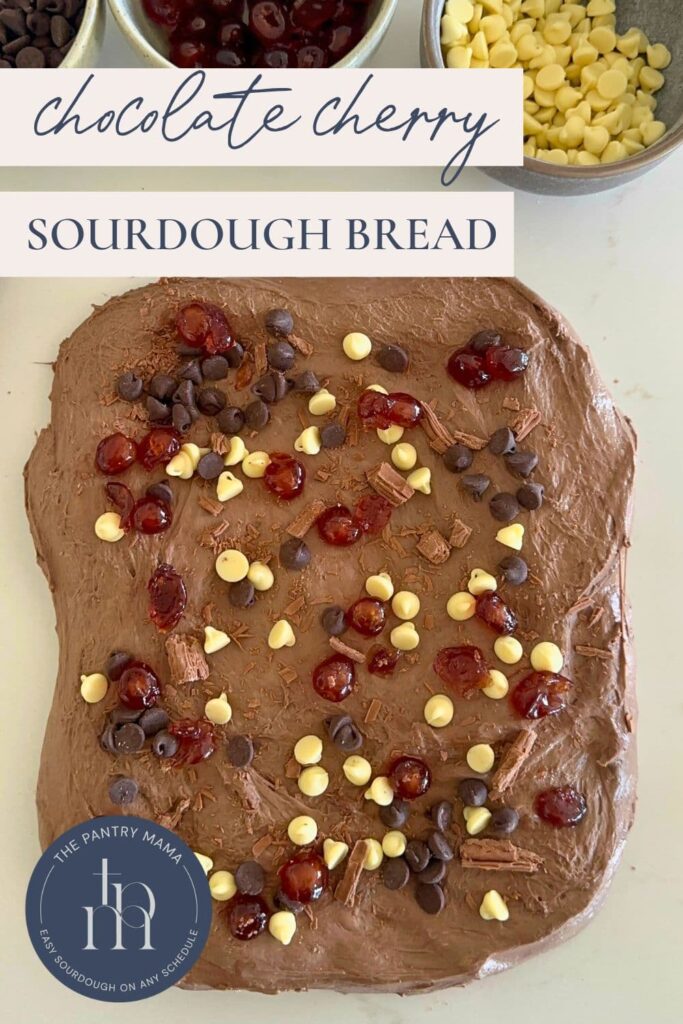
- Chocolate Chips – I’ve used a mixture of white chocolate chips, semi sweet chocolate chips and a Cadbury Flake bar for the chocolate component of this loaf. You can use whatever chocolate you like, just stick to the weights I’ve given in the recipe card. If you can’t get Flake bars where you like, just sub with more chocolate chips. You could also use butterscotch or caramelised chocolate chips too.
- Glace Cherries – I’ve used glace cherries in this recipe because they’re sticky and sweet and remind me of happy things. You can use other types of cherries if you like, just remember you will need to cold ferment the loaf, so don’t use anything that is going to leak juice out into the banneton. This is one of the reasons glace cherries work so well! If you’ve got fresh cherries to use up, give this sourdough cherry cobbler a try!
How To Make Chocolate Cherry Sourdough Bread
This dough shouldn’t be any stickier than a regular sourdough loaf, even though I have increased the water slightly. I’ve added an extra 30g of water to account for the cocoa powder. If you want to, you can hold that water back until you’ve mixed the dough to see if you really need it, it’s really up to you. If the dough seems too dry, you can always add a little extra water too.
Weigh out your starter and water, give it a little mix so that the sourdough starter is dissolved in the water.
Mix the cocoa powder, salt and flour together and then tip this on top of the water and sourdough starter. Mix together into a rough dough. The dough will be fairly shaggy and only just brought together.
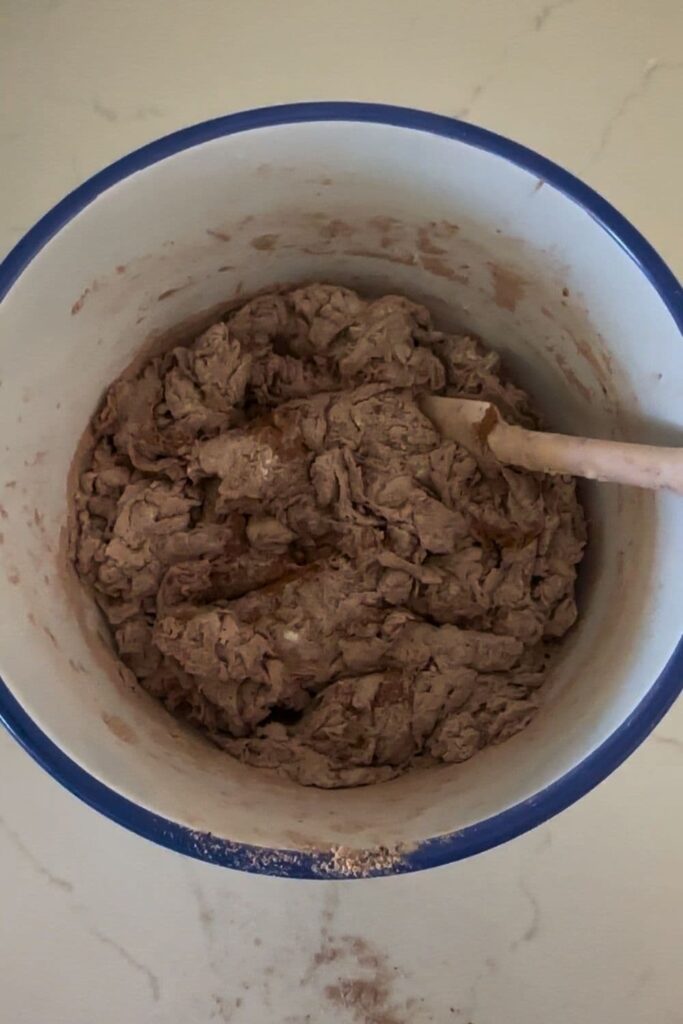
Cover the dough with a plastic food cover or a dish towel and let it sit for around an hour to fully incorporate.

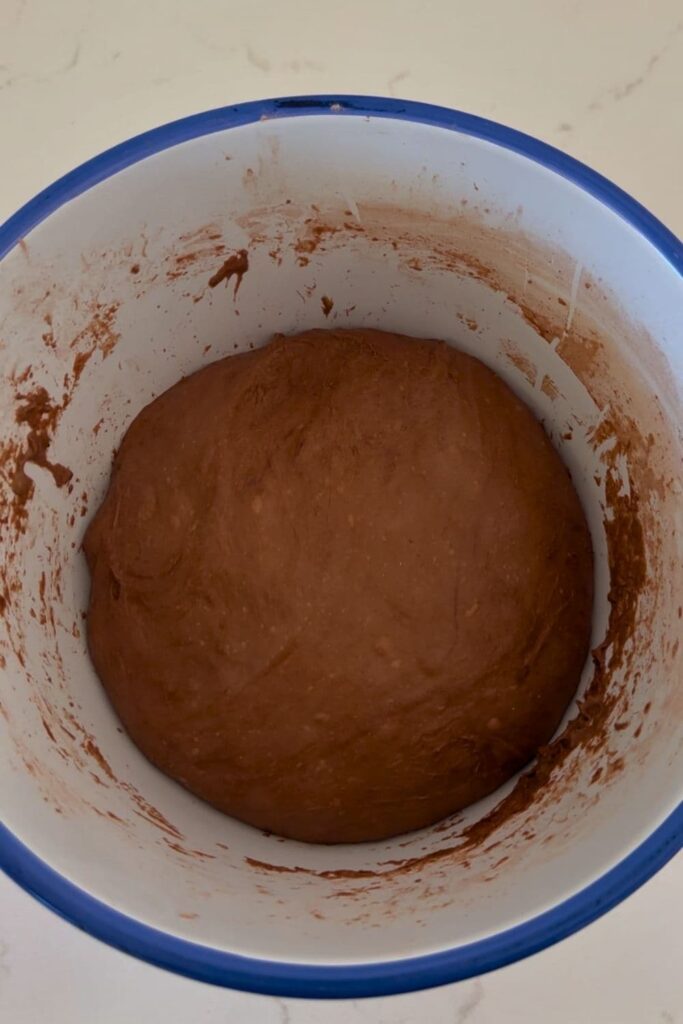
Now that the dough is hydrated, work your way around the bowl, grabbing the dough from the outside, stretching it up and over itself until a smooth ball is formed. You shouldn’t need more than about 20-25 folds to form the ball.
Once the dough has formed into a smooth ball, pop the cover back on and let it rest for around 30 minutes.
Stretch & Fold
Now it’s time to stretch and fold your dough to create some structure and strength. The dough should remain at room temperature on the counter while you are performing your stretch and folds.Try to do around 4 sets of stretch and folds with around 15 to 30 minutes between each set.
You can find out more info on how to do stretch and folds here.
Bulk Ferment
Once you’ve finished your stretch and folds, place the plastic cover or damp tea towel back over your dough and let it rest and ferment at room temperature. The time that it takes will depend on many factors (see notes for details). You want the dough to double. This will signal the end of the bulk fermentation period.
Shaping Your Dough
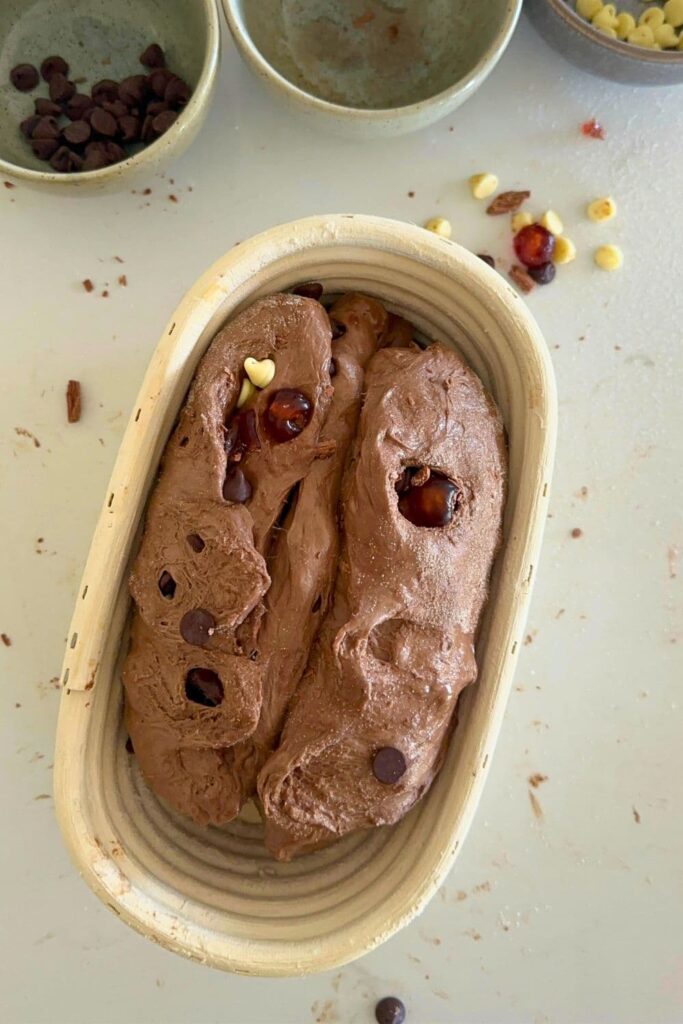
Once your dough has finished its first ferment, it’s time to give it some shape and surface tension.I think this recipe lends itself to a batard however it’s completely up to you what shape you would like. You can see me shaping a batard here.
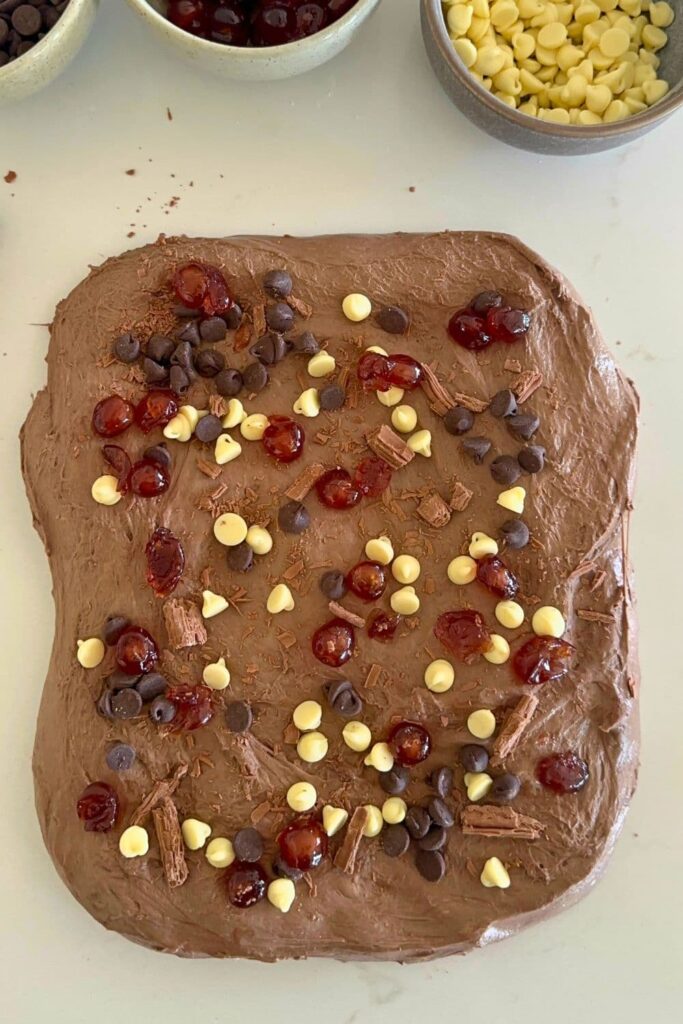
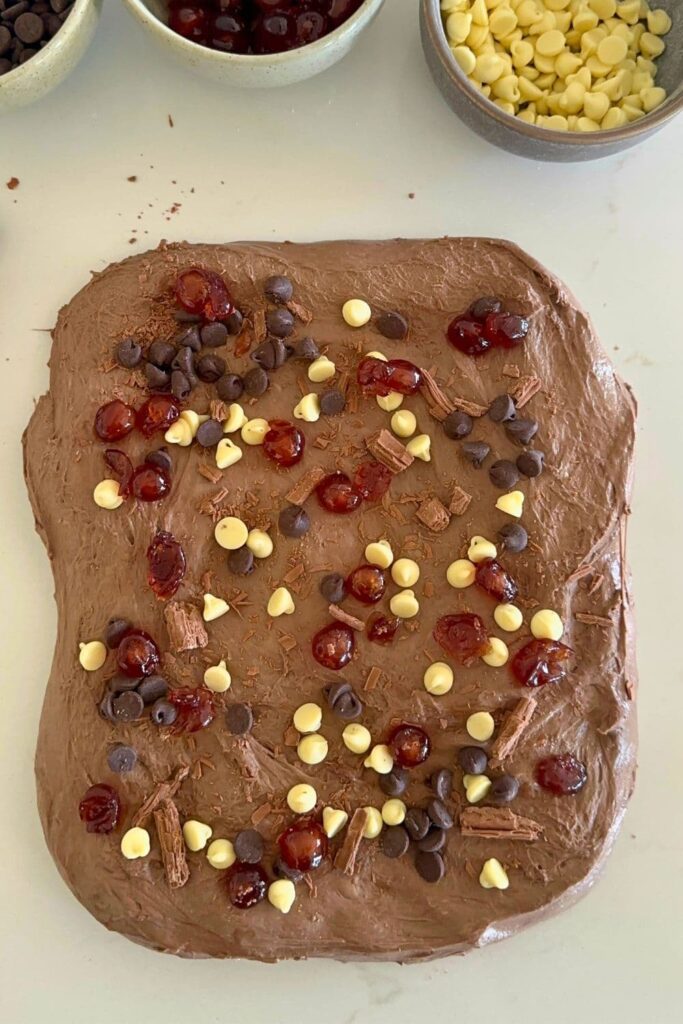
Tip the dough out of the bowl so that the sticky side is facing up. You can pull the dough out into a rough rectangle.It’s at this stage that you need to add the additional ingredients. Add handfuls of the chocolate and cherries as you shape the dough.
Shape the dough into your desired shape and then gently place it into your banneton, stitching the base if necessary.
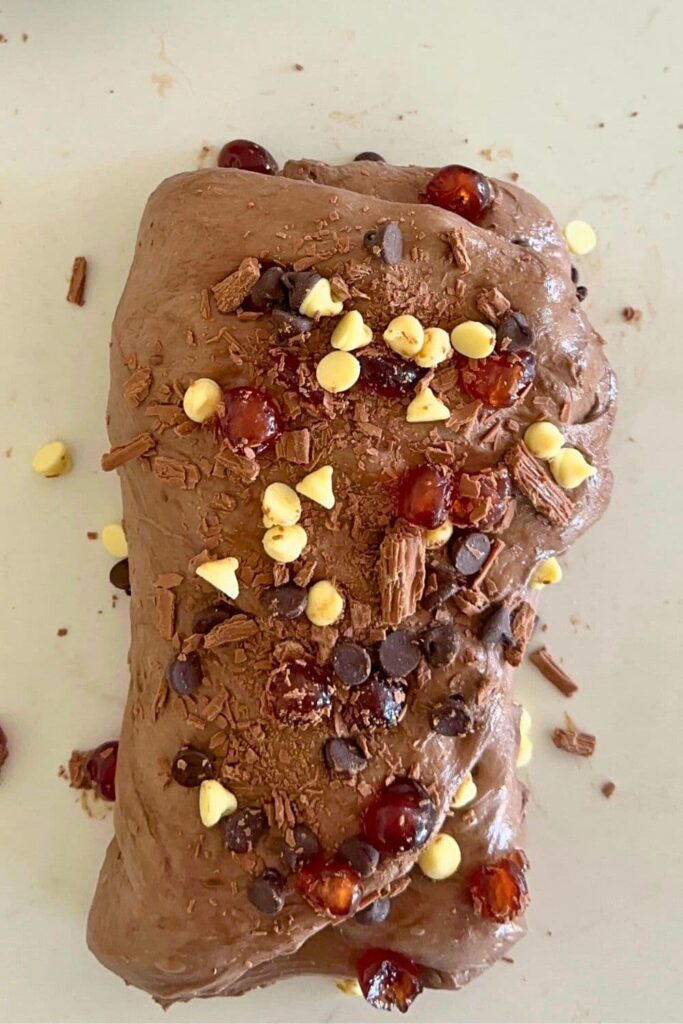
The flavor additions will make the dough quite hard to pull together so let the dough relax for 10 minutes or so and this should allow the gluten to relax enough and allow you to stitch the base together.
Cold Ferment
Now your dough is in it’s “shaping container” cover it loosely with a plastic bag or damp tea towel and place into the fridge. I use a large plastic bag to cover it – I just reuse it each time.
Try to leave it in the fridge for a minimum 5 hours up to a maximum of around 36 hours. The longer you leave it the better your bread will be! A longer cold ferment creates beautiful blisters on your crust and a deeper sourdough flavour.
Preparing To Bake Your Sourdough
Once you’re ready to bake your sourdough, you’ll need to preheat your oven to 230C/450F.Place your Dutch Oven into the oven when you turn it on so it gets hot.
Leave your dough in the fridge until the very last minute – placing a cold dough into a hot oven will give you a great “spring”.
Baking Your Sourdough
When your oven is at temperature. Take your sourdough out of the fridge. Gently place it onto a piece of baking paper.Gently score your bread with a lame, clean razor blade or knife.
Carefully take your dutch oven out of the oven. Place the sourdough into the pot using the baking paper as a handle. Put the lid on and place into the hot oven.
BAKE TIME
30 Minutes with the lid on at 230C/450F plus
10-15 Minutes with the lid off at 210C/410F
Because of the higher level of sugar in the dough, the base of this bread can burn easily, so I recommend using a trivet at the base of your Dutch oven or place a baking tray underneath the pot.
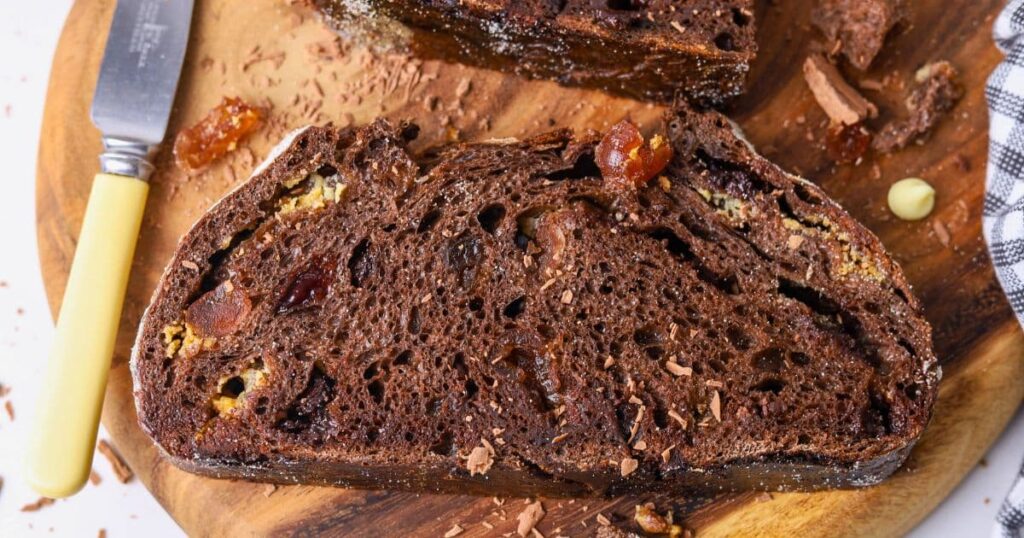
Finishing Your Bake
When you remove your dough from the oven, carefully remove it from the Dutch oven as soon as possible and place on a wire rack to cool.
How To Store + Freeze
Homemade sourdough bread is free from preservatives, which is one of the reasons I love making it for my family. Here, you’ll find my best tips for storing sourdough bread. I’ve also put together tips for freezing sourdough bread here.
Chocolate Cherry Sourdough Bread Recipe
Equipment
- Mixing Bowl
- Banneton
- Dutch Oven
Ingredients
For Bread Dough
- 100 g Sourdough Starter , (Fed and Bubbly)
- 500 g Bread Flour
- 30 g Cocoa Powder
- 380 g Water, (see notes before commencing recipe)
- 10 g Salt
To Add At Shaping
- 30 g Cadbury Flake, (crumbled into pieces)
- 100 g White Chocolate Chips
- 100 g Semi Sweet Chocolate Chips
- 100 g Glace Cherries, (see notes)
Instructions
- Weigh out your starter and water, give it a little mix so that the sourdough starter is dissolved in the water.Mix the cocoa powder, salt and flour together and then tip this on top of the water and sourdough starter. Mix together into a rough dough. The dough will be fairly shaggy and only just brought together.Cover the dough with a plastic food cover or a dish towel and let it sit for around an hour to fully incorporate.
- Now that the dough is hydrated, work your way around the bowl, grabbing the dough from the outside, stretching it up and over itself until a smooth ball is formed. You shouldn't need more than about 20-25 folds to form the ball.Once the dough has formed into a smooth ball, pop the cover back on and let it rest for around 30 minutes.
- Stretch & Fold:Now it's time to stretch and fold your dough to create some structure and strength. The dough should remain at room temperature on the counter while you are performing your stretch and folds.Try to do around 4 sets of stretch and folds with around 15 to 30 minutes between each set.You can find out more info on how to do stretch and folds here.
- Bulk Ferment:Once you've finished your stretch and folds, place the plastic cover or damp tea towel back over your dough and let it rest and ferment at room temperature. The time that it takes will depend on many factors (see notes for details). You want the dough to double. This will signal the end of the bulk fermentation period.
- Shaping Your Dough:Once your dough has finished its first ferment, it's time to give it some shape and surface tension. I think this recipe lends itself to a batard however it's completely up to you what shape you would like. You can see me shaping a batard here.Tip the dough out of the bowl so that the sticky side is facing up. You can pull the dough out into a rough rectangle. It's at this stage that you need to add the additional ingredients. Add handfuls of the chocolate and cherries as you shape the dough. You can see how I've done it in the photos above.Shape the dough into your desired shape and then gently place it into your banneton, stitching the base if necessary. The flavor additions will make the dough quite hard to pull together so let the dough relax for 10 minutes or so and this should allow the gluten to relax enough and allow you to stitch the base together.
- Cold Ferment:Now your dough is in it's "shaping container" cover it loosely with a plastic bag or damp tea towel and place into the fridge. I use a large plastic bag to cover it – I just reuse it each time.Try to leave it in the fridge for a minimum 5 hours up to a maximum of around 36 hours. The longer you leave it the better your bread will be! A longer cold ferment creates beautiful blisters on your crust and a deeper sourdough flavour.
- Preparing To Bake Your Sourdough:Once you're ready to bake your sourdough, you'll need to preheat your oven to 230C/450F. Place your Dutch Oven into the oven when you turn it on so it gets hot. Leave your dough in the fridge until the very last minute – placing a cold dough into a hot oven will give you a great "spring".
- Baking Your Sourdough:When your oven is at temperature. Take your sourdough out of the fridge. Gently place it onto a piece of baking paper.Gently score your bread with a lame, clean razor blade or knife. Carefully take your dutch oven out of the oven. Place the sourdough into the pot using the baking paper as a handle. Put the lid on and place into the hot oven.BAKE TIME:30 Minutes with the lid on at 230C/450F plus10-15 Minutes with the lid off at 210C/410FBecause of the higher level of sugar in the dough, the base of this bread can burn easily, so I recommend using a trivet at the base of your Dutch oven or place a baking tray underneath the pot.
- Finishing Your Bake:When you remove your dough from the oven, carefully remove it from the Dutch oven as soon as possible and place on a wire rack to cool.
Notes
- Notes on Water – The dough can be quite sticky, so I recommend taking thing slowly and holding back some of the water, especially if you are a beginner. You can always add extra water, but you can’t remove it! I have increased the amount of water in this recipe to account for the cocoa powder, but of course, the humidity and temperature in your kitchen may be different to mine, as well as the brand of flour you use etc. So I do recommend holding back a little water just in case!
- Notes on Sourdough Starter –
This recipe is based on you having an active starter that you have fed a few hours before starting your bake. For information on whether your starter is ready, go here.
- Notes on Stretch & Folds –
If you are going to do the stretch & folds on your bench top, spray your surface with water mist rather than using flour.
- Notes on Bulk Fermentation –
If your home is warm then your dough will ferment a lot faster and could be done in as little as a few hours. If it’s colder, it will take longer, possibly overnight. I would recommend that you try to do your first few bulk ferments during daylight hours so that you can watch your dough closely.
Once you’re more familiar with the process – and the temperature of your home – you will be able to do overnight ferments.
You will know your dough is ready to move to the next stage when it has *just* doubled in size. It will be fairly wobbly and full of bubbles. You should be able to see large air bubbles under the surface of the dough.
You don’t want to let it go any further than doubled as it will be over fermented. If you want to do an overnight ferment, but your home is warm, consider using a little less starter (ie 25g).
Less starter means your dough will take longer to ferment and you will reduce the risk of over fermenting your dough. You’ll find more information on these topics here: When is my bulk ferment finished? What is the difference between cold ferment and bulk ferment? Why does the amount of starter matter?
- Notes on Baking –
If you’re worried about the base of your bread burning, place a baking sheet on shelf underneath your Dutch Oven – it works! If you’re worried about your bread not being cooked all the way through, turn the oven off and place your dough straight onto the oven rack. Leave the door ajar and let your bread rest there for a few hours. Remember not to cut into your loaf too soon – you’ll need to let it cool for at least a few hours (4-6 is best).
Nutrition
Nutrition information is automatically calculated, so should only be used as an approximation.
Like this? Rate and comment below!


Quick question. I made your chocolate starter last night and am ready to bake the bread, do I still need to add the 30g of cocoa powder or is the starter alone fine? Or both if I want a richer flavour?
I would still add the cocoa powder as you want the rich cocoa flavor 🙂
This bread is easy to make and tastes amazing! I make a double batch every time. Thank you for such a yummy chocolate bread!
Thank you so much, Liz! We appreciate your review and are so glad you enjoy this one. 🙂
Hello. I have a few questions regarding this recipe that looks amazing. For one what is Cadbury flakes? What is glazed cherries? Can I use dried cherries? Can I omit the white chocolate? Thank you, Vivian.
Cadbury Flake is a flakey chocolate, you can just crumble some chocolate or even grate it on a box grater to get the same effect. Glace cherries are fresh cherries that have been preserved in a thick sugar syrup until they are fully saturated. They are really sticky and shiny and are very popular in recipes at Christmas time. Dried cherries aren’t the same, but you can use them. They won’t be as sweet though 🙂 You can swap the white chocolate for another type of chocolate you prefer if you like. Alternatively, you might like this plain chocolate sourdough loaf 🙂