Cinnamon Swirl Sourdough Bread [with step by step video]
This post may contain affiliate links.
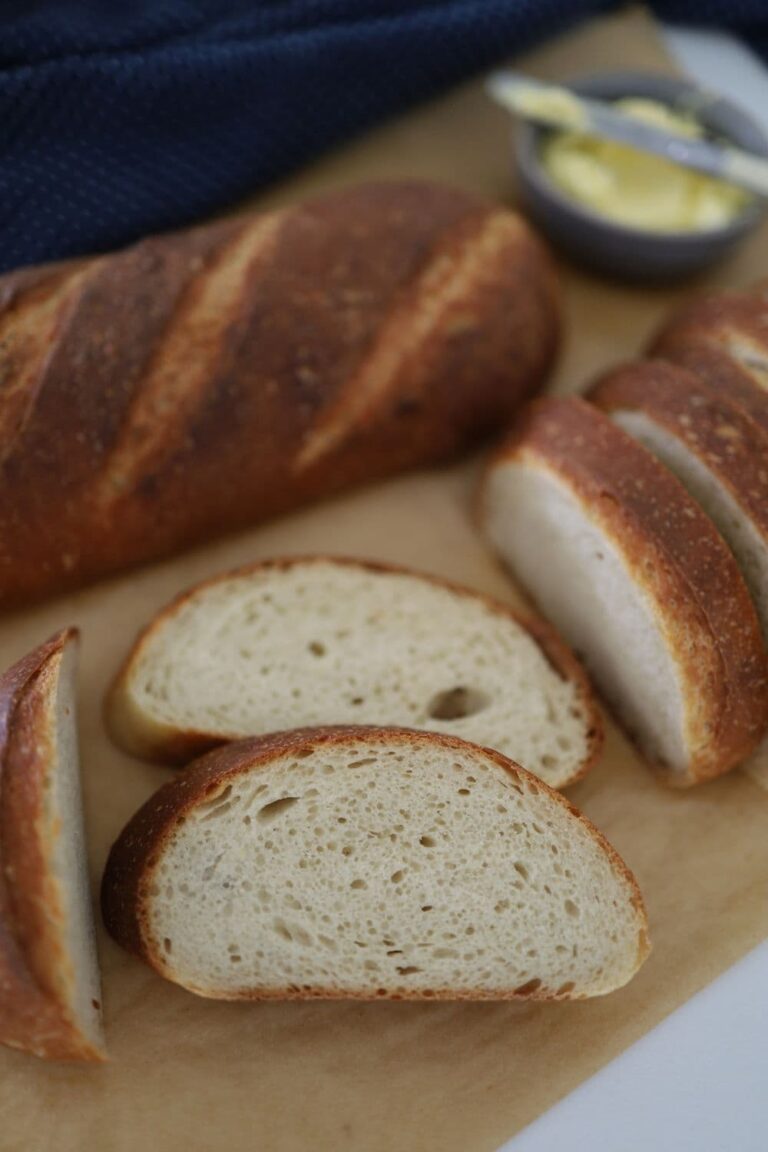
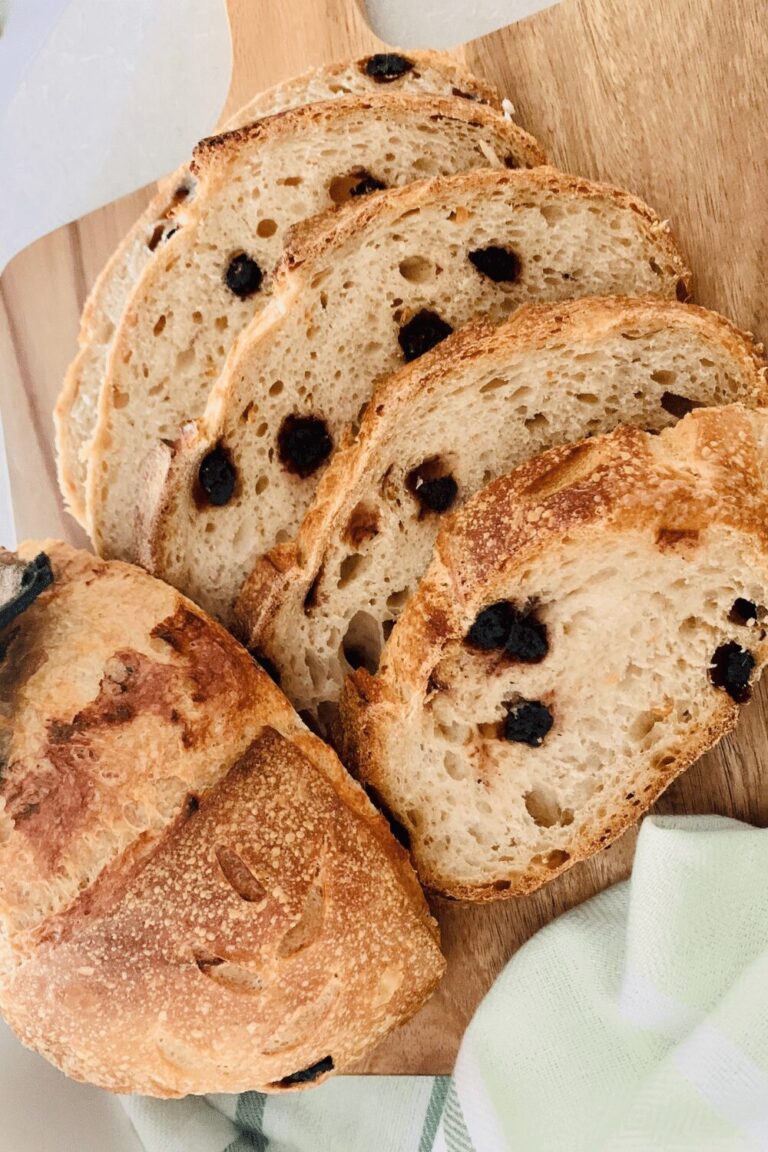
Sourdough Cinnamon Swirl Bread is such a beautiful loaf - lacey swirls of cinnamon sugar nestled in a deliciously crusty loaf of sourdough bread. The great thing about this loaf of cinnamon swirl sourdough bread is that you don't have to add the cinnamon sugar until the shaping stage. If you'd like to make this into sourdough cinnamon raisin bread, you can also add some raisins to the cinnamon sugar.
This is such a delicious breakfast bread, perfect for slathering in homemade butter! And if you have any leftovers, it makes the most lovely French Toast.

You'll need an active sourdough starter to make this cinnamon swirl sourdough bread. You can find instructions for making sourdough starter here.
If you're new to making sourdough bread, I recommend you read this beginner's guide to sourdough bread to get a feel for the basic sourdough making process.
If you love all things cinnamon sourdough recipes, why not try these fluffy sourdough cinnamon rolls, cinnamon sourdough muffins, sourdough monkey bread or sourdough cinnamon coffee cake. And I just know you're going to love this sourdough discard banana bread!
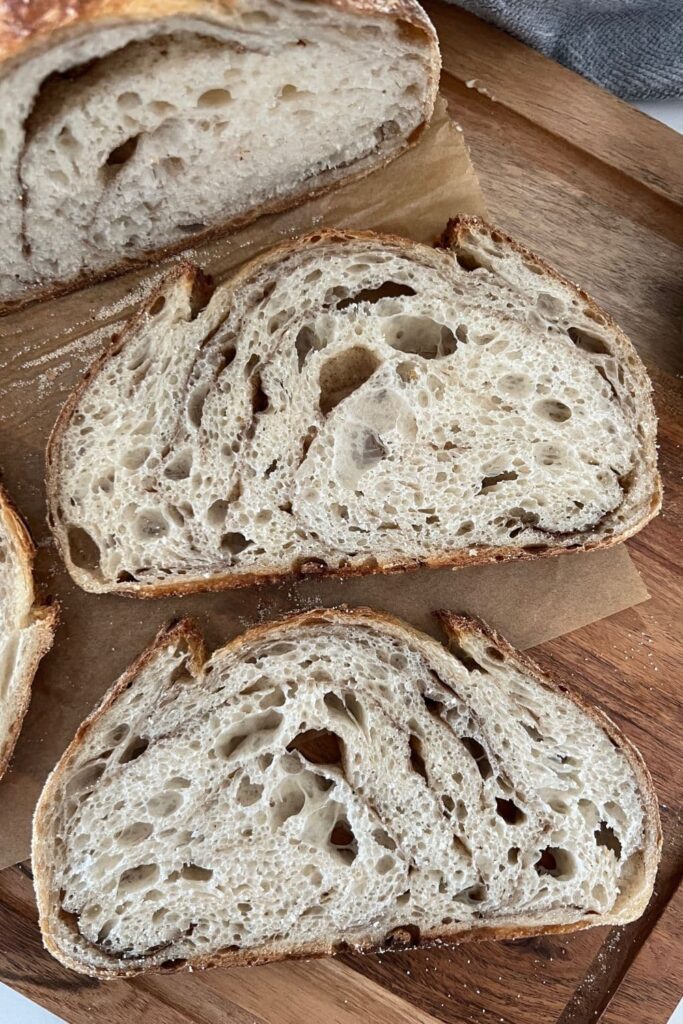
Cinnamon & Sourdough - What You Need To Know
Cinnamon and sourdough are flavors that go so well together ... however, cinnamon will actually inhibit the fermentation of your sourdough bread if you add it into the actual dough. For this reason, I've found that adding the cinnamon at shaping is the best way to add it to your sourdough bread.
The main component in cinnamon is cinnamaldehyde. Cinnamaldehyde has antifungal properties which is bad news for wild yeast as they are actually a fungus (sounds weird, but it's true - you can read more about how sourdough starter works here).
It's for this reason that sourdough cinnamon rolls have the cinnamon added in the filling, rather than in the dough.
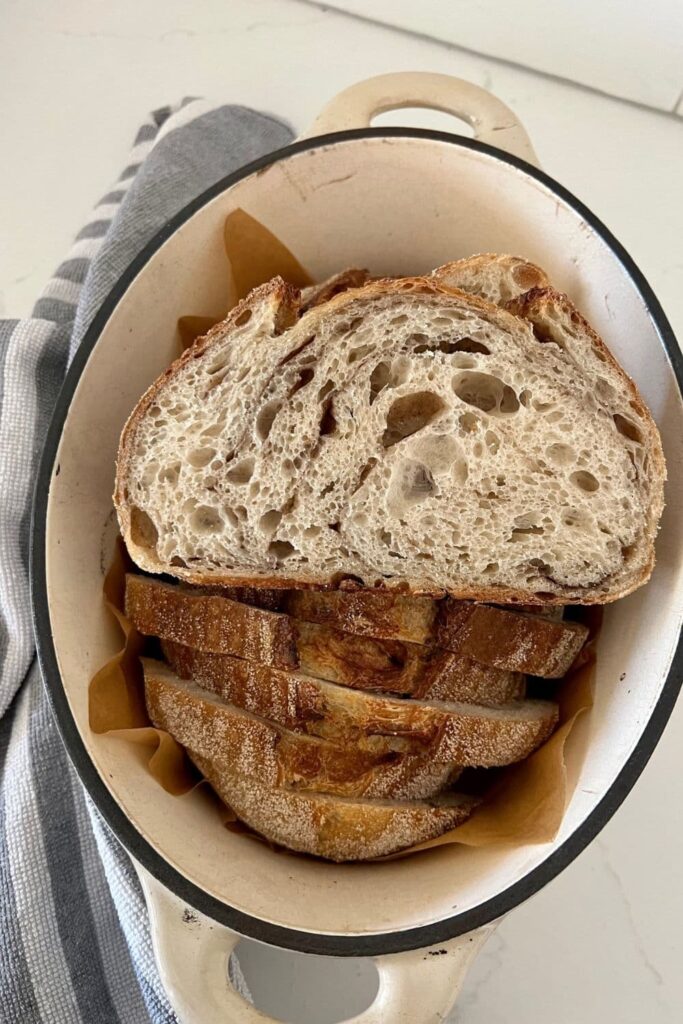
How To Make Cinnamon Swirl Sourdough Bread
This sourdough bread is just like making a plain loaf, until you get to the shaping, which is where you add the cinnamon swirl. You can read through the instructions here and I've put a step by step video to show you how to shape the dough and add the cinnamon swirl below.
Autolyse - Premixing The Dough
Weigh out your sourdough starter and water into a large ceramic or glass bowl.
Mix the water and starter together briefly. Then add your flour and salt and mix whole lot together to form a shaggy dough.
I find a dough scraper the easiest way to mix it as you can keep the sides of bowl clean.
The dough will be fairly shaggy and only just brought together.
Cover your bowl with cling film or a damp dish towel and let it sit for around 1 hour. It's ok if it's a little bit longer, it's not going to matter too much.
This process is called the "autolyse" and allows your flour to soak in all the water and become hydrated.
Forming Up The Dough
After the dough has been through autolyse you need to bring it together into a ball. Work your way around the bowl, grabbing the dough from the outside, stretching it up and over itself, into the centre, until a smooth ball is formed. You shouldn't need more than about 20-30 stretches to form the ball.
You'll notice that the dough is fully hydrated after soaking all the water up. It will be fairly sticky but as you bring it into a ball, it will become smoother and shinier.
Once the dough has formed into a smooth ball, pop the cling film back on and let it rest for 30 minutes.
Stretch & Fold - Creating Structure
Over the next few hours you need to create some structure for your dough by "stretching and folding".
Aim to do around 4-6 sets of stretches and folds.
For each set, stretch the dough up and over itself 4 times. Leave around 15 minutes in between each set. Again you do not have to be exact with time, but you need to do at least 4 sets over 2 hours.
Bulk Ferment
Once you've finished your stretch and folds, place the cling film or damp tea towel back over your dough and let it rest and ferment (a plastic cover is a better option for this stage).
While the dough is resting and fermenting, mix the brown sugar and cinnamon powder together in a small bowl. Set aside ready for when you're ready to shape the dough.
Shaping The Dough
Once your dough has finished its first ferment, it's time to shape it into either a boule or a batard. This is also when we add the cinnamon swirl to the dough. In the video above, I've chosen to shape my dough into a batard.
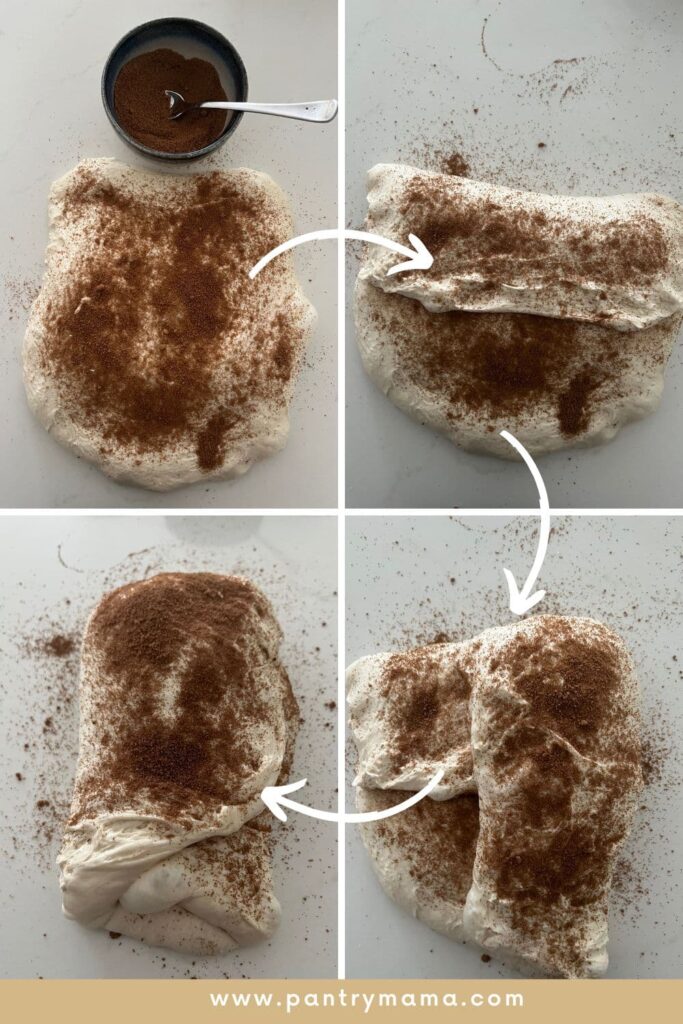
Flip your dough out onto the counter, sticky side up. Gently pull the dough outwards to form a rough rectangle (with the short side in front of you). Sprinkle some of the cinnamon sugar mixture over the dough. Each time you fold the dough during shaping, sprinkle some of the cinnamon sugar mixture over the exposed dough.
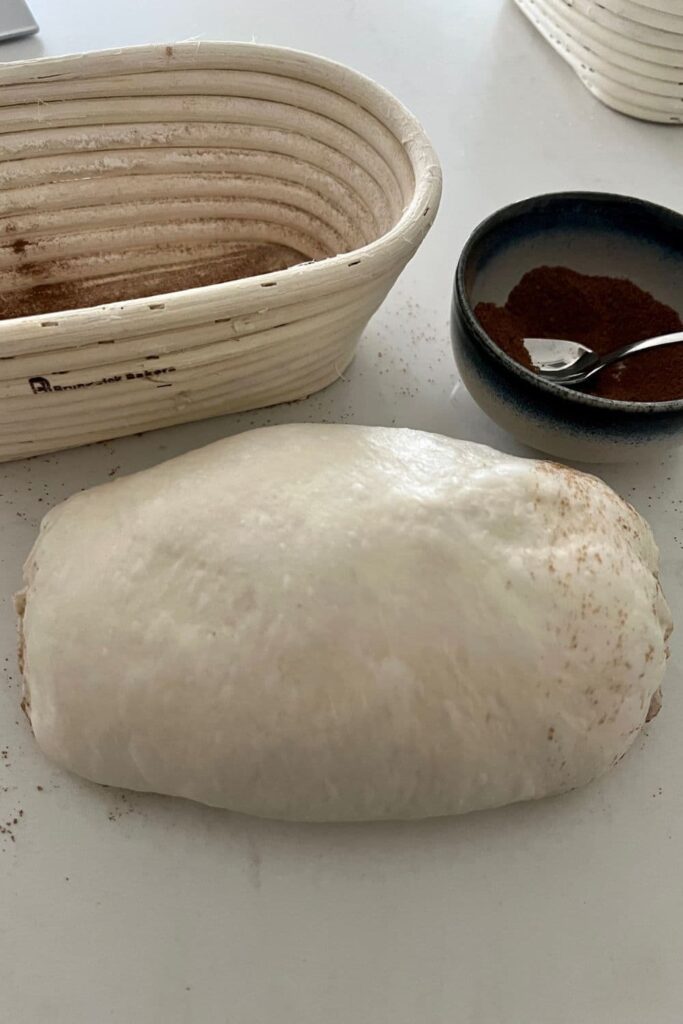
When you roll the dough up into a batard or boule, the cinnamon sugar should be safely tucked inside the dough. You might find a little bit pops out when you flip it into the banneton - that's ok!
You will need a banneton to put your dough into. If you do not have a banneton, then a bowl or basket lined with a floured tea towel is perfectly fine. Make sure your bowl isn't too big though, you want your dough to retain some shape.
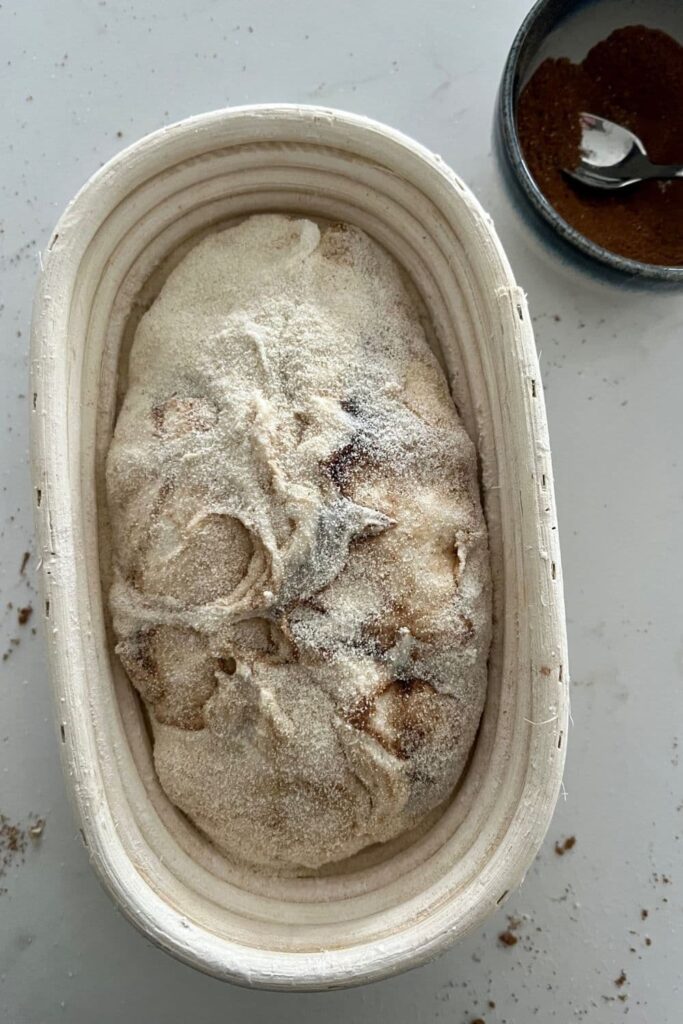
Whatever you're using needs to be liberally floured (I've used semolina and cinnamon powder in my banneton. If you're using a cloth or tea towel, rub the flour into it to ensure it becomes non stick.
Placing Into A Banneton
Once the dough is shaped, place it into your banneton smooth side down, so your seam is on the top - this way the top of your dough will get the pretty lines from the banneton ... and some of the cinnamon will stick to the top while it rests.
If you're using a cloth or tea towel in a bowl it's ok to put your dough with the smooth side up. Just make sure the dough is tight.
Lift your dough around the edges to pop a little more rice flour if you feel it needs it. Just try to handle the dough as little as possible and be really gentle as you really want to preserve all the gases and air bubbles that have formed during your bulk ferment.
Cold Ferment
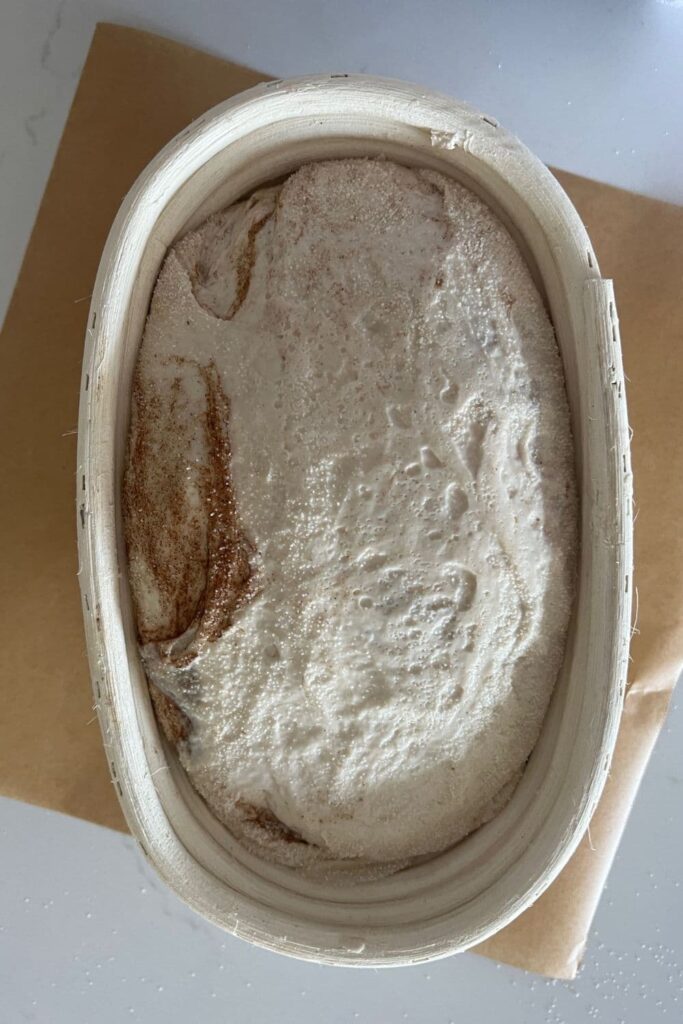
Now the dough is in its "shaping container" cover it loosely with a plastic bag or damp tea towel and place into the fridge.
Try to leave it in the fridge for a minimum 5 hours up to a maximum of around 36 hours. The longer you leave it the better your bread will be! A longer cold ferment creates beautiful blisters on your crust and a deeper sourdough flavour. It will also ensure your dough forms a skin which makes it easier to score.
Preparing To Bake
Once you're ready to bake your sourdough, you'll need to preheat your oven to 230C/450F.
Place your Dutch Oven into the oven when you turn it on so it gets HOT. Try to preheat for around 1 hour to ensure your oven is super hot - but you know your oven so just adjust this time if you need to.
Leave your dough in the fridge until the very last minute - placing a cold dough into a hot oven will give you a great "spring".
Bake Time!
Now it's time to bake!
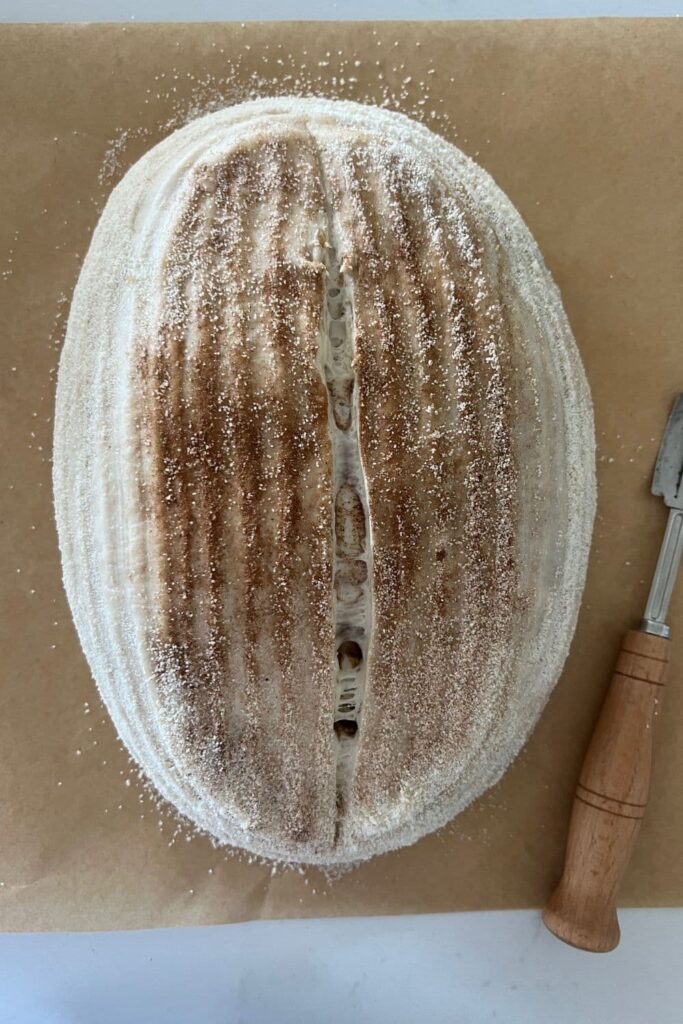
When your oven is at temperature, take your sourdough out of the fridge. Gently place it onto a piece of baking paper.
Make sure that you make the baking paper big enough to use the edges as a handle to lower to dough into your Dutch Oven.
Gently score the top of the dough with a lame, clean razor blade or knife. At minimum a large cross is sufficient, but you can get as artistic as you like. You can find my full guide on how to score sourdough bread here.
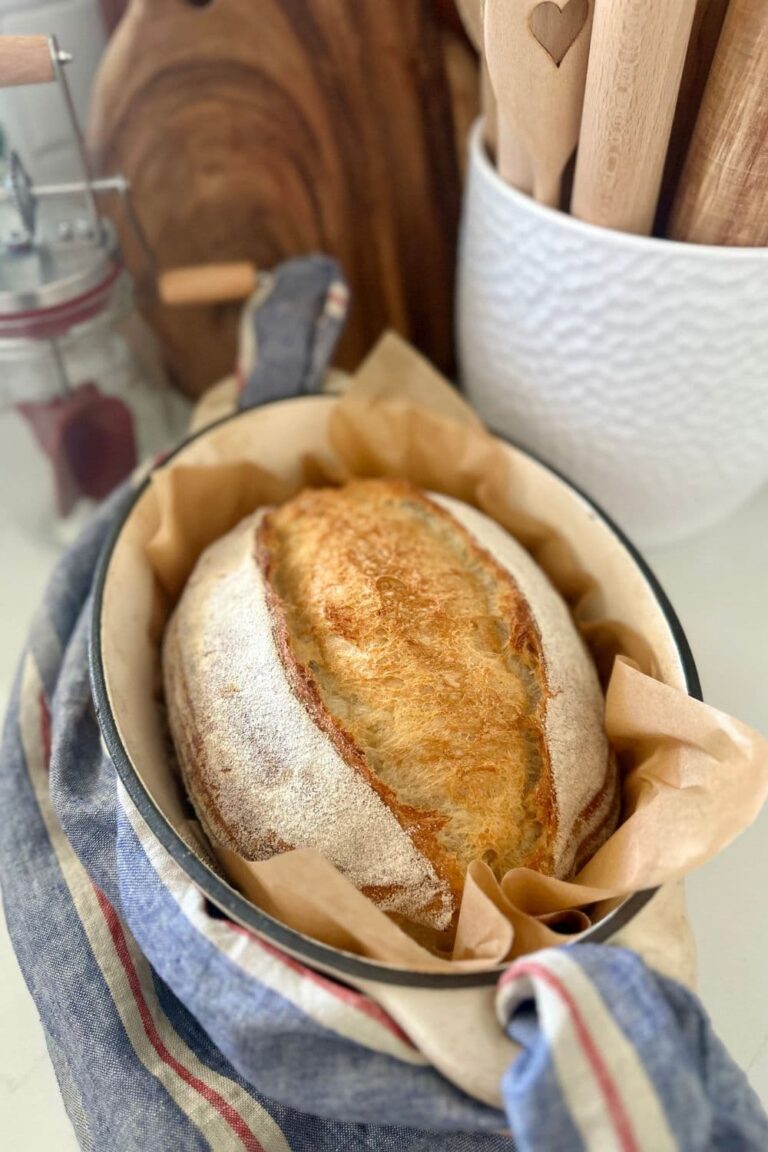
Carefully take your dutch oven out of the oven. Place the sourdough into the pot using the baking paper as a handle. Put the lid on and place into the hot oven.
If you want to you can spritz your dough with extra water before you put the lid on.
BAKE TIME:
30 Minutes with the lid on at 230C/450F plus
10-15 Minutes with the lid off at 210C/410F
Finishing The Bake
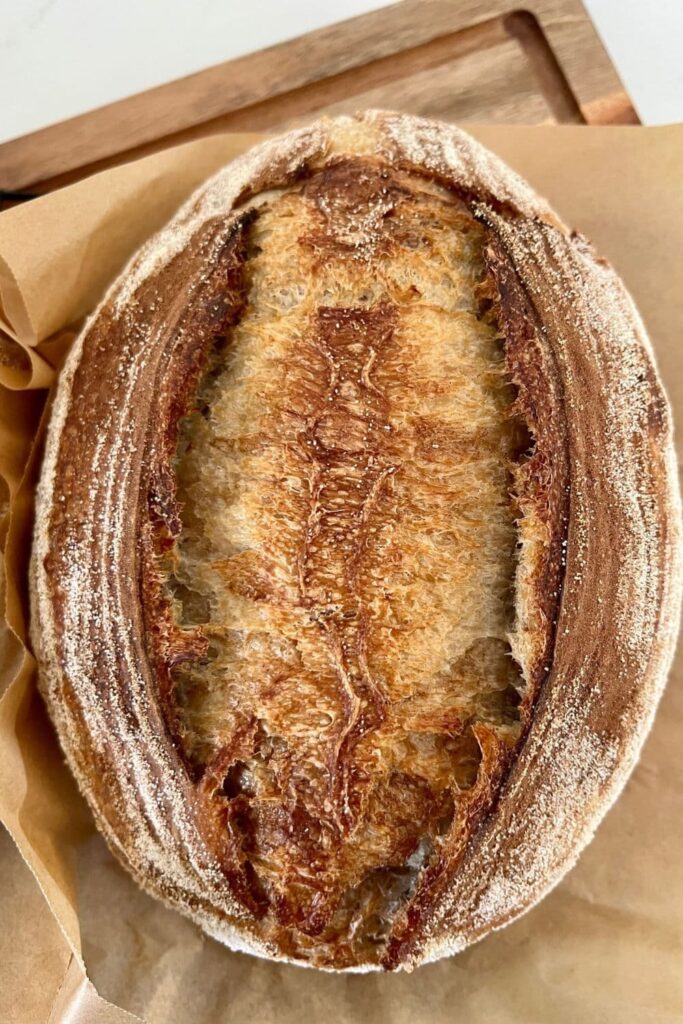
When you remove your dough from the oven, carefully remove it from the dutch oven as soon as possible and place on a wire rack to cool.
Baker's Timeline for Sourdough Cinnamon Swirl Bread Recipe
This sourdough cinnamon swirl bread is not a quick bread, but it's so worth the time investment. You can find more information on creating a timeline for sourdough baking here.
DAY 1
1.00pm – Feed sourdough starter
5.00pm – Premix and Autolyse
6.30pm – Form into a smooth ball. Rest for 30 minutes.
7.00pm – Perform 4-6 sets of stretch & folds over next 2 hours.
9.00pm – Cover and leave on bench overnight for bulk ferment if temp right (adjust starter as necessary).
DAY 2
6.00am – Shape & lift into banneton/bowl & into the fridge.
(I could bake my bread from around 2pm today if I wanted to, I just prefer a longer cold ferment).
DAY 3
2.00pm – 32 hours later place into hot oven.
7.00pm – finally cut into delicious sourdough!
How To Use Sourdough Cinnamon Swirl Bread
This delicious bread recipe is perfect for a simple breakfast, toasted and slathered in homemade butter or even cultured butter. You could even take it to the next level and serve it with this whipped honey cinnamon butter.
I also love to use this cinnamon sourdough bread in sourdough bread pudding - it gives the pudding the most loveliest warm flavor.
If you want to take this sourdough cinnamon swirl bread to the next level, try making this sourdough carrot cake bread.
Frequently Asked Questions
If you'd like to make cinnamon raisin sourdough bread, you can easily sprinkle on some sweet raisins when you are adding the cinnamon sugar at shaping. This will give you a nice distribution and ensure that the raisins add to the lacey swirls in your baked sourdough cinnamon bread.
You can absolutely bake this sourdough cinnamon swirl bread in a loaf pan. Once it is shaped, place it in a greased loaf pan and pop into the fridge for a cold retard. You can find more details on how to bake sourdough in a loaf pan here.
Good sourdough bread is a combination of a healthy, active sourdough starter, perfect bulk fermentation and well practiced dough shaping. All of these factors combine to give you beautiful sourdough bread.
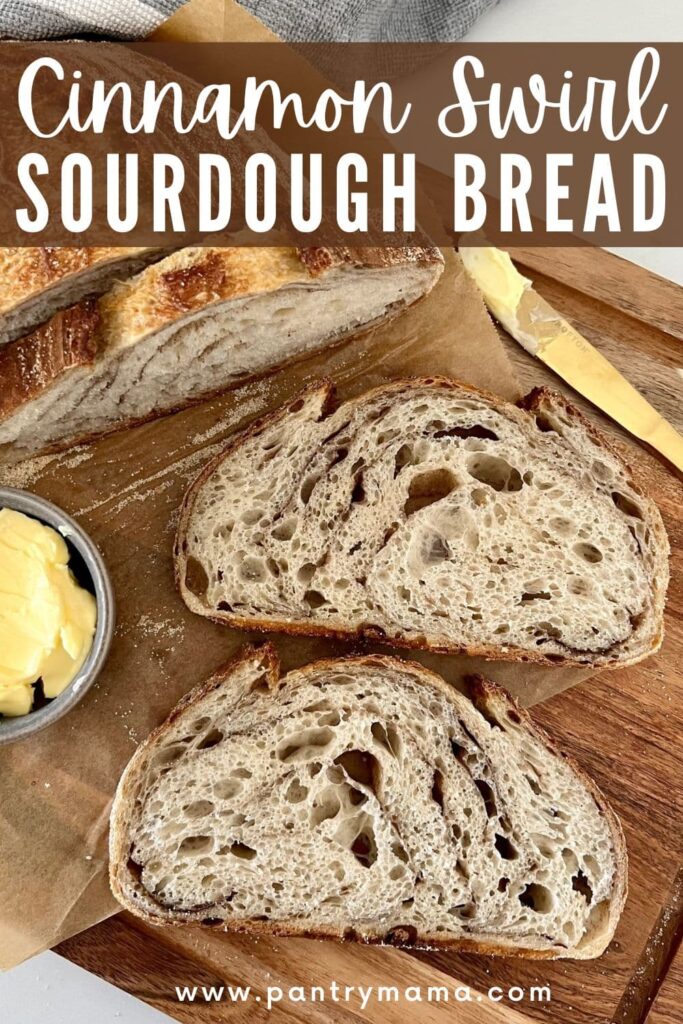
Cinnamon Swirl Sourdough Bread
Equipment
- Mixing Bowl
- Digital Scales
- Banneton (size guide for bannetons)
- Dutch Oven (size guide for Dutch Ovens)
Ingredients
- 500 g Bread Flour
- 350 g Water
- 50 g Sourdough Starter
- 10 g Salt
- 50 g Brown Sugar
- 5 g Cinnamon
Instructions
- Autolyse - Premixing The DoughWeigh out your sourdough starter and water into a large ceramic or glass bowl. Glass is always good as you can see what's happening underneath your dough. This recipe is based on you having an active starter that you have fed a few hours before starting your bake.Mix the water and starter together briefly. Then add your flour and salt and mix whole lot together to form a shaggy dough. I find a dough scraper the easiest way to mix it as you can keep the sides of bowl clean.The dough will be fairly shaggy and only just brought together (see photo). You might wonder how this will turn into bread, but just wait, time is your friend and the dough will change in around an hour.
- Cover your bowl with cling film or a damp tea towel and let it sit for around 1 hour. It's ok if it's a little bit longer, it's not going to matter too much.This process is called the "autolyse" and allows your flour to soak in all the water and become hydrated. You can see how the dough has changed in this photo.
- Forming Up The DoughAfter the dough has been through autolyse you need to bring it together into a ball. Work your way around the bowl, grabbing the dough from the outside, stretching it up and over itself, into the centre, until a smooth ball is formed. You shouldn't need more than about 20-30 stretches to form the ball. You'll notice that the dough is fully hydrated after soaking all the water up. It will be fairly sticky but as you bring it into a ball, it will become smoother and shinier.
- Once the dough has formed into a smooth ball, pop the cling film back on and let it rest for 30 minutes.
- Stretch & Fold - Creating StructureOver the next few hours you need to create some structure for your dough by "stretching and folding". Aim to do around 4-6 sets of stretches and folds. For each set, stretch the dough up and over itself 4 times. Leave around 15 minutes in between each set. Again you do not have to be exact with time, but you need to do at least 4 sets over 2 hours.I like to be fairly liberal with my timings as I am generally cooking amongst the chaos of family life and therefore sometimes timing does go astray!
- Bulk FermentOnce you've finished your stretch and folds, place the cling film or damp tea towel back over your dough and let it rest and ferment (a plastic cover is a better option for this stage).See notes below for more info on this step.
- While the dough is resting and fermenting, mix the brown sugar and cinnamon powder together in a small bowl. Set aside ready for when you're ready to shape the dough.
- Shaping The DoughOnce your dough has finished its first ferment, it's time to shape it into either a boule or a batard. This is also when we add the cinnamon swirl to the dough. In the video above, I've chosen to shape my dough into a batard.Flip your dough out onto the counter, sticky side up. Gently pull the dough outwards to form a rough rectangle (with the short side in front of you). Sprinkle some of the cinnamon sugar mixture over the dough. Each time you fold the dough during shaping, sprinkle some of the cinnamon sugar mixture over the exposed dough.When you roll the dough up into a batard or boule, the cinnamon sugar should be safely tucked inside the dough. You might find a little pops out when you flip it into the banneton - that's ok!You will need a banneton to put your dough into. If you do not have a banneton, then a bowl or basket lined with a floured tea towel is perfectly fine. Make sure your bowl isn't too big though, you want your dough to retain some shape.Whatever you're using needs to be liberally floured (I've used semolina and cinnamon powder in my banneton. If you're using a cloth or tea towel, rub the flour into it to ensure it becomes non stick.
- Placing Into A BannetonOnce the dough is shaped, place it into your banneton smooth side down, so your seam is on the top - this way the top of your dough will get the pretty lines from the banneton ... and some of the cinnamon will stick to the top while it rests.If you're using a cloth or tea towel in a bowl it's ok to put your dough with the smooth side up. Just make sure the dough is tight.Lift your dough around the edges to pop a little more rice flour if you feel it needs it. Just try to handle the dough as little as possible and be really gentle as you really want to preserve all the gases and air bubbles that have formed during your bulk ferment.
- Cold FermentNow the dough is in its "shaping container" cover it loosely with a plastic bag or damp tea towel and place into the fridge. I use a large plastic bag to cover it - I just reuse it each time. Try to leave it in the fridge for a minimum 5 hours up to a maximum of around 36 hours. The longer you leave it the better your bread will be! A longer cold ferment creates beautiful blisters on your crust and a deeper sourdough flavour. It will also ensure your dough forms a skin which makes it easier to score.
- Preparing To BakeOnce you're ready to bake your sourdough, you'll need to preheat your oven to 230C/450F. Place your Dutch Oven into the oven when you turn it on so it gets HOT. Try to preheat for around 1 hour to ensure your oven is super hot - but you know your oven so just adjust this time if you need to.Leave your dough in the fridge until the very last minute - placing a cold dough into a hot oven will give you a great "spring".
- Bake Time!Now it's time to bake!When your oven is at temperature, take your sourdough out of the fridge. Gently place it onto a piece of baking paper. Make sure that you make the baking paper big enough to use the edges as a handle to lower to dough into your Dutch Oven.Gently score your bread with a lame, clean razor blade or knife. At minimum a large cross is sufficient, but you can get as artistic as you like. You can find my full guide on how to score sourdough bread here.Carefully take your dutch oven out of the oven. Place the sourdough into the pot using the baking paper as a handle. Put the lid on and place into the hot oven. If you want to you can spritz your dough with extra water before you put the lid on.BAKE TIME:30 Minutes with the lid on at 230C/450F plus10-15 Minutes with the lid off at 210C/410F
- Finishing The BakeWhen you remove your dough from the oven, carefully remove it from the dutch oven as soon as possible and place on a wire rack to cool.
Notes
- Notes on Cinnamon: Cinnamon and sourdough are flavors that go so well together ... however, cinnamon will actually inhibit the fermentation of your sourdough bread if you add it into the actual dough. For this reason, I've found that adding the cinnamon at shaping is the best way to add it to your sourdough bread. The main component in cinnamon is cinnamaldehyde. Cinnamaldehyde has antifungal properties which is bad news for wild yeast as they are actually a fungus (sounds weird, but it's true - you can read more about how sourdough starter works here).
- Notes on Flour: This recipe is written using strong Bread Flour. Bread flour has a higher protein content than All Purpose flour. If you choose to use All Purpose flour you may have a different result because of this. You can read more about the differences between All Purpose Flour and Bread Flour here.
- Notes on Sourdough Starter: This recipe is based on you having an active starter that you have fed a few hours before starting your bake. For info on how to make a sourdough starter, go here.
- Notes on Stretch & Folds: If you are going to do the stretch & folds on your bench top, spray your surface with water mist rather than using flour. You can leave the dough in the bowl if you want to. Wet your hands to stop the dough sticking - although it shouldn't be too sticky. It will get less sticky as you do your stretches and folds. For more information on how to do stretch and folds, go here.
- Notes on Bulk Fermentation: If your home is warm then your dough will ferment a lot faster and could be done in as little as a few hours. If it's colder, it will take longer, possibly overnight.
I would recommend that you try to do your first few bulk ferments during daylight hours so that you can watch your dough closely.
Once you're more familiar with the process - and the temperature of your home - you will be able to do overnight ferments. You will know your dough is ready to move to the next stage when it has *just* doubled in size. It will be fairly wobbly and full of bubbles. You should be able to see large air bubbles under the surface of the dough.
You don't want to let it go any further than doubled as it will be over fermented.
If you want to do an overnight ferment, but your home is warm, consider using a little less starter (ie 25g).
Less starter means your dough will take longer to ferment and you will reduce the risk of over fermenting your dough. You'll find more information on these topics here:
When is my bulk ferment finished? What is the difference between cold ferment and bulk ferment? Why does the amount of starter matter?
- Notes on Dutch Oven: You can use either a round or oval Dutch Oven, depending on the shape of the loaf you're making. I recommend a 5Q or 5L Dutch oven for each one, however as long as your banneton fits inside with a little wiggle room, you will be able to fit your loaf inside. You can find more information on the best Dutch Oven to use for sourdough bread here.
- Notes on Baking: If you're worried about the base of your bread burning, place a baking sheet on shelf underneath your Dutch Oven - it works! If you're worried about your bread not being cooked all the way through at the end of cooking time, turn the oven off and place your dough straight onto the oven rack. Leave the door ajar and let your bread rest there for a few hours. Make sure you don't close the door or your sourdough will sweat and you'll get a wrinkly, soggy crust. Remember not to cut into your loaf too soon - you'll need to let it cool for at least a few hours (4-6 is best).
Nutrition


