Quick Sourdough Discard Pizza Dough [no yeast]

This post may contain affiliate links.

Quick sourdough discard pizza dough that you can make with your eyes closed! This sourdough pizza dough is so simple and there's lots of ways you can make it fit exactly what you need.

You can easily use sourdough discard for this recipes, but it works just as well with an active, bubbly starter. I've explained how to decide what to use further down.

You'll also discover that this delicious quick sourdough pizza dough is really easy to freeze. You'll never need to order pizza in again!

We love this quick sourdough discard pizza served with this delicious sourdough garlic bread or as sourdough pizza bianca! And don't forget to make this delicious homemade pizza sauce to take your sourdough pizza to the next level! Or for something different, try this white pizza sauce made with sourdough starter.

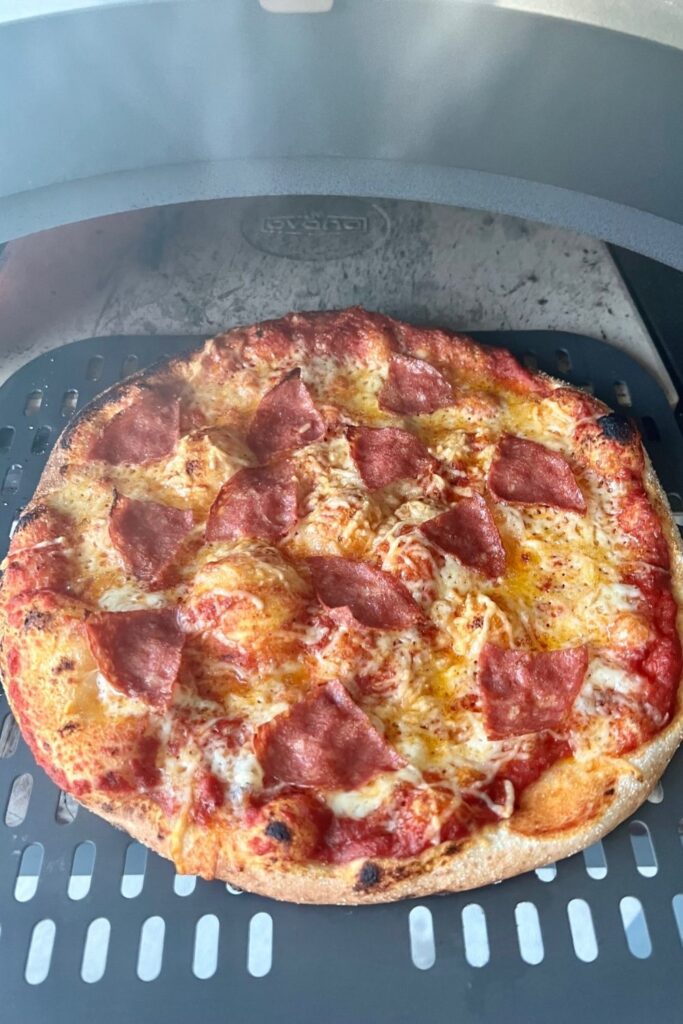
Sourdough pizza topped with pepperoni and cheese and sitting on a wooden pizza peel. There is a sprig of roseary on the left side of the pizza.

Using Sourdough Discard In Pizza Dough

This recipe has been made using sourdough discard but I do want to explain why and how you should use discard in this recipe so you have the most success possible!

Basically, the success of this discard pizza dough will depend on the age and strength of your sourdough starter, so here's a quick chart so you know what to use and when.

Sourdough Starter AgeHow To Use It In Pizza Dough
Sourdough Discard [no yeast]If your sourdough starter is mature and doubling regularly, you can use your unfed discard with no yeast. It will just take a bit longer to double than if it was active.
Sourdough Discard + 4g yeastIf your sourdough starter is only young and not doubling consistently, add 4g of yeast to help it along. If you want super fast pizza dough, add 7g of yeast.
Active Fed Sourdough StarterIf you have a mature sourdough starter, this recipe works perfectly with an active, bubbly starter. It will take less time to double than discard will.

As real life examples of how you could use your discard in this sourdough pizza dough:

  • Your starter is two weeks old. You have 200g of discard in a jar in the fridge from the last week of feeding your sourdough starter. You use 200g of sourdough discard from the fridge with an additional 4g of instant yeast in your dough.
  • Your starter is 6 months old. You haven't fed the starter in the fridge for a week but you want to make pizza. Take 200g of starter from your jar and use that for your bake (no yeast needed). Then feed your sourdough starter before you put it back into the fridge.
  • Your starter is mature and has been around for a few years. Use 200g of fed, active starter to make this delicious sourdough pizza dough.
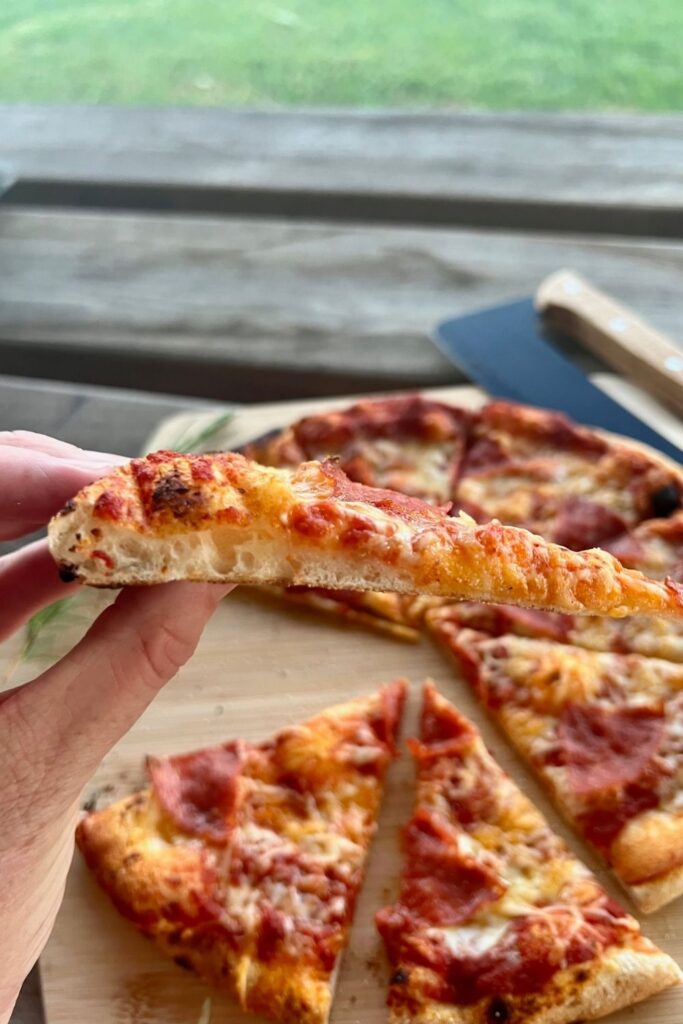
Photo showing a hand holding a slice of pizza to show a perfect crust - it doesn't sag when being held at the edges.

How To Make Sourdough Discard Pizza Dough

This sourdough discard pizza dough is described as quick because it is really easy to pull together - you can literally throw it in a bowl and you're half way there.

You can of course make it super fast by adding a little commercial yeast, but it's definitely not essential.

And if you're looking for the best sourdough pizza toppings, check out this extensive list!

Here's how to make sourdough discard pizza dough:

  1. Measure out the sourdough starter, water and honey (and yeast if you want to add it). Stir together until the sourdough starter and honey are dissolved into the water.
  2. Now, add the oil, flour and salt into the bowl and gently stir together with a dough whisk or knife. Cover with plastic wrap and allow the dough to sit for around 30 minutes.
  3. Now, tip the dough out onto the counter and knead it really well using your hands. This is a lovely dough to work with and with the right kneading, it will become soft and silky. I find it takes around 10 minutes to come together when kneading by hand.
  4. Once the dough is silky and elastic, pop it into a warm bowl (I warm a bowl with water and then dry it - this speeds up the rising). Cover with a plastic cover and leave to rise until it has doubled.
  5. Once the dough has doubled, separate the dough into smaller balls so they are ready to be rolled out. I use 200g per pizza (this fits my pizza oven perfectly) but anywhere from 200g to 300g is good for a pizza. Leave the balls on your counter top, covered with a tea towel, for around 30 minutes to allow the gluten to relax.
  6. Once you're ready to make your bases, use your fingers to press your dough into a pizza round. If you need to stretch the dough, pick it up and move your hands around the edges, allowing the dough's own weight to stretch it out into a round. Avoid using a rolling pin if you can to maintain your dough's sourdough character and give it good structure when baked.
  7. Place your pizza dough onto pizza peels ready to top with your favorite toppings.
  8. When you are ready to bake, pre heat your oven to 230C/450F and make sure it's HOT!!
  9. Place your pizzas into the hot oven for around 15 minutes or until toppings are cooked and bases are crispy on the bottom. These bases are especially good baked in a wood fired or gas pizza oven. I bake them for 2 minutes at 350C - 400C (662F - 752F)
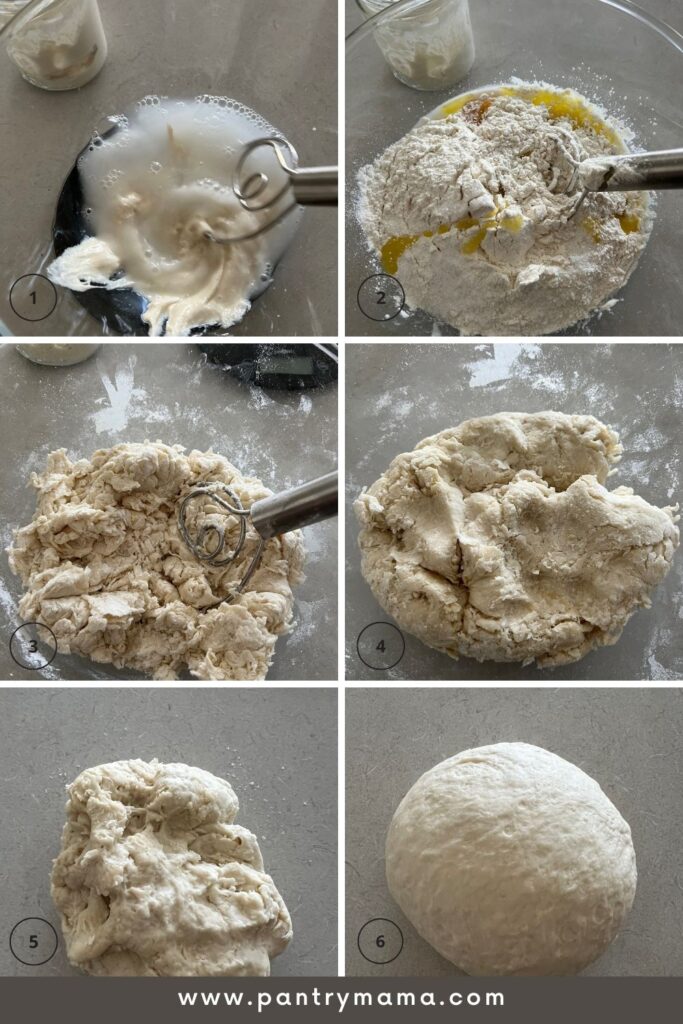
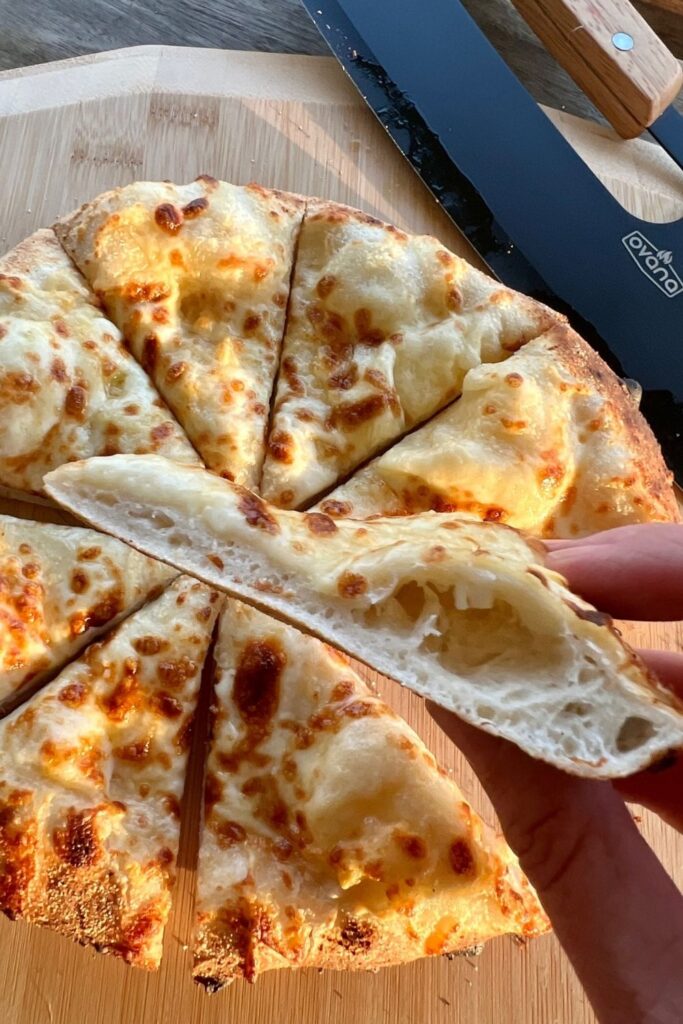
Photo showing a hand holding a slice of pizza to show a perfect crust - it doesn't sag when being held at the edges.
This sourdough discard pizza dough is perfect! No soggy crust - it holds up just fine when you hold the edges!

Kneading Sourdough Pizza Dough

This versatile sourdough pizza discard dough can be made using your hands or using a stand mixer.

Kneading by hand is really easy - you just need to knead it until the dough becomes soft and supple. It will be quite elastic and stretchy. Don't be tempted to add flour to the surface you're kneading on. Use a metal dough scraper to bring the dough together if you need to (this can be handy to scrape up sticky dough while you build gluten).

You can easily make this recipe in a stand mixer or Thermomix. I've included the instructions here. You might also like to make sourdough focaccia or sourdough fougasse.

Baker's Timeline for Sourdough Pizza

One of the questions I get asked the most is around sourdough timelines. If you would like to know more about building a sourdough timeline, you might be interested in my book "Scheduling Sourdough".

Here's the timeline I use when making this sourdough discard pizza dough with no commercial yeast - sourdough discard only.

7.00am Mix pizza dough with sourdough discard.

8.00am Place kneaded dough into a warm bowl, cover with plastic cover. Pop the bowl into the microwave with the door ajar.

5.00pm Turn the risen pizza dough out onto the counter and divide into balls. Allow them to rest for 30 minutes.

5.30pm Shape pizza bases and place onto the pizza peels. Allow to rest while pizza oven heats up.

6.00pm Top pizzas and take to pizza oven to bake.

Pizza dough is really forgiving, so I could let it sit for a few extra hours and not shape until 7pm for example. It's not as time sensitive as sourdough bread.

2 uncooked sourdough pizzas sitting on pizza peels. There is a glass of wine in the middle of them.

Can You Put Sourdough Pizza Dough In The Fridge?

The great thing about sourdough discard pizza dough is that it's really forgiving.

If you want to make sourdough pizza dough in advance and store it in the fridge until you're ready to shape, place the dough in the fridge once its doubled.

It will last for up to 24 hours like this.

If you've used commercial yeast with your discard, you can leave it in the fridge for up to 3 days after doubling.

How To Cook Sourdough Pizza For Best Crust

I have cooked a lot of sourdough pizza crusts. We have pizza every single Friday night (and sometimes we have it during the week and on a Saturday too!). And that adds up to a LOT of sourdough pizza!

I have cooked sourdough pizza in an oven on a pizza stone, on perforated pizza trays, baking trays with parchment paper, in a wood fired pizza oven and in a gas fuelled pizza oven.

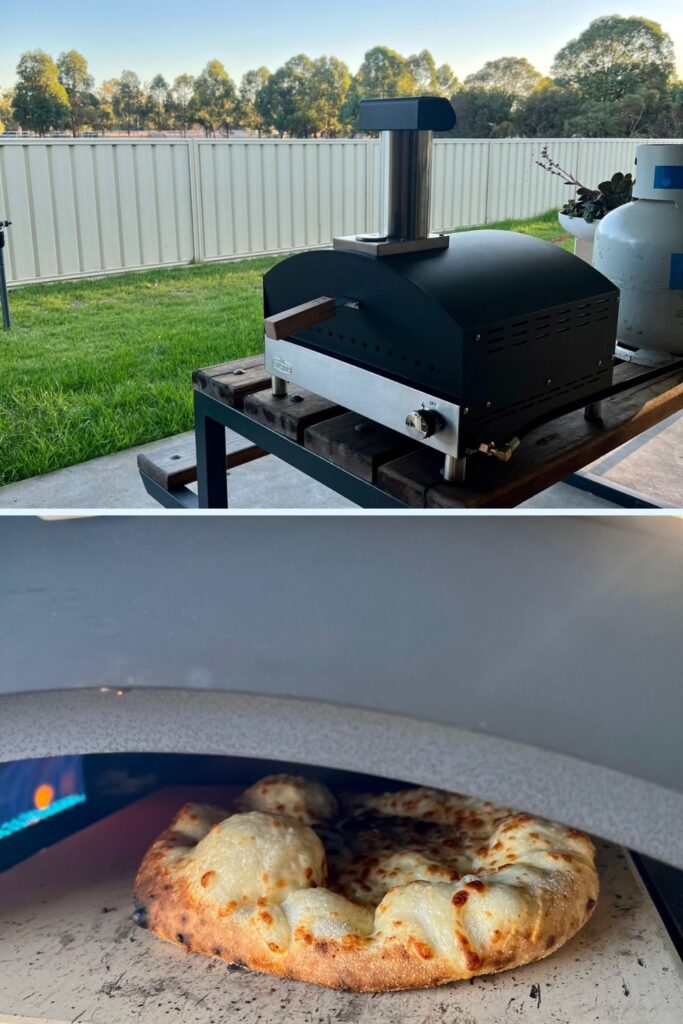
I have gotten the best results with our gas fuelled pizza oven. It's small and easy to fire up, it holds a constant temperature and pumps out a perfectly cooked pizza in just a few minutes.

If you don't have access to a gas fuelled pizza oven, I find the next best result on a pizza stone in the oven. If you bake a lot of pizza, it's well worth investing in a pizza or baking stone for your oven. The trick is to make sure the pizza stone is super hot before you put the pizza in. You want the crust to cook almost instantly on the searing hot stone!

If you do want to invest in a gas fuelled pizza oven, I recommend this one. It's the most similar to what I have at home. I also recommend getting yourself a few accessories to make life easier. I use a perforated pizza peel and a pizza turner.

Photo shows gas fired pizza oven with the door closed as well as with a bubbly sourdough pizza inside.
This is my gas fired pizza oven - it cooks my sourdough pizza perfectly! Bubbly crust that's never soggy and golden, molten cheese! YUM!

Using Semolina Flour for Sourdough Pizza

I highly recommend using semolina flour when you are shaping sourdough pizza bases.

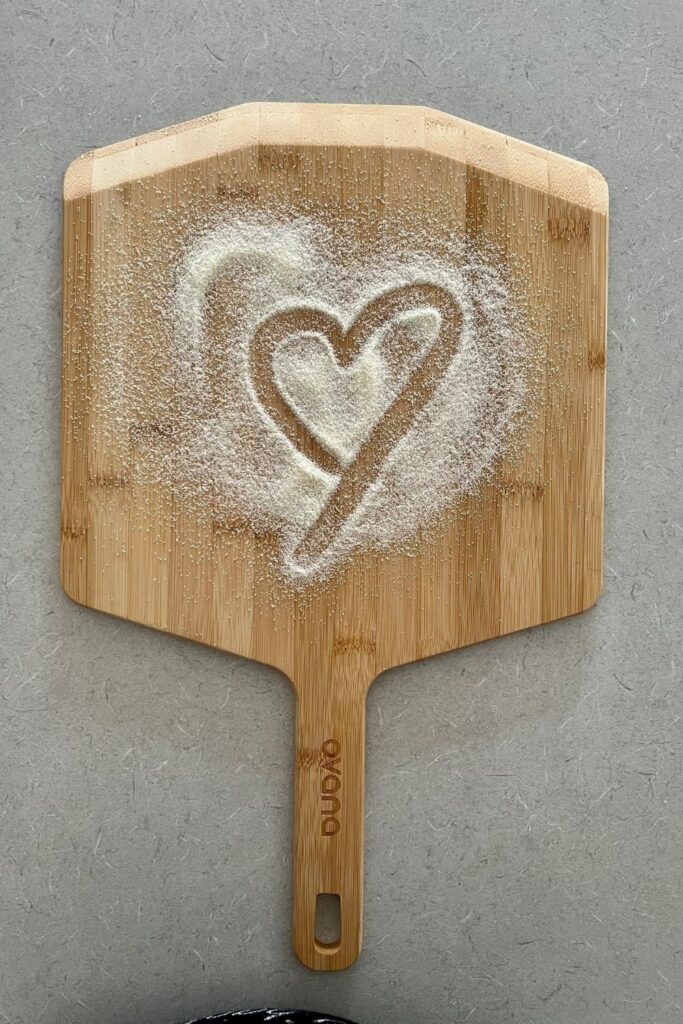
I use semolina on all of my pizza peels to ensure that the pizza bases are easy to slide into the pizza oven. It makes the pizza peels non stick and allow you to move the pizza bases with no issues.

You can read more about the best flour for sourdough pizza dough here.

My 3 year old loves playing with this pizza dough ... and pushing the semolina around the counter top with his toy digger! You can find my best tips for getting kids baking sourdough here!

Pizza peel with semolina flour - a heart has been drawn in the semolina flour.

Can You Freeze Sourdough Pizza Dough?

Yes! Sourdough pizza dough is so simple to freeze and it can free up so much time! I've got two options for freezing your pizza dough, depending on what you'd prefer:

Freeze Sourdough Pizza Dough Balls

If you want to have some pizza dough in the freezer at all time, you can divide the pizza dough into balls after it's doubled. Place each ball into a zip loc bag and then place into the freezer.

When you want to make a pizza, a bag of dough out of the freezer and allow it to defrost at room temperature. Once the dough is at room temp, shape it into a pizza base as you normally would.

Freeze Sourdough Pizza Bases

For an even faster frozen sourdough pizza, shape your dough into pizza bases. Place each pizza base onto a piece of parchment paper and then onto a pizza peel. Snap freeze the base by allow the base to freeze uncovered in the freezer for around an hour. Once all the bases are frozen, stack them (ensuring you leave the parchment paper between them) and then wrap the stack in aluminium foil or place into a large zip loc bag.

When you want to use one, take out a base and top it with whatever you like - you don't even have to let it defrost, it will defrost as you add the topping!

You'll never have to order pizza in again!

What To Do With Leftover Sourdough Pizza Dough?

I often have portions of sourdough pizza dough leftover, so I've created a few recipes to make sure we don't have any food waste!

Equipment for Sourdough Pizza Dough

You don't need a lot of specialised equipment for pizza dough, however there are a few things which can make it easier for you - and give you better tasting pizza! These are the things that I use every week when making sourdough pizza crust.

Glass Mixing Bowl - allows you to see what's happening as your sourdough pizza dough is rising.

Silicone Dough Scraper/Metal Dough Scraper - these make getting the dough out of the bowl much easier and dividing the dough a breeze!

Pizza Peel - I have 5 of these in my kitchen and we use them for so much more than just pizza! But they make pizza night a breeze and are a great alternative to parchment paper.

Pizza Stone - a good pizza stone is essential in any home sourdough baker's kitchen - it's not just useful for pizza, but can help you make amazing sourdough bread without a Dutch Oven too!

Pizza Rocker - makes slicing through molten mozzarella and crispy sourdough a breeze! I love the black blade and wooden handles on this one!

I've also put together a fully illustrated guide to the best equipment for sourdough pizza dough.

Sourdough pizza being taken out of gas fired pizza oven using a perforated pizza peel.

Step By Step Video for Sourdough Pizza

YouTube video

Frequently Asked Questions

Do I have to use honey in this recipe?

No, you do not have to use honey in this recipe but it definitely adds flavor and color to the crust and it speeds up the doubling of the dough for a quicker pizza. If you don't want to use honey, you can substitute with a little sugar or leave it out entirely.

Why is my sourdough pizza crust tough?

Sourdough pizza crust can become tough if you use too much flour. The dough should be silky and elastic (no wet and sticky) but never be tempted to add extra flour as you will risk a tough crust. Knead the dough until the gluten develops and stops it from being wet and sticky.

Is sourdough starter good for pizza?

Absolutely! You can use sourdough starter fed or unfed. The wild yeast contained in sourdough starter is perfect for a pizza crust. It will give you an amazing bubbly pizza dough perfect for oven or wood fire baking.

What is the difference between pizza dough and bread dough?

There are many differences - and similarities between pizza and bread dough. You can find all the information in this comprehensive guide.

QUICK SOURDOUGH DISCARD PIZZA DOUGH RECIPE

Further Reading

If you love this quick sourdough discard pizza dough recipe you might enjoy these articles:

Sourdough Discard Pizza Dough

A quick and easy sourdough discard pizza dough that you can make anytime!
4.56 from 196 votes
Prep Time 1 hour
Cook Time 15 minutes
Total Time 10 hours 45 minutes
Servings 5 Pizza Bases
Calories 467 kcal

Equipment

  • Digital Scales
  • Mixing Bowl
  • Pizza Trays

Ingredients  

  • 200 g Sourdough Starter DISCARD
  • 7 g Instant Yeast OPTIONAL
  • 280 g Water
  • 20 g Honey
  • 30 g Olive Oil
  • 500 g Bread Flour
  • 20 g Salt

Instructions 

  • Measure out the sourdough starter, water and honey (and yeast if you want to add it). Stir together until the sourdough starter and honey are dissolved into the water.
    Mix sourdough starter, water and honey together using a Danish Whisk.
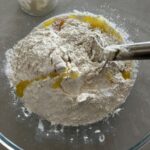
  • Now, add the oil, flour and salt into the bowl and gently stir together with a dough whisk or knife. Cover with plastic wrap and allow the dough to sit for around 30 minutes.
    The dough will seem a little dry and shaggy and that's ok! You can see photos of how the dough looks through the process in the recipe notes above.
    Now add the olive oil, flour and salt and form a shaggy dough
  • Now, tip the dough out onto the counter and knead it really well using your hands. This is a lovely dough to work with and with the right kneading, it will become soft and silky. I find it takes around 10 minutes to come together when kneading by hand.
    Note - you can do this using a stand mixer - you can see the instructions for how to do this here.
  • Once the dough is silky and elastic, pop it into a warm bowl (I warm a bowl with water and then dry it - this speeds up the rising).
    Cover with cling wrap or a damp tea towel and leave to rise until it has doubled.
    See notes below for timing and how to judge it.
  • Once the dough has doubled, separate the dough into smaller balls so they are ready to be rolled out. I use 200g per pizza (this fits my pizza oven perfectly) but anywhere from 200g to 300g is good for a pizza.
    Leave the balls on your counter top, covered with a tea towel, for around 30 minutes to allow the gluten to relax.
  • Once you're ready to make your bases, use your fingers to press your dough into a pizza round. If you need to stretch the dough, pick it up and move your hands around the edges, allowing the dough's own weight to stretch it out into a round.
    Avoid using a rolling pin if you can to maintain your dough's sourdough character and give it good structure when baked.
  • Place your pizza dough onto pizza peels ready to top with your favorite toppings (see my notes in the article above for my best tips on using pizza peels).
    When you are ready to bake, pre heat your oven to 230C/450F and make sure it's HOT!!
    Place your pizzas into the hot oven for around 15 minutes or until toppings are cooked and bases are crispy on the bottom. These bases are especially good baked in a wood fired or gas pizza oven. I bake them for 2 minutes at 350C - 400C (662F - 752F)

Notes

Size of Bases - I weigh out 5 x 200g balls of dough to make 5 pizza crusts. The crusts are around 10 inches (25 cm) across. I find this is the ideal size for baking in my outdoor pizza oven. If you are baking on a tray where you don't have to transfer the pizza with a peel, you could make 4 larger crusts.
 
Bulk Ferment - If you are using sourdough discard without commercial yeast, the dough will take time to double or bulk ferment. I find putting the dough into a warm bowl and then into the microwave with the door ajar speeds this up. You are using 200g of discard which means it won't take as long as it would if you used less sourdough starter.
Obviously if you are using commercial yeast with your discard, the doubling time will be considerably reduced.

Nutrition

Serving: 203g Calories: 467kcal Carbohydrates: 84g Protein: 14g Fat: 8g Saturated Fat: 1g Polyunsaturated Fat: 1g Monounsaturated Fat: 5g Sodium: 1557mg Potassium: 116mg Fiber: 3g Sugar: 4g Vitamin A: 2IU Vitamin C: 0.02mg Calcium: 18mg Iron: 1mg
Tried this recipe?Share your creation with us @ThePantryMama or tag #thepantrymama!

Share the sourdough love!

Recommended

4.56 from 196 votes (162 ratings without comment)

Leave a Reply

Your email address will not be published. Required fields are marked *

Recipe Rating


136 Comments

  1. 5 stars
    Trick for super hot stones. Oven rack 8-inches below broiler element. Add stone. Preheat oven and stone to 450-500F.

    When thoroughly heated, switch to broil for ten minutes and really heat the stone.

    Switch back to 450-500. Bake pizza as desired on now very hot stone.

  2. This dough was really a sicky mess for me, never carne together like silky, nice to work with. Also the pizza ended up being quite small and the dough made holes easily. Maybe my discard was too hungry? Maybe I didn't kneed it long enough? Maybe it's too humid at my house? It's only 44% today but it is like 85°. Anyway, popped one in the oven, we'll see in about 10 min or so. Oh my starter is a rye starter. Maybe they're just stickier?

  3. Thank you for this recipe. I usually buy Trader Joe’s already made dough or make my own yeast pizza dough. I plan to try this with my discard. Wanted to ask…once balls of dough have been separated into the 5 dough balls and ready to use, can I refrigerate the dough balls and if so for how long?

      1. 5 stars
        Thanks for a great recipe, can't wait to eat! I am using a 15.5 x 10"x1" pan. Would you know how much dough I need to use to get a nice, thin crust pizza?

      2. 5 stars
        Hi! So if I make the dough now, (2pm) w/o any commercial yeast how would I prepare or store to use tomorrow evening?

      3. Can these be frozen? Would you freeze before baking or after baking? Trying to stop buying frozen pizzas!

        1. Yes they can definitely be frozen, there's a section towards the bottom of the post on how to freeze and use from frozen 🙂

  4. I used the recipe above but omitted the yeast as my starter is pretty robust (used discard). I kneaded for at least 15 minutes but dough was still pretty sticky. Should I have kneaded longer?

  5. 5 stars
    Found the dough to be very sticky and difficult to knead. When preparing to bake, I shaped like doing a lamination and that worked well. Will definitely do this again.

    1. Me too! I really was hoping to solve and know what I did wrong... but not finding an answer :(. Did you find a solution?

    1. 5 stars
      Great recipe. This pizza was amazing. The instructions were very clear. I loved that I basically didn’t have to do anything once I got the crust kneaded. This is probably my new go-to recipe.

  6. 5 stars
    This is hands down, the best pizza dough recipe I've tried. I made it in my mixer, rather than my hand, which I don't feel made any difference. It was light, soft and delicious and fortunately, there was enough dough left over to allow me to freeze three more pizza bases. Thank you!

    1. My dough was sticky! I followed the exact measurements and directions but it was super duper sticky. Maybe there is some other trick. It would be nice if you said “if your dough is sticky, do such and such” in your video.

    2. I was scrolling through the comments to see exactly this...if one can freeze the dough balls to make later on. Each ball Wrapped in plastic,I imagine,right? Thank u

  7. Had a wonderful time with this pizza recipe. Seriously, discard recipes work so well for me. My husband put his own toppings on, and it was a monster. Less is more? Not for him! But he enjoyed himself, so that's great! Thank you for sharing so much information so generously. Really, really appreciate it.

  8. Love the recipe. Thank you.
    I have made this twice and have a few questions. When I bulk fermented the dough I put it in a measuring cup so I could see when it was doubled. However, my dough was very sticky and loose and did not shape into a ball like your video at all. Any ideas why?
    The next problem I had was that the first time I made it the base wasn’t cooked enough. So the second time I pre-baked the base which helped a bit. Once I put on all the toppings it still got mushy.
    I think the problem is my dough to start with, but I’m not sure. I do use a digital scale to weigh out all the ingredients.
    Last question, if I don’t always have enough starter discard for the recipe do you suggest to scale the recipe to the amount of starter I have or just use the recipe amounts as is with a reduced amount of starter, knowing that it will take much longer at the bulk fermenting stage?
    Would love to try the recipe again, once I figure out what’s going wrong for me. Thank you for your help.

  9. 5 stars
    I've used this recipe several times and it always turns out perfectly! It's a fun dough to work with and does well with kneading by hand or in my Kitchen Aid mixer. The flavor is very good and the crust is always crisp. I'll be using this recipe for years! Thank you!!

  10. 5 stars
    I’m new to sourdough, so the detailed instructions and videos and extra tips/links are just what I needed. And the results were amazing! I can’t believe how well my pizza (and leftover-dough pizza rolls) turned out! Sourdough pizza will be a new regular go-to meal for our family of 4, and a great idea for entertaining! Thank you Pantry Mama!

    1. Hi...this is a question about the stand mixer. My trusty old (40 yo) Kenwood died I was given the newest Kenwood titanium bakers model ..BUT the dough hook is so badly designed it doesn't mix what's at the bottom..and a crust forms.
      So as a super baker in your experience which mixer has the power to properly mix sourdough???

  11. 5 stars
    Love this recipe! I’ve made it several times with yeast, with active starter and with freshly discarded starter (within a couple days w/no feeding) every time it worked and tasted great. I usually prep it early morning and it’s ready by dinner time. We grill our pizzas on a stone and it taste like those artesian pizzas from a restaurant. We’ve had many guest for dinner and they love our pizzas!! This last batch I decided to make them and freeze all 4 dough balls (roughly 200g each). Never froze them before but I’m trusting those who’ve gone before me and said it works well. Crossing my fingers because this would be a lifesaver for quick dinner options. Thank you Pantry Mama!!

  12. 5 stars
    After doing many different pizza crust recipes, this is by far the best. It is a very nice dough to work with. I now supply two households (my daughter's house and mine) with fresh sourdough discard pizza dough.

      1. This has become my go to for sourdough info and recipes, the instructions and pictures are just the best.

  13. 5 stars
    After letting my dough to bulk ferment in a measuring cup, so I can know when it has doubled, it is very runny, and I can't form it into a ball or shape it. Any suggestions on how to fix this? Thanks, love the recipe.

  14. My dough is very sticky and wet when kneading without any flour. Can this be because I live in a humid country? What would be your approach?

  15. This is my first attempt at making this dough, mine is super sticky.

    I used my kitchenaid to knead it, and it was still sticky, I even tried kneading it by hand, the stickiness never went away.

    What did I do wrong?

    I have it in a warm bowl to rise, we'll see how it goes.

    Thanks, Melanie

  16. I'm rather new to sourdough starters and baking.

    I'm attempting this recipe for the first time.

    The directions say this isn't supposed to be sticky, but after putting the dough into my KitchenAid mixer to knead, the dough crawls up the dough hook but also sticks to the bottom of the bowl. I let the machine knead the dough for 10 minutes then gave it a rest then kneaded for another 10 minutes and the dough stuck to both my hands and the bowl.

    Then I tried hand kneading and still the dough was sticky, it bounced back when I pressed my finger into the dough and didn't break right away when I stretched it. I put it into a warm bowl to rise, which it did within an hour.

    When I went to take the dough out of the bowl it collapsed like the air had been let out, and it was so sticky that trying to form the dough balls was impossible, I just threw it away and am now starting over.

    What did I do wrong?

  17. Hello thank you for your well thought out recipe!

    I’m hoping you can give me some advice. I was so looking forward to working with this non sticky dough but mine was SO sticky. After kneeding longer than ten minutes it was still a sticky mess. I gave in and had to start kneeding in extra flour until it somewhat behaved. I followed your recipe scale and all exactly. Using active strong starter. Any ideas what could have gone wrong?

    Thanks!!

  18. Question: This will be my first time trying your Quick Sourdough Discard Pizza Dough [No Yeast]. Can this dough be made a day before and kept in the refrigerator until I am ready to press it into a pizza pan? Thank you.

  19. Hi, just had a quick question. I made this recipe with AP flour rather than bread flour (the latter is not available in my country). It tasted delicious and rose in the oven but the dough was *incredibly* sticky. Do you have any tips to counteract the stickiness? It was so hard to knead and shape! But we very much would love to make it again because of how tasty the pizza bases came out! Thank you in advance!

  20. Made my very first pizza and everybody in my household was delighted with the outcome. Will make it again for sure. Thank you once again Pantry Mama!

  21. Has this recipe been tried with a different flour? I exclusively use einkorn flour, and wonder how this would work. I am always in search of new recipes to try, and love using up excess sourdough starter.

    Thank you in advance for any information you may be able to provide.

  22. My dough was super sticky after the 1st 30 min rest. As I was kneading, I kept thinking it'd come together, but it never did. I ended up needing to add a cup of flour to the dough to be able to knead it together without sticking.
    Can you think of anything I could have done wrong?
    My starter is 4 months old. I fed last night and left out of fridge. I did not add instant yeast since my starter was bubbly. I made sure to zero out scale and weight ingredients properly.
    I did 2 batches, 1st with bread dough and Second with all purpose flour. Both doughs turned out sticky.

  23. Hi Kate, I love using discard for pizza!!! My way is a bit different though. I do not mix the discard with flour or anything, I just use discard.. Heat a cast iron skillet in your oven, pour enough discard to coat pan on bottom and part way up (I love the crunchy bits on the side), put back in oven till about half way done and then just put what ever toppings you want on it. Then stick it back in the oven and in 10-15 min pull the pan out, slide it onto a pizza stone, cut and enjoy!!! Timesaving way of making really good pizza!!!

  24. I’d like to know if I could halve this recipe, I only need enough dough to make a cookie sheet size pizza, would I just cut everything in half?

    1. 5 stars
      This recipe is amazing! I can’t believe how easy it is. My two year old and I have so much fun making it, and my husband told me he’d be disappointed if we ever ate any other pizza! Thanks for a great recipe!

  25. 5 stars
    I love this pizza. The recipe is easy to follow. I froze the pizza dough in balls, as suggested, let them come to room temperature, and formed them. Next I’ll try freezing the pizza already formed. I love having wonderful, homemade pizza available any time!

  26. I have been trying to print out this recipe, but every time I hit the print button it just takes me back to the top of the post. I would love to print it if you could fix the link! I have printed your recipes before with no problems

  27. Hey, does 200g create 1 10” pizza dough, or all 5? Also, can you freeze dough balls if you’re not using all 5 at once? And proper way to thaw them out if they can be frozen? I’m a little bit new to this.

  28. If I want to proof the dough in a bread proofer, can you suggest a temperature to proof at? Thanks so much for the recipe! We are excited to try it!

  29. 4 stars
    Hi, made this twice
    Works well and impressed. First with 4g of yeast and then 100% starter.
    Can you confirm what hydration your starter is please as mine is quite difficult to handle, all beit very tasty

  30. Hi,
    I like this recipe a lot and have tried few times. For some reason while kneading, my dough is always sticking to hands and counter- my hands are never clean like you show yours in video. After bulking also dough comes out very sticky and difficult to shape. I am using exact measurement as in recipe. What should I do ? Thanks for sharing the recipe.

  31. 4 stars
    Hi can you tell me if Einkorn AP flour would work ok in this (and most of your other) recipes? I have trouble with gluten and have zero problems with Einkorn. 🙂

  32. Kneaded mine with dough hook in stand mixer, until smooth and silky. Doubled beautifully but sticky. Should I have kneaded longer than the 5 mins?

  33. Help! I may have added too much water (my scale turned off while adding water so I did my best at guessing where it was before the shut off) then when it was too sticky, I added more flour. I bulk fermented and then must have gone too long? The dough was bubbling over but it was webby and very wet. I know in a SD boule, you can put dough in the fridge and sometimes salvage it... what can indi to save the pizza dough, or is it done for?

  34. My dough was very sticky and I tried kneading it with flouring my hands as well as wetting my hands with water until it looked like it’s elastic enough. It’s currently resting to double in size.

    My questions are: Will this batch turn out okay considering what I did? What could be the issue? What can I do or change for next time so the dough doesn’t get sticky?

    Thank you for your response!

  35. 5 stars
    Made these tonight! Discard + yeast.

    Wow!!! They were incredible! Crispy on the bottom and bubbly on the top. Can't imagine that I will ever do store bought again.

    Thanks Pantry Mama!

    Oh...we just used our little electric indoor pizza oven and it cooked these perfectly!

  36. Firstly, thank you so much for sharing your knowledge, and clear instructions.
    One query, in this recipe and instructions you say the recipe can be made by hand mixing or a stand mixer/Thermo. When you click the link to go to the stand mixer instructions, the recipe changes from 200 g Sourdough "Discard" to 200 g Sourdough "Starter active and fed".
    Is there any reason for changing the discard to an active, fed starter when using a Stand Mixer?
    Thanking you. Chris

  37. This is my second time making this dough, first time without yeast. It was the first thing I made with my sourdough discard. I used my hands to knead the first time. Not this time! Used my mixer with dough attachment. Sooo much easier for my arthritic hands.
    I’ll divide and freeze the one. I’m assuming the nutritional facts are for the whole batch?
    I see where you say not to roll out. I didn’t but did use a fork to poke holes. I’m pretty sure I wasn’t supposed to do that either, as I read “you want the air bubbles.”
    Thanks for your time helping out this newbie.

  38. 5 stars
    We have been making this weekly for a few months now and we love it! I am curious what your suggestion would be if my dough is coming out sticky? I have tried slightly less water and it did not help, any suggestions? It always ends up tasting amazing, it would just be nice to have that lovely "silky" dough vs the sticky mess! Thank you in advance.

  39. 5 stars
    I will be trying this recipe tomorrow for my daughters birthday! Making individual pizzas. If I dont need 4 or 5 crusts could I just freeze what I dont use for the next time? If so, after what step would I put into freezer?

  40. 4 stars
    Great taste, but I ended up needing quite a bit more flour just to get it to knead into a ball; and they only needed about 6 minutes to bake. I’m glad I didn’t go the full 15 like the recipe said.

  41. 5 stars
    Loved this and so did my kids! We used spelt flour and starter to great effect.

    Your recipe states 20g of salt, which has to be a typo. Is it supposed to be 2g? I just used my best judgement.

    Thanks again!

  42. How thin should a get this. I halved the recipe will it be too much to make a 12 inch pizza.
    Do I need to prebake so the top doesn't get soggy? I am going to bake it in the oven in a round solid bottom pizza pan.
    Do I need to put olive oil on top before adding toppings?
    Thank you

  43. Hello, I've tried this twice now and followed the directions exact and my dough is very very sticky, and for a long time. what did I do? And what could I do differently?

  44. Can you freeze them and what would the process be? Freeze right after splitting into 5? Would you then take them out and let them rise on the counter? I would love to double or triple this recipe to keep in the freezer.

  45. Can you skip the oil? I'm trying to follow WFPBNO diet (whole food, plant-based, no oil) and I'm new to sourdough stuff - just got my first starter from a friend and looking to use up discard 🙂

  46. 4 stars
    I have made this recipe 2 times so far and both times the dough was very sticky. The taste of it was wonderful. My kids ate it right down and my husband and I both really enjoyed it. However, I don’t know what I’m doing wrong as I’m following the steps exactly as they are listed and it was extremely sticky. The 1st time I used a stand mixer to knead the dough and ended up needing to use some olive oil to get it so I could manipulate it. I just made it a 2nd time and decided to hand knead it. I had a very hard time with it. I did sprinkle a little flour on it every now and then when it was getting unmanageable due to the sticking. Any suggestions?

  47. Do you have a rough idea of how long it should take to rise? Is it like an hour or 5 hours? I’m just having a hard time gauging. I made it once and had it come out fluffy and the other times it hasn’t been as fluffy so I’m thinking it didn’t rise long enough. The dough is sooooo good and we love this recipe! Just want to nail down the rise time. Thanks for the recipe!

  48. Hi!

    If I have frozen mature discard, and then leave it to defrost before using the discard, could I do without commercial yeast? And just allow it ferment at room temperature till it doubles in volume?

  49. Used this recipe and my whole family loved it. Used half of the dough for a large thin crust pizza, and the other half for thicker cheesy breadsticks. Definitely will use it again

  50. I used this dough recipe to make a cherry cheesecake strudel. It was AMAZING! Just rolled the dough out into a rectangular shape, used a cookie cutter to slice each side into little braid able edges. Left the center solid. Spread on some no bake cheesecake in the middle, then top that with your choice of pie filling. Take your sliced edges and pull across to opposite side creating a braid affect. Tuck the edges a bit. Bake. Enjoy!

    1. It's best to use bread flour for this recipe. Some readers have reported it not working correctly with AP flour. 🙂

  51. 5 stars
    I made this dough today, for the first time. Fabulous! Thank you! I used a bread machine for mixing and kneading. Divided dough into four balls. (Approx. 12” pizza)

  52. 4 stars
    Bake it anyways!
    My dough was a sticky mess from the start (but I used AP flour, so likely not the recipes fault). I also totally forgot about it and overproofed. It was a soupy mess. I skipped the second counter proofing, laminated with veggie pizza sauce, pepperoni, spinach, and mozzarella. Scooped the soupy mess of goodness into muffin tins and baked. DELICIOUS pizza muffins. I thoroughly messed up the dough and it was still delicious.

  53. 5 stars
    I love this dough—makes a great crust just how I like it? I I bake iit on my pizza steel after preheating steel in oven at 550 F for an hour. Then I turned on the fan. It was perfect in 6 minutes. I love having dough balls in the freezer. Took one out last night and let thaw in fridge. Then took it out of fridge 2 hours before ready to bake. Don’t laugh, but because I’m one person, I portion out all my toppings, including homemade sauce, and freeze little topping kits. I set those out to thaw when I take the dough out of fridge. By doing this, I can have almost instant pizza anytime I want!

  54. I've made this before, but this time the dough was a lot more sticky than last time. I will be freezing them in separate balls. Hopefully it will still turn out great.

      1. I made this dough this morning with discard from a young starter, and I must have added way too much commercial yeast because my dough doubled in about an hour. I weighed it, but it must have been an inaccurate measurement because it was probably a tablespoon or two. Do I need to throw away the dough? How long might it take to make this dough with the 7g of commercial yeast added?

  55. 5 stars
    Used this recipe multiple times it’s AMAZING, but it seems that my frozen dough gets very tough ( I am using cling wrap and Tinfoil) Any idea how to remedy?

  56. 5 stars
    I just made this recipe and it’s the best homemade pizza crust I’ve ever made. I’m starting the sourdough journey and these instructions were easy to understand and follow. My dough took longer to come together, longer than 10 mins. If your dough still feels sticky after kneading for 10 mins, just keep going!

  57. 5 stars
    I use this recipe with active starter once a week for my large family. It’s so delicious. We love it! Grateful for all your active starter recipes.

  58. I’ve tried this twice now. Once by kneading by hand and once in the stand mixer. Both times I ended up with super sticky dough.

      1. I have the same issue as Jennifer. In fact, this dough gets stickier as I knead it. None of the troubleshooting notes in your “sticky sourdough” article are relevant here. My starter is exceptionally strong, my kitchen is between 71 and 74 degrees during the day, I am not at high altitude and it is not over fermented because it hasn’t had any time to ferment. I had to add more flour just to make the dough able to be handled. We’ll see how the pizza comes out…

        1. Same here, too wet and sticky to even knead it. I watched the video on how to make the dough and it looks much less sticky than what I made. So I added more flour when kneading. I don't know how much it was, but about 3/4 - 1 cup I think.

        2. The stickiness can come from the type of flour you use and the hydration of your sourdough starter. Next time you make the sourdough pizza dough, try adding extra flour when mixing, or less water and see if that helps. Kate makes this recipe at least once a week, sometimes twice as they adore sourdough pizza and it's an easy family dinner and never have issues with this dough at all. It's one of the most tried and tested recipes on the site 🙂

  59. 5 stars
    This has become my family's go-to pizza dough recipe (gotta use that discard!) Every time I make it, I get great results. Tonight, we've just tried using dough that had been frozen and it still worked great. In future, I will definitely shape the dough prior to freezing so I can go from freezer to oven faster. I don't have a pizza oven or even a stone but I've found that flipping one of my large, rimmed baking sheets upside down on the rack works great. I usually just leave my dough on a piece of parchment and use that with a pizza peel to get it in/out. I also give them a quick spin half way through since my oven seems to have a hot spot at the back - very easy when it's sitting on a piece of parchment.

    1. Hi, I’ve kneaded the dough by hand for about 20 minutes but can’t get it to be silky, it’s still sticky. Can I still let it double and use it?

      1. Yes you can still let it double and use it. Semolina is really helpful for shaping pizza dough that is a little sticky x

  60. Hi! My dough remained incredibly sticky. Any thoughts where I went wrong? I used discard and yeast. First timer!

  61. I just made this dough and used starter + yeast. My dough is super sticky, but I resisted the temptation to add any more flour, (perhaps I should have?),].The dough never got "silky and elastic" even after 10 minutes of hand kneading. What did I do wrong?

  62. I’ve made this twice, I found the dough to be very sticky and never formed into a soft silky texture. I followed the directions exactly as written. The first time I tried kneading by hand the second time I used my kitchenaid. It came out the same both times.

  63. I just made this dough for the first time (actually twice because I thought I measured incorrectly) because my dough was so sticky!! Any thoughts of why it would be so sticky? I used 200 grams of starter that was in my fridge for a week. And measured everything separately before adding!

      1. Same and the stock response to read about “sticky sourdough” is not helpful. I did add more flour but haven’t baked yet. Stay tuned….

        Jennifer Farley can you kindly provide other guidance here?

  64. What am I doing wrong? I used an active starter that was just fed. I did all the instructions as listed in the recipe and need the dough for about 10 minutes, but it was extremely sticky. I decided to put it in my bread machine on stir to help need it there for another 15 mins. Took it out and it was still very sticky. I understand that it may have high hydration, but everything else worked well so I now have it in the bowl seeing if it will rise.