This post contains affiliate links. Please see our disclosure policy.

I’m going to show you how to make these sourdough cheese and bacon rolls with sourdough discard and with active sourdough starter. The choice is yours!
You’ll love these soft, squishy sourdough rolls topped with crispy bacon and molten cheese. They are an absolute family favorite here and something I make over and over again. There’s almost always a batch in the freezer, but you can’t beat them served warm out of the oven!

Why You’ll Love This Recipe!
Perfect Sourdough Snack – there’s no better sourdough snack than these savory cheese and bacon rolls (well maybe this sourdough grilled cheese is stiff competition). Perfect for grabbing and snacking on the go.
Freeze Well – these sourdough bacon and cheese rolls freeze so well! They are something I make often and freeze individually for school snacks for my boys.
Save Money – Now if you’re not Australian, you might not be familiar with these, but here in Australia, there is a chain bakery that’s generally located in busy shopping malls and they sell these soft cheese and bacon buns individually and in packs of 6. They are absolutely delicious, but the last time I bought them a pack of 6 cost $8 and with 5 of us we have to fight over the last one. So I set upon creating a recipe that made a whole bunch of them!

Ingredients
- Sourdough Starter – I have used active sourdough starter to create this recipe. I generally feed my sourdough starter the night before and then mix the dough when I get up. You can find my timeline further down, as well as notes for using sourdough discard in the notes of the recipe card.
- Water – to hydrate the flour.
- Bread Flour – this recipe has been developed using bread flour, not all purpose flour.
- Salt – you need a bit for flavor and to strengthen the gluten in your dough.
- Sugar – just a little bit of a sugar, if you really don’t want to use it, you can omit it.
- Olive Oil – I’ve chosen to add olive oil to the actual dough rather than butter. I found that it makes the dough softer and more elastic and gives a softer baked roll. You could substitute butter if you prefer, but I feel you get a better result with the olive oil.
- Butter (melted) – this is not to add to the actual dough, but brushed on the rolls before adding the bacon and cheese.
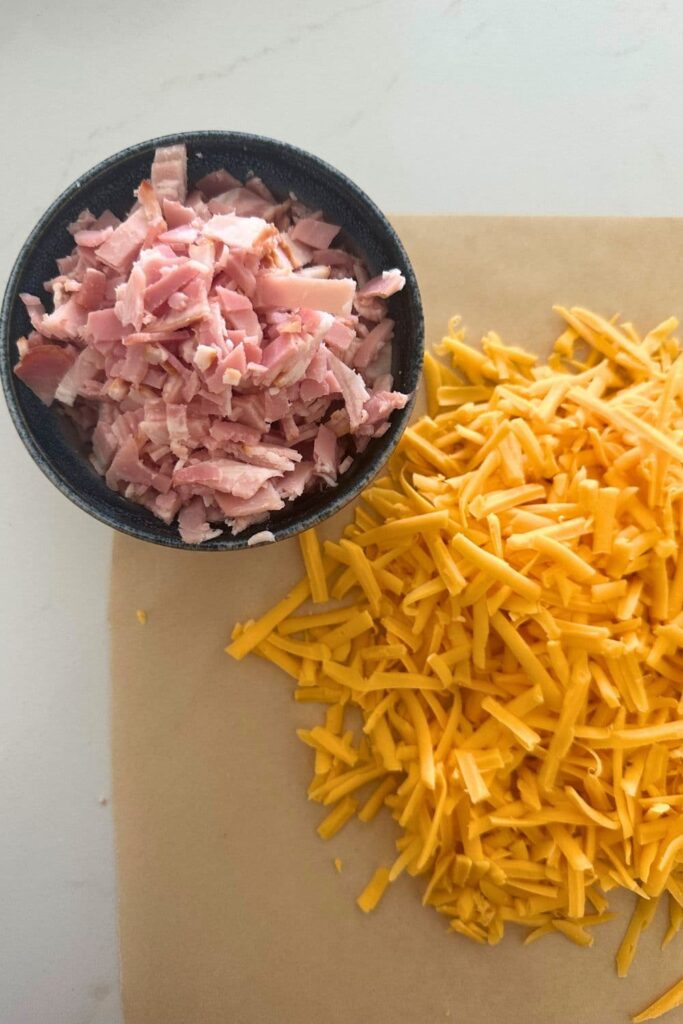
- Sharp Cheddar Cheese (shredded) – you can use whatever cheese you like to eat. I’ve used sharp cheddar that I’ve shredded myself. The cheese melts better if you don’t use pre-shredded cheese.
- Bacon – I’ve used streaky bacon that I’ve chopped into a fine dice. You can use any bacon you like to eat. I even tested this recipe with maple bacon and it was really good too!
How To Make Sourdough Cheese and Bacon Rolls
I’ve used a stand mixer to create the dough for these sourdough cheese and bacon rolls, but you can knead the dough by hand if you prefer. I like using the dough hook attachment and find this gives me soft, elastic dough that’s really easy to shape.
Combine the sourdough starter, water and flour into the bowl of your stand mixer and mix until it forms a shaggy dough (around 30 seconds will do it). Leave the dough to rest for 30 minutes.
Now add the salt, sugar and olive oil to the bowl and knead the dough for around 3 to 6 minutes. You want the dough to be elastic, silky and slapping the sides of the bowl. Just keep the mixer going until you achieve this.
Now it’s time to let the dough bulk ferment at room temperature. You want the dough to rise to around 30% for this bake. It doesn’t have to be exact though.
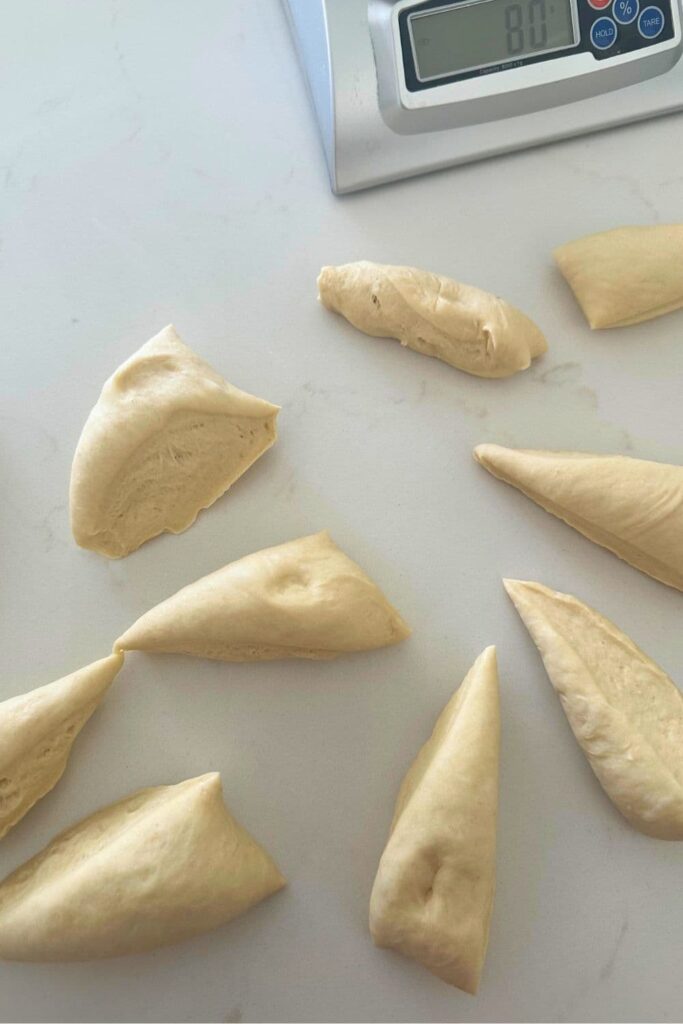
Once the dough has risen, it’s time to shape it into rolls. I’ve divided the dough into 12 rolls weighing around 80g each. You’ll need to weigh your dough and then divide it into 12 equally weighted pieces. Shape each portion of dough into a round and give it a little tension by rolling it on the counter top.
Once all of the dough pieces are shaped, gently place them onto a large baking tray or cookie sheet that has been lined with parchment paper. I place them so they are nearly touching, but not quite. This means that they will touch each other once they proof.
Now you need to let the rolls proof and become nice and puffy before you add the bacon and cheese. Cover the rolls with a damp cloth and allow them to get nice and puffy. If you have a bread proofer this can be handy for this step.
When you’re ready to bake, turn your oven on and set the temperature to 180C/350F.
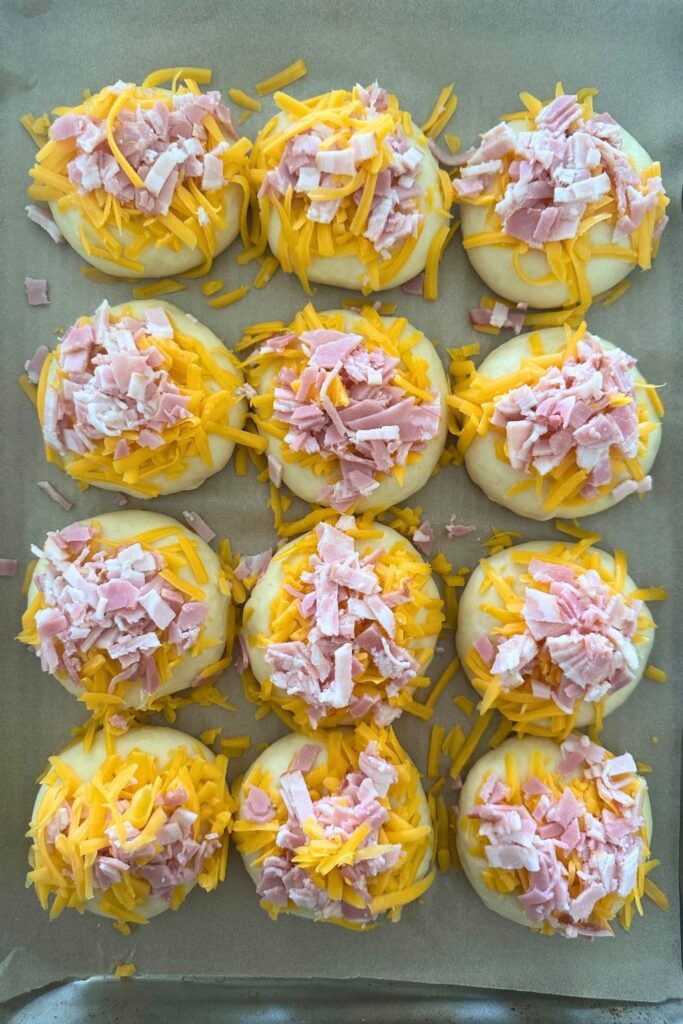
While the oven is preheating, brush each of the rolls with melted butter and top them with equal amounts of shredded cheese and diced bacon. Again, I’m not exact here, I just divide the bacon and cheese equally among the 12 rolls.
Once topped, place the tray of bacon and cheese sourdough rolls into the oven and bake for around 30 minutes, or until they are golden brown and baked through.
Remove from the oven and allow to cool a bit before serving.

Baker’s Timeline
This is a sample timeline of how I like to schedule making these sourdough cheese and bacon rolls using active sourdough starter. Of course if you use sourdough discard, your timing will be much shorter. You can read more about creating a sourdough baking timeline here.
| TIME | PROCESS |
|---|---|
| 9 PM | Feed sourdough starter the night before so it’s ready to go in the morning. |
| 7 AM | Mix and knead dough for rolls. Allow dough to rise 30%. |
| 11 AM | Divide and portion dough. Shape rolls into rounds. |
| 11.30 AM | Leave rolls on the counter to proof and get nice and puffy. |
| 4.30 PM | Pre heat oven. |
| 5 PM | Add butter, cheese and bacon to sourdough rolls. |
| 5.10 PM | Bake rolls for 30 minutes. |
| 5.40 PM | Remove from oven and allow to cool before freezing ready for school snacks. |
How To Store + Freeze
I think I’ve already mentioned how good these are warm out of the oven, right? So they are best eaten on the day of baking, without a doubt! Because of the cheese, they will stay fresh for around 24 hours, as long as you keep them in a plastic bag, or under a glass cloche.
They do freeze exceptionally well (and they are definitely included in my list of sourdough discard recipes that freeze well). I freeze these individually in ziploc bags as it makes them easy to grab and go. They thaw easily at room temperature and can be eaten as is, or warmed in the microwave if you prefer.


Sourdough Cheese and Bacon Rolls
Equipment
- Stand Mixer
- Digital Scales
- Baking Sheet
Ingredients
- 100 g Sourdough Starter, (see notes for using sourdough discard)
- 250 g Water
- 500 g Bread Flour
- 10 g Salt
- 20 g Sugar
- 60 g Olive Oil
- 20 g Butter, (melted)
- 200 g Sharp Cheddar Cheese, (shredded)
- 200 g Bacon, (diced)
Instructions
- Combine the sourdough starter, water and flour into the bowl of your stand mixer and mix until it forms a shaggy dough (around 30 seconds will do it). Leave the dough to rest for 30 minutes.
- Now add the salt, sugar and olive oil to the bowl and knead the dough for around 3 to 6 minutes. You want the dough to be elastic, silky and slapping the sides of the bowl. Just keep the mixer going until you achieve this. If you are using a stand mixer you'll need to use your dough hook attachment for this step.
- Now it's time to let the dough bulk ferment at room temperature. You want the dough to rise to around 30% for this bake.
- Once the dough has risen, it's time to shape it into rolls. I've divided the dough into 12 rolls weighing around 80g each. You'll need to weigh your dough and then divide it into 12 equally weighted pieces. Shape each portion of dough into a round and give it a little tension by rolling it on the counter top.
- Once all of the dough pieces are shaped, gently place them onto a large baking tray or cookie sheet that has been lined with parchment paper. Now you need to let the rolls proof and become nice and puffy before you add the bacon and cheese. Cover the rolls with a damp cloth and allow them to get nice and puffy.
- When you're ready to bake, turn your oven on and set the temperature to 180C/350F.
- While the oven is preheating, brush each of the rolls with melted butter and top them with equal amounts of shredded cheese and diced bacon.
- Place the tray of bacon and cheese sourdough rolls into the oven and bake for around 30 minutes, or until they are golden brown and baked through.
- Remove from the oven and allow to cool before serving.
Notes
Nutrition
Nutrition information is automatically calculated, so should only be used as an approximation.
Like this? Rate and comment below!


Did you wanted the cheese and bacon added as inclusions vs just on top, when would you add? I’m thinking more tasty goodness in every bite 😃. Thank you!
How do you form the rounds for the buns? Similar to forming a round loaf? Could you make a short clip?
Thanks for the recipe!
Hi Anna – you just need to pinch the bottom together and then roll it around on the bench. They are very similar to making a dinner roll. Are you on Instagram? There are videos of me shaping these there. I will add these to my list of recipes to film for you and come back and add the link once I’ve done it 🙂 Kate xx
What speed do you use for your stand mixer with the dough hook?
Speed for shaggy dough?
Speed for elastic & silky dough?
I don’t go above speed 2 when using my dough hook in the KitchenAid.
Could you please post more specific details for using sourdough discard? We’re a small household of 2 and this sounds like an awesome way to use up my discard. My husband would love them.
Also thank you for all of the sourdough tips for us newbies. ❤️
Hi Sharon, thank you so much for your comment. What additional details are you looking for? I can point you in the right direction. 🙂 In the meantime, Kate has a ton of discard recipes that can be found here.
I have just found your website love love love all your ideas. I’m excited to try a few recipes. I’m somewhat new to Sourdough baking but a lot of these discard recipes I was wondering does it have to be discard? to make these ham and cheese, Penwell or the garlic bites I’d appreciate any kind of information. Thank you and have a wonderful day.
You can absolutely swap out the discard for active starter if you prefer.
Love this recipe and I’ll be making it soon.
Just a quick question though if you don’t mind. Why do you only let them rise to 30% instead of doubling like most others?
I just started sourdough and I really love to understand other baker’s timeliness and suggestions.
Thank you so much 😊
I only let these rise 30% during bulk ferment because then they rise again during the proofing, unlike when you make regular sourdough where the dough is doubled and then goes straight into cold proofing after shaping where it doesn’t need to rise at all.