Golden Sourdough Cheese Bread
This post may contain affiliate links.
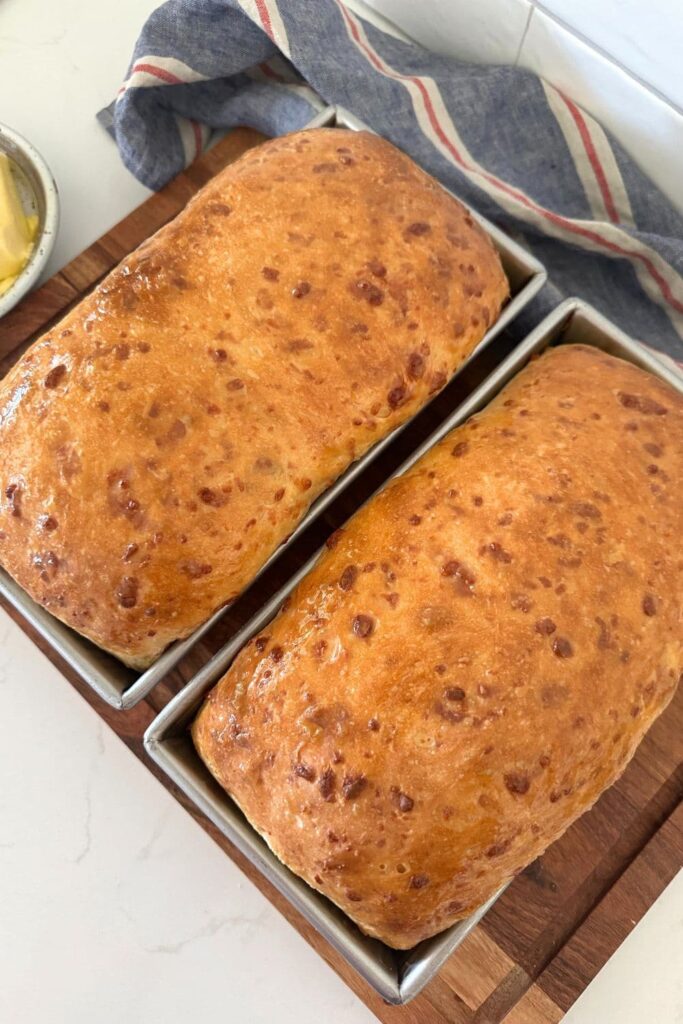
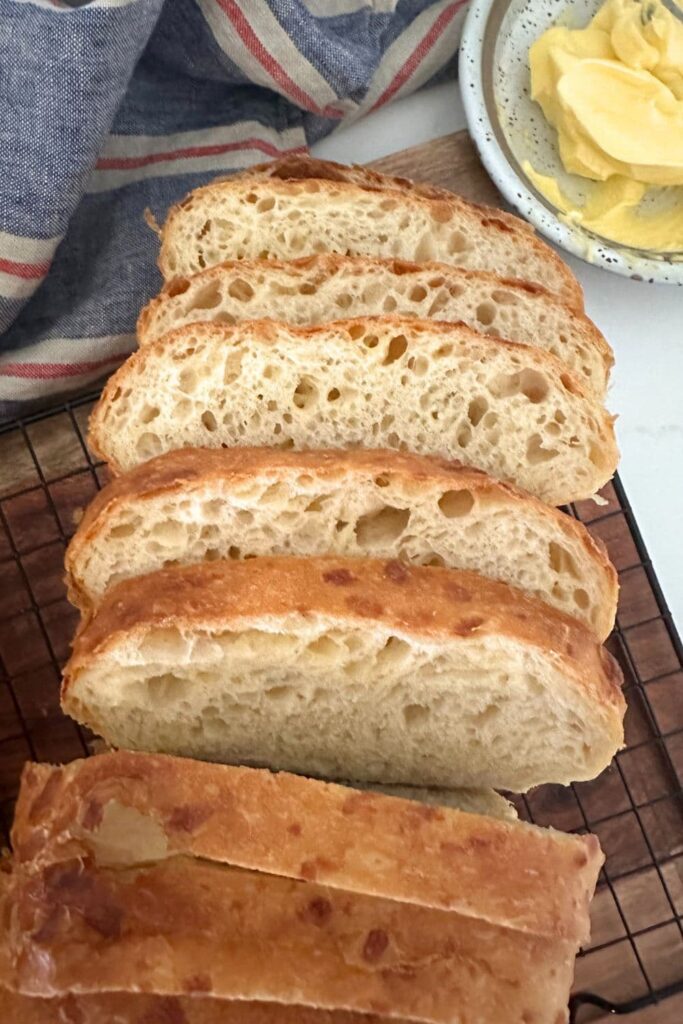
This golden sourdough cheese bread is going to rock your world! It's golden brown exterior hides a soft, cheesy crumb that slices like a dream and makes the most amazing sandwiches, whether you're eating it fresh or making sourdough grilled cheese.
I created this deliciously golden sourdough cheese bread for my kids, not only to eat, but as an easy recipe that they can make when they want to bake something in the kitchen without my help. Yep, it's that easy!
If you love adding cheese to your sourdough bakes, make sure you try this Italian herb and cheese sourdough bread, these sourdough cheese muffins, sourdough zucchini muffins or this sourdough jalapeño cheddar loaf.
Why You'll Love This Recipe
No Fancy Equipment, No Kneading - You literally need a bowl and set of scales for this loaf ... and a loaf pan. There's nothing fancy, no kneading and no fancy shaping (it's a bit like this sourdough white farmhouse loaf)!
Soft Sandwich Bread - This sourdough cheese bread recipe will give you a golden, cheesy loaf with a soft, sandwich worthy crumb the whole family will love!
Versatile - You can make this bread as a true sourdough loaf using active sourdough starter, or for a quick version, use sourdough discard with a little yeast. It's totally up to you!
Which Cheese Is Best?
I've made this sourdough cheese bread so many times, with a lot of different cheesy combinations. Basically, any cheese you like to eat can be added to this deliciously golden sourdough cheese bread.
My favorite is a mix of shredded cheddar and parmesan cheese, but any cheese works - mozzarella, feta, cheddar, gouda, asiago - anything you like to eat is perfect for this loaf. You can even add in some bacon or pepperoni if you like.
The only caveat here is that you'll need to shred the cheese yourself. Using pre shredded cheese won't give the best result due to the anti caking agents added to the cheese to stop it sticking together. It's worth the little bit of time to shred it yourself, I promise! Of course if you use a crumbly cheese, it's fine to just crumble it up instead.
Sourdough Starter or Sourdough Discard?
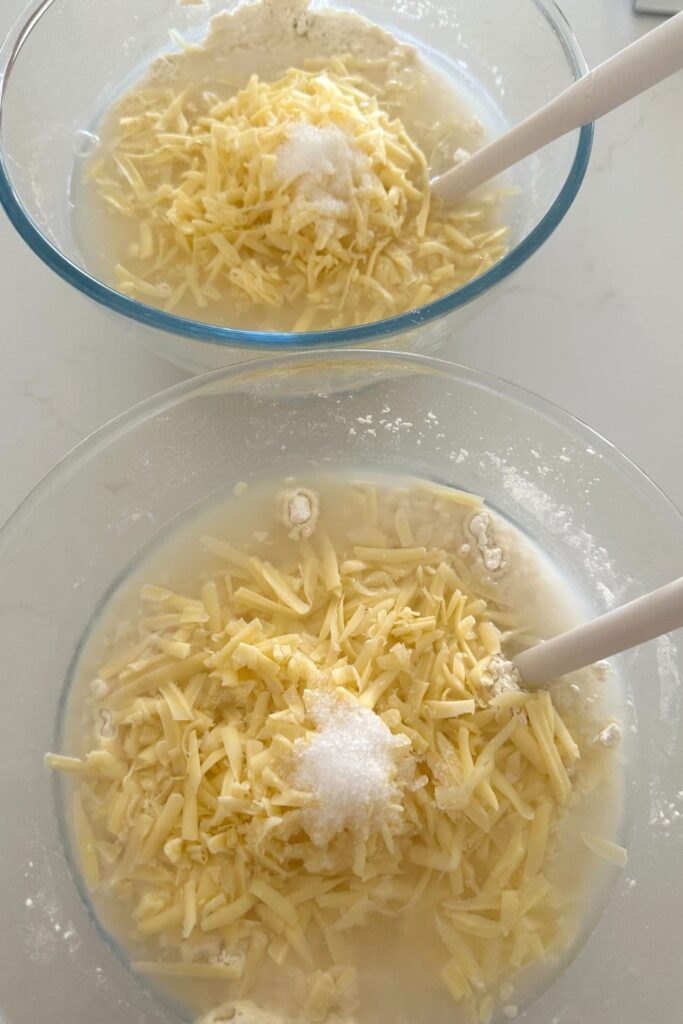
You can use active sourdough starter or sourdough discard for this golden sourdough cheese bread. I've written the timeline and recipe card as if you are using active sourdough starter.
If you want to use discard, simply swap out 100g of active starter with 100g of sourdough discard plus 7g of instant or active dried yeast. Using the yeast will mean that your dough will rise much more quickly, so you'll need to disregard the baker's timeline given below.
You can read more about the difference between active sourdough starter and sourdough discard here.
How To Make Sourdough Cheese Bread
I've use my basic sourdough recipe to create this sourdough cheese bread, of course with the addition of cheese. I've also brought in my recipe for making sourdough bread in a loaf pan to create the sandwich bread shape for this one.
There is no kneading or fancy shaping involved, just a a few stretch and folds. When it comes to shaping, all you need to do is roll it up and plop it in the loaf pan. Too easy!
Premix The Dough
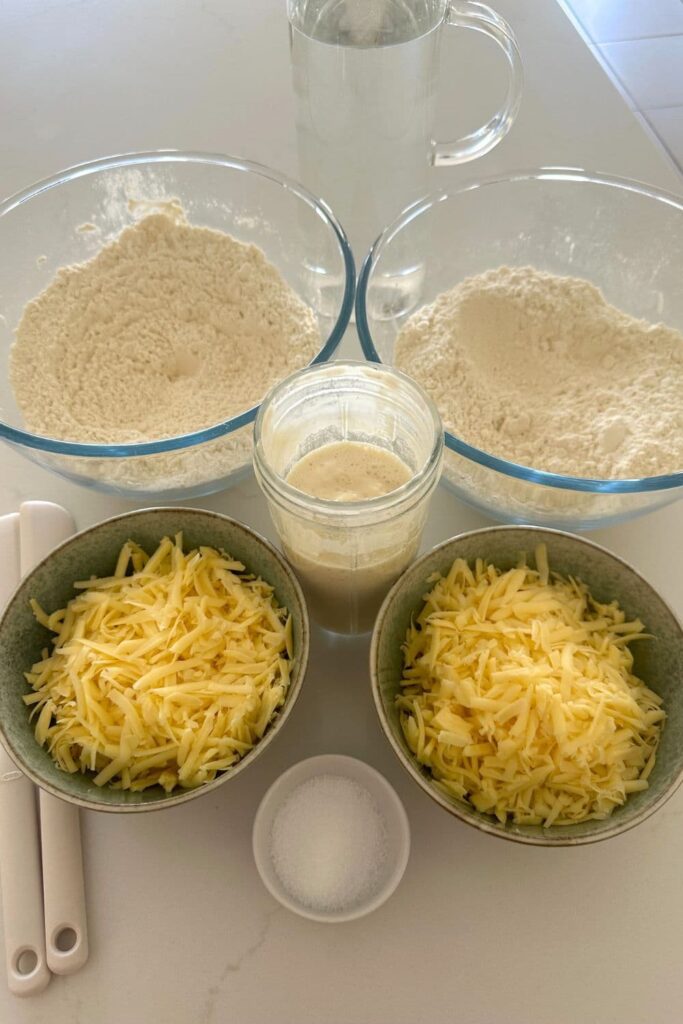
Weigh out your flour and make a well in the centre. To this add your sourdough starter, water, cheese and then salt on top (remember you can use discard if you prefer, you'll find instructions for this further down and also in the notes of the recipe card).
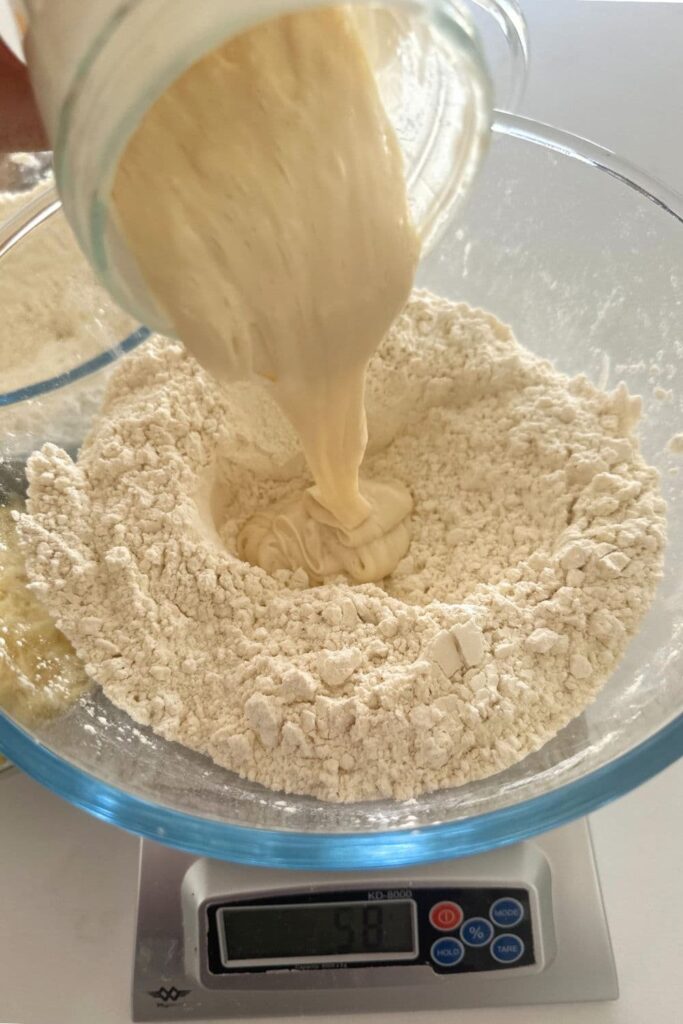
Mix the whole lot together to form a dry, fairly shaggy dough.
Cover your bowl with cling film or a damp tea towel and let it sit for around 1 hour.
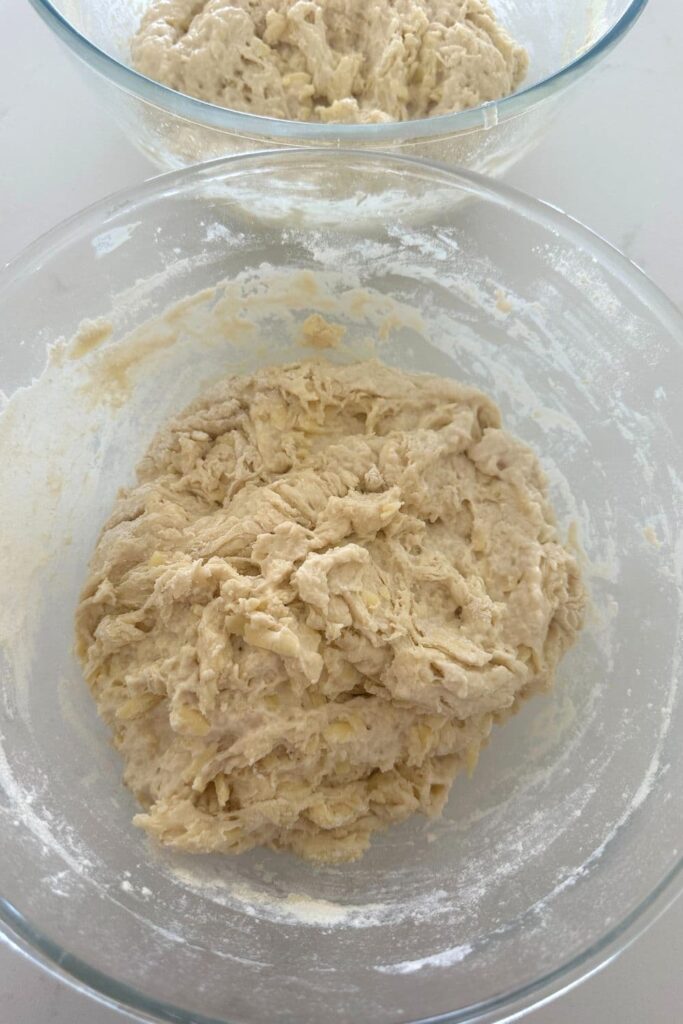
Forming Up The Dough
Bring the dough together into a ball. Pull the edges of the dough into the centre until it's smoother and more formed.
You'll notice that the dough is fully hydrated after soaking all the water up. It will be fairly sticky but as you bring it into a ball, it will become smoother and shinier.
Once the dough has formed into a smooth ball, pop the cling film back on and let it rest for 30 minutes.
Stretching & Folding (Strengthening the Dough)
Over the next few hours you need to create some structure for your dough by "stretching and folding".
Aim to do around 4-6 sets of stretches and folds.
For each set, stretch the dough up and over itself 4 times. Leave around 15 minutes in between each set. Again you do not have to be exact with time, but you need to do at least 4 sets over 2 hours.
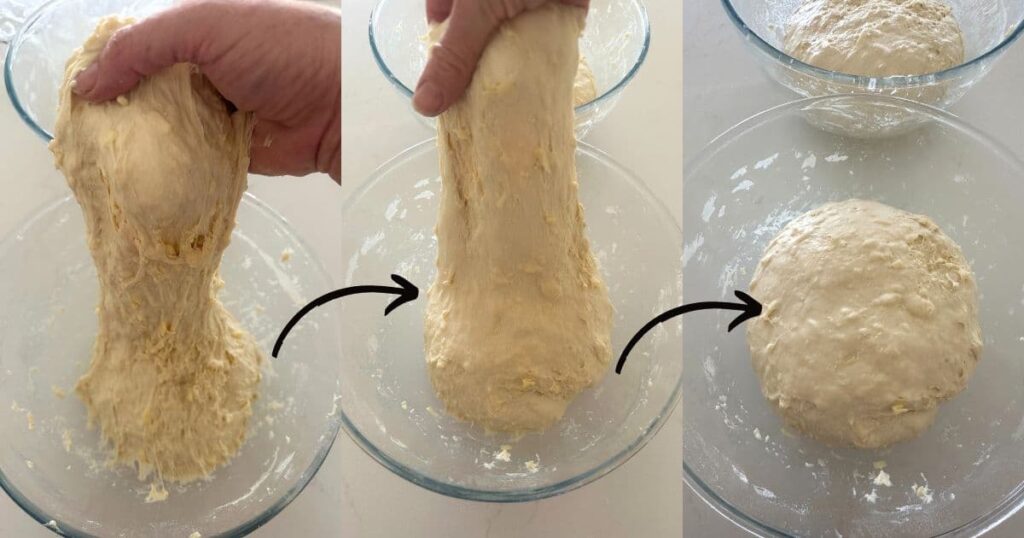
Bulk Fermentation
Once you've finished your stretch and folds, place the cling film or damp tea towel back over your dough and let it rest and ferment at room temperature until it's risen by around 50% (a plastic cover is a better option for this stage).
The dough does contain cheese, but it's perfectly fine to bulk ferment on the counter - do not put it in the fridge for bulk fermentation.
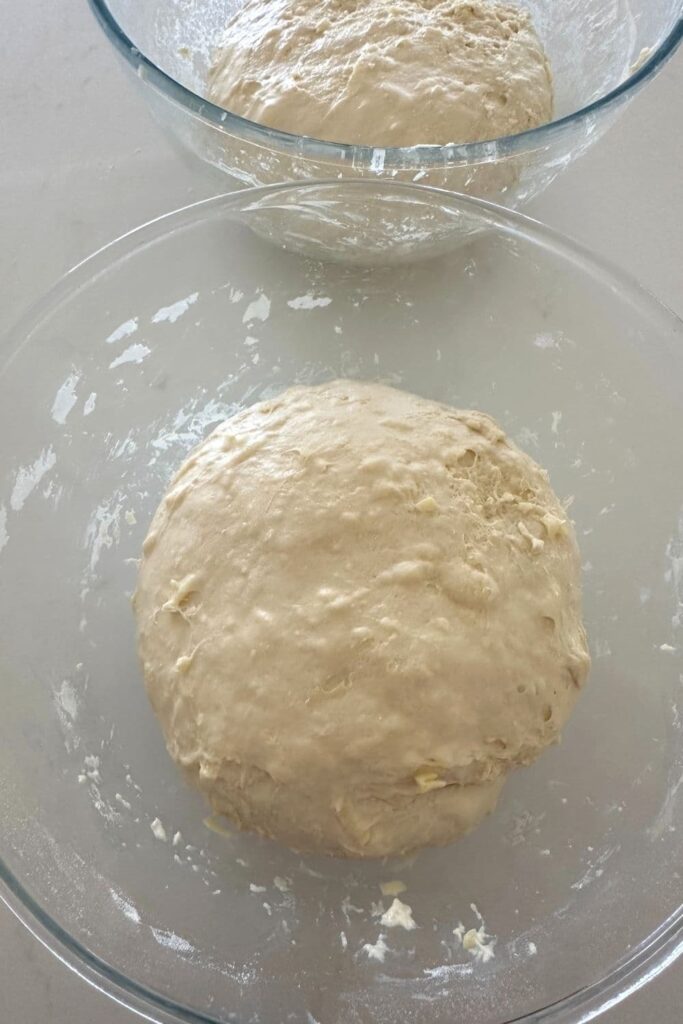
Shaping The Dough
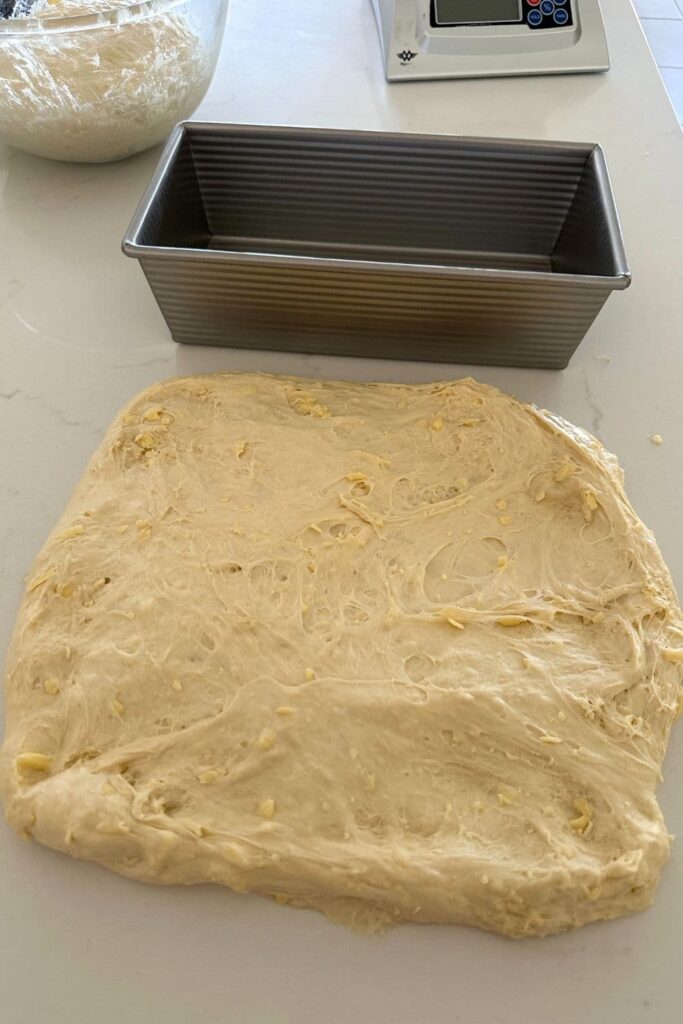
Once your dough has finished its first ferment, it's time to shape it so that it will fit into your loaf tin. Shaping your dough into a batard is the best for proofing and baking in a loaf tin.
I don't use any flour to shape the dough as it isn't sticky, but if you think you need flour, you can use a light dusting. Use a silicone dough scraper to gently ease the dough out of the bowl.
You want it to land upside down on your counter so that the smooth top of the dough is on the countertop and the sticky underside is facing up. This will make it easier to shape.
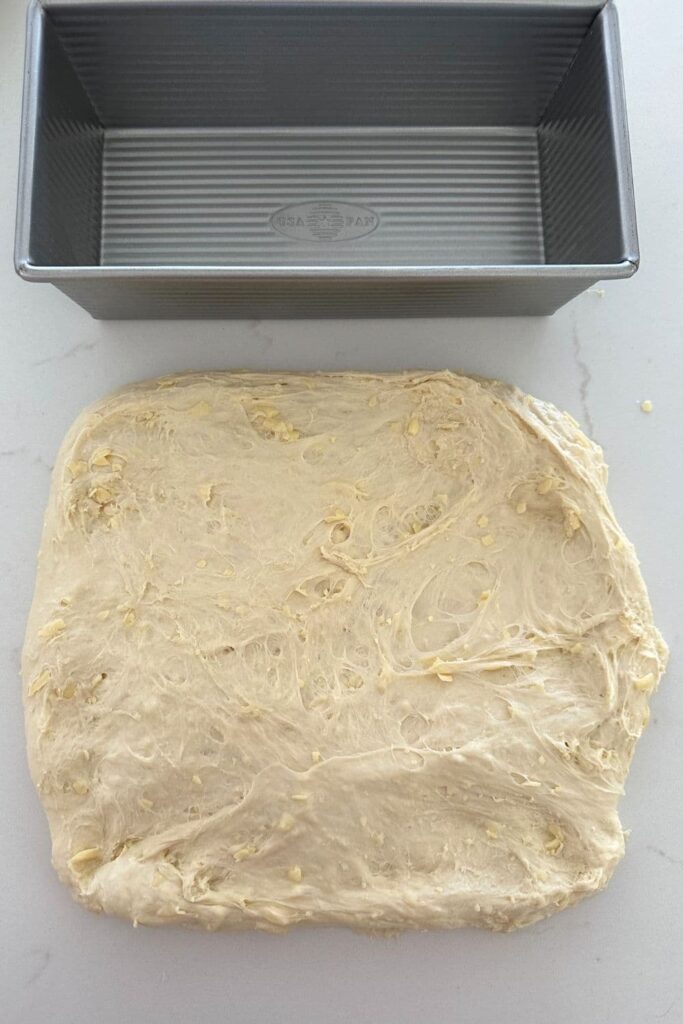
All you need to do is roll the dough up into a log - seriously, it's that easy! It's just like when you roll sourdough cinnamon rolls or shape this farmhouse white sourdough loaf.
You can see in the photos below that I have tucked the ends in, but you don't have to if you don't want to.
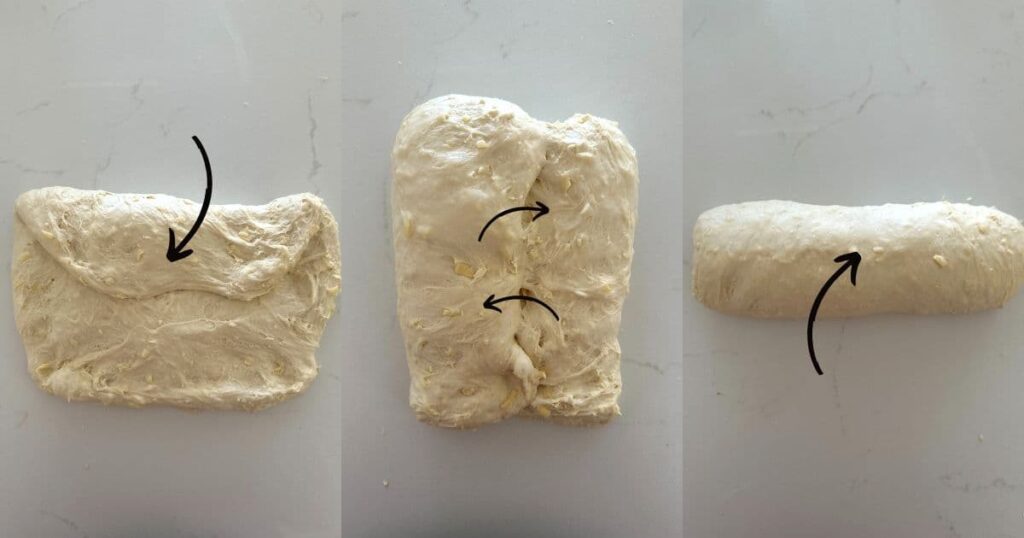
Putting The Dough Into A Loaf Pan
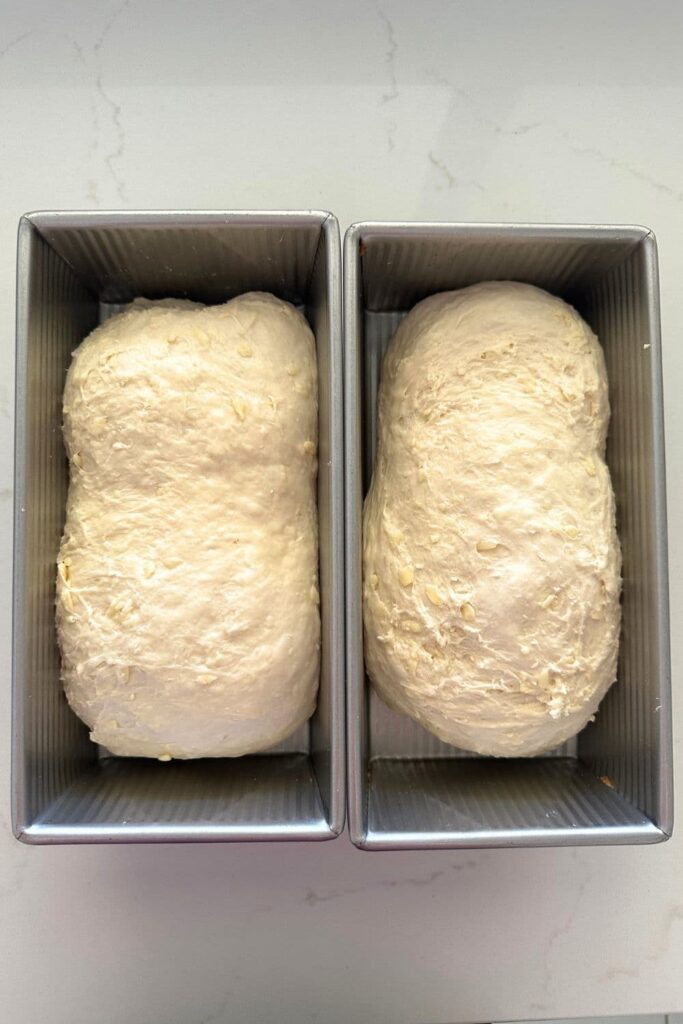
Once the dough is shaped, you need to gently lift it into the loaf pan. You need to place it into the loaf tin with the seam on the bottom (opposite to how you would place it into a banneton).
I have not used any oil or butter to grease my loaf pan because it's a non stick pan and doesn't need it. If you want to, you can butter your loaf pan.
Proofing
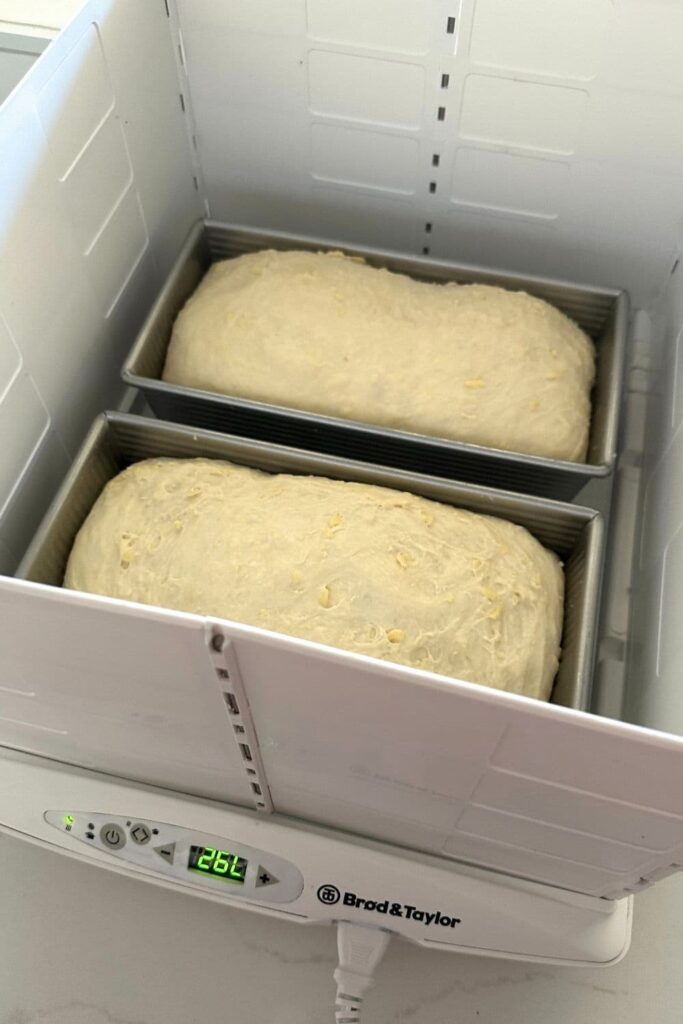
Now the dough is in the loaf tin, you need to let it proof. For this sourdough loaf I like to proof it a little on the counter first and then put it in the fridge until I'm ready to bake.
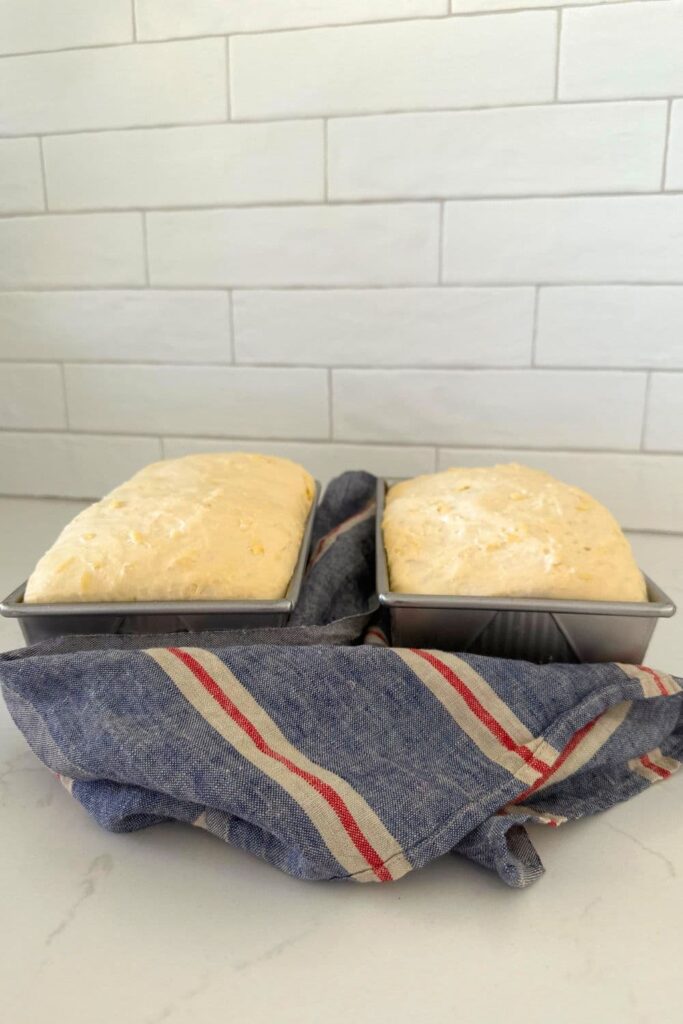
As long as it didn't over ferment during bulk fermentation, allow the dough to puff up a bit before you put it in the fridge for cold fermentation. Don't let it go too far though or you won't have any oven spring.
With the USA loaf pans that I've used, I let the dough rise just over the top of the pan.
Bake Your Sourdough Bread!
Once you're ready to bake your sourdough, you'll need to preheat your oven to 200C/390F.
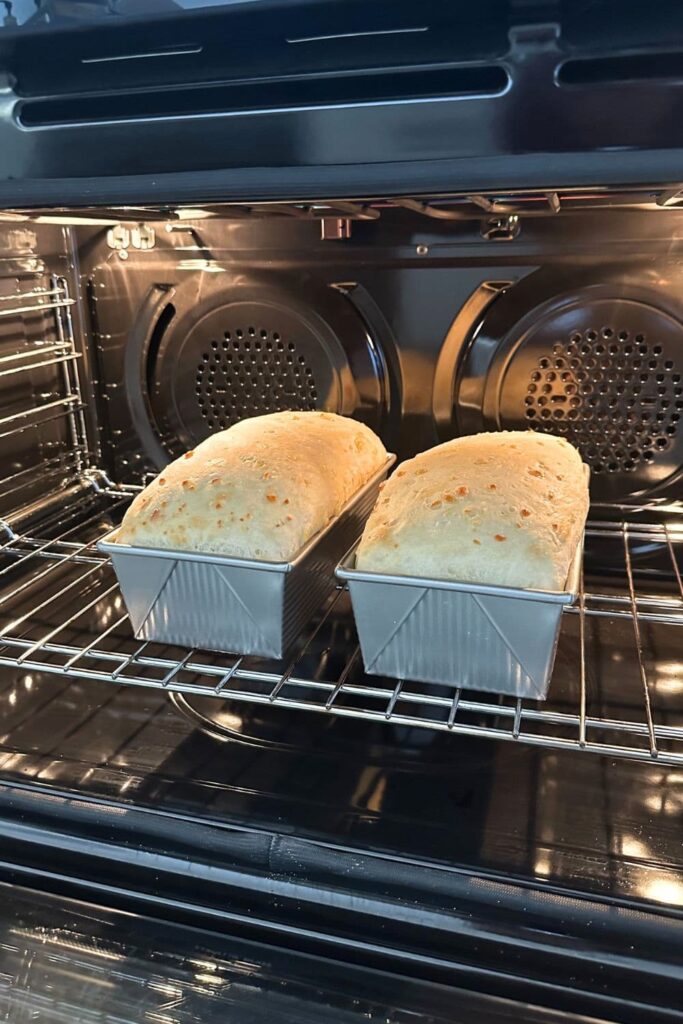
Now it's time to bake! When the oven is at temperature place your sourdough golden cheese loaf into the oven.
BAKE TIME:
40 Minutes at 200C/392F
Let Your Bread Cool
When your sourdough is done, remove it from the oven. Let it sit for a few minutes and then carefully remove it from the tin.
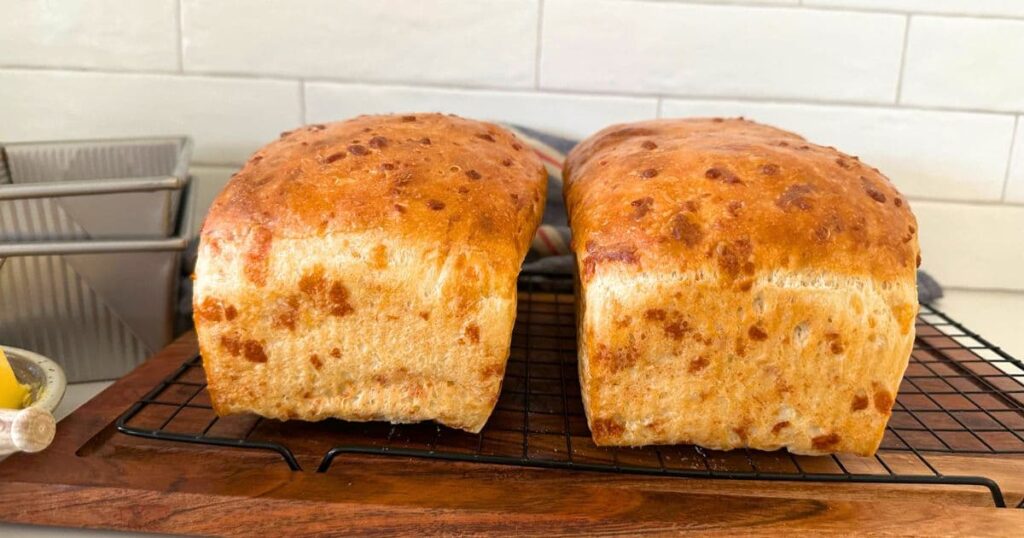
Place onto a wire rack to cool. If you wish to soften the crust a little, you can brush the top of the loaf with melted butter if you wish.
Which Loaf Pan To Use For Sourdough Cheese Bread
I've recently started using USA Pans for my sourdough loaves - I absolutely love them! The one I've for this sourdough cheese bread is the 1.5 pound loaf pan which measures 10" x 5" x 3" or 24.4cm x 12.7cm x 7.6cm. It comes out perfectly every single time in this tin.
Usually when I make sandwich bread I will butter the loaf pan or tin before placing the dough inside. I haven't done that with this sourdough cheese bread for a two reasons. One, the USA pans are non stick so you don't need to add butter. And two, the cheese has enough oil so adding butter as well can make the loaf too greasy.
I allow the loaf to rise so that it is above the lip of the pan before I bake it and this ensures that the dough is properly risen and will give you a light, fluffy interior.
Baker's Timeline for Golden Sourdough Cheese Bread
This is the rough timeline I use when making this golden sourdough cheese bread. You could adapt this timeline to suit your own situation. You might also find this article on creating a sourdough baking timeline helpful in adapting it.
In The Morning
7am - Feed your sourdough starter (I do 1:1:1 because I want to use it today).
10am - Mix the dough, stretch and fold and allow to rise (bulk fermentation).
3pm - Shape the sandwich bread, place into tin and allow to rise again.
9pm - Bake sandwich loaf and allow to cool overnight so it's ready for breakfast in the morning.
If you want to hit pause on this recipe, you can place your sandwich loaf in the fridge once it's shaped. I allow the loaf to rise around half way up the tin and then put them it the fridge for up to 12 hours. When I want to bake it, I take it out, allow it to rise over the lip of the pan and then bake.
How To Store + Freeze
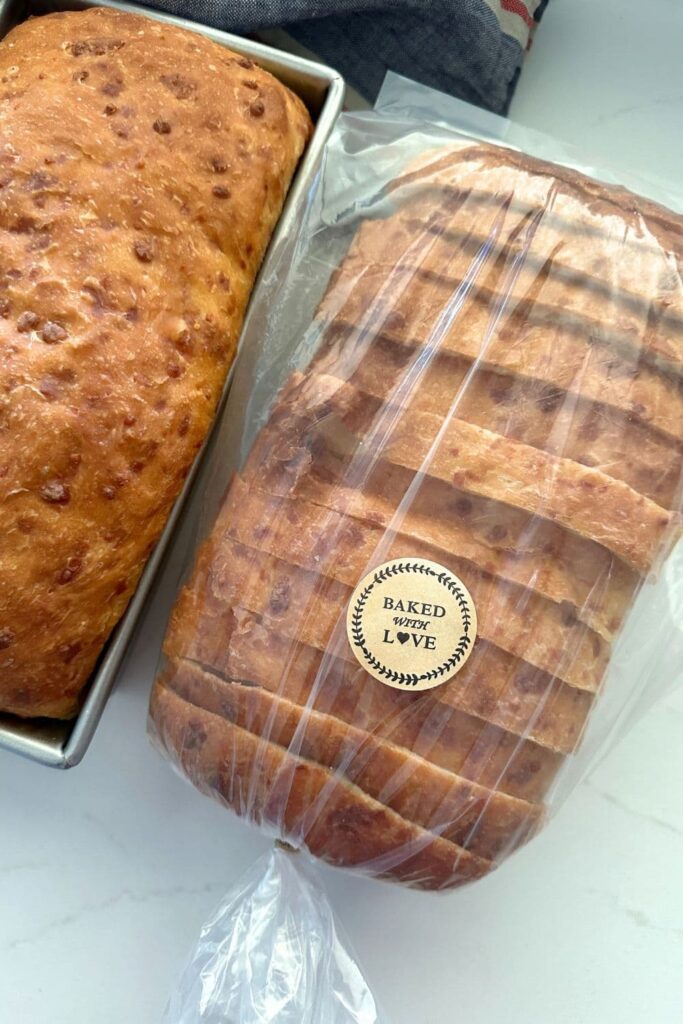
This golden sourdough cheese bread freezes so well! I love making a double batch so there's always one in the freezer. I slice it and then place it into clear plastic bread bags and freeze for up to 2 months. Remember that you can click on 2x in the recipe card below and it will automatically double the recipe for you.
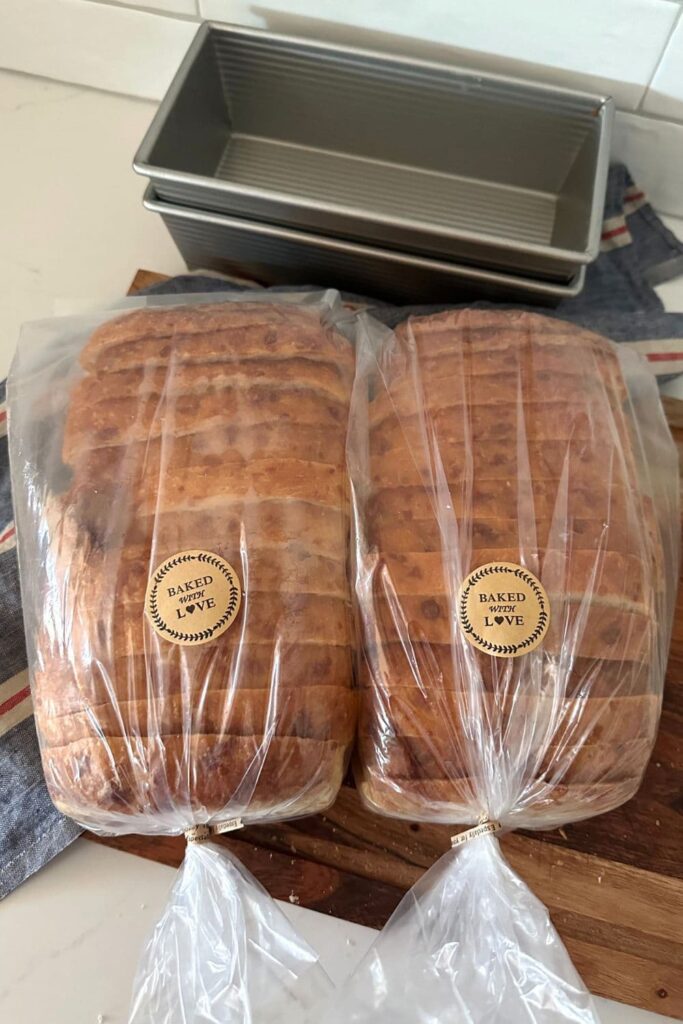
If we are using the loaf as fresh bread, it's best to use within 24 hours. I store in the same clear plastic bags as I freeze the loaf in and it stays fresh for up to 24 hours. After that, it's best toasted.
If you'd like to use the same bags as I have in the photos, you'll find them here.
Golden Sourdough Cheese Bread
Equipment
- Mixing Bowl
- Digital Scales
- 1.5 pound Loaf Pan (10" x 5" x 3" or 25.4cm x 12.7cm x 7.6cm)
Ingredients
- 500 g Bread Flour
- 350 g Water
- 100 g Sourdough Starter
- 10 g Salt
- 200 g Cheddar Cheese (shredded)
Instructions
- Weigh out your flour and make a well in the centre. To this add your sourdough starter, water, cheese and then salt on top (remember you can use discard, instructions for this are both in the post above and the recipe notes).
- Mix the whole lot together to form a dry, fairly shaggy dough.
- Cover your bowl with cling film or a damp tea towel and let it sit for around 1 hour. This process is called the "autolyse" and allows your flour to soak in all the water and become hydrated. You can see how the dough has changed in this photo.
- Bring the dough together into a ball. Pull the edges of the dough into the centre until it's smoother and more formed.You'll notice that the dough is fully hydrated after soaking all the water up. It will be fairly sticky but as you bring it into a ball, it will become smoother and shinier.
- Once the dough has formed into a smooth ball, pop the cling film back on and let it rest for 30 minutes.
- Over the next few hours you need to create some structure for your dough by "stretching and folding". Aim to do around 4-6 sets of stretches and folds. For each set, stretch the dough up and over itself 4 times. Leave around 15 minutes in between each set. Again you do not have to be exact with time, but you need to do at least 4 sets over 2 hours.
- Once you've finished your stretch and folds, place the cling film or damp tea towel back over your dough and let it rest and ferment at room temperature until it's risen by around 50% (a plastic cover is a better option for this stage). The dough does contain cheese, but it's perfectly fine to bulk ferment on the counter - do not put it in the fridge for bulk fermentation.
- Once your dough has finished its first ferment, it's time to shape it so that it will fit into your loaf tin. Shaping your dough into a batard is the best for proofing and baking in a loaf tin.I don't use any flour to shape the dough as it isn't sticky, but if you think you need flour, you can use a light dusting.Use a silicone dough scraper to gently ease the dough out of the bowl. You want it to land upside down on your counter so that the smooth top of the dough is on the countertop and the sticky underside is facing up. This will make it easier to shape.All you need to do is roll the dough up into a log - seriously, it's that easy! It's just like when you roll sourdough cinnamon rolls or shape this farmhouse white sourdough loaf.
- Once the dough is shaped, you need to gently lift it into the loaf pan. You need to place it into the loaf tin with the seam on the bottom (opposite to how you would place it into a banneton). I have not used any oil or butter to grease my loaf pan because it's a non stick pan and doesn't need it. If you want to, you can butter your loaf pan.
- Now the dough is in the loaf tin, you need to let it proof. For this sourdough loaf I like to proof it a little on the counter first and then put it in the fridge until I'm ready to bake. As long as it didn't over ferment during bulk fermentation, allow the dough to puff up a bit before you put it in the fridge for cold fermentation. Don't let it go too far though or you won't have any oven spring.
- Once you're ready to bake your sourdough, you'll need to preheat your oven to 200C/392F.
- Now it's time to bake!When the oven is at temperature, take your loaf of sourdough out of the fridge and place it into the hot oven.BAKE TIME:40 Minutes at 200C/392F
- When your sourdough is done, remove it from the oven. Let it sit for a few minutes and then carefully remove it from the tin. Place onto a wire rack to cool.If you wish to soften the crust a little, you can brush the top of the loaf with melted butter if you wish.
Notes
- Notes on Flour: This recipe is written using strong Bread Flour. Bread flour has a higher protein content than All Purpose flour. If you choose to use All Purpose flour you may have a different result because of this. You can read more about the differences between All Purpose Flour and Bread Flour here.
- Notes on Sourdough Starter: This recipe is based on you having an active starter that you have fed a few hours before starting your bake. For info on how to make a sourdough starter, go here. You can also make this recipe using 100g of sourdough discard and 7g of yeast. You will need to adjust the baker's timeline to account for commercial yeast as it will rise much faster once this is added.
- Notes on Stretch & Folds: If you are going to do the stretch & folds on your bench top, spray your surface with water mist rather than using flour. You can leave the dough in the bowl if you want to. Wet your hands to stop the dough sticking - although it shouldn't be too sticky. It will get less sticky as you do your stretches and folds. For more information on how to do stretch and folds, go here.
- Notes on Loaf Pan: I've used a USA Pan 1.5 pound loaf pan to bake this loaf. It measures 10" x 5" x 3" or 25.4cm x 12.7cm x 7.6cm.
Nutrition



I have to make this! Just wondering if it could be made into buns. Since there are just two of us, I make all my sourdough into buns instead of loaves. I use three six-bun pans, bake, and freeze them.
The loaf rose nicely on the top but didn't rise at the bottom. Baked as instructed 40 Minutes at 200C. What could be a reason?
This is a great cheese bread recipe. For myself, I have been using the Pullman Loaf Pan for the last couple years. It gives you that great square loaf which is great for sandwiches and for toasting. I use a 13" x 5" x 5" pan, but the amount of dough you can put into this pan would be no more the 900 grams, so for your recipe, it would have to be decrease by 20%
My mouth is watering....this is on the to do list...Thank you for sharing all of your recipes. Everything I have tried has been delicious.
Can you use a pan that measures 9.5x5x3?
Absolutely delicious, perfect and easy stayed so fresh for nearly a week though I can’t believe it lasted that long. Excellent toast and sandwich loaf. I bake at high altitude and use 100% hydration and didn’t have to modify the recipe. Thanks!
Hi Di hi Bakers
Just had a crack at this using my trusty old rye based starter and it worked like a dream. I used a Pullman Loaf Tin with lid off (lid on for cold ferment). I wish I could post a photo because it's a mighty fine looking loaf of bread!
I love to hear that Nigel! I'm sure it's a beautiful loaf!
Wow my new favorite. Great flavor!
Started it last night, cooked it earlier and just tried a wee slice - delicious. I look forward to hearing from my friends with their thoughts.
Love this recipe! Bread is soft and so delicious. As always, I appreciate all the tips, photos, and ‘how
Love this recipe! Bread is super soft and so delicious. As always, appreciate the tips, photos, and info on variations.
I just have to tell you how much I appreciate your website! You have put A LOT of work in sharing the knowledge of the sourdough world with us. I am a year into sourdough and I always come back to your site. I also share it with anyone asking about sourdough!!! You’re amazing, thank you!!
I made two loaves of this sourdough cheese bread and both did not turn out, i may have underfermented the dough, the consistency was gummy when I pulled them out of the oven at first they were raw in the middle so I baked them for another 40 minutes but still came out gummy. I will attempt it again in the future.
I've made this three times now, and I think it's my favorite sourdough recipe. I would like to add fresh, diced jalapenos next time. At what point would I add them? At the beginning with everything else, during stretch and folds, or before final shaping?
So glad you're loving this recipe. I would add the diced jalapenos during the stretch and folds 🙂
Hi, I was wondering if you could leave out the 10 g of salt as the cheese seems to have plenty of that already. I would like to somehow minimize the amount of salt in the loaf. TIA
You can reduce or leave out the salt if you're sensitive.
1st try making this cheesy sourdough...used 150 g Cheddar cheese and 30 g Parmesan cheese. Waiting for my 50% rise. Fingers crossed.
After looking at other sourdough recipes.... I was very sad to see how big an investment it would be to use the equipment. Discouraged by the cost of Dutch Oven, instant-read thermometer, heavy duty Oven Mitts, nearing $150.00 on Amazon in 2024, I didn't bother to price a digital scale, just used the old fashioned one I own (not digital), so this looked more affordable sourdough alternative. Paid $16.00 Canadian for 2 similar pans described in the recipe.
Thanks for your instructions!!!
I am still a bit new to sourdough even though I bake almost every weekend. I am always a little uncertain about the first ferment. You say you let it proof on your counter for "a little". I'm not sure what this means. I usually do my first proof in the oven with the light on and it almost doubles in about 4 hours, then I do overnight ferment in the fridge for as many hours as I'd like. I'm just a little unclear how to tell when the first ferment is not "over" fermented. Thanks!!!
Followed the recipe and I felt like my dough didn’t look like the picture and it felt tight and not like when I make plain dough. I did add a smidge extra water to try and see if that would help.
Regardless I just kept moving through the process and hoping for the best, and it turned out super good! After it came out of the oven I brushed garlic butter over it. It tasted a lot like store bought Texas toast, but yummier, healthier, and homemade of course! I I actually liked the texture of this better than the plain loaf bread.
Adding garlic butter to the top sounds delicious! Thank you so much for sharing. 🙂
I have used several of your sourdough bread recipes and love them all!
I have noticed that the mixing process described is different for each of the ones I use regularly:
Sourdough French Bread (no stretch & folds)
Sourdough Rye Bread
Sourdough Cheese Bread (mix wet into dry ingredients)
Is there a reason for the differences or are you just offering different methods?
The mixing method will depend on whether we're using discard and yeast or straight sourdough starter, how hydrated the dough is, whether it has butter added or not, things like that. Sometimes we'll find during recipe testing that a certain method works better than others so we'll go with that. Hope that helps xx
Delicious! What would I need to adjust if I want to make rolls?
Once put in loaf pan and goes into refrigerator, how long can it cold proof before baking?
I have made this bread several times using different cheeses, all delicious. I was wondering what I would have to do to make it into 2 baguettes. It would be great with a pasta dish.
Thanks for your wonderful recipes and tips.
That's a great idea! For two baguettes, you would probably half the recipe and follow the shaping steps in this post. Please let us know how it turns out.
Update on my last post, made it into baguettes and it turned out wonderful. Just need to practice my shaping. But no one cared how they looked.
If I want to reduce the cheese. Is there anything else I need to adjust?
Thanks
Yay! Thanks for letting us know, Marguerite. You can reduce the cheese without making any additional changes. 🙂
Can I add Chorizo?
We haven't tried, but that should work. Make sure it's cooked first. Sounds delicious!
Absolutely delicious! My favorite loaf to bake. Neighbors love it, too. Easy and awesome!
The cheese bread is delicious! A real keeper!
incredible! might be the best loaf of sourdough i’ve made yet!
Even before I knew what I was doing, this recipe always came out great. In fact, I have a loaf (using pepper jack and extra sharp cheddar) cold fermenting right now. It's my husband's favorite.
We love to hear that, Jayne! 🙂
Just made this the other day. It was delicious ... a huge favourite for my family. I will definitely be making it again!
I habitually use the two pan method for my sourdough baking, so I thought I'd give your recipe a go using my preferred flour %'s (Bread, Wholemeal, Rye & Spelt), and using my stand mixer. I swapped out 50g of cheddar for parmesan, but all else was the same. I did think that I'd let it go too far in the bulk, but to my delight, after overnight retard, the resultant loaf came out with a good rise, a bit heavier than my usual, but as expected, with a crumb that was not as open as I'm used to, and moist though not wet ... and, with a flavour to die for!! It got a hammering at lunch today, without anything on it. Gr8 result for me. Many thanks for your effort in putting it together
Just made this with sourdough discard and instant yeast. I watched the bread to figure out what to do, and it took around 2 hours total (bulk fermentation and brief fridge fermentation) before baking. My loaf pan was smaller than the recipe too but I still baked it for 40 minutes . It turned out amazingly well! Delicious flavour and crisp crust. The sourdough taste was very mild as would be expected from such a brief ferment.