Sourdough Chocolate Sandwich Cookies
This post may contain affiliate links.
You have to make these sourdough chocolate sandwich cookies! These chocolate cookie sandwiches, made with sourdough starter, are filled with a deliciously easy vanilla buttercream that sets and holds the cookies together. They are perfect with a cold glass of milk (or a hot cup of coffee in my case).
Want more sourdough chocolatey goodness? Check out these sourdough brownies, sourdough chocolate chip cookies or even this sourdough chocolate discard bread. If you love chocolate cookies, you might also love this cookies and cream sourdough bread!

Why You'll Love This Recipe!
Chocolatey Goodness - These cookies are rich and chocolatey, with crunchy edges and chewy centres. And that vanilla buttercream - it is out of this world good!
Choose Your Size - You can make these as big or small as you would like! I personally love giant chocolate cookie sandwiches but you can make them smaller (a bit like Oreos) if you like.
Fermented Cookies - one of the best things about this recipe is that the cookie dough is actually fermented, giving it a unique flavor and allowing your sourdough starter to work its magic!
Ingredients
Here's what you'll need to make these rich and chocolatey sourdough cookie sandwiches:
For the cookies:
- All Purpose Flour - regular all purpose flour is perfect for this recipe, it doesn't need to be anything special.
- Sourdough Starter - you can use sourdough starter or sourdough starter discard in this recipe, it won't make any difference to the outcome of the cookies. If I am fermenting the cookies for a longer period, I like to use active sourdough starter.
- Cocoa Powder - I've just used regular cocoa powder, but you can use Dutch processed cocoa powder if you prefer.
- Baking Soda - Provides the leavening for these cookies. When I first started making them, I added both baking powder and baking soda, but I experimented with just baking soda and they work! So now I don't bother with the baking powder!
- Salt - just a pinch to balance the rich, chocolate flavor of these sourdough sandwich cookies. Leave it out if you don't like the salty flavor.
- Sugar - White, granulated sugar is fine for this recipe. You can use raw sugar if you prefer, just make sure that it isn't too grainy when you combine the ingredients teogether.
- Butter - as always, I've used salted butter, softened at room temperature. You can use unsalted butter if you prefer.
- Egg - I've used a single, large egg to bring this recipe to life.
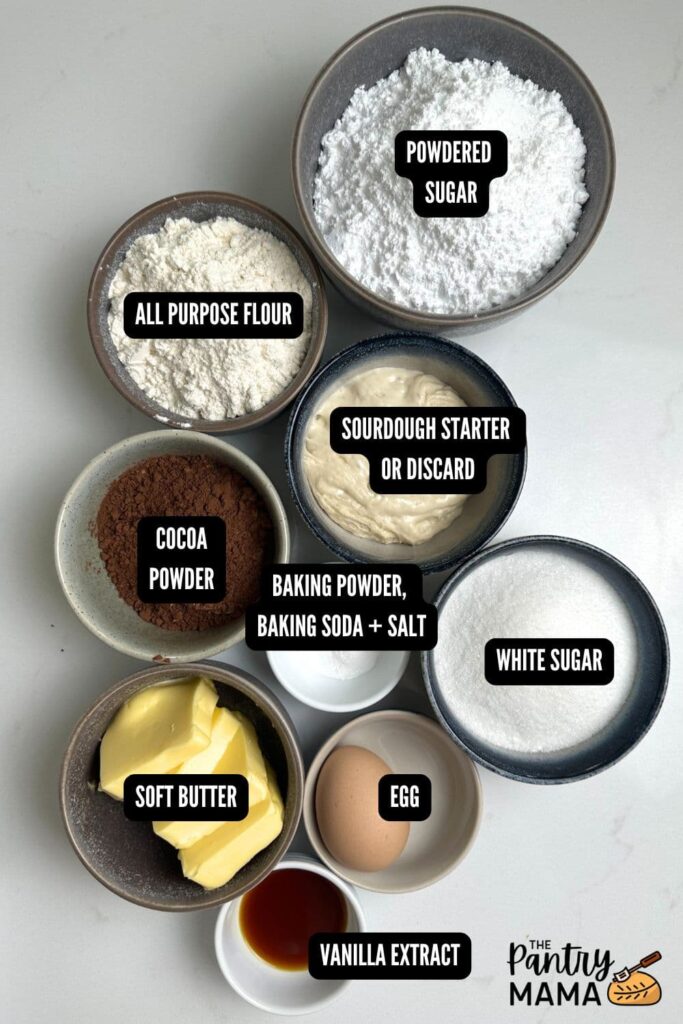
Vanilla buttercream filling:
- Butter - as always, I've used salted butter, softened at room temperature. You can use unsalted butter if you prefer.
- Vanilla Extract - just a splash to bring out the vanilla flavor of this buttercream filling.
- Powdered Sugar - I've used powdered sugar (you might know it as icing sugar or even icing mixture).
- Salt - just a pinch to balance all the sweetness!

How To Make Sourdough Chocolate Sandwich Cookies
The thing I love most about these sourdough chocolate sandwich cookies is that they are so easy to pull together! Honestly, it's minimal effort for maximum result! Let's get started!
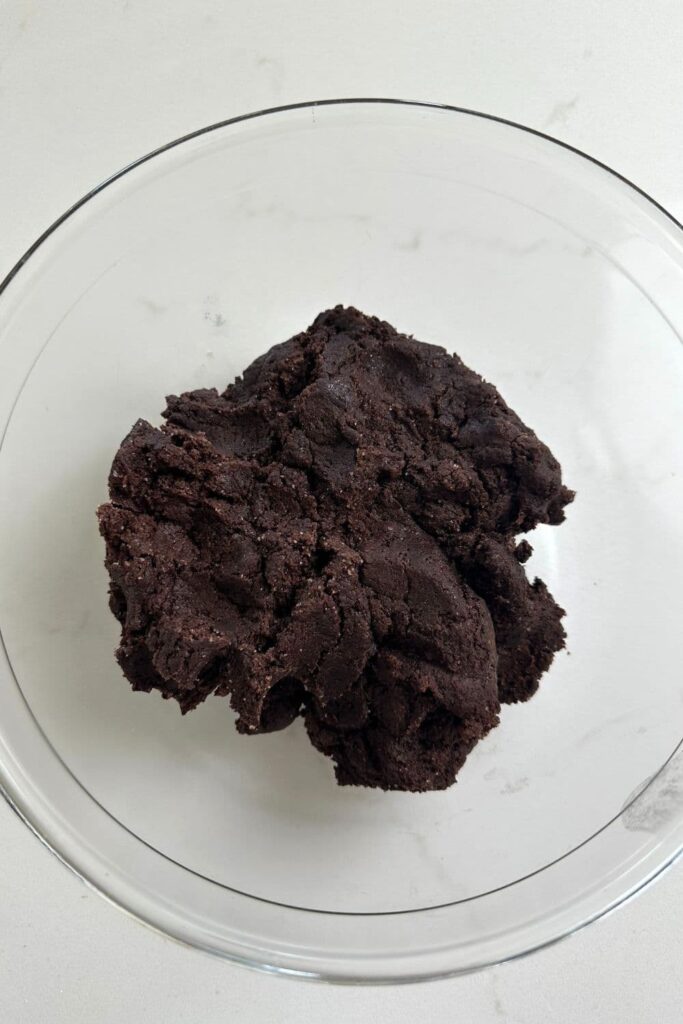
Add all of the cookie dough ingredients to a food processor or stand mixer (paddle attachment). Blitz the ingredients for around 20 seconds or until they form a cohesive, moist cookie dough.
You can mix the ingredients by hand if you prefer. I recommend beating the egg, sugar, sourdough starter and butter together first (a whisk if perfect for this) and then fold in the dry ingredients. You're looking for a moist dough that stays together when you roll it into a ball.
Place the sourdough chocolate sandwich cookie dough into a bowl and place into the fridge for around 2 hours (it can stay in the fridge for up to 48 hours though). This gives your sourdough starter time to work its magic.
When You're Ready to Bake
Preheat your oven to 190C and line 2 cookie trays with parchment paper (I've used 2 x half sheet pans).
Use a cookie scoop to scoop out balls of dough. I made 24 cookies around 1 tablespoon in size (this equated to 27g of dough per ball).
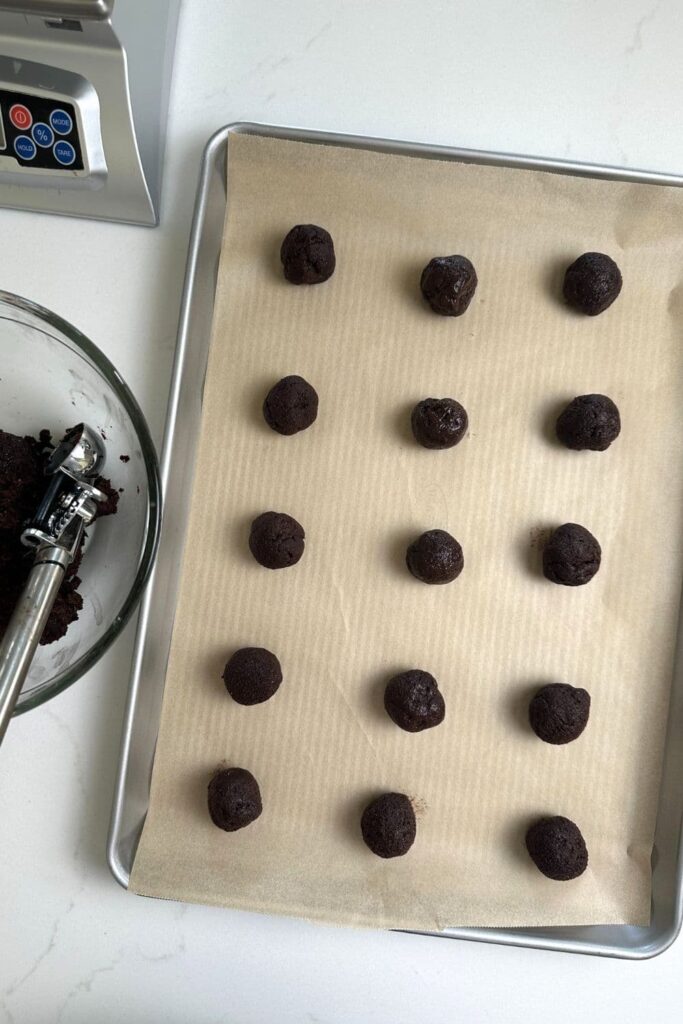
Place the cookie dough balls onto parchment lined cookie sheets. Using a flat bottomed glass or measuring cup gently press the dough balls flat. You want them to be around 1 cm thick. They will flatten out more when they cook.
Once they're all flattened out, place the trays of dough into the oven at 190C for around 15 minutes.
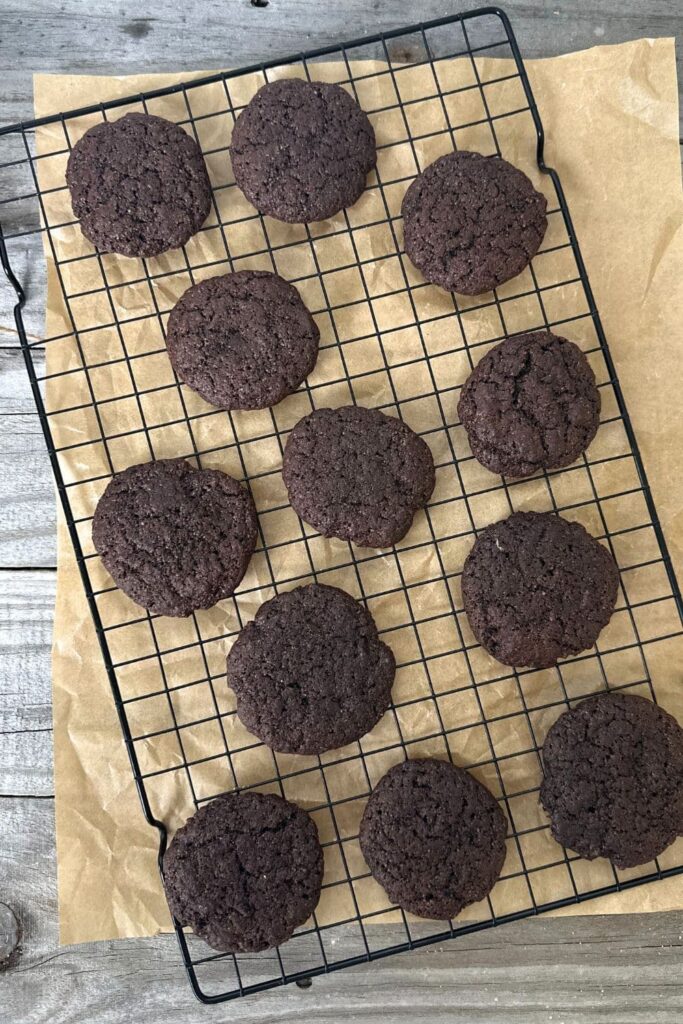
Remove from the oven and allow the cookies to cool on the trays. The cookies will still be soft when you remove them from the oven and will firm up as they cool.
Make the Filling
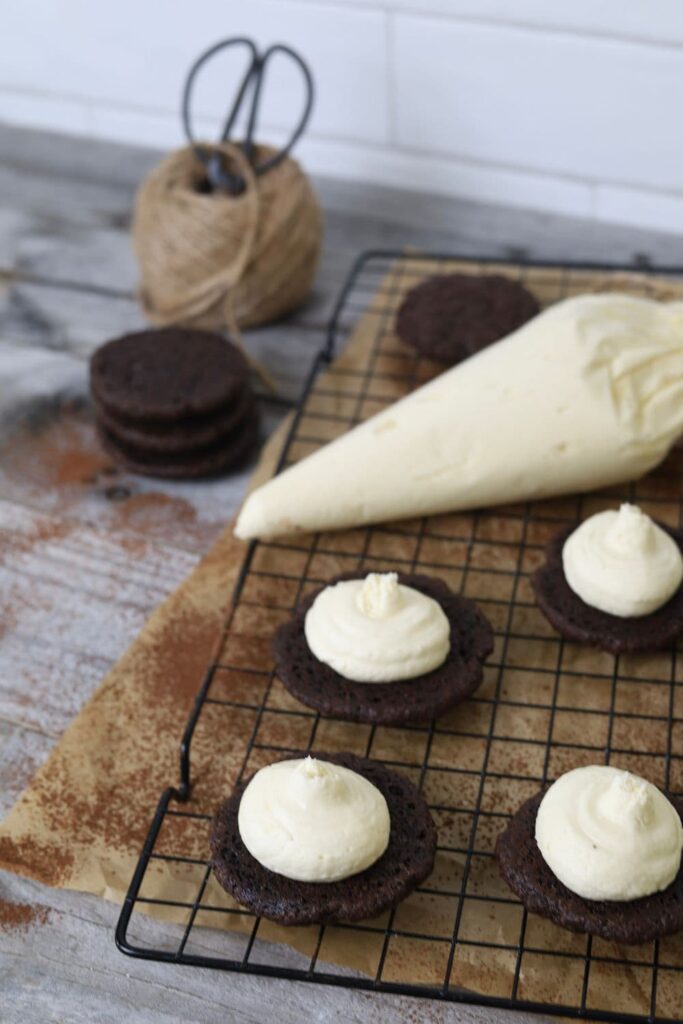
Place the butter, vanilla, salt and powdered sugar into the bowl of your stand mixer and whip using the whisk attachment until very pale in color and light and airy in texture. I whip this filling for at least 2 minutes. It will get lighter in color the longer you whip it.
If you feel like the frosting is too stiff, add a splash of milk. You want it to be smooth and pipable but not too wet or it won't set inside the cookies.
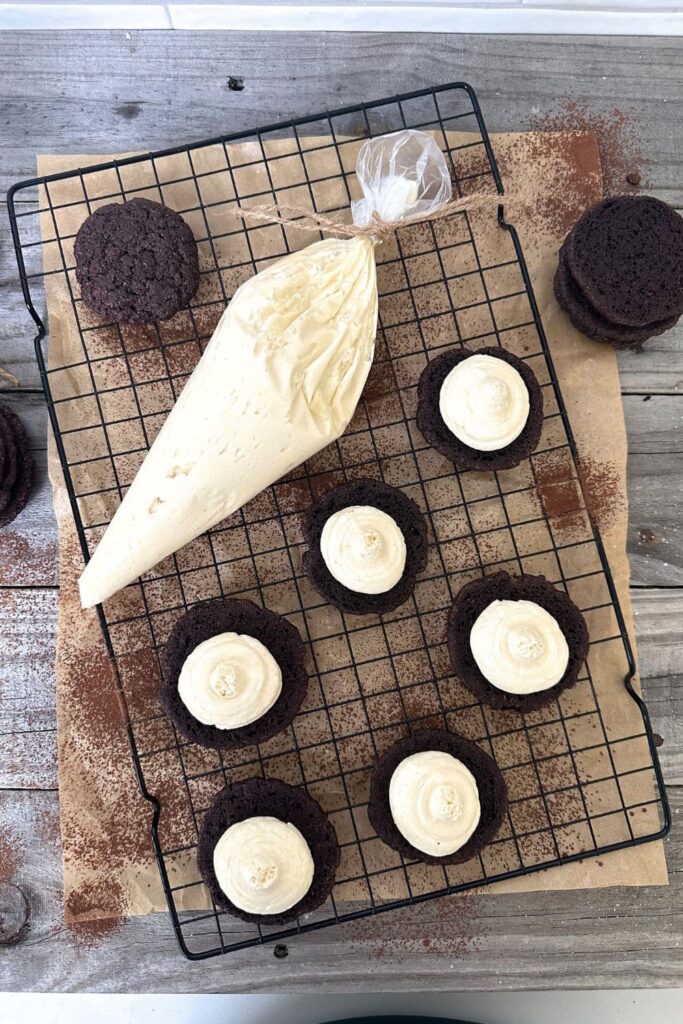
Spoon the filling into a piping bag and set aside until the cookies are completely cool.
When you're ready to sandwich the sourdough cookies together, pipe a generous amount of filling into the centre of half the cookies and then sandwich the other half of the cookies on top.
Did you know that you can use this buttercream filling to sandwich together other sourdough cookies? I love using it to make cookie sandwiches with these sourdough gingerbread crinkle cookies. So good!
Tips for Success
- Sourdough Starter - Make sure your sourdough starter or discard isn't on the thin side as this will affect the consistency of the dough. I actually prefer active sourdough starter for these, but discard is fine, as long as it's not too old and sour.
- Refrigerate Your Dough - do not skip this step because otherwise the dough will be too sticky and the cookies will spread too fast in the oven giving you mis shaped cookies. Another way to do this is to mix the dough, form into balls and place onto your trays. Refrigerate like this and then flatten out just before you bake them. This takes up more room in the refrigerator though.
- Cool On The Tray - Allow the sourdough chocolate chookies to cool on the tray before you transfer them to a wire cooling rack. If you move them too soon they will break.
- Food Processor Is Best - I've tried this recipe by hand, in a food processor and in my Kitchenaid stand mixer and I get the best results in the food processor. I find it's very messy in the Kitchenaid as the cocoa floats off everywhere! If you have a Kitchenaid mixer with a guard attachment, it would worth while using it for this recipe.
How To Store + Freeze
I've tested this recipe so many times, not only to make sure that I can get the consistency right, but also so I can test how long these homemade sourdough chocolate cookie sandwiches actually last once baked.
I actually think they taste even better the next day! So I will generally bake these the day before I want to serve them (but you bet I have to hide the tin so that they don't all disappear - dear husband I'm looking straight at you lol).
Store chocolate cookies and filled cookie sandwiches in a glass jar or biscuit tin for up to 5 days. They will still be edible after this, but the texture does soften a little bit. Don't store them in plastic as they will go soft. A metal biscuit tin is best.
You can freeze these, but I recommend freezing the unbaked cookie dough balls rather than the cookies once they are baked. You can bake them from frozen.


Sourdough Chocolate Sandwich Cookies
Ingredients
Cookie Dough
- 150 g All Purpose Flour
- 200 g Sugar
- 100 g Sourdough Starter (or sourdough discard)
- 150 g Butter (softened at room temp, I use salted)
- 50 g Cocoa Powder (I've just used regular cocoa powder)
- 1 Egg
- 7 g Baking Soda
- 3 g Salt (optional - leave out if you don't like salty taste).
Vanilla Filling
- 100 g Butter (softened at room temp, I use salted)
- 5 g Vanilla Extract
- 315 g Powdered Sugar (confectioner's sugar or icing sugar)
- 3 g Salt
Instructions
- Add all of the cookie dough ingredients to a food processor or stand mixer (paddle attachment). Blitz the ingredients for around 20 seconds or until they form a cohesive, moist cookie dough.You can mix the ingredients by hand if you prefer. I recommend beating the egg, sugar, sourdough starter and butter together first and then fold in the dry ingredients. You're looking for a moist dough that stays together when you roll it into a ball.
- Place the cookie dough into a bowl and place into the fridge for around 2 hours (it can stay in the fridge for up to 48 hours though).
When You're Ready to Bake
- Preheat your oven to 190C and line 2 cookie trays with parchment paper (I've used 2 x half sheet pans).
- Use a cookie scoop to scoop out balls of dough. I made 24 cookies around 1 tablespoon in size (this equated to 27g of dough per ball).
- Place the cookie dough balls onto parchment lined cookie sheets. Using a flat bottomed glass or measuring cup gently press the dough balls flat. You want them to be around 1 cm thick. They will flatten out more when they cook.
- Once they're all flattened out, place the trays of dough into the oven at 190C for around 15 minutes. Remove from the oven and allow the cookies to cool on the trays. The cookies will still be soft when you remove them from the oven.
Make the Filling
- Place the butter, vanilla, salt and powdered sugar into the bowl of your stand mixer and whip using the whisk attachment until very pale in color and light and airy in texture. I whip this filling for at least 2 minutes. It will get lighter in color the longer you whip it.
- Spoon the filling into a piping bag and set aside until the cookies are completely cool.
- When you're ready to sandwich the sourdough chocolate cookies together, pipe a generous amount of filling into the centre of half the cookies and then sandwich the other half of the cookies on top.
Notes
Nutrition


