Sourdough Christmas Tree Pull Apart Bread with Cheese + Garlic
This post may contain affiliate links.
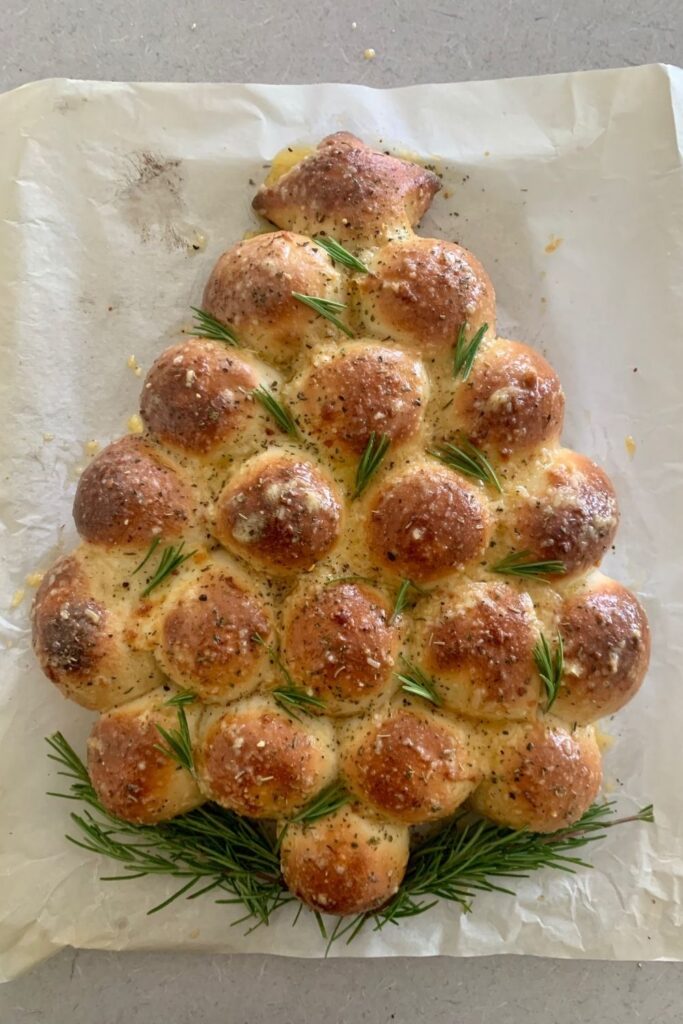
This Sourdough Christmas Tree Pull Apart Bread with cheese and garlic is sure to impress your family and friends!
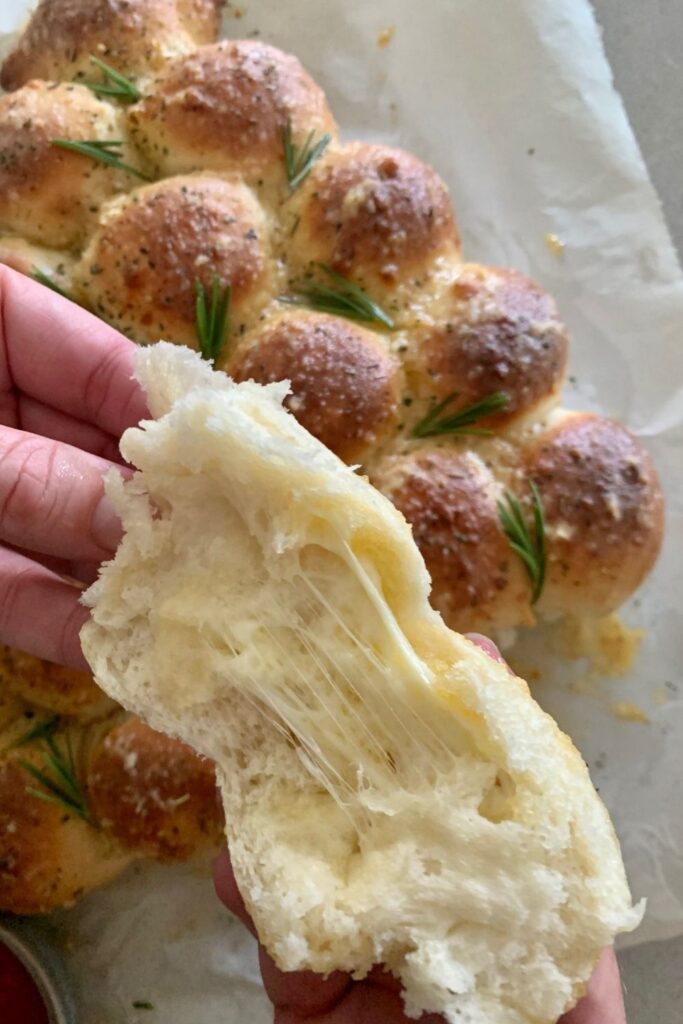
Each little bread roll is filled with gooey garlic butter and cheese and the top is brushed with garlic butter to create the most amazing flavor explosion!
While this Christmas Tree Sourdough looks incredible - it's actually really easy to put together.
I've included timelines and tips to help you serve it up at the right time for your Christmas function.
If you're looking for some other sourdough Christmas recipes, you might like this collection of sourdough Christmas recipes that are perfect for gifting or this Christmas Tree Pull Apart made with sourdough cinnamon rolls.
Why You'll Love This Recipe!
Full of Festive Spirit - this sourdough Christmas Tree pull apart bread not only tastes fantastic, it's full of festive spirit and will be a beautiful centrepiece on any Christmas table.
Cheese & Garlic - who doesn't love the flavors of cheese & garlic? These soft, squishy rolls are bursting with cheese and garlic and just begging to be eaten!
Make Ahead - you can make this sourdough Christmas tree pull apart bread ahead of time and proof it in the fridge overnight before baking it on the day of eating.

How To Make Sourdough Christmas Tree Pull Apart Bread
Making a Sourdough Christmas Tree Pull Apart Loaf is really easy.
There is a little hands on work involved, but most of it is simple, just repetitive. It's even a fun recipe to get the kids involved with.
The secret to the best sourdough rolls are making a lovely elastic dough and giving it ample time to bulk ferment to ensure maximum fluffiness.
How to make Cheese + Garlic Sourdough Christmas Tree Pull Apart Loaf:
- Make the dough using a stand mixer (this lovely enriched dough will be stretchy and elastic.
- While the dough is in bulk ferment, mix the cheese, garlic and butter to make the filling. Allow it to chill in the fridge.
- Once the dough has completed bulk ferment, divide it into equal pieces.
- Add a small ball of filling to the centre of each piece of dough and pinch the bottom to seal it shut.
- Gently roll each piece of dough into a ball.
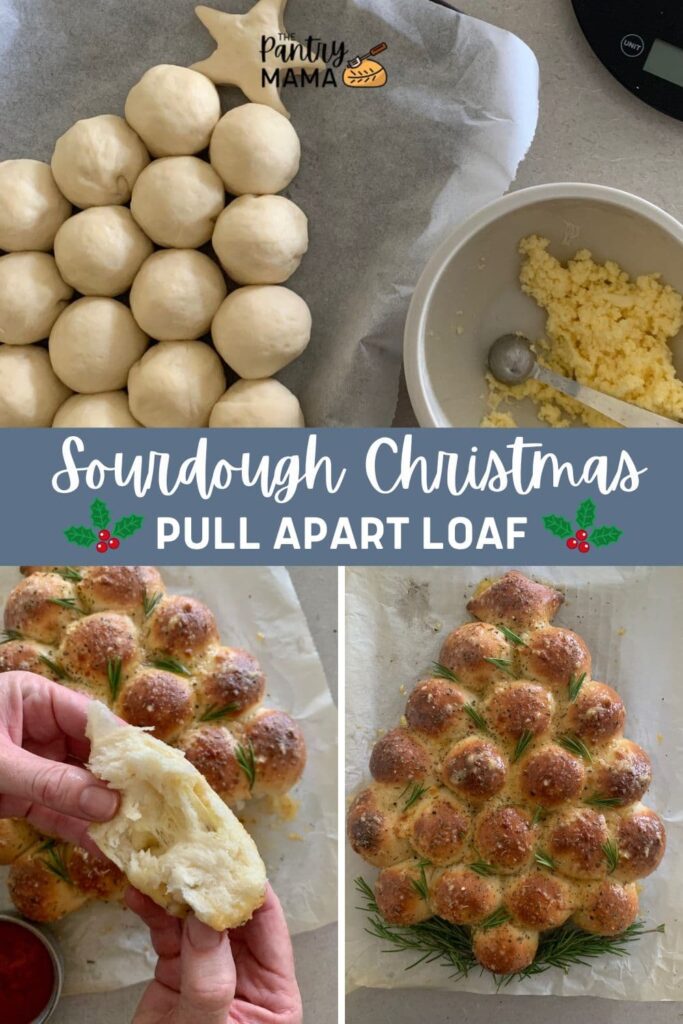
- Arrange the balls into a Christmas Tree shape, including a star for the top and a trunk for the base.
- Allow the rolls to proof before brushing with garlic butter.
- Bake in a moderate oven.
- Once out of the oven, brush with more garlic butter and serve warm with a bowl of Marinara sauce for dipping (I love serving it with this homemade pizza sauce).
Cheese & Garlic Sourdough Rolls
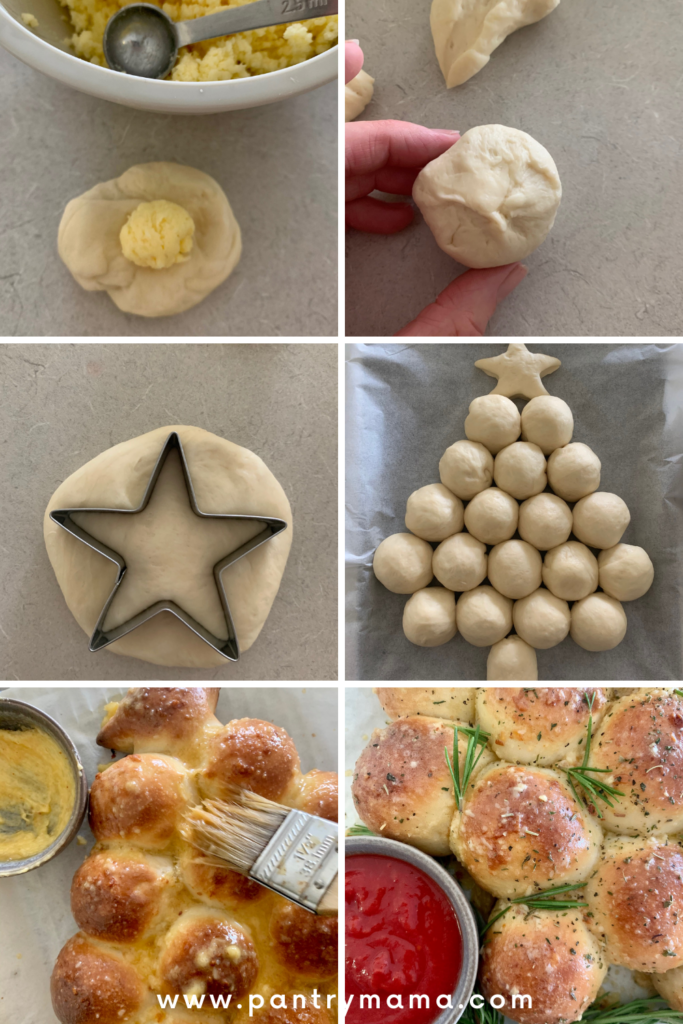
To make the individual rolls you'll need to weigh out your dough and then work out how many rolls you need. Then you can find the perfect weight and make them all uniform.
My total dough weight is 940g so I made the rolls 40g each (giving me 23 rolls).
For each little bread roll, I scooped out approximately 7g of filling using a small spoon and then placed that into the centre of each piece of dough.
I pinched the dough around the filling and then gently rolled it into a ball.
Repeat for each bread roll and put them onto the tray as explained below.
Once they're baked, the cheesy garlic butter will be gooey and ooze out when you take a bite!

Shaping Sourdough Christmas Tree Bread
It's really easy to shape this Christmas Tree Sourdough Bread.
You'll need to find a large baking sheet so you can create the shape on it.
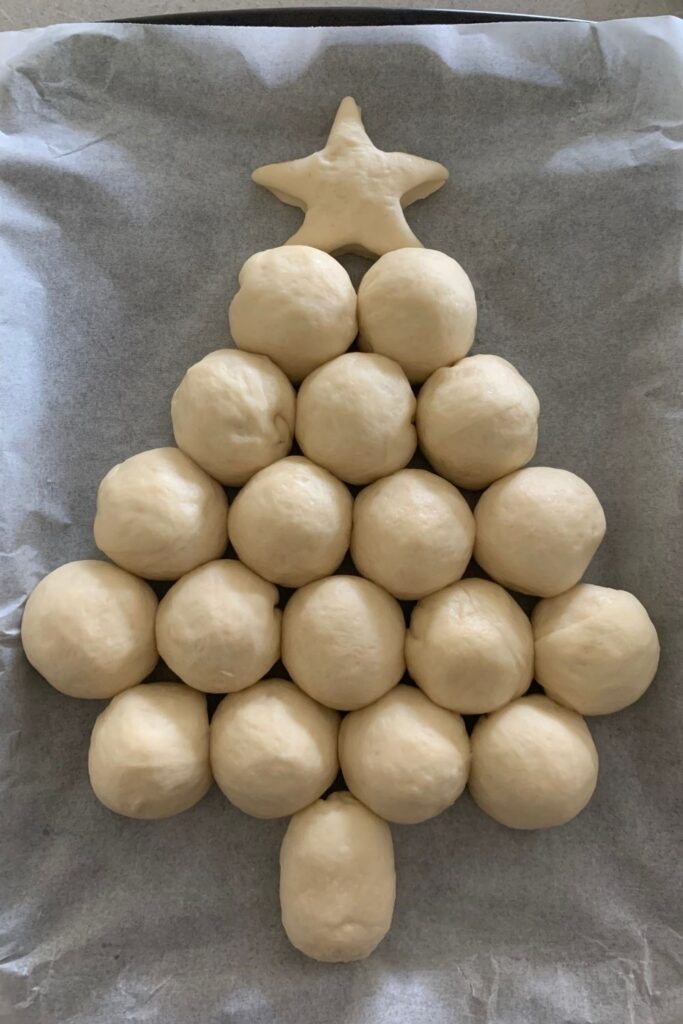
For this recipe, I've made 18 bread rolls plus a star and a trunk. The total dough weight is 940g. This gave me a little extra to play with so I had some spare.
If you need a larger tree, you can double the recipe.
You can choose to place a star at the top (I just cut out some dough using a cookie cutter) or you can just place a roll.
Then under the top star or roll, place two rolls, then three and so on - until you have the shape of a Christmas Tree.
For the base, I just used a roll and squished it out a little to create the trunk.
Tips for Best Sourdough Christmas Tree Pull Apart Bread
This sourdough Christmas tree pull apart bread is really so easy, but there a few things you can do to make it out of this world good.
- Make sure you start off with a happy, bubbly sourdough starter - this will ensure your rolls puff up and have a lovely sourdough tang.
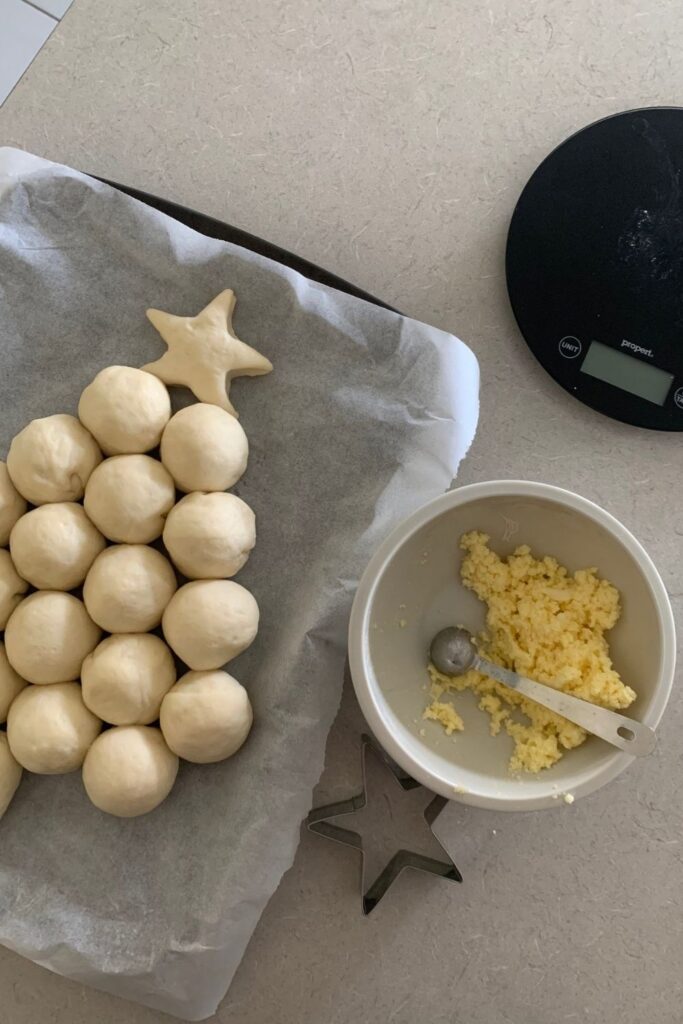
- Chill the filling mixture before you shape the rolls. This will make it easier to scoop into balls and add them to the dough.
- Don't be tempted to overfill the balls of dough. I found 7g was the perfect amount for 40g dough balls. If you overfill them, the cheese will leak out while the bread is cooking and you won't get the oozy, stringy garlic cheese when you break the rolls open.
- When you create the Christmas Tree, make sure the dough balls are just touching. This will make sure that they create the "pull apart" loaf once they have risen and puffed up.
- You can decorate your Sourdough Christmas Tree however you like. A pomegranate scattered over the tree will look lovely (I just couldn't get one at the time I made this tree). Cherry tomatoes would look cute too!
Ingredient Notes
Like most recipes, you can tweak this one to suit your tastes and ingredients on hand.
Here are some notes about making changes to the filling:
- I've chosen to use mozzarella and parmesan cheese - you can use whatever cheese combination you like. Mozzarella will give you the gooey, stringy melted cheese when you bite into the rolls.
- You can add parsley, oregano, rosemary or any herbs you like to the filling along with the cheese, garlic and butter. Just make sure they are fine so you don't bite into big chunks of herbs.
- Garlic is added to the filling and topping of these rolls, but not to the actual dough because garlic can hamper fermentation.
- If you don't want to use garlic powder, you can use roasted garlic or minced garlic. I like mild flavor that the garlic powder provides.
- Salt is added to the topping to give it extra flavor and keep you wanting more! If you don't like things salty, feel free to leave it out.
- If you want something a little different, try topping your sourdough Christmas tree with homemade Everything Bagel seasoning! So good!
Baking Timeline for Sourdough Christmas Tree Bread
This sourdough pull apart loaf is perfect for sharing - take it along to a Christmas party or make it to have with festive glass of wine!
If you'd like to have it ready for a certain time, it's important to create a baking timeline.
If you want to take this along to a Christmas party in the evening, you could use this timeline to have it warm and delicious for a 7pm take along.
Another alternative is to take the Christmas Tree out of the fridge and bake it at the party so you could serve it warm. The rolls will come to room temperature while you're travelling to your destination.
Just remember that your baking timeline will depend on the health of your sourdough starter and the temperature in your kitchen.
7.00am - Mix the dough and allow to bulk ferment (remember it's an enriched dough).
3.30pm - Shape and fill rolls and create Christmas tree. Allow to proof and get puffy.
7.30pm - Bake Sourdough Christmas Tree.
7.50pm - Brush with garlic butter and take along to your party!

Further Reading
If you love this Sourdough Christmas Tree Pull Apart Bread, you'll love these ideas:
- Christmas Sourdough Recipes to Bake and Gift- perfect for family, friends, neighbours and teachers.
- Sweet tear and share sourdough bread - Sourdough Chocolate Star Bread
- Fluffy Sourdough Cinnamon Rolls - make the loveliest Christmas morning breakfast or brunch.
- Rosemary and Parmesan Sourdough Bread Wreath - gorgeous festive sourdough bread for your Christmas table.

Sourdough Christmas Tree Pull Apart Bread with Cheese + Garlic
Video
Equipment
- Stand Mixer
- Digital Scale
- Star Cookie Cutter
- Large Baking Sheet
- Pastry Brush
Ingredients
Dough
- 500 g Bread Flour
- 100 g Sourdough Starter Fed and bubbly
- 200 g Milk Warm 37C
- 80 g Water Room temp
- 20 g Sugar Fine white
- 30 g Butter
- 10 g Salt
Filling
- 150 g Mozarella Shredded
- 50 g Parmesan Cheese Shredded
- 50 g Butter
- 5 g Garlic powder
Garlic Butter Topping
- 10 g Salt
- 60 g Butter
- 5 g Garlic Powder
- 20 g Parmesan Cheese Shredded
Instructions
- Add warm milk, water and sugar to the bowl of your stand mixer. Mix until the sugar is dissolved.
- Now add the flour and sourdough starter and use the stand mixer to knead into a rough dough. Allow to rest for around 30 minutes.
- Add the salt and butter and knead the dough until it is silky and elastic. This is such a lovely dough it should be very easy to handle.
- Transfer the dough to a bowl and allow it bulk ferment until the dough has risen around 30%.
Cheese and Garlic Filling
- While the dough is fermenting, it's time to make the filling for the bread rolls.
- Add mozarella, parmesan, butter and garlic to a food processor and blitz until it forms a thick paste. Place this into the fridge to chill until you need it.
Shaping & Filling the Bread Rolls
- Once the dough has finished the bulk ferment, you will need to shape and fill the bread rolls with the garlic cheese filling.
- Weigh out the dough into whatever size balls you'd like. I've done them at 40g.
- Take each piece of dough and add a small ball of filling (approx. 7g) to the centre. Pinch the dough around the filling and gently roll into a ball.
- Once you have filled and shaped all of the bread rolls, arrange them on a tray to form the shape of a Christmas tree. Cut out a star if you like and elongate one of the rolls to form the trunk.
- Cover the Christmas Tree and allow the rolls to proof and get nice and puffy. See notes for using the fridge for proofing.
Baking the Christmas Tree
- Preheat the oven to 180C/356F.
- Take the ingredients for the garlic butter topping and blend together. Using a pastry brush, lightly brush a little onto each bread roll (save the rest for when the Christmas Tree comes out of the oven).
- Bake the Christmas Tree at 180-C/356F for approximately 20 minutes or until the rolls are golden brown.
- Take the Christmas Tree out of the oven and brush on the rest of garlic butter topping so that it melts into the rolls. Sprinkle with fresh rosemary or whatever herbs you would like.
- Transfer onto a cooling rack and allow to cool a little before serving (you want it to be warm but not scalding hot).
- Serve with Marinara Sauce for dipping.
Notes
Nutrition




Also - how big is this?
Can I make the dough the day before, let it rise room temp, then put it in the fridge overnight without shaping. And then In the evening shape and bake ?
I would shape the dough and then put it in the fridge. When you're ready to bake, take the dough out of the fridge and allow it to come to room temperature before you bake it 🙂
Would you say there's a minimum and/or maximum amount of time you can leave it in the fridge? I plan on taking it to a lunch party so will shape it the evening before and just want to make sure it doesn't sit for too long (or too little) in the fridge overnight. Thank you!
I wouldn't leave it more than 24 hours 🙂
Hi Kate, this looks like an exciting recipe, I am looking forward to it!
What would be your suggested timeline for a lunch? We are having Christmas lunch at 1pm and I am struggling to figure out the best timeline. My starter typically takes 4-6 hours to rise before using for a recipe. While waiting for the rolls to proof on a tray, should the towel that covers them be damp? How long does it typically take for the balls to be come nice and fluffy? ( I know every temp / kitchen is different) just curious about rough estimate.
Hi Ana - I know you're going to love these! You could follow the same timeline as my sourdough dinner rolls, adjusting as you need to for start time 🙂 Yes, it's better if the towel is damp. You could also lightly oil some press and seal and lay this over them as an alternative. They will take a while to proof. At least 2 to 3 hours 🙂 Merry Christmas, I hope you enjoy eating these xo
Used this recipe to make the Christmas tree bread that’s layered and twisted So excited to see how it bakes n the morning