Sourdough Country Loaf Recipe
This post may contain affiliate links.
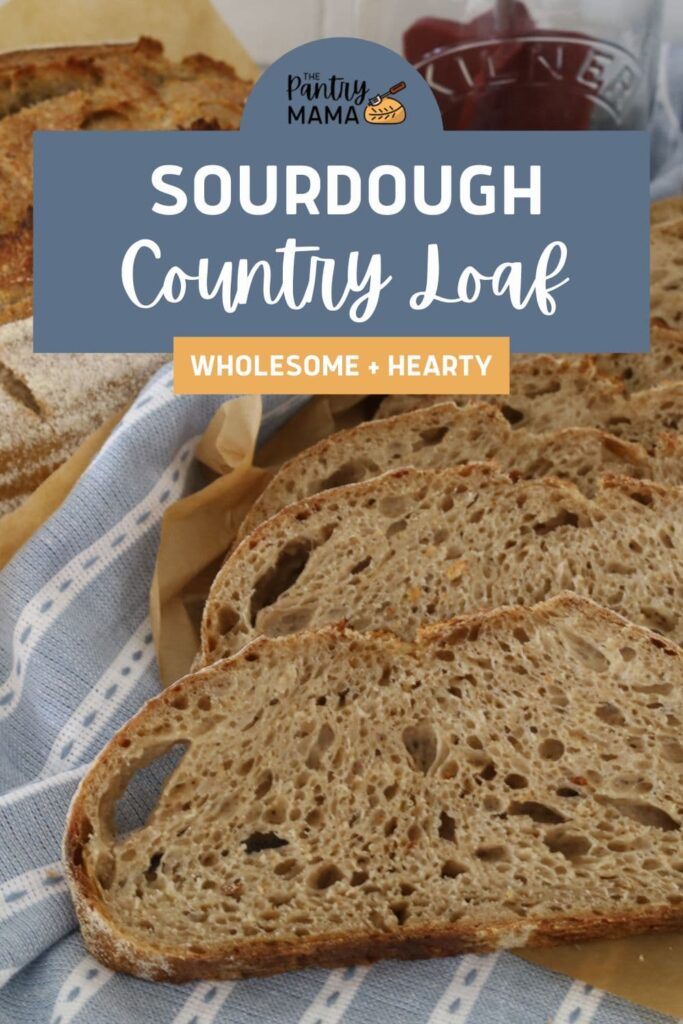
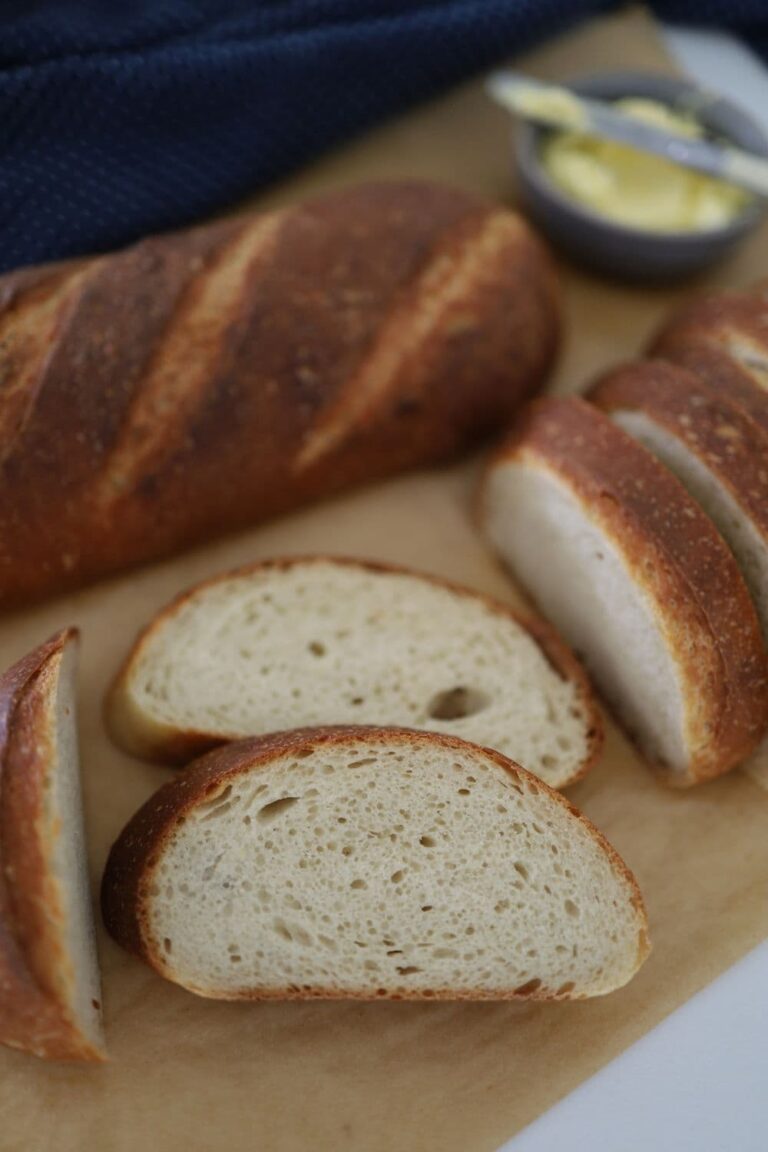
This sourdough country loaf uses just 3 ingredients to create a delicious rustic country style loaf with a gorgeous open crumb and crispy crust.
A combination of bread flour and whole wheat flour creates a rustic coloring, with a slight nuttiness that sits perfectly alongside the sourdough tang. You'll enjoy the flavor this country sourdough brings to your table.
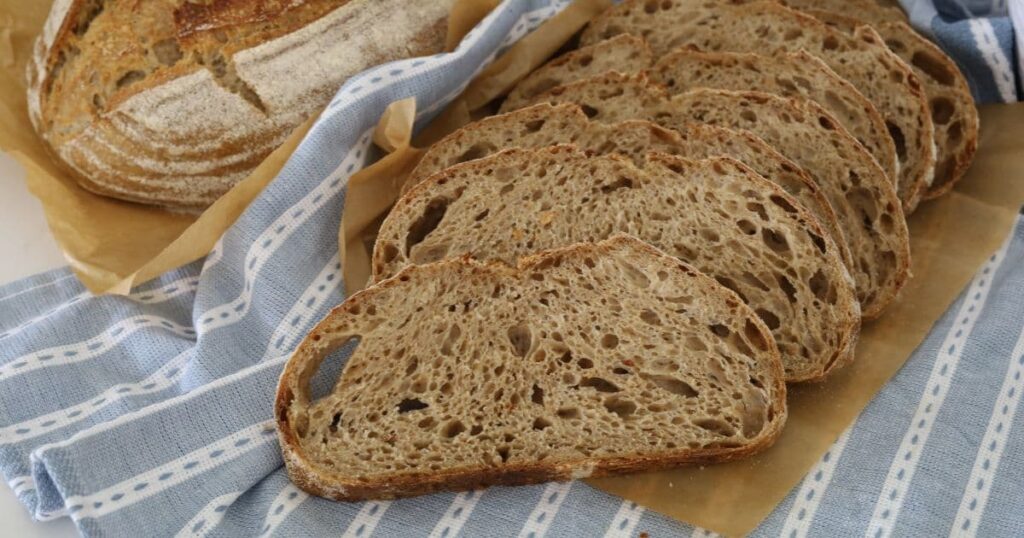
If you love this sourdough country loaf, you might also enjoy making this hearty sourdough rye bread, sourdough in a loaf pan or this rustic no knead sourdough loaf. This sourdough brown bread is also delicious!
What Is A Country Loaf?
A country loaf can mean many things. You can translate the French "Pain De Campagne" as a Country Loaf. It generally refers to a loaf of sourdough with a thick, chewy crust and moderately open crumb.
Country loaves almost always contain some whole wheat flour, although the ratio of bread flour to whole wheat flour is really up to the baker. If you're a serious home baker, you may want to push the whole wheat flour ratio, whereas if you're a beginner, I recommend sticking to the ratio given in the recipe below.
The sourdough starter used to raise a country loaf brings a tanginess which aligns well with the complex nuttiness of the whole wheat flour. This flavor combination is often said to create the perfect loaf of sourdough bread.
What Equipment Do I Need For This Recipe?
It's definitely possible to make this country loaf, or in fact any sourdough loaf, without specialised equipment, however there are a few things that will help you to have a more successful bake.
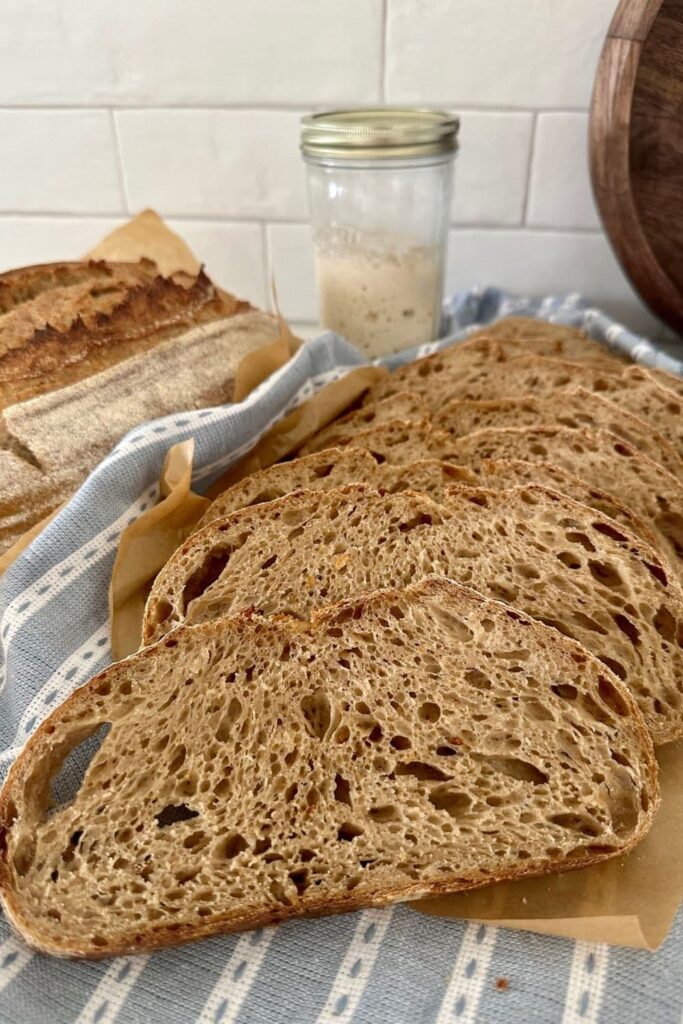
- Sourdough Starter - a strong, active sourdough starter is a must for baking this loaf. You can find instructions for making a sourdough starter here.
- Kitchen Scale - a good baking scale is essential in sourdough baking. It's much more accurate than baking with volume and will ensure you are setting yourself up for success.
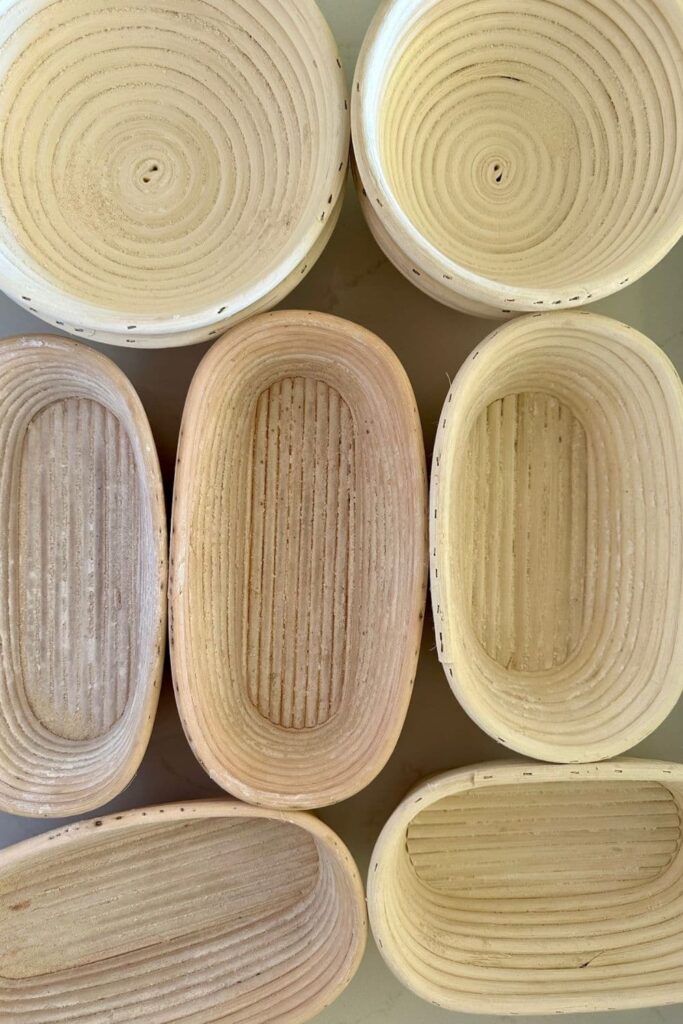
- Banneton - I highly recommend using a purpose made banneton for your sourdough bread, but if you don't have one, you can find out about banneton alternatives here.
- Dutch Oven - while you can bake sourdough bread without a Dutch Oven, you'll find you get more consistent results with a good Dutch Oven. You can find the best Dutch Oven for sourdough bread here.
Sourdough Resources
If you are just starting out on your sourdough journey, you might find these sourdough resources helpful in navigating the sourdough leaning curve:
- Beginner's Guide to Sourdough Bread
- Autolyse vs Fermentolyse - which one should you use?
- Sourdough Glossary
How To Make Sourdough Country Loaf Bread
This sourdough country loaf is fairly easy to make. It does use 20% whole wheat flour, however this is a fairly small amount, which is blended with 80% bread flour (100g +400g). This gives you a fairly workable dough which you shouldn't have too much trouble with.
So let's get mixing!
Autolyse - Premixing The Dough
Weigh out your sourdough starter and water into a large bowl.
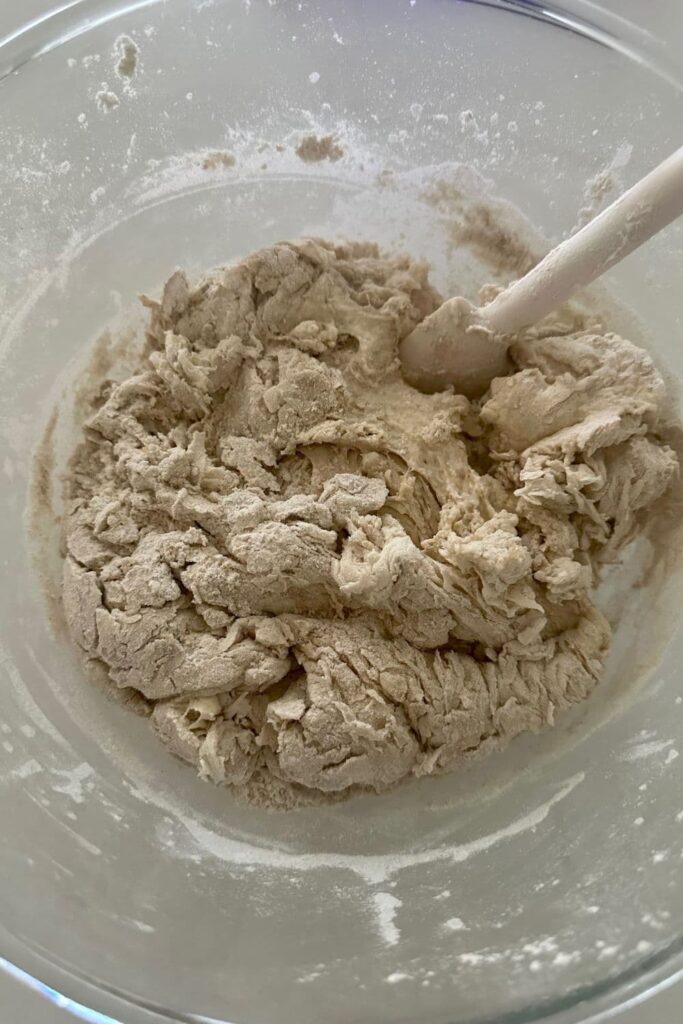
Mix the water and starter together briefly. Then add your whole wheat flour, bread flour and salt and mix whole lot together to form a shaggy dough. You could use warm water if you want to speed things up a little, but cold water is also fine.
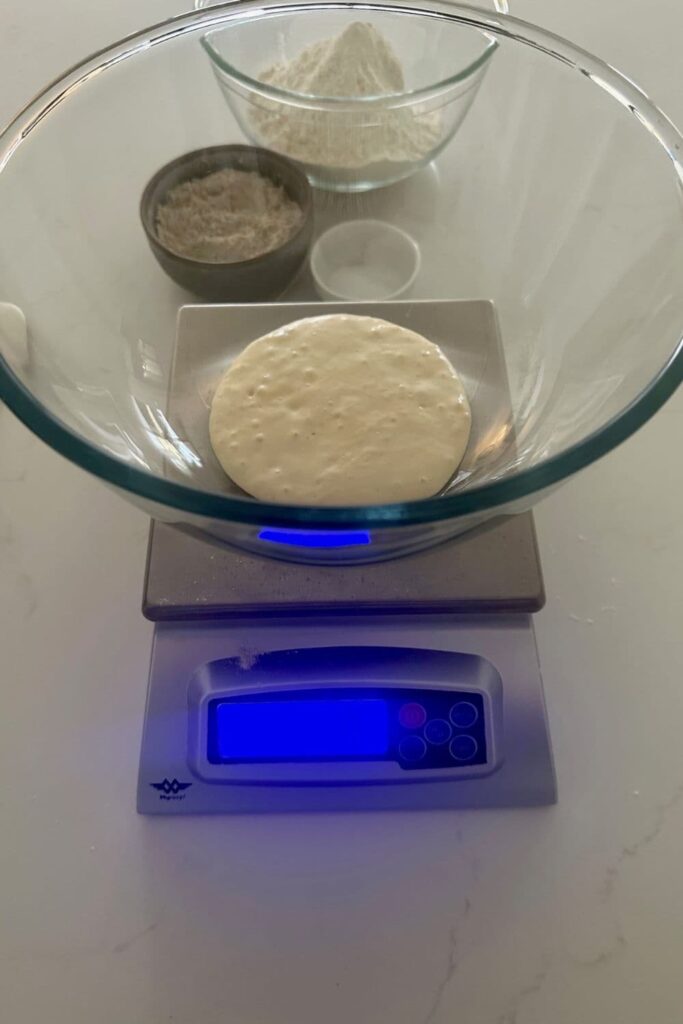
The dough will be fairly shaggy and only just brought together.
Cover your bowl with an elastic food cover or plastic wrap and let it sit for around 1 to 2 hours. It's ok if autolyse time is a little longer because the whole grain flour takes longer to become hydrated.
This process is called the "autolyse" and allows your flour to soak in all the water and become hydrated.
Forming Up The Dough
After the dough has been through autolyse you need to bring it together into a ball. Work your way around the bowl, grabbing the dough from the outside, stretching it up and over itself, into the centre, until a smooth ball is formed.
You shouldn't need more than about 20-25 stretches to form the ball.
You'll notice that the dough is fully hydrated after soaking all the water up. It will be fairly sticky but as you bring it into a ball, it will become smoother and shinier.
Once the dough has formed into a smooth ball, pop the cover back on and let it rest for 30 minutes.
Stretch & Fold - Creating Structure
Over the next few hours you need to create some structure for your dough by "stretching and folding".
Aim to do around 4-6 sets series of stretch and folds.
For each set, stretch the dough up and over itself 4 times. Leave around 15 minutes in between each set. Again you do not have to be exact with time, but you need to do at least 4 sets over 2 hours.
You can find more information on stretch and fold technique here. If you prefer to use coil folds or other gluten development techniques that's fine too.
Bulk Fermentation
Once you've finished your stretch and folds, cover the dough with a plastic cover and set it on the counter to double (so you want a volume increase of 100%).
The time this takes depends on the strength of your starter and the temperature of your kitchen. This is sometimes referred to as the first rise, but this can be misleading given that you actually don't have a second rise (if you want more information on this, you can read bulk ferment vs cold ferment for further clarification).
I have created a sample timeline below to help you navigate this. You might also find these cambro containers helpful for more accurate bulk fermentation.
Shaping The Dough
Once your dough has finished its bulk ferment, it's time to shape it into either a boule or a batard.
You'll need to flour your counter top with rice flour for this (we use rice flour because it has no gluten, however in the photos in this article I have actually used semolina). Try to be quite sparing with the rice flour, you only need a very light dusting.
Use a dough scraper to gently ease the dough out of the bowl (your hands work just fine if you don't have one). You want it to land upside down on your counter so that the smooth top of the dough is on the countertop and the sticky underside is facing up. This will make it easier to shape.
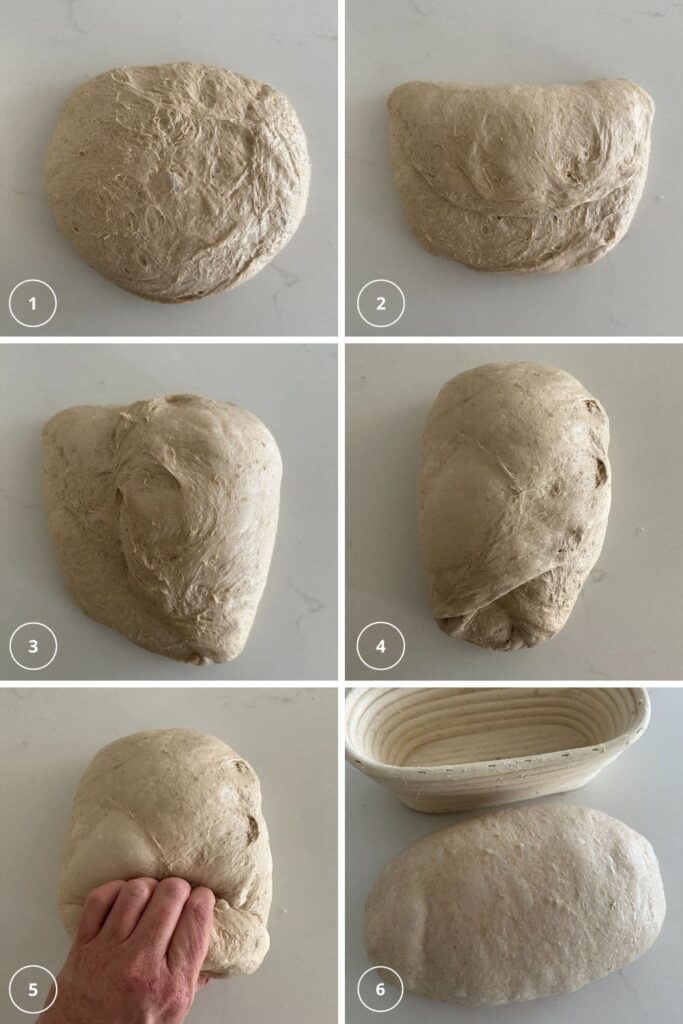
You want to pull the edges of the dough into the centre and then flip it over so that the sticky side is now underneath. Using the stickiness, gently pull the dough into a tight ball (you can see how I've shaped the batard below or you can watch the batard shaping video here).
You will need a proofing basket or container to put your dough into. You can find more notes on what to use as a banneton here.
Whatever you're using needs to be liberally floured with your rice flour (or semolina).
Placing Into A Proofing Container
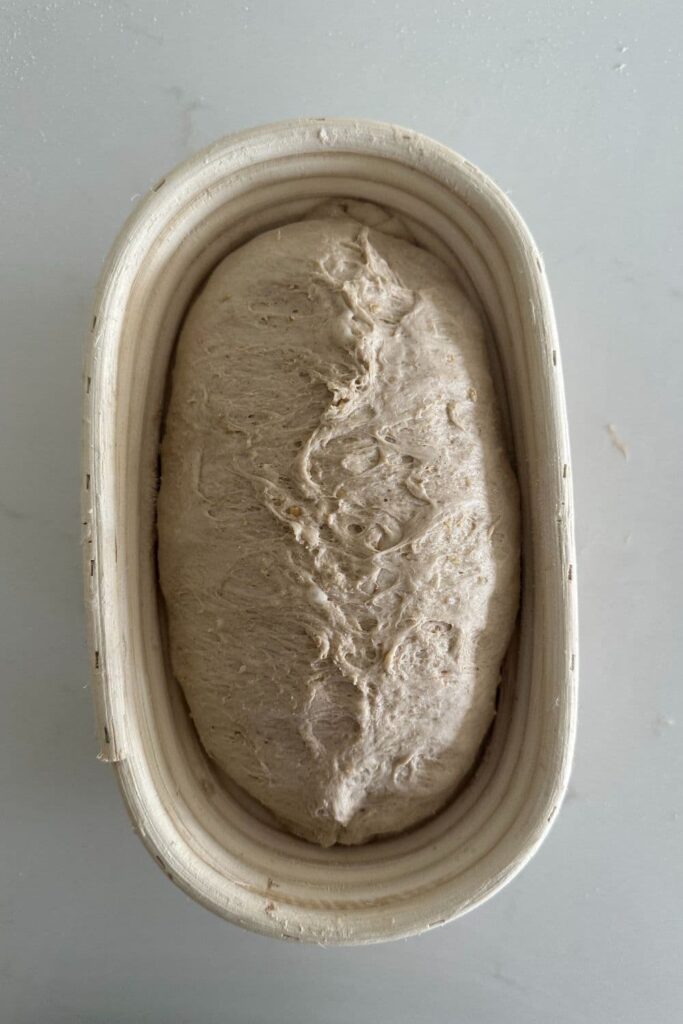
Now place your shaped dough into your proofing basket or container smooth side down, so your seam is on the top. You might find it easier to use a bench scraper for this step.
If you're using a cloth or tea towel in a bowl it's ok to put your dough with the smooth side up. Just make sure the dough is tight.
Lift your dough around the edges to pop a little more rice flour if you feel it needs it. Just try to handle the dough as little as possible and be really gentle as you really want to preserve all the gases and air bubbles that have formed during your bulk ferment.
Cold Ferment
Now the dough is in its "shaping container" cover it loosely with a plastic bag and place into the fridge.
I use a large plastic bag to cover it - I just reuse it each time.
Try to leave it in the fridge for a minimum 5 hours - but you can leave it for up to 36 hours for maximum sour flavor if you prefer.
Preparing to Bake
Once you're ready to bake your sourdough, you'll need to preheat your oven to 230C/450F.
Place your Dutch Oven into the oven when you turn it on so it gets hot.
Leave your dough in the fridge until the very last minute - placing a cold dough into a hot oven will give you a great "oven spring".
When your oven is at temperature, take your sourdough out of the fridge. Gently flip it onto a piece of parchment paper or silicone sling if using so that the seam is now on the bottom.
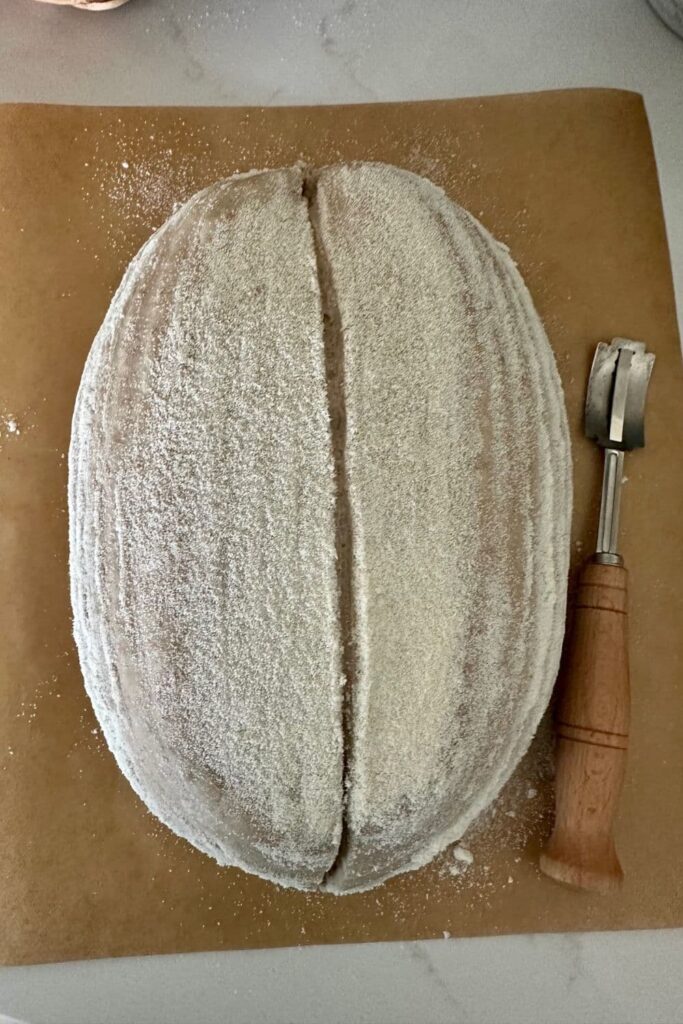
Gently score your bread with a clean razor blade or knife. At minimum a large cross is sufficient, but you can get as artistic as you like. You can find my full guide on how to score sourdough bread here.
Carefully take your dutch oven out of the oven. Place the sourdough into the preheated Dutch Oven using the silicone sling or parchment paper as a handle.
Put the lid on and place into the hot oven.
If you want to you can spritz your dough with extra water before you put the lid on.
BAKE TIME:
30 Minutes with the lid on at 230C/450F plus
10-15 Minutes with the lid off at 210C/410F
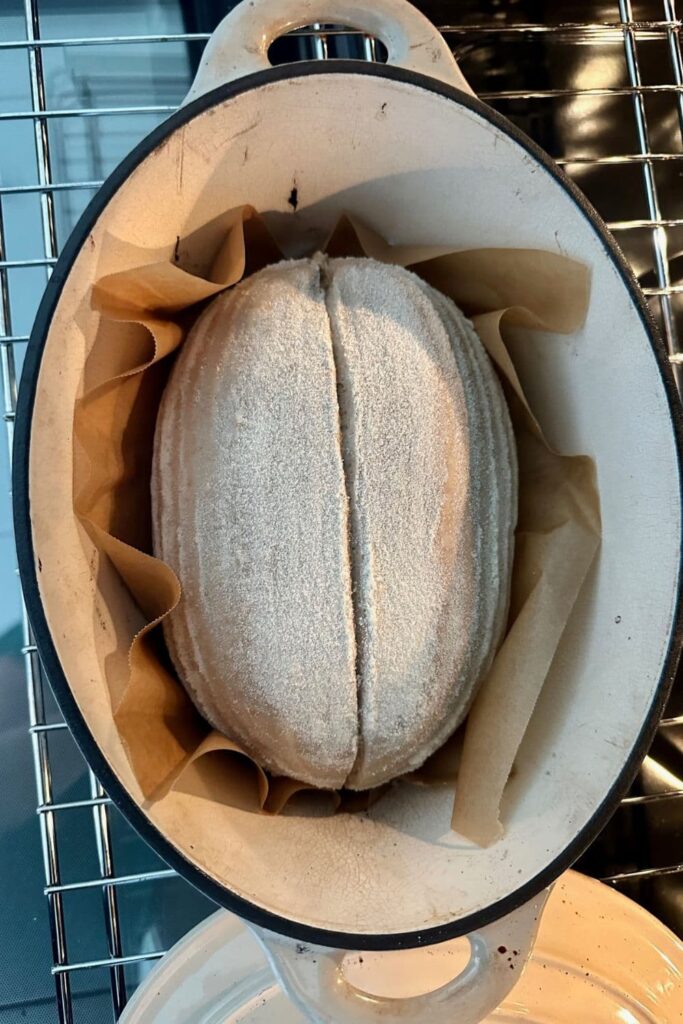
Finishing The Bake
When you remove your dough from the oven, carefully remove it from the oven as soon as possible and place on a wire rack to cool.
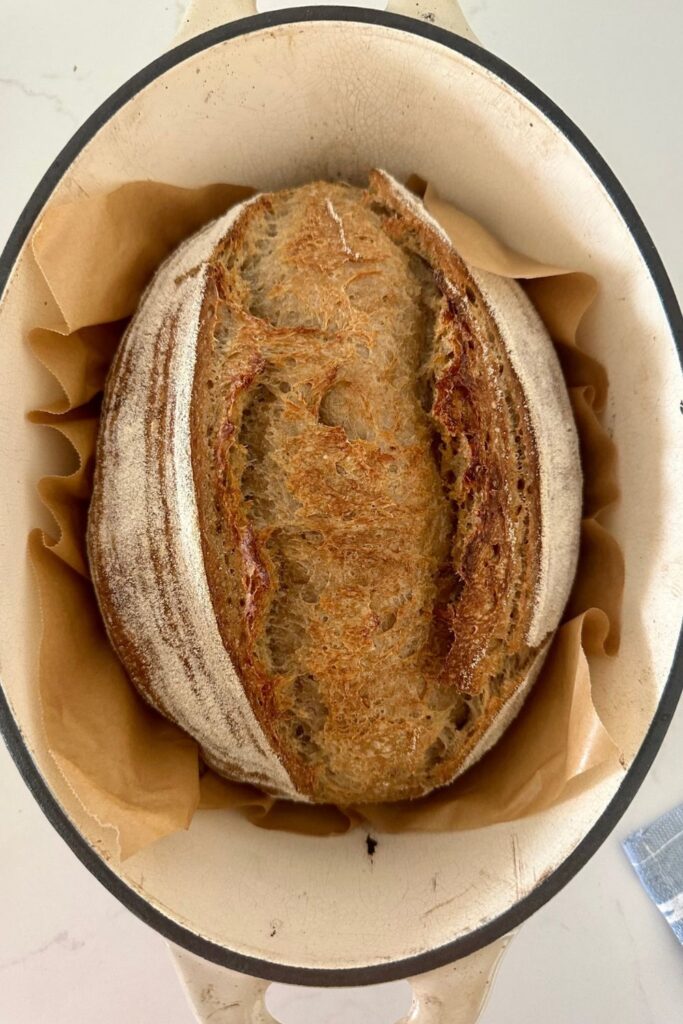
Baker's Timeline for Sourdough Country Loaf Recipe
This is the rough timeline I use when making this sourdough country loaf recipe. You could adapt this timeline to suit your own situation. You might also find this article on creating a sourdough baking timeline helpful in adapting it.
Day 1
7am - Feed your sourdough starter (I do 1:1:1 because I want to use it today).
10am - Mix the dough, knead and allow to rise (bulk fermentation).
6pm - Shape the dough, place into banneton and then into the fridge for cold fermentation.
Day 2
7am - Bake sourdough country loaf.
Sourdough Country Loaf
Equipment
- Basic Kitchen Scale (grab them for as little as $10 here)
- Mixing Bowl
- Dutch Oven
Ingredients
- 400 g Bread Flour
- 100 g Whole Wheat Flour
- 370 g Water (plus extra 30g if necessary)
- 100 g Sourdough Starter (Fed and Bubbly)
- 10 g Salt (increase or decrease according to your taste)
Instructions
- Autolyse - Premixing The DoughWeigh out your sourdough starter and water into a large mixing bowlMix the water and starter together briefly. Then add your flour and salt and mix whole lot together to form a shaggy dough. The dough will be fairly shaggy and only just brought together.Cover your bowl with an elastic food cover or plastic wrap and let it sit for around 1 hour. It's ok if it's a little bit longer, it's not going to matter too much.This process is called the "autolyse" and allows your flour to soak in all the water and become hydrated.
- Forming Up The DoughAfter the dough has been through autolyse you need to bring it together into a ball. Work your way around the bowl, grabbing the dough from the outside, stretching it up and over itself, into the centre, until a smooth ball is formed. You shouldn't need more than about 20-25 stretches to form the ball.You'll notice that the dough is fully hydrated after soaking all the water up. It will be fairly sticky but as you bring it into a ball, it will become smoother and shinier.Once the dough has formed into a smooth ball, pop the cover back on and let it rest for 30 minutes.
- Stretch & Fold - Creating StructureOver the next few hours you need to create some structure for your dough by "stretching and folding". Aim to do around 4-6 sets of stretches and folds. For each set, stretch the dough up and over itself 4 times. Leave around 15 minutes in between each set. Again you do not have to be exact with time, but you need to do at least 4 sets over 2 hours.
- Bulk FermentOnce you've finished your stretch and folds, cover the dough with a plastic cover and set it on the counter to double. The time this takes depends on the strength of your starter and the temperature of your kitchen. I have created a sample timeline above to help you navigate this.
- Shaping The DoughOnce your dough has finished its bulk ferment, it's time to shape it into either a boule or a batard. You'll need to flour your counter top with rice flour for this (we use rice flour because it has no gluten, however in the photos in this article I have actually used semolina). Try to be quite sparing with the rice flour, you only need a very light dusting.Use a dough scraper to gently ease the dough out of the bowl (your hands work just fine if you don't have one). You want it to land upside down on your counter so that the smooth top of the dough is on the countertop and the sticky underside is facing up. This will make it easier to shape.You want to pull the edges of the dough into the centre and then flip it over so that the sticky side is now underneath. Using the stickiness, gently pull the dough into a tight ball.You will need a proofing basket or container to put your dough into. You can find more notes on what to use as a banneton here.Whatever you're using needs to be liberally floured with your rice flour (or semolina).
- Placing Into A Proofing ContainerOnce the dough is shaped, place it into your proofing basket or container smooth side down, so your seam is on the top.If you're using a cloth or tea towel in a bowl it's ok to put your dough with the smooth side up. Just make sure the dough is tight.Lift your dough around the edges to pop a little more rice flour if you feel it needs it. Just try to handle the dough as little as possible and be really gentle as you really want to preserve all the gases and air bubbles that have formed during your bulk ferment.
- Cold FermentNow the dough is in its "shaping container" cover it loosely with a plastic bag and place into the fridge. I use a large plastic bag to cover it - I just reuse it each time. Try to leave it in the fridge for a minimum 5 hours - but you can leave it for up to 36 hours for maximum sour flavor if you prefer.
- Preparing to BakeOnce you're ready to bake your sourdough, you'll need to preheat your oven to 230C/450F. Place your Dutch Oven into the oven when you turn it on so it gets hot. Try to preheat for around 1 hour to ensure your oven is super hot - but you know your oven so just adjust this time if you need to.Leave your dough in the fridge until the very last minute - placing a cold dough into a hot oven will give you a great "spring".When your oven is at temperature, take your sourdough out of the fridge. Gently flip it onto a piece of parchment paper or silicone sling if using so that the seam is now on the bottom.Gently score your bread with a clean razor blade or knife. At minimum a large cross is sufficient, but you can get as artistic as you like. You can find my full guide on how to score sourdough bread here.Carefully take your dutch oven out of the oven. Place the sourdough into the pot using the silicone sling or parchment paper as a handle. Put the lid on and place into the hot oven. If you want to you can spritz your dough with extra water before you put the lid on.BAKE TIME:30 Minutes with the lid on at 230C/450F plus10-15 Minutes with the lid off at 210C/410F
- Finishing The BakeWhen you remove your dough from the oven, carefully remove it from the oven as soon as possible and place on a wire rack to cool.
Notes
- Notes on Flour: This recipe is written using strong Bread Flour. Bread flour has a higher protein content than All Purpose flour. If you choose to use All Purpose flour you may have a different result because of this. You can read more about the differences between All Purpose Flour and Bread Flour here.
- Notes on Sourdough Starter: This recipe is based on you having an active starter that you have fed a few hours before starting your bake. For info on how to make a sourdough starter, go here.
- Notes on Stretch & Folds: If you are going to do the stretch & folds on your bench top, spray your surface with water mist rather than using flour. You can leave the dough in the bowl if you want to. Wet your hands to stop the dough sticking - although it shouldn't be too sticky. It will get less sticky as you do your stretches and folds. For more information on how to do stretch and folds, go here.
- Notes on Bulk Fermentation: If your home is warm then your dough will ferment a lot faster and could be done in as little as a few hours. If it's colder, it will take longer. I recommend using this overnight sourdough bread recipe in cooler temperatures, as if it's too warm the dough will over ferment while you're sleeping and you'll wake up to a bowl of soupy dough!
You will know your dough is ready to move to the next stage when it has *just* doubled in size. It will be fairly wobbly and full of bubbles. You should be able to see large air bubbles under the surface of the dough.
You don't want to let it go any further than doubled as it will be over fermented.
If you want to do an overnight ferment, but your home is warm, consider using a little less starter (ie 25g).
Less starter means your dough will take longer to ferment and you will reduce the risk of over fermenting your dough. You'll find more information on these topics here:
When is my bulk ferment finished? What is the difference between cold ferment and bulk ferment? Why does the amount of starter matter?
- Notes on Baking: If you're worried about the base of your bread burning, place a baking sheet on shelf underneath your Dutch Oven - it works! If you're worried about your bread not being cooked all the way through, turn the oven off and place your dough straight onto the oven rack. Leave the door ajar and let your bread rest there for a few hours. Make sure you don't close the door or your sourdough will sweat and you'll get a wrinkly, soggy crust. Remember not to cut into your loaf too soon - you'll need to let it cool for at least a few hours (4-6 is best).
Nutrition




I'm wondering if you can bake this country loaf in a loaf pan? Thank you.
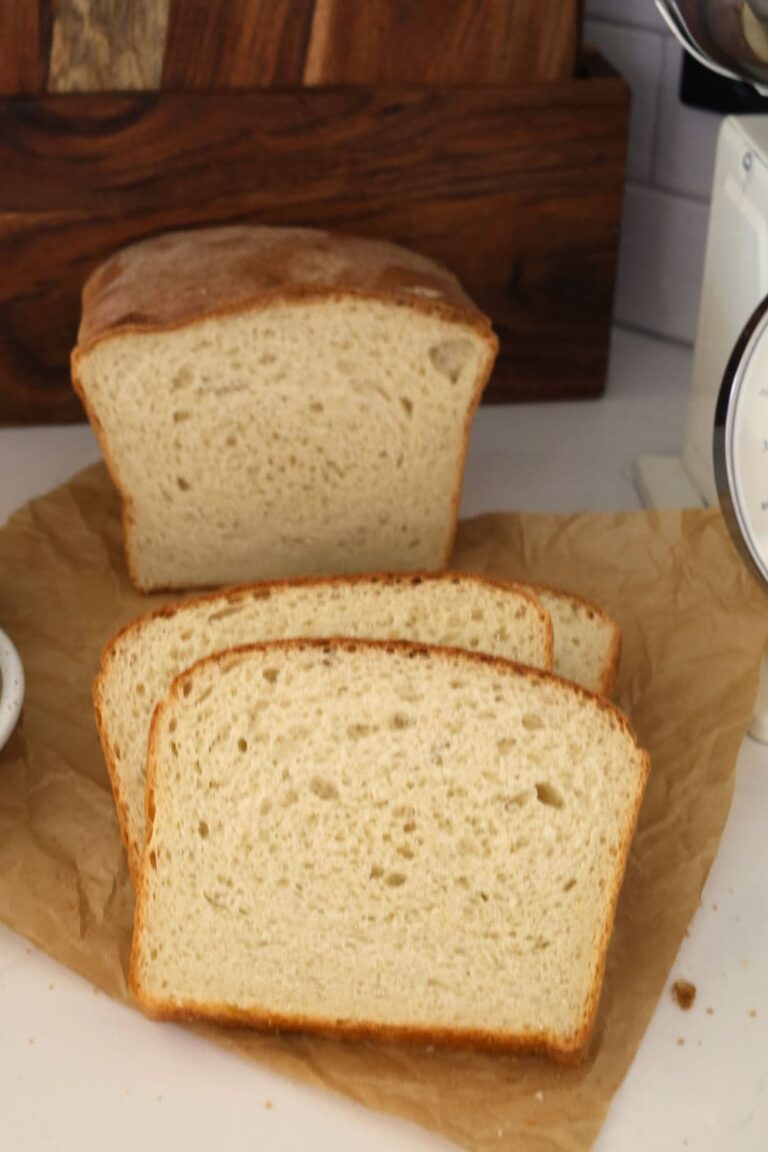
You absolutely can bake this sourdough country loaf in a pan. Once you've shaped it, pop it in a loaf pan and then allow it to proof in the pan before you bake it 🙂
But what size pan?
Hi! I was wondering if with a higher hydration, some vital wheat gluten, and longer fermentation period I could make this dough fully whole wheat?
Yes you could definitely do that - you would definitely need to increase the hydration though yes.
hi! Was just wondering why you used double the amount of starter (100g) in this recipe in comparison to 50 g with the all white flour recipe? I didn't notice it in the beginning so I used 50 g instead. 🙁
Increasing the amount of starter shortens the bulk fermentation time and also tempers the flavor of the loaf. I prefer using 100g of starter for this loaf, but you can use 50g if you prefer. This article explains about how the amount of sourdough starter affects the recipe.
I have whole wheat bread flour and unbleached white AP flour in my cupboard. What ratio/amounts would you suggest I use to make this recipe work for me and what I have on hand?
I cut down 10g of water on is recipe hope it's ok?
My loafe is to air and soft on crust, could it be to much water?
Thanks for your recipes, they’ve all been turning out great! Could you sub whole wheat einkorn in this bread?
This is the best sourdough loaf I have made so far. Great recipe and instructions!