This post contains affiliate links. Please see our disclosure policy.

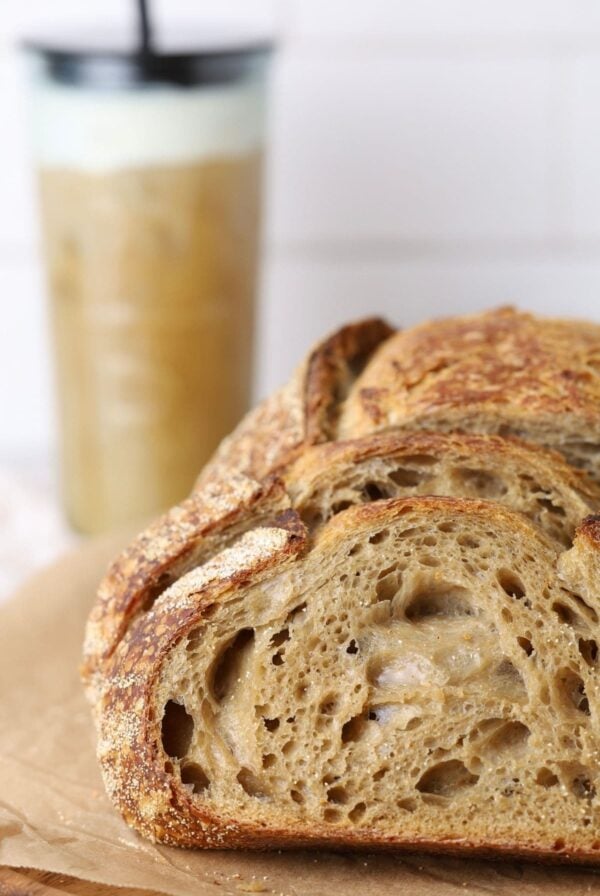
Sourdough croissant bread is literally a loaf of sourdough that has had a block of butter grated into it during the stretch and folds. It doesn’t have any lamination or butter blocks, so it really doesn’t deserve the name “croissant”. However, once baked, it does have a deliciously flakey and golden crust which is reminiscent of a croissant.
This sourdough croissant loaf recipe is easy enough to be tackled by a beginner sourdough baker. If you are a little further along in your sourdough journey, you can increase the amount of butter you use to increase the challenge a little! I’ve written notes on changing the amount of butter you use further down, just in case you need some guidance.
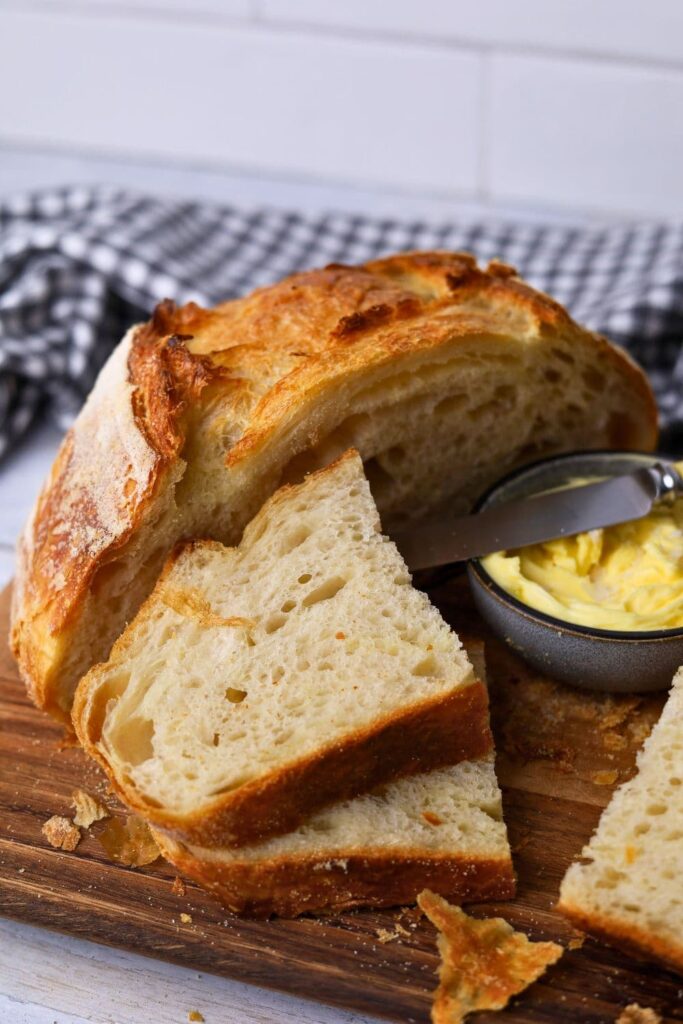
Table of Contents
- Why You’ll Love This Recipe!
- Ingredients
- How to Make Sourdough Croissant Bread
- Baker’s Timeline
- Adjust the Amount of Butter
- Recipe Tips + Troubleshooting
- Stretch and Fold or Lamination?
- Why Does This Recipe Work?
- Recipe Variations
- Fun With Flavors
- How To Store + Freeze
- Helpful Sourdough Resources
- Frequently Asked Questions
- Sourdough Croissant Bread Recipe
Why You’ll Love This Recipe!
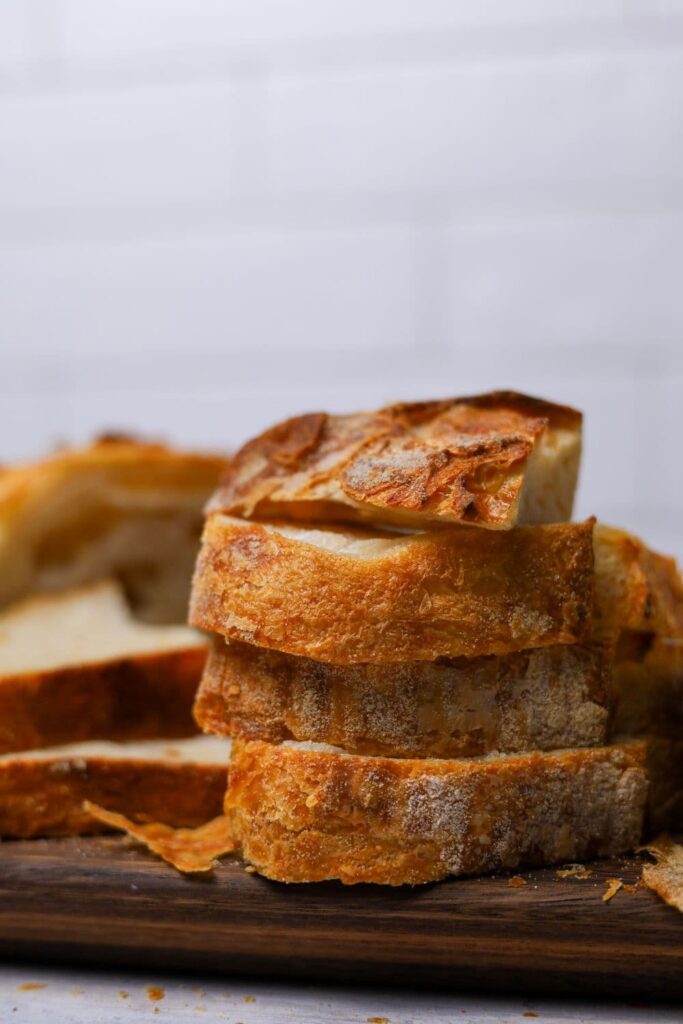
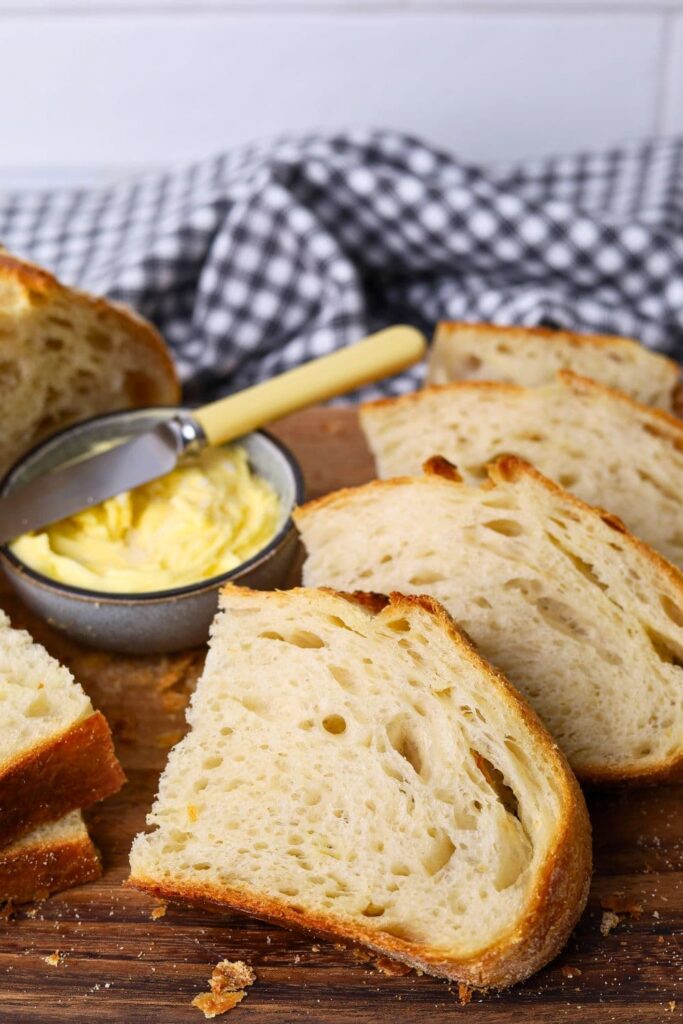
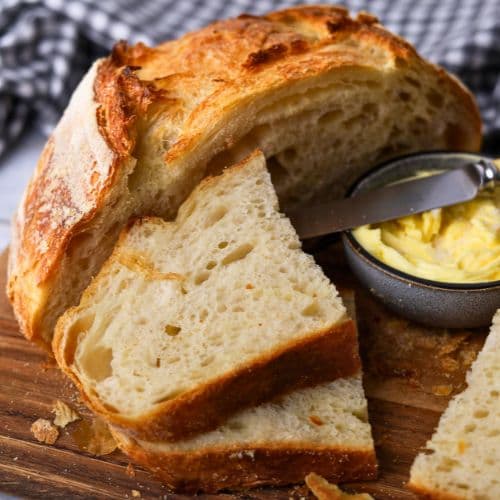
Flakey, Golden Crust – The grated butter gives this loaf of sourdough bread a golden, flakey crust that is just out of this world delicious! Just wait til you try it!
Adjust the Amount of Butter – Depending on your taste and skill level, you can adjust the amount of butter you use to ensure you never end up with a greasy, gummy mess!
Stays Softer Longer – While this loaf has a flakey, crunchy crust, the crumb is soft and tender and kissed all over by the butter. The fat in the butter actually creates a crumb that stays soft for a number of days, giving this loaf a longer shelf life.
Ingredients
- Sourdough Starter – a bubbly, active and recently fed sourdough starter is necessary for this recipe. I recommend using 100g of starter for this recipe.
- Water – I generally recommend 350g of water, but you can adjust the hydration of this loaf to suit your needs.
- Bread Flour – You definitely need bread flour for this recipe, do not use all purpose flour, unless you’re proficient in reducing the hydration.
- Salt – I’ve used 10g, you can reduce this depending on your taste.
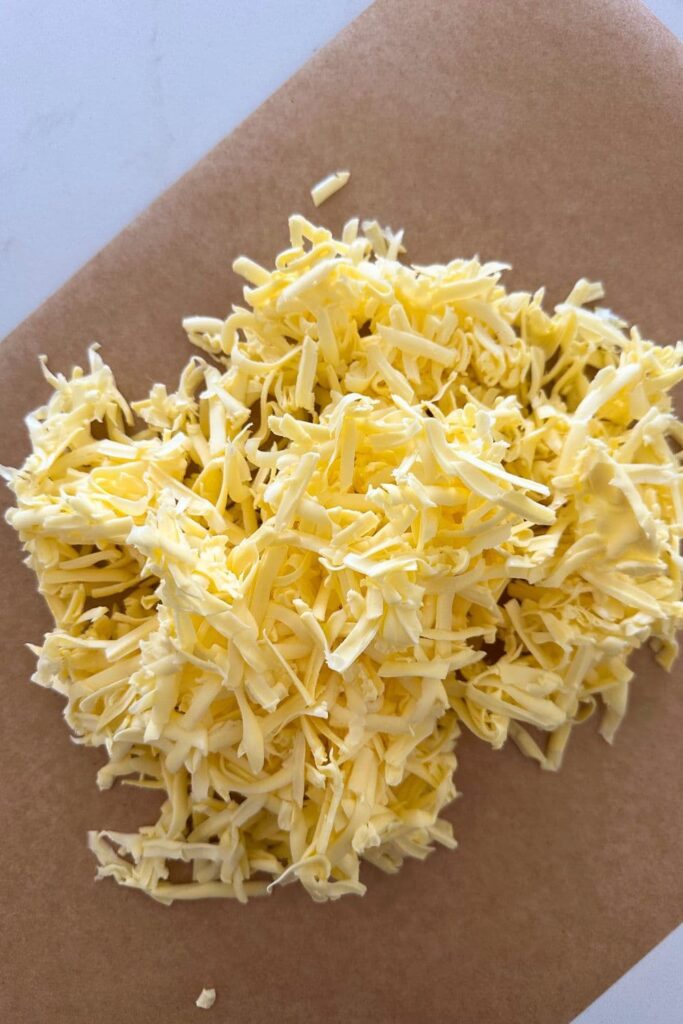
- Butter – you’ll need very cold, grated butter to create this sourdough croissant loaf. I’ve also added notes further down on how to adjust the amount of butter depending on your skill level. I’ve used salted butter, but you can use unsalted if you prefer.

How to Make Sourdough Croissant Bread
This golden crusted sourdough croissant bread is essentially simple to put together, as long as you keep things cool. That really is the most important thing for this recipe. Keeping the butter cool enough so it doesn’t get too greasy and make a big mess of your dough! This is one loaf of sourdough I don’t mind making with the air conditioning on.
Pre Mix & Autolyse
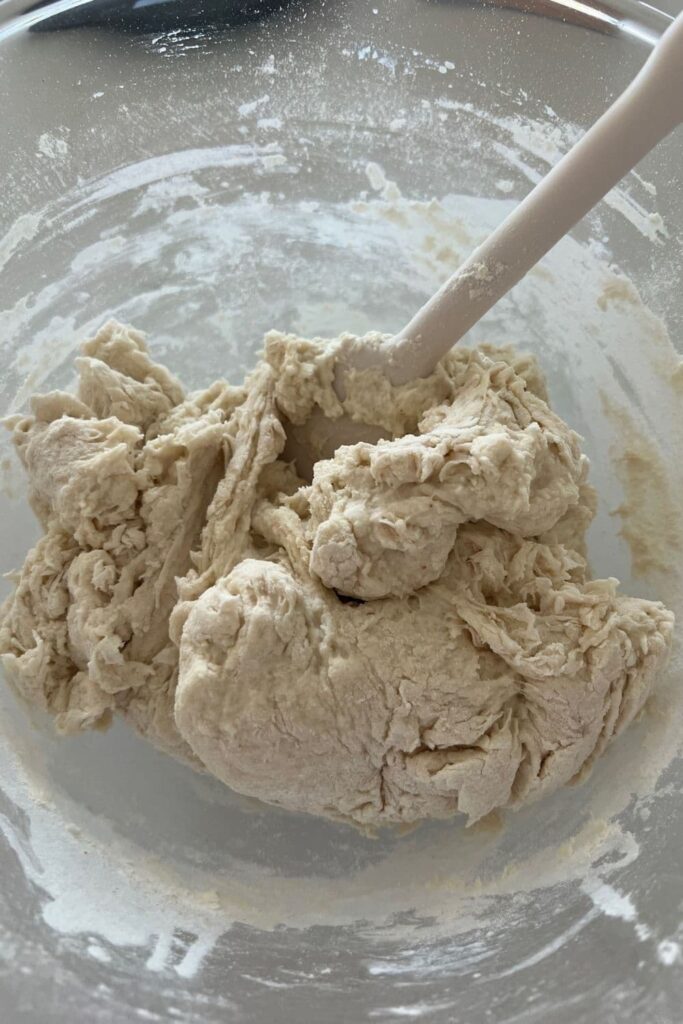
Weigh out your starter and water in a glass or ceramic bowl. Mix them together and then add your flour and salt. Bring it altogether into a shaggy dough. Cover your bowl with cling film or a damp tea towel and let it sit for around 1 hour.
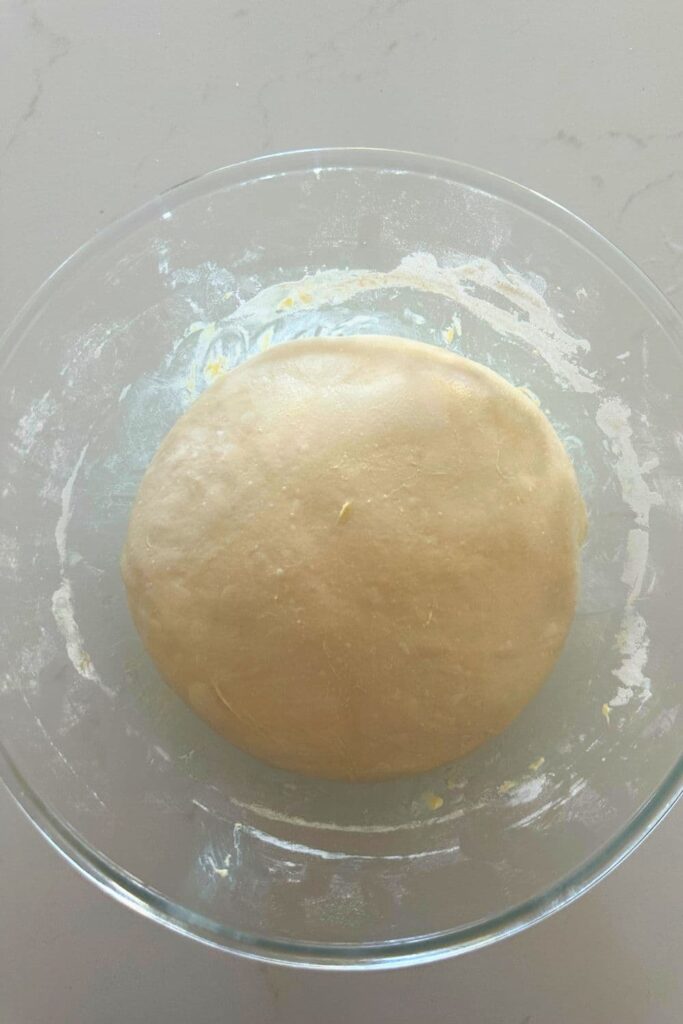
Forming Up Your Dough
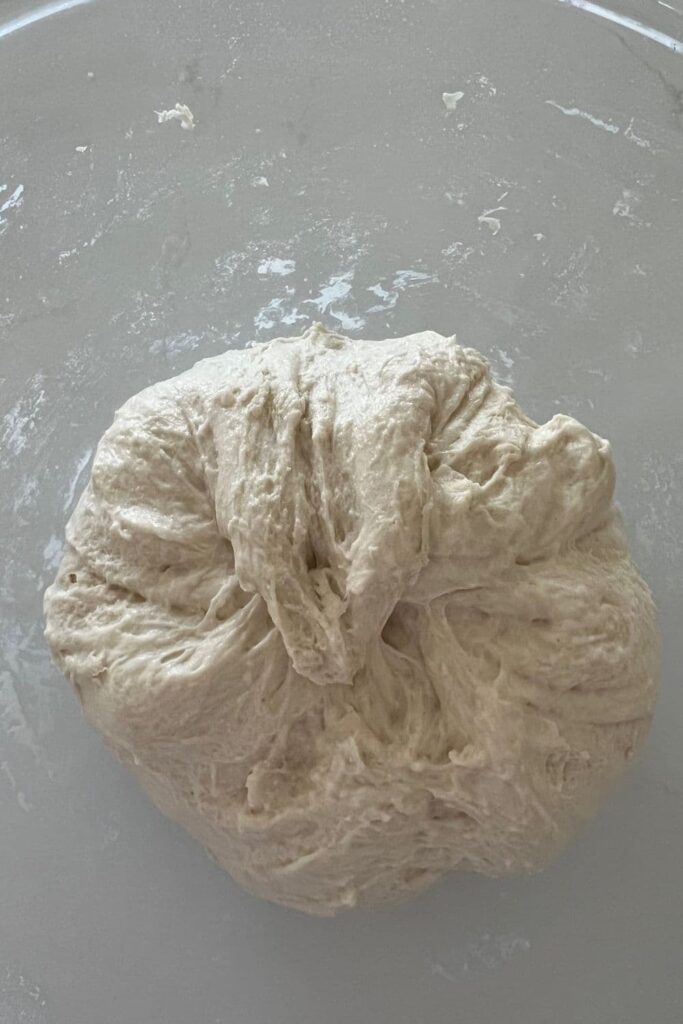
Work your way around the bowl, grabbing the dough from the outside, stretching it up and over itself until a smooth ball is formed. You shouldn’t need more than about 20-25 folds to form the ball. Once the dough has formed into a smooth ball, pop the cling film back on and let it rest for 30 minutes.
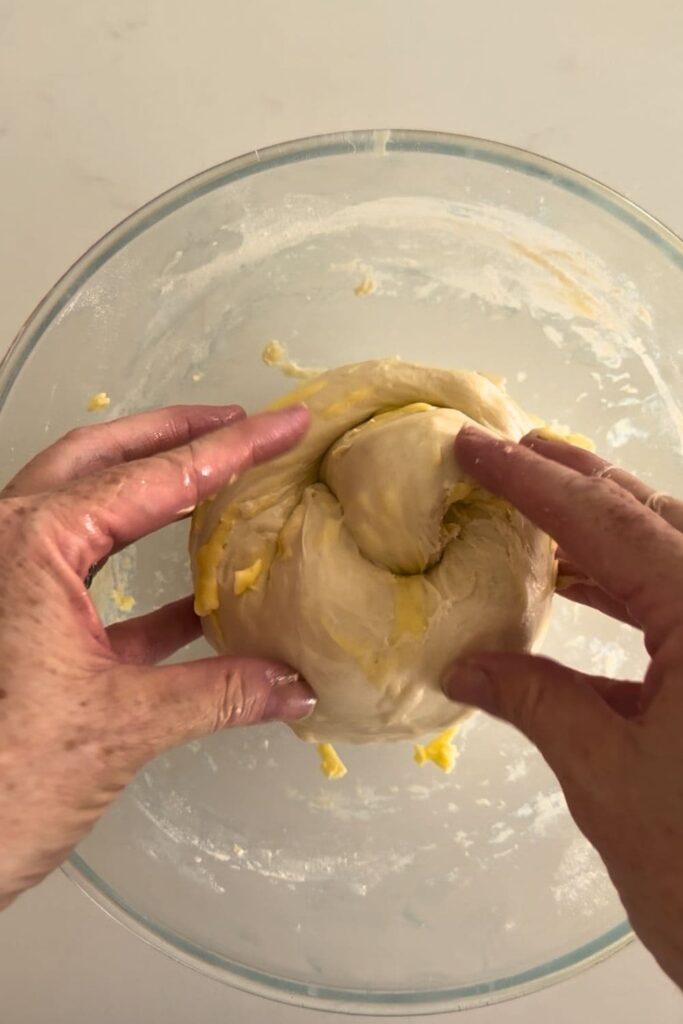
Stretch & Fold – Creating Structure
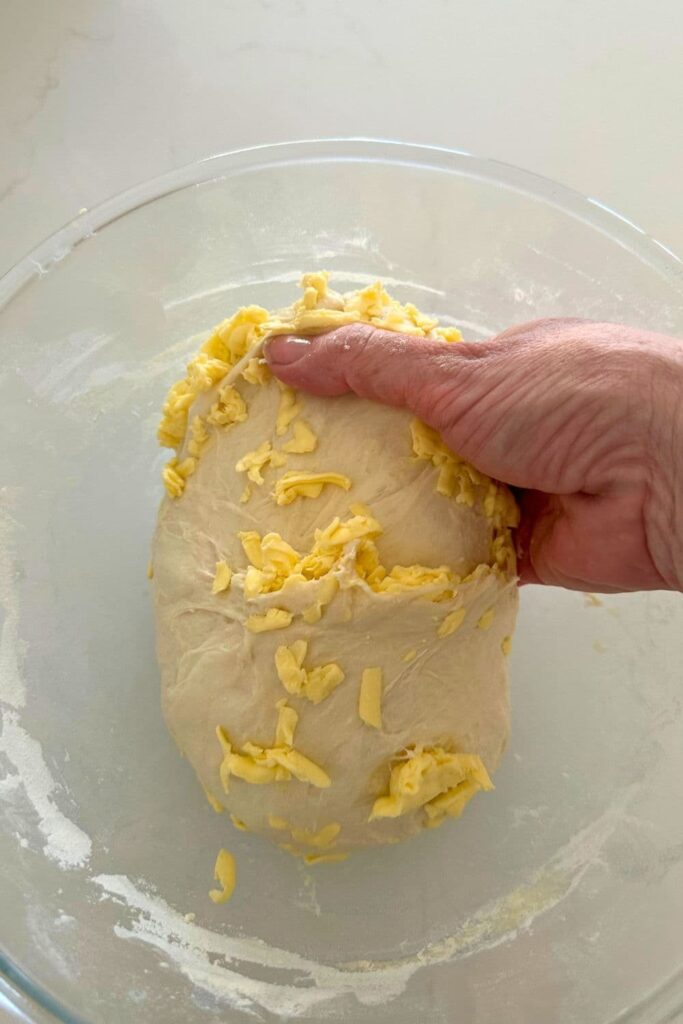
You need to add the grated butter to your dough during the stretch and fold phase. It’s very easy to do but you don’t want to let the butter melt too much during this phase.
I like to add a little of the butter at a time during the second and third stretch and folds, keeping the dough as cool as possible. Try to do around 4 sets of stretch and folds with around 15 to 30 minutes between each set.
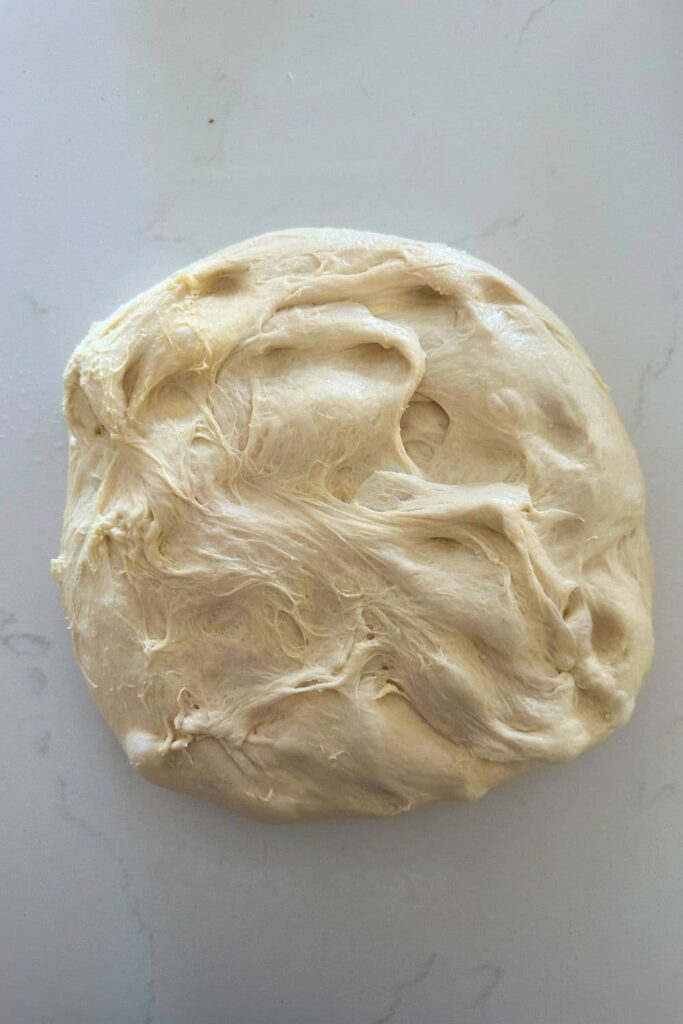
Bulk Ferment
Once you’ve finished your stretch and folds, place the cling film or damp tea towel back over your dough and let it rest and ferment at room temperature. You don’t want your dough getting too warm for this recipe as you don’t want the butter to melt and the dough to become a big greasy mess.
I don’t normally recommend it, but if you need to put your dough in the fridge for short bursts to keep the butter temperature down, that is ok.
Shaping Your Dough
Once your dough has finished its bulk ferment, it’s time to give it some shape and surface tension. I think this recipe lends itself to a batard however it’s completely up to you what shape you would like. You can see me shaping a batard here.
You can also bake this sourdough croissant loaf in a loaf pan if you prefer, it makes a delicious sandwich with a tender, soft crumb! You can find tips on baking sourdough in a loaf pan here.
Before you place your dough into your banneton, give it a good dusting of rice flour or semolina. Place your shaped dough into the banneton, seam side up.

Cold Ferment
Now your dough is in it’s “shaping container” cover it loosely with a plastic bag or damp tea towel and place into the fridge. I use a large plastic bag to cover it – I just reuse it each time.Try to leave it in the fridge for a minimum 5 hours up to a maximum of around 36 hours.
Cold fermentation really is key for the flakiness of the crust. Allowing this sourdough croissant loaf to sit in the fridge solidifies the butter and creates the flakey layers that are akin to the French croissant giving this bread its name.
Preparing to Bake Your Sourdough
Once you’re ready to bake your sourdough, you’ll need to preheat your oven to 230C/450F. Place your Dutch Oven into the oven when you turn it on so it gets hot. Try to preheat for around 1 hour to ensure your oven is super hot – but you know your oven so just adjust this time if you need to.Leave your dough in the fridge until the very last minute – placing a cold dough into a hot oven will give you a great “spring”.
Baking Your Sourdough
Now it’s time to bake! When your oven is at temperature. Take your sourdough out of the fridge. Gently place it onto a piece of baking paper. Gently score your bread with a lame, clean razor blade or knife.Carefully take your dutch oven out of the oven. Place the sourdough into the pot using the baking paper as a handle. Put the lid on and place into the hot oven.
BAKE TIME:
30 Minutes with the lid on at 230C/450F
plus10-15 Minutes with the lid off at 210C/410F
If you’re worried about the base of your bread burning, place a baking sheet on shelf underneath your Dutch Oven – it works!
When you remove your dough from the oven, carefully remove it from the dutch oven as soon as possible and place on a wire rack to cool.

Baker’s Timeline
This is a suggested timeline for making a sourdough croissant loaf using 100g of sourdough starter.
The night before – make sure you feed your sourdough starter before you go to bed so it’s ready to make bread when you get up. I recommend a 1:3:3 or 1:5:5 sourdough starter ratio when feeding.
| TIME | PROCESS |
|---|---|
| 7 am | Premix and autolyse for around an hour, forming up the dough and leaving to rest for another 30 minutes before stretch and folds. |
| 8.30 am | 1st stretch and fold |
| 9 am | 2nd stretch and fold – add half the butter |
| 9.30 am | 3rd stretch and fold – add half the butter |
| 10 am | 4th stretch and fold |
| 10.30 am | Bulk fermentation at room temperature remembering to keep the dough on the cooler side. |
| 4 pm | Shape dough into a batard, place into banneton and then into fridge for cold fermentation. Leave overnight. |
| 9 am | Wake and bake! The next morning, you can get up, make a coffee and bake your sourdough croissant loaf! |
Adjust the Amount of Butter
Depending on you skill level, or perhaps your tastes, you might like to adjust the amount of butter you use in this recipe. The temperature of your home can also be a factor here as if it’s really warm, you can end up with a big greasy mess! Here’s what I recommend:
Beginner – 350g water, 75g butter
Intermediate – 360g water, 100g butter
Advanced – 370g water, 115g butter
Of course it’s up to you as to how much butter you put in your sourdough, but this is something I have have tested over and over again. There isn’t too much difference in the end result from using 75g of butter to 115g of butter, but the handling of the dough can be very different. If you are a beginner then I definitely recommend trying less butter first!
Recipe Tips + Troubleshooting
- Using good quality butter is essential here. You don’t want cheap butter with fillers. I found that my sourdough croissant loaves work best when I use homemade butter where I’ve taken the time to squeeze as much buttermilk out as possible.
- Freeze your butter to make grating it much easier. I use an old fashioned box grater to grate my butter, but you can use a Thermomix or food processor if it’s easier for you too. I love having little parcels of pre-grated butter weighed out in the freezer. It makes creating this sourdough croissant bread or these sourdough cheddar biscuits an absolute no brainer!
- Temperature is so important with this loaf. It’s a really fine balance between enabling the loaf to bulk ferment, but not letting the butter get too warm. For this reason I don’t recommend using less than 100g of sourdough starter for this loaf as you’ll need to keep it fairly cool, so the higher amount of starter helps to keep bulk fermentation on track.
- If you find the loaf gets greasy, it means that the butter has gotten too warm so you’ll need to cool the loaf down. The best way to do this is to place it into the fridge for a short stint.
- For the best results, you’ll need to bake this loaf inside a Dutch oven to create the steamy environment it requires to perfect that golden flakey crust! Baking sourdough in a Dutch Oven is the easiest way to trap steam around your loaf.

Stretch and Fold or Lamination?
I definitely recommend adding the grated butter during the stretching and folding rather than during lamination or shaping. While testing this recipe, I tried a number of methods of adding the butter and found that adding the grated butter during stretching and folding to be the best time.
Adding the butter during the shaping process (like I have added the roasted garlic to this roasted garlic sourdough loaf) resulted in too much butter leakage during cooking and also resulted in quite a gummy crumb once baked. It was really disappointing!
You can add the butter during a lamination as long as you then give the dough time to bulk ferment afterwards and it’s not going straight into cold fermentation. So you could do a few stretch and folds, a lamination where you added the butter then allow the dough to bulk ferment and then shape.
Why Does This Recipe Work?
Have you ever wondered how croissants get their flakey layers? Basically, croissants get their signature flakey layers by having cold layers of butter (usually called butter blocks) layered repeatedly through a process called lamination. When the butter laminated dough hits the oven, the multiple layers of dough puff up and create the flakey layers we all love.
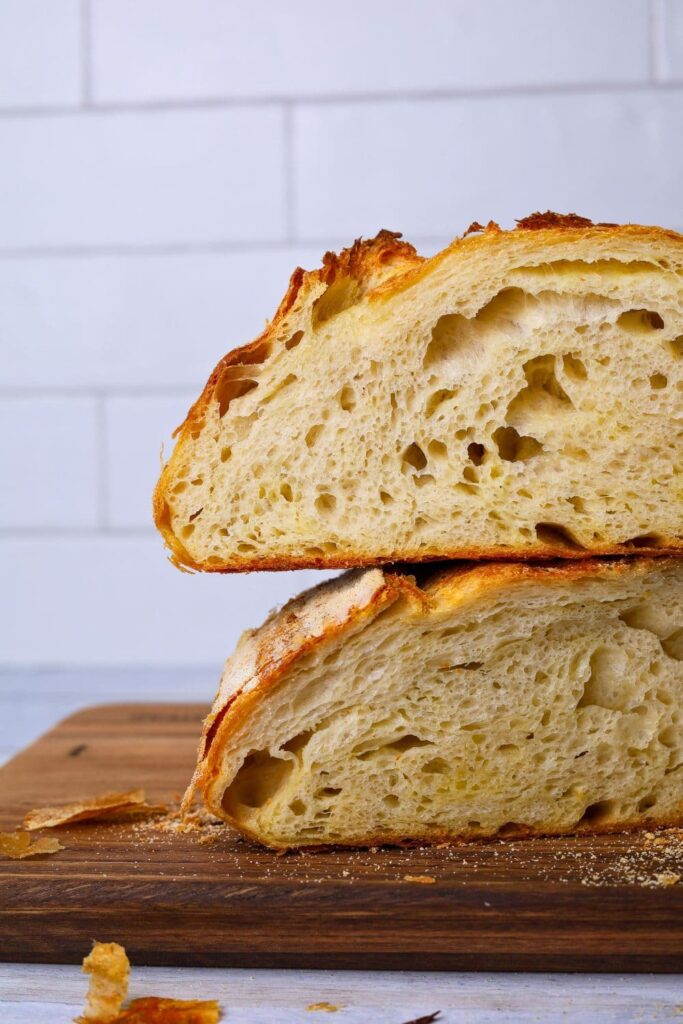
Now, if you’re like me and you don’t have time for this process, adding cold, grated butter to your sourdough will give you a similar effect (kinda, sort of). It will definitely give you a flakey, buttery crust, that’s for certain. The grated butter does create the layered dough effect on the outer crust in this way. The interior of the loaf does not get flakey like a croissant, however it is tender and buttery and somewhat close to perfection.
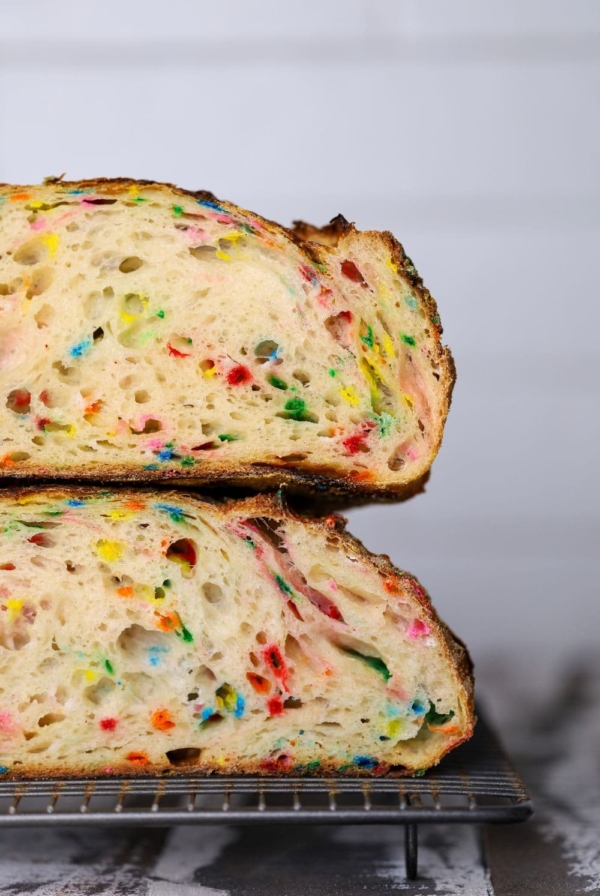
Recipe Variations
I recommend you nail the plain butter version of this recipe first before you try variations, but once you’ve got it down pat some fun flavor variations to include can be:
- Ham and cheese – laminate around 100g of cheese and 100g of ham into the dough right before shaping (and subsequent cold ferment).
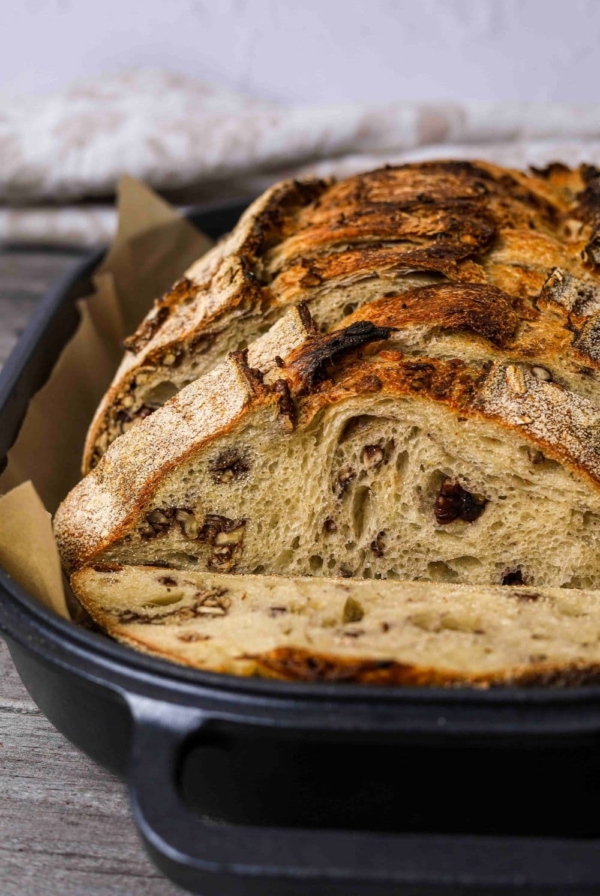
- Chocolate chips – add 100g of semi sweet or dark chocolate chips to the dough along with the grated butter for a sourdough chocolate croissant loaf. Seriously good!
- Raisins – don’t discount the sophistication of 100g of raisins added with the butter in this loaf. You could also sprinkle in a little cinnamon when you shape the loaf for some wow factor (do not add this during stretch and folds though as it will inhibit the wild yeast). You can check out this sourdough cinnamon swirl loaf to see how I shape the loaf with the cinnamon.
Kate’s RECIPE Tip
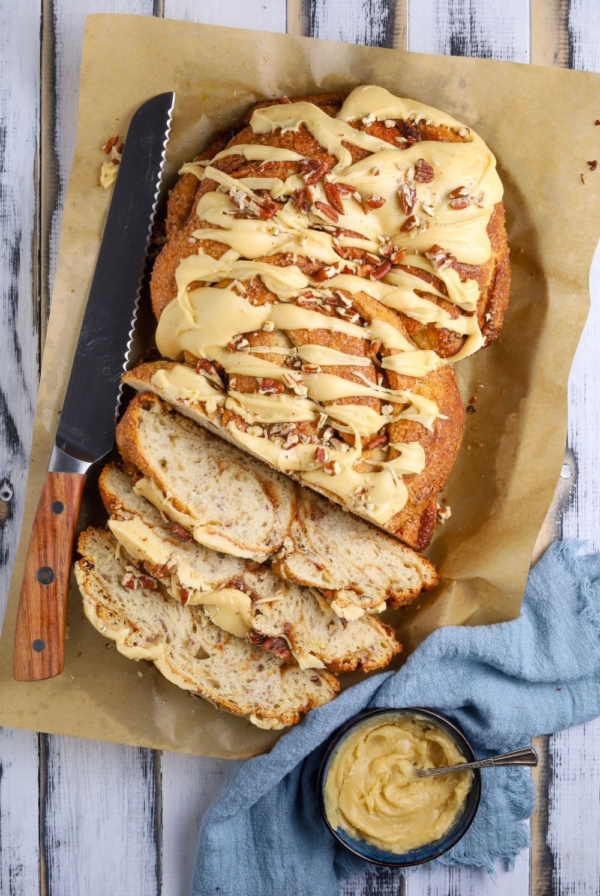
Fun With Flavors
For a fun flavor variation, try freezing some flavored butters and grating them before adding them to this loaf for something truly delicious! You could try adding this whipped maple butter or this decadent honey cinnamon butter.
How To Store + Freeze
This is one loaf of sourdough that I recommend eating fresh! That flakey crust is just too good to waste! In saying that, the fat from the butter will keep the crumb soft for several days. I store my loaf of sourdough croissant bread under a glass cloche for around 4 days and it’s still good (if no one else has sniffed it out by then).
This loaf does freeze just as well as any other loaf of sourdough bread. You can find instructions for freezing and refreshing sourdough bread here.

Helpful Sourdough Resources
These sourdough resources will help you as you navigate your way through making this loaf of sourdough croissant bread.
- Best Time To Use Sourdough Starter
- How Do I Know When Bulk Fermentation is Finished?
- Bulk Ferment vs Cold Ferment
Frequently Asked Questions
It’s really easy to end up with a gummy loaf because the fat from the butter can be heavy, adding weight to the gluten structure of the sourdough bread. Bulk fermentation can also be tricky because you’re trying to keep the butter cool, while simultaneously allowing the dough to bulk ferment. Bulk fermentation is critical to avoiding a gummy loaf. This will be helpful in avoiding an under fermented sourdough loaf.
I also recommend reducing your hydration and butter to “beginner level” and getting this perfected before you increase to intermediate to ensure you don’t end up with a gummy sourdough croissant loaf.
Yes, as long as you don’t use too much water in your dough and the dough isn’t too sticky to shape, you can divide your dough into equally smaller portions to create rolls or buns. You could even fill them with chocolate or ham and cheese.
I don’t recommend using all purpose flour to create this loaf as it doesn’t have the protein required. If it’s all you have, you’ll need to decrease the hydration in the recipe by at least 50g.

Sourdough Croissant Bread
Equipment
- Mixing Bowl
- Digital Scale
- Banneton
- Dutch Oven
Ingredients
- 100 g Sourdough Starter, (see notes)
- 350 g Water
- 500 g Bread Flour
- 10 g Salt
- 100 g Butter, (cold, grated – see notes)
Instructions
- Pre Mix & Autolyse:Weigh out your starter and water in a glass or ceramic bowl. Mix them together and then add your flour and salt. Bring it altogether into a shaggy dough. Cover your bowl with cling film or a damp tea towel and let it sit for around 1 hour.
- Forming Up Your Dough:Work your way around the bowl, grabbing the dough from the outside, stretching it up and over itself until a smooth ball is formed. You shouldn't need more than about 20-25 folds to form the ball.Once the dough has formed into a smooth ball, pop the cling film back on and let it rest for 30 minutes.
- Stretch & Fold – Creating Structure:You need to add the grated butter to your dough during the stretch and fold phase. It's very easy to do but you don't want to let the butter melt too much during this phase.I like to add a little of the butter at a time during the second and third stretch and folds, keeping the dough as cool as possible.Try to do around 4 sets of stretch and folds with around 15 to 30 minutes between each set.
- Bulk Ferment:Once you've finished your stretch and folds, place the cling film or damp tea towel back over your dough and let it rest and ferment at room temperature (see notes). You don't want your dough getting too warm for this recipe as you don't want the butter to melt and the dough to become a big greasy mess.I don't normally recommend it, but if you need to put your dough in the fridge for short bursts to keep the butter temperature down, that is ok.
- Shaping Your Dough:Once your dough has finished its bulk ferment, it's time to give it some shape and surface tension. I think this recipe lends itself to a batard however it's completely up to you what shape you would like. Before you place your dough into your banneton, give it a good dusting of rice flour or semolina. Place your shaped dough into the banneton, seam side up.
- Cold Ferment:Now your dough is in it's "shaping container" cover it loosely with a plastic bag or damp tea towel and place into the fridge. I use a large plastic bag to cover it – I just reuse it each time.Try to leave it in the fridge for a minimum 5 hours up to a maximum of around 36 hours.
- Preparing to Bake Your Sourdough:Once you're ready to bake your sourdough, you'll need to preheat your oven to 230C/450F. Place your Dutch Oven into the oven when you turn it on so it gets hot. Try to preheat for around 1 hour to ensure your oven is super hot – but you know your oven so just adjust this time if you need to.Leave your dough in the fridge until the very last minute – placing a cold dough into a hot oven will give you a great "spring".
- Baking Your Sourdough:Now it's time to bake!When your oven is at temperature. Take your sourdough out of the fridge. Gently place it onto a piece of baking paper.Gently score your bread with a lame, clean razor blade or knife.Carefully take your dutch oven out of the oven. Place the sourdough into the pot using the baking paper as a handle. Put the lid on and place into the hot oven. BAKE TIME:30 Minutes with the lid on at 230C/450F plus10-15 Minutes with the lid off at 210C/410FIf you're worried about the base of your bread burning, place a baking sheet on shelf underneath your Dutch Oven – it works!
- Finishing Your Bake:When you remove your dough from the oven, carefully remove it from the dutch oven as soon as possible and place on a wire rack to cool.
Notes
- Notes on Sourdough Starter: This recipe is based on you having an active starter that you have fed a few hours before starting your bake. For information on whether your starter is ready, go here.
- Butter: I recommend frozen, grated butter, the best quality you can find. It’s easiest to grate it while frozen. You can add it it your dough frozen, or just cold from the fridge.
- Notes on Bulk Fermentation: This recipe is best done when it’s not too hot due to the butter. You want to keep the butter on the cool side so you don’t end up with a big greasy mess. You can put the dough in the fridge for short stints if you need to in order to keep it cool.
You’ll find more information on these topics here:
When is my bulk ferment finished? What is the difference between cold ferment and bulk ferment? Why does the amount of starter matter?
- Notes on Baking: If you’re worried about the base of your bread burning, place a baking sheet on shelf underneath your Dutch Oven – it works! If you’re worried about your bread not being cooked all the way through, turn the oven off and place your dough straight onto the oven rack. Leave the door ajar and let your bread rest there for a few hours. Remember not to cut into your loaf too soon – you’ll need to let it cool for at least a few hours (4-6 is best).
Nutrition
Nutrition information is automatically calculated, so should only be used as an approximation.
Like this? Rate and comment below!


I’m so looking forward to trying this recipe. Can I bake this bread in a Pullman loaf pan?
I found my answer—I just needed to scroll a bit more. I really can’t wait to make this.
Another fabulous recipe, superb tasting bread, all the family love it, it’s now a regular on my baking list, Thank you.
I baked mine in a loaf pan. While it looks like regular sourdough inside, it does actually taste like a croissant!
I baked this recipe this morning – it really tastes like a croissant!!! Be ready to tend to it every 30 to 40 minutes putting it in the fridge and taking it out during fermentation to keep the butter cold. I baked mine in a loaf pan at 390 for 40 minutes. when I removed it from the oven I set the pan on a rack to cool for 10 minutes to be sure that the sides wouldn’t cave in. They did a little. The bread rose so high. Maybe next time I will shorten the bulk fermentation a little. Thank you for this recipe.
came out so super soft and yummy! Thanks for the great recipe!
ps: Your recipe says honey on the 2nd page but I think it was a mistake.
I am a sourdough newbie and have watched videos of influencers making croissant sourdough. Seems like they usually had a bunch of melted butter at the bottom of their DO, which kind of defeats the purpose of butter IN the bread. I decided to attempt this the Pantry Mama way and holy moly, it is amazing! I followed your method exactly and my bread was not swimming in a pool of melted butter – ALL the butter was incorporated beautifully into the loaf. The crust, typically my least favorite part of any bread, was out-of-this-world good, very flaky and delicious. For any follower who may be hesitant to try croissant sourdough, THIS IS YOUR RECIPE. Best bread I’ve ever had and *I* was the one who made it! 😀
We love to hear that, Summer!
Absolute perfection! My favorite recipe by far. First time I’m making it and will most likely only use this recipe going forward.
This recipe is flawless, I made it for my husband’s birthday and the entire family devoured it! I will definitely be making this on repeat. I used Kerrygold butter and it was absolutely delicious.
I baked this and the crust was everything you said it would be. Unfortunately the bread seemed almost wet. I baked a little longer to get internal temp to 204 but didn’t feel I could bake longer and not burn the crust. Great flavor when I toasted it but still not much true sour taste despite 12 hrs cold ferment. Any ideas about where I went wrong?
This is a common problem with this sourdough croissant bread and one that I hear from many people who aren’t a fan of this method. The gumminess or wetness is caused partly by under fermentation, but also by the butter that you use. I would decrease the amount of butter and increase bulk fermentation time and you should see a better result next bake 🙂
Im not seeing the typical 205F., I’m getting 175 but it looks divine.
I turned off the oven and removed her from the ceramic bread pan and returned her to the oven for 1 hour, with the oven door ajar. Absolutely the best sourdough sandwich bread I’ve ever made. I cannot wait to make a batard with this dough.
This is such an amazing bread. Thank you so much!
Love this recipe. Made it following directions and by adding cinnamon and blueberries. The cinnamon blueberry is now my husband’s favorite. Either way it is a delicious easy recipe.
My new favorite! This loaf has a delicate but crunchy crust, the inside is soft/airy, and the smell is absolutely divine. I live at 46° latitude and normally, 3 out of the 4 seasons, I have to put my dough in the microwave (door left ajar so light stays on) overnight for the bulk fermentation. For this recipe, I was able to just leave on the counter overnight.
I too would like to bake this in a Pullman pan. Will this recipe fit in that pan?
Yes this recipe works well in a loaf pan, you’ll just need to adjust it for your pullman pan to ensure it doesn’t burst out of the lid 🙂
This is one of the best sourdough bread recipes I’ve ever made! I did the advanced version, the texture of the crust is flaky, not too crisp. The inside is fluffy, soft, and light. I’d say, it is important that you use quality butter. I didn’t because I was afraid the loaf may not turn out, which may happen when you try a new recipe for the first time. I can’t wait to try it with grassfed butter.
I’m so glad you love the recipe! OMG it will phenomenal with grass fed butter! Thank you so much for leaving a review. I truly appreciate it! xo
Hi. Can i turn this into a loaf using 2 loaf pans as a dutch oven? I do it all the time for other recipes. I have dutch ovens, but am looking for a loaf recipes that have butter instead of oil. Please advise. Thanks 😁😘
Absolutely you can do this 🙂
Can I bake this in a Pullman pan to make a loaf for sandwiches? The Lodge pan makes too large of a loaf. Looking forward to making this bread!
Absolutely you can bake this sourdough croissant loaf as a sandwich loaf. I recommend a 1.5 pound USA loaf pan.
I made this bread in a Pullman pan. What should the internal temperature be when done?
Hi Priscilla, Kate doesn’t use internal temperature to determine when the bread is done. There are a few reasons why, which you can read about here, along with what she does instead. 🙂
Your site is so helpful! I have a question about this recipe and your recipes in general. I live alone but still want to bake sourdough without filling my freezer all the way up 🙂 can I cut this recipe and most of your recipes in half? If so, is there a smaller banneton you’d recommend for proofing and shaping? Any changes to cooking time?
Thanks so much!
Absolutely you can cut most recipes in half for sure 🙂 You could bake loaves in a smaller loaf pan (I love using the USA pan 1 pound loaf pan) or alternatively, something around 20-23cm (7.8 to 9″ would be perfect for a half loaf). I often divide my sourdough bread recipe into two halves and cold ferment in 23cm (9″) bannetons 🙂 I hope this helps xx
I’ve been making sourdough for about a year now. I guess I’ll consider myself a “seasoned sourdough baker” which is hilarious really, but I think I am there! This bread… was by far.. the most wonderful bread EVER. I made it for a luncheon with the girls and it was absolutely outstanding. I will make it again for special occasions. It was pretty easy too, I followed your recipe precisely and I did stick it in the fridge for 5 minutes and I told my husband to put on a sweat shirt because the air is going to be cold in the house for a few hours! Instead of rising under the light on the stove, I rose on the table directly under the air conditioning vent. It came out perfect. When I did my final shaping I could see the butter and it looked perfect. The dough was super easy to manage too. THANK YOU! I have turned to your recipes so very often and they NEVER disappoint. While I was making it, my husband said, “Are you sure? You’re making this for the first time for friends?!!” and my reply was, “I trust Pantry Mama”. Thanks again!
I’m so glad you love the recipe! This is so nice to hear! Thank you for leaving such a lovely comment, I truly appreciate it xo
Baked this morning looks amazing.Husband is waiting patiently, not sure if he will wait 4 hours to try it. Baked in Dutch oven. Thanks for the recipe.
is it possible to use some whole wheat flour in this bread? I”m guessing the answers is no, based on the need for bread flour, but I am curious.
I don’t recommend using whole wheat flour in this recipe, just bread flour 🙂
Thanks, I will make it as written. It will be a good change from the hearty whole wheat bread I usually make.
This bread is so delicious, I actually like more that croissants. It is great both fresh and toasted with jam or chocolate spread on top. Thank you so much for sharing this incredible recipe!
Another 5 star sourdough from PantryMama! Maple pecan loaf used to be my favorite, I think we now have a tie.