Best Sourdough Farmhouse White Sandwich Loaf [Easy Recipe]
This post may contain affiliate links.
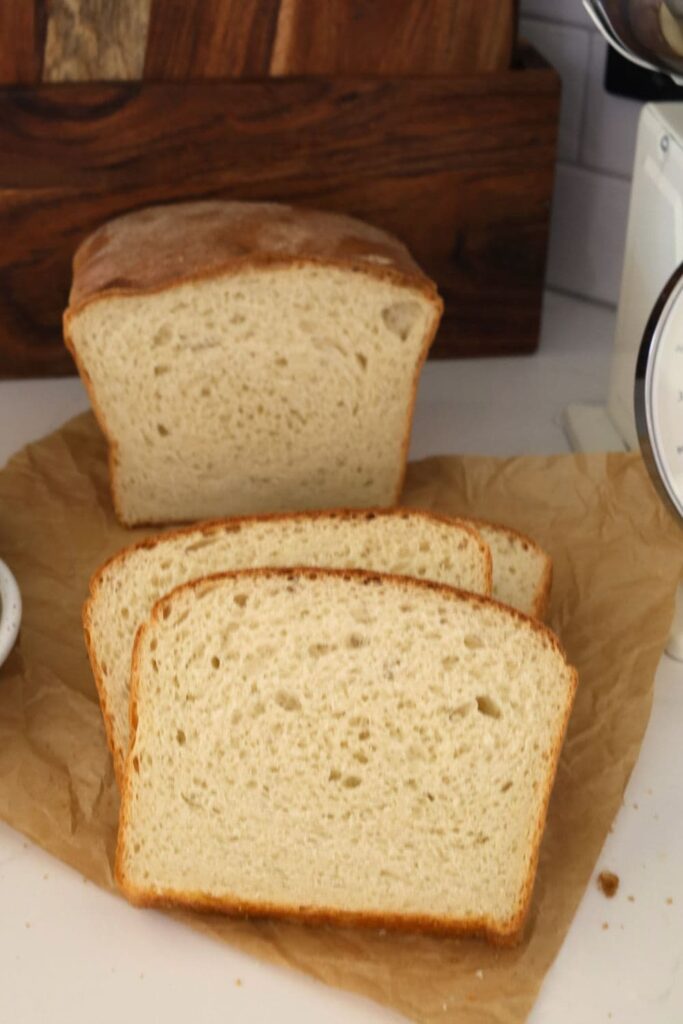
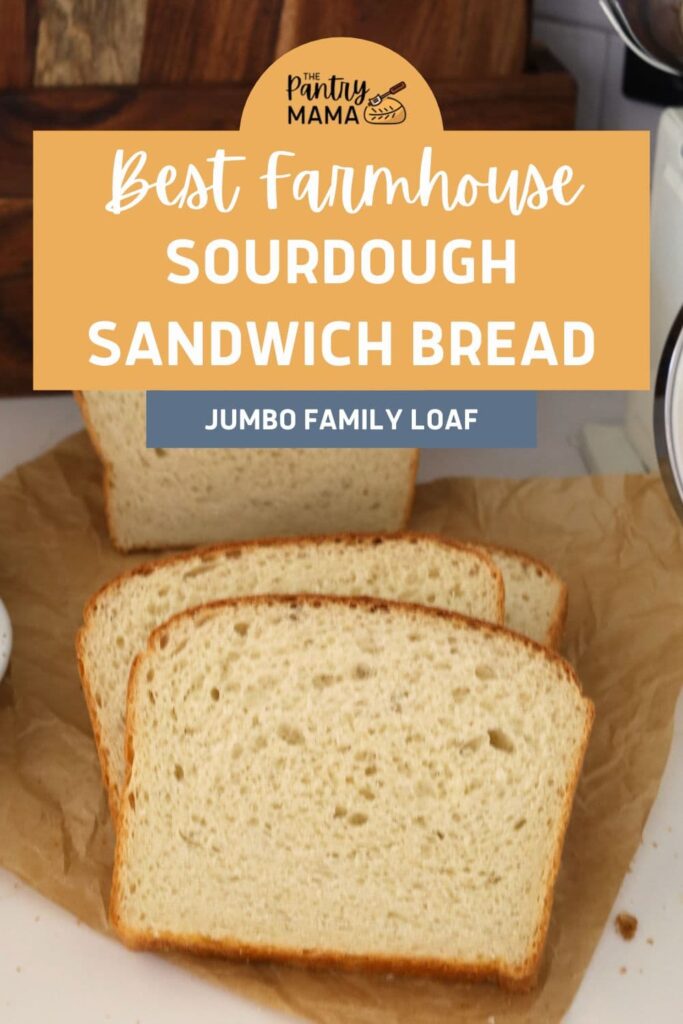
You are going to love this sourdough farmhouse white sandwich loaf! It has a light and airy crumb with plenty of squish, a soft crust and loads of flavor to boot. It's a loaf of bread just begging to be sliced and filled with your favorite sandwich fillings.
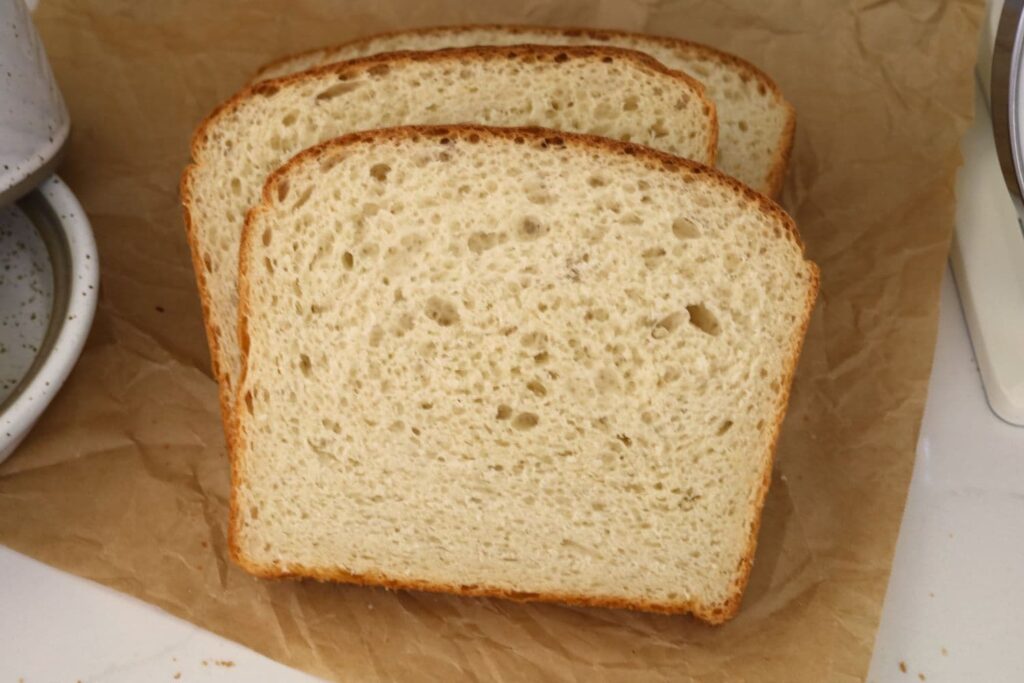
This sourdough farmhouse white sandwich loaf has been a labor of love for me - I've lost count of the amount of times I tested this recipe to get it perfect - and to fit this jumbo sized tin perfectly too! It really is the perfect white sandwich bread made with bubbly sourdough starter.
I created this loaf as a "legacy loaf". I wanted a signature loaf to make for my kids that they will remember when they're grown up and hopefully tell their kids "your grandma used to make the best farmhouse white loaf and we would eat it smothered in homemade butter". Is it just me that thinks about these things? Surely not!
If you are a sourdough sandwich bread lover then you just have to try this easy sourdough discard sandwich loaf and these sourdough sandwich rolls. This sourdough country loaf will also be at home on your farmhouse table, along with this golden sourdough cheese loaf!
Why You'll Love This Recipe
This recipe makes a giant, farmhouse sized loaf of sourdough white sandwich bread. It uses simple ingredients you'd find in any pantry and uses them to create something truly special. It really is the perfect sourdough bread! Here's why you'll love this recipe:
No fancy shaping required - this recipe is baked in a loaf pan, so there's no special shaping required. I've used a jumbo farmhouse bread pan, but you can size this recipe to any bread pans you have at home using baker's math.
Minimal Ingredients - this bread brings big flavor with minimal ingredients. There's no eggs or specialty ingredients and you can use whatever milk you have on hand.
Soft, squishy white bread - this is the perfect everyday loaf of sandwich bread. It's soft and squishy, light and airy. It's great for sandwiches, makes deliciously golden brown toast and will fast become a family favorite in your kitchen.
Freezes Like A Dream - if making fresh bread daily isn't possible, then making a few loaves of this sourdough farmhouse white bread and freezing them is a great way to have homemade bread everyday. This loaf freezes like a dream and is a cinch to thaw and use.
Best Flour For This Loaf?
I've tested this loaf using both all purpose flour and strong white bread flour and the bread flour wins by far. It gives a more sturdy, taller loaf with better rise.
Of course if you don't have access to bread flour, then all purpose flour will work, but you will get a better, more flavorsome result with bread flour.
You can read about the differences between all purpose flour vs bread flour here.
How to Make a Sourdough Farmhouse White Sandwich Loaf
This sourdough farmhouse white really is a basic loaf. It requires pretty basic ingredients and a bit of kneading. You can easily knead this loaf by hand if you've got the time or you can let your stand mixer do the work for you. I also love making this one in my Thermomix.
You could even let your bread machine do all the heavy lifting if you have one. Whatever let's you get this bread on the table I say!
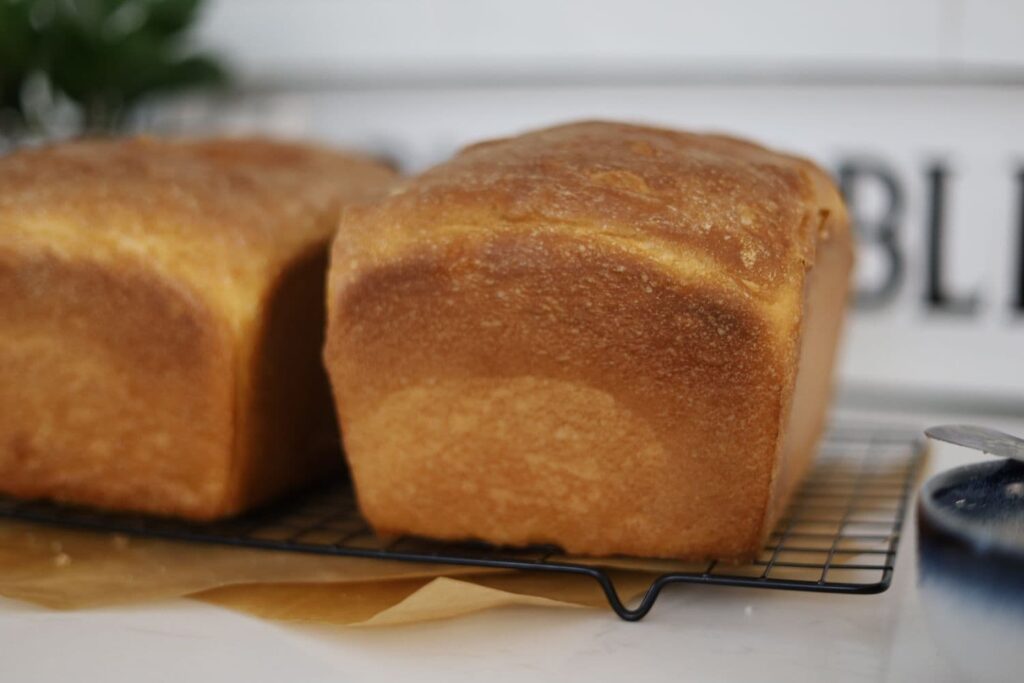
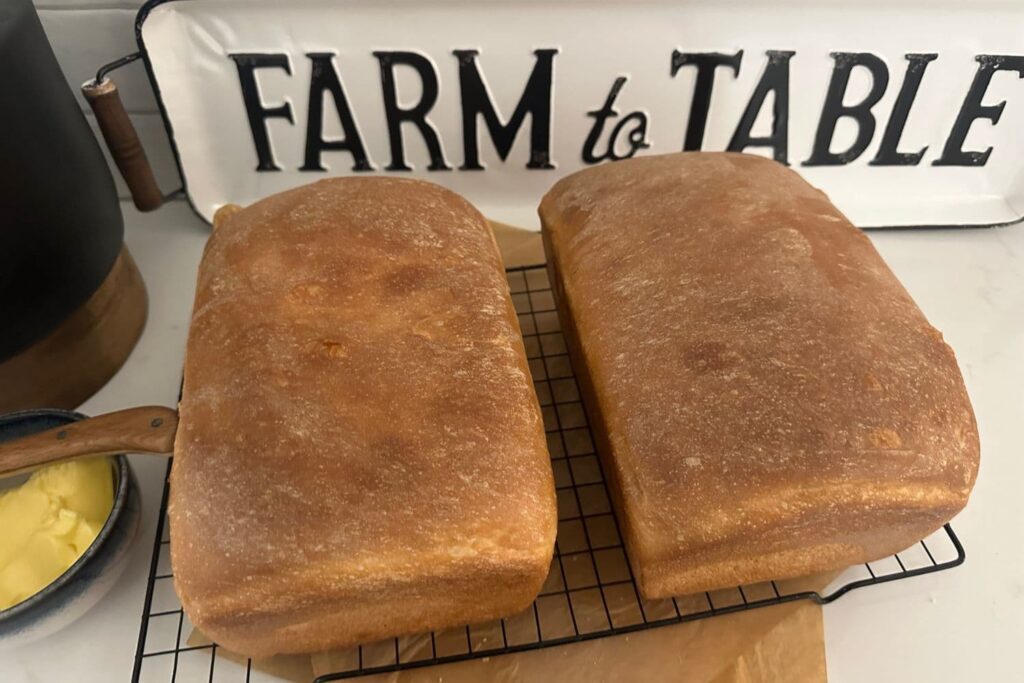
This recipe makes one giant loaf - if you want to make 2 loaves (like you can see in some of these photos) you'll need to select x2 on the recipe card and it will automatically double the recipe.
Premix & Autolyse
Add your milk, water and sugar to a large bowl and stir until the sugar is dissolved. It does help if you warm your milk and water just a little (or even use hot water added to cold milk which will make the mix "warm").
Now add the sourdough starter to the liquid ingredients and stir to dissolve it a little.
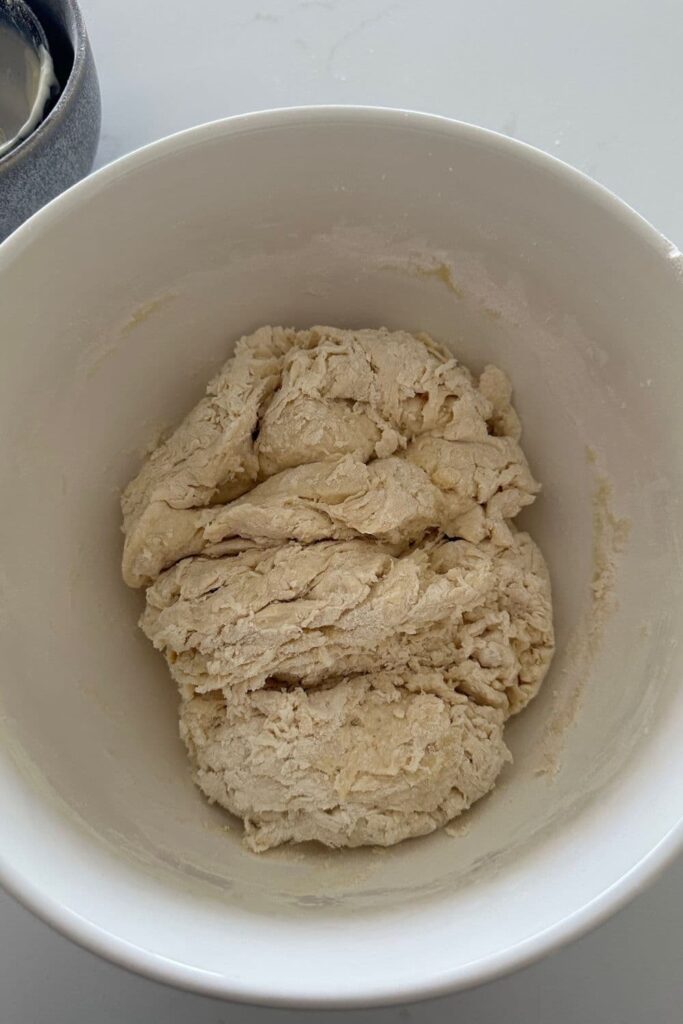
Now add the rest of your ingredients - bread flour, salt and melted butter. Mix them together until a shaggy dough forms.
Cover with a damp kitchen towel or elastic food cover and let it sit for around an hour.
Kneading Your Farmhouse White Sandwich Dough
You can knead this dough by hand or in a stand mixer or Thermomix.
Either way is fine and you'll end up with soft, elastic dough that is slightly sticky, but shouldn't stick to your hands.
Try not to add additional flour to the dough while kneading unless you absolutely have to. You want this dough to have moisture. If you add too much extra flour the dough will be dry - and so will your baked loaf.
Kneading by hand - knead the dough for around 10 minutes or until it is soft and elastic. The dough should feel slightly sticky but not be a big mess.
Stand Mixer - you'll need to use your dough hook. Knead for 2 minutes, then give your mixer a rest for 2 minutes. Knead again for 2 minutes and so on. The dough should come away from the sides of the bowl when it's done.
Thermomix - knead using the dough function for 5 minutes or until the dough isn't sticking to sides of the bowl and is stretchy and elastic.
Bulk Ferment
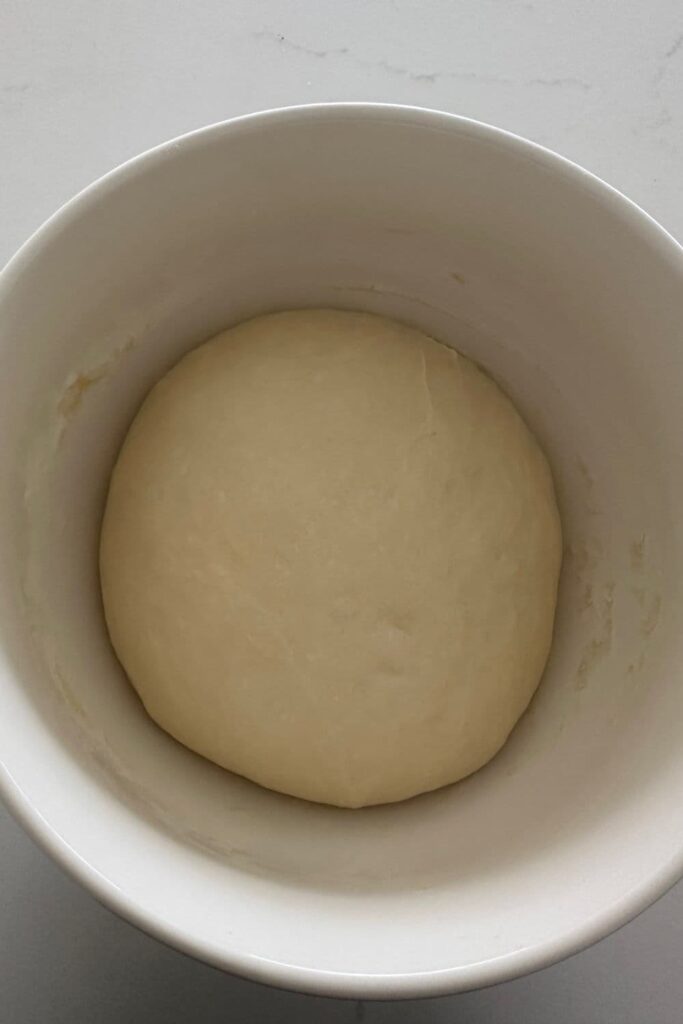
Once your dough is kneaded sufficiently, you need to allow it to bulk ferment at room temperature. If you're using a stand mixer, it's fine to leave it in the mixing bowl. If you're using a Thermomix you'll need to tip your dough into a glass or ceramic bowl to finish its bulk ferment.
At this point, you can just leave the dough as it is, covering it with some plastic wrap to stop it drying out. If you prefer your dough to be a bit neater, you can wet your hands and fold it into a neat ball.
As with any sourdough bread, the bulk ferment time will depend on the temperature in your kitchen and of course the strength of your starter.
You're looking for your dough to be just UNDER double.
Now remember this is an enriched dough and it's a lower hydration so it will take longer than a lean dough. Try to put it somewhere warm if you can (I love using my Brod & Taylor proofer for this).
Shaping Your Sourdough Farmhouse Sandwich Loaf
Once your dough has finished its bulk ferment you can shape your dough.
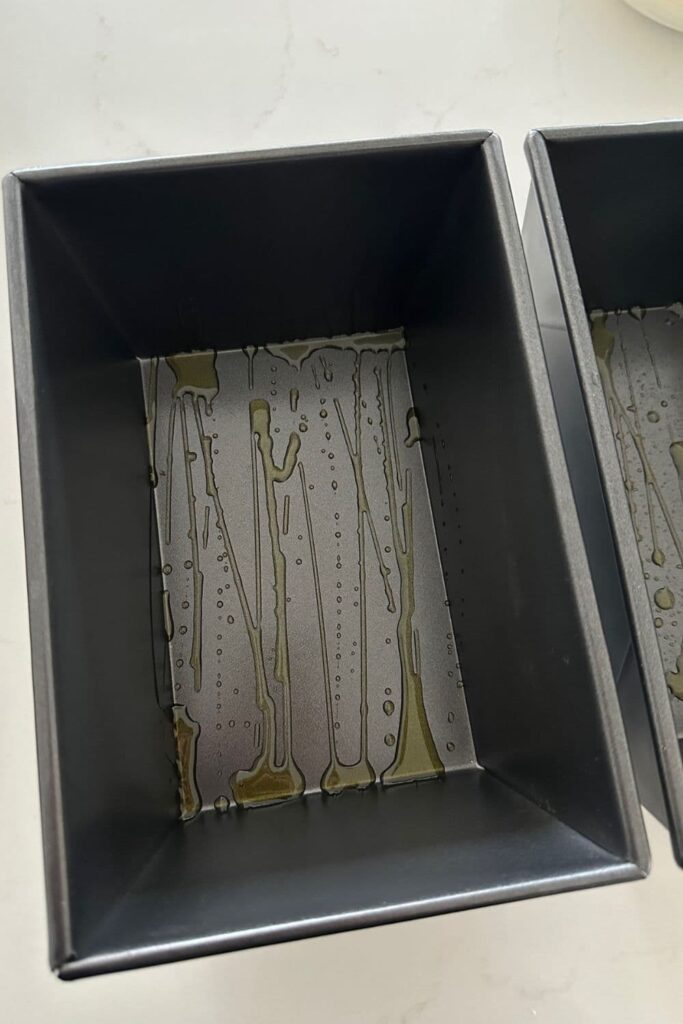
Before you start shaping, lightly oil your loaf tin. I just use a little olive oil for this.
Ease your dough out of the bowl using a silicone dough scraper, remembering to have the smooth side on the counter and the sticky side facing up. You shouldn't need any flour for this as your dough shouldn't stick (it's such a beautiful silky, enriched dough).
Gently ease your dough out into a rough rectangle, with the longest side in front of you.
Pop any large bubbles and gently flatten the dough using your fingertips.
Then roll the dough up into a log (using the short side) and tuck the ends under.
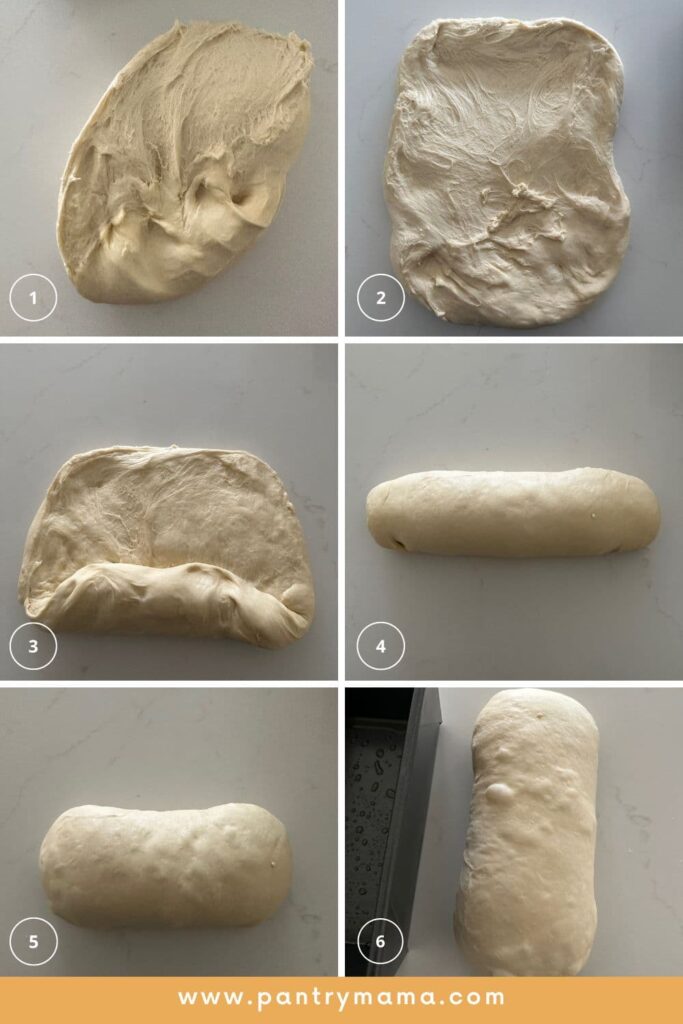
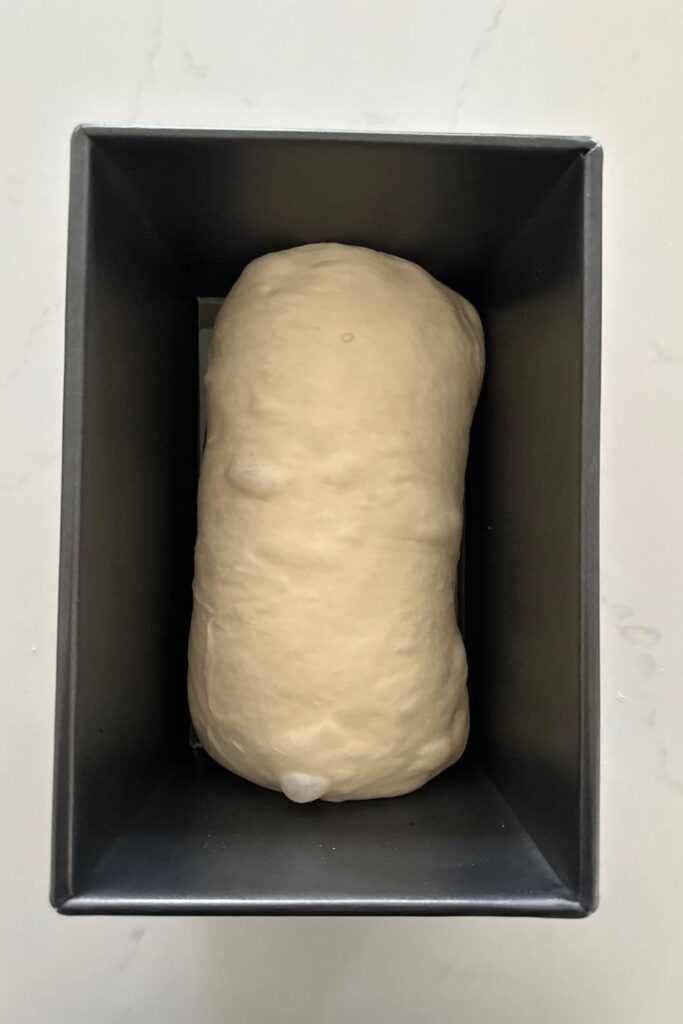
Then simply plop the log into your bread tin. I like to spread a little olive oil on the top of my dough before putting a plastic food cover over the tin, this way the dough won't stick to the plastic if I forget to check it regularly.
It doesn't have to be perfect. As the dough rises it will fill the tin and tighten up the surface.
Second Rise
Once your bread has been shaped and is in the tin, you'll need to let it rise again so that it fills up the shape of the tin.
This should only take a few hours, but like the bulk ferment, this will depend on the strength of your starter and the temperature of your kitchen. I like to use my Brod & Taylor Bread Proofer for this. It fits 2 loaves of this farmhouse white inside and it takes the guess work out the second rise for me.
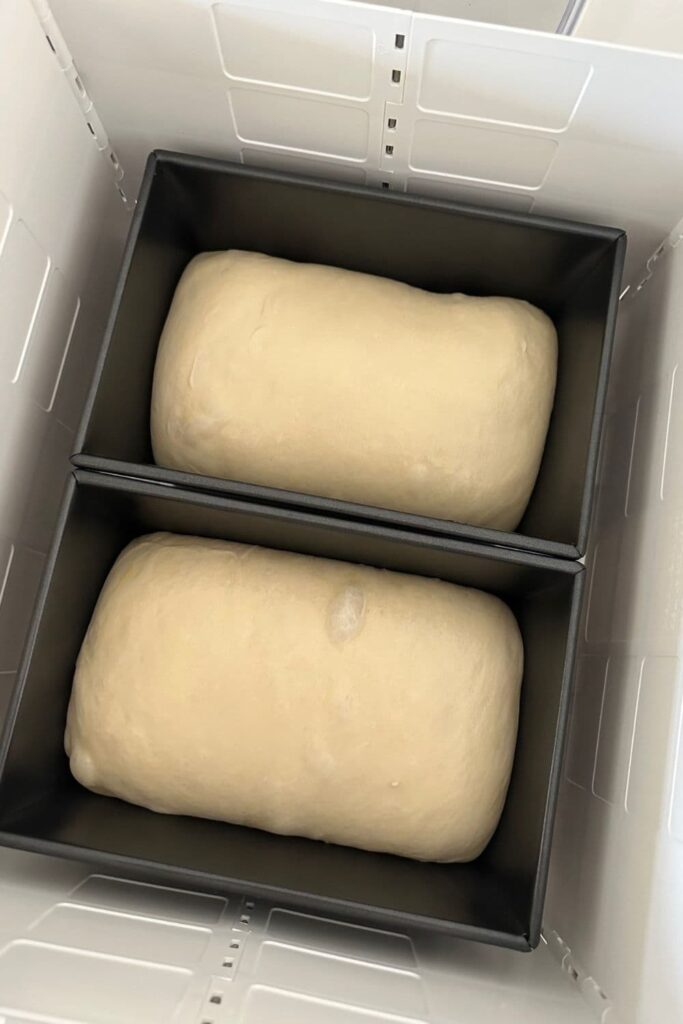
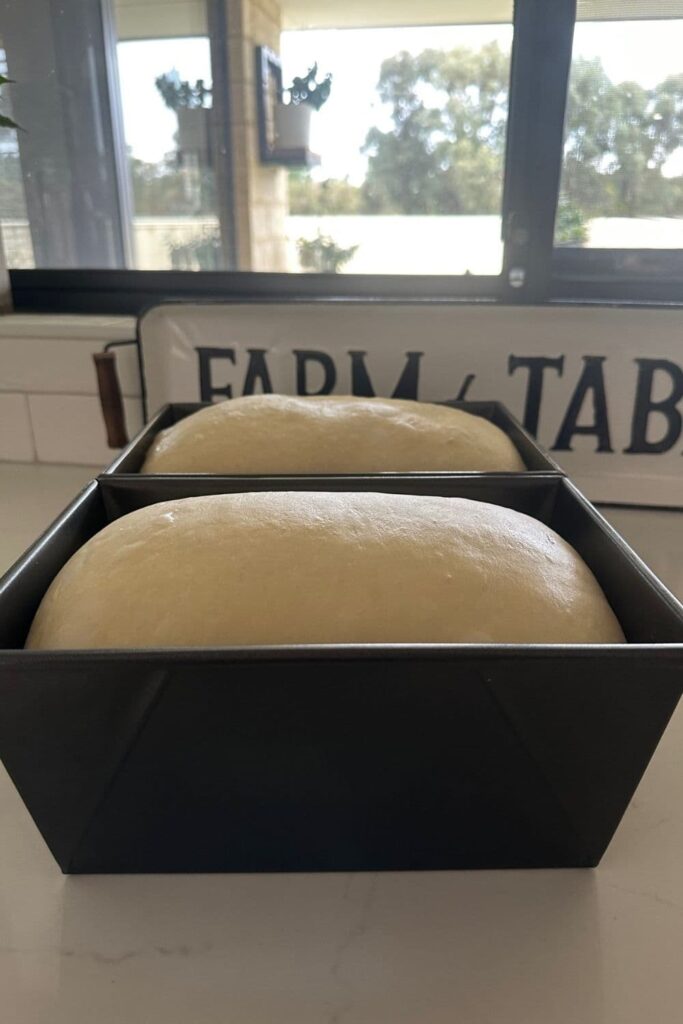
You'll know it's done when it's risen above the lip of the tin (if you're using an open tin). It will be rounded on the top. When you poke it it will leave a slight indent but spring back nice and slowly.
You'll see some tension on the top of the dough as it's risen.
Baking Your Sandwich Bread
Preheat your oven to around 180C/350F.
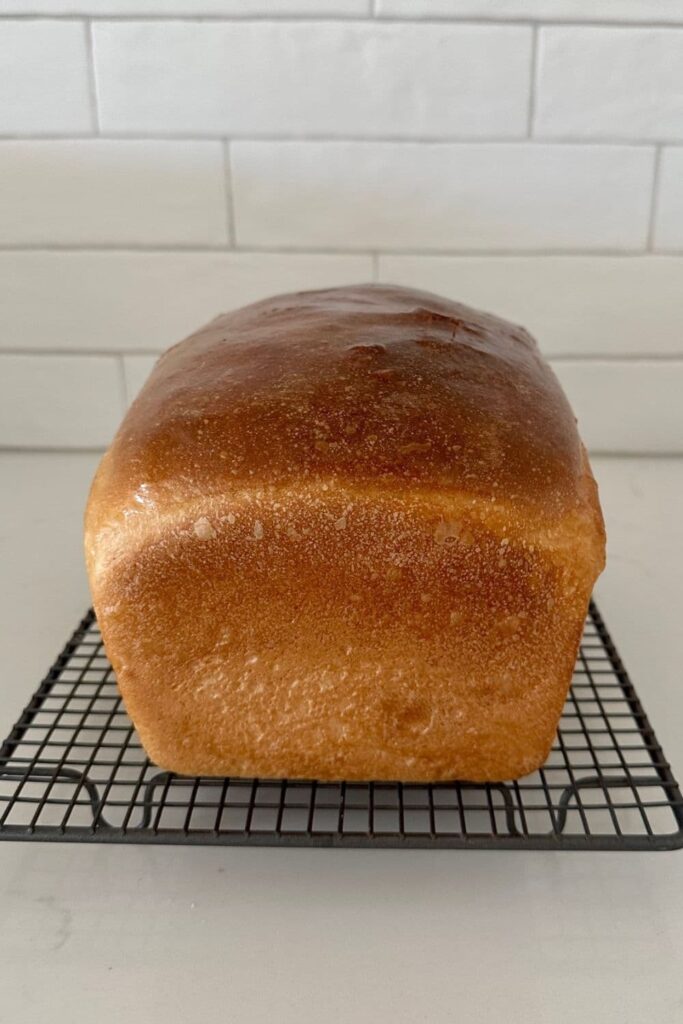
Let your oven warm for around 10 minutes and then place your sandwich loaf in the oven and bake for approximately 40 minutes or until the top is golden brown.
It may take a little longer depending on your oven.
Once your dough is baked, remove it from the tin and leave to cool on a wire rack. Brush the top with some melted butter for a richer flavored, softer crust.
Ideally, leave it for at least 90 minutes before you cut into it. Enjoy!
What Size Bread Tin Should I Use For This Recipe?
I love making this sourdough farmhouse white sandwich loaf in a jumbo bread tin. When I first started making this recipe, I used a smaller tin, but as I made adjustments and perfected it, I changed it to a giant farmhouse pan and found the results to be much better. I love making sourdough banana bread and whole wheat sandwich loaves in smaller baking tins, but this farmhouse loaf deserves a jumbo sized home!
The jumbo pan I use measures 24cm x 16cm x 12cm or 9.5" x 6" x 4.7". I purchased this pan from a kitchenware shop in Australia but you can find it online here. I have found jumbo farmhouse pans similar in measurement on Amazon. These are my picks:
USA Pan Aluminised Steel Bread Pan
Ultra Cuisine Non Stick Loaf Pan
Baker's Timeline for Sourdough Farmhouse Loaf
This is the rough timeline I use when making this sourdough farmhouse sandwich loaf. You could adapt this timeline to suit your own situation. You might also find this article on creating a sourdough baking timeline helpful in adapting it.
In The Morning
7am - Feed your sourdough starter (I do 1:1:1 because I want to use it today).
10am - Mix the dough, knead and allow to rise (bulk fermentation).
3pm - Shape the sandwich bread, place into tin and allow to rise again.
9pm - Bake sandwich loaf and allow to cool overnight so it's ready for breakfast in the morning.
If you want to hit pause on this recipe, you can place your sandwich loaf in the fridge once it's shaped. I allow the loaf to rise around half way up the tin and then put them it the fridge for up to 12 hours. When I want to bake it, I take it out, allow it to rise over the lip of the pan and then bake.
Using Sourdough Discard
This recipe was developed using an active sourdough starter and without any commercial yeast. If you don't have an active starter yet, you can find instructions for making a sourdough starter here.
If you want to use sourdough discard you can, however I would recommend adding 7g of commercial yeast (or instant yeast) along with your discard to help it rise (otherwise you will be waiting a very long time).
Just remember that if you use commercial yeast you will need to adjust your baking timeline. Yeast dough rises much faster and hence won't have the same flavor as sourdough doughs.
How To Store & Freeze Sourdough Farmhouse White Loaf
This sourdough bread can be stored in a plastic bag for up to 3 days. Because it contains some sugar, salt and butter, the loaf will be edible for a bit longer. It won't be fluffy like store bought bread, but it will stay softer than a lean loaf.
I find storing it in a plastic bag keeps it softer for longer. I just reuse the plastic bags. They're also very handy if you're planning on freezing a loaf.
I also like to store my loaves under a glass cloche. If they are on display on the counter, they tend to get eaten a bit faster too which I love! No food waste!
Although, if you do have any leftovers from this bread, I highly recommend this sourdough bread pudding or these sourdough croutons.
Freezing this sourdough loaf could not be easier. It's up to you whether you slice it or not. I prefer to freeze mine unsliced, however slicing it first can definitely be more convenient. It's the perfect bread to have in the freezer "just in case".
When I freeze a whole unsliced loaf, I wrap it in foil and place it inside a large ziploc bag or wrap it in Press n Seal. I store in the freezer until we need it. When I want to use it, I let it thaw at room temperature and then slice as necessary. It can also be warmed in the oven if you like.
Frequently Asked Questions
Sourdough sandwich bread is generally enriched with butter, sugar and milk which means that it will stay softer than a lean dough. Sourdough sandwich bread will generally stay soft for around 3 days if stored in a plastic bag. Avoid placing bread in the fridge as this will dry it out.
You can leave the sugar out, however the sugar plays a part in both the texture and flavor of this sourdough sandwich loaf. If you'd prefer to use natural sweeteners, you could substitute the sugar with the same amount of honey or maple syrup.
I highly recommend this bread knife for slicing sourdough sandwich bread into perfectly even slices. It's reasonably priced and available on Amazon.
Sourdough Farmhouse White Sandwich Loaf
Equipment
- Stand Mixer (optional)
- Bread Tin (I've used a jumbo size 24cm x 16cm x 12cm or 9.5" x 6" x 4.7")
Ingredients
- 270 g Water (warm)
- 85 g Milk (warm)
- 45 g White Sugar
- 120 g Sourdough Starter (fed and bubbly)
- 50 g Butter (melted but cooled)
- 600 g Bread Flour
- 12 g Salt
Instructions
- Premix & Autolyse:Add your milk, water and sugar to a large bowl and stir until the sugar is dissolved. It does help if you warm your milk and water just a little.
- Now add the sourdough starter to the liquid ingredients and stir to dissolve it a little.
- Now add the rest of your ingredients - bread flour, salt and butter. Mix them together until a shaggy dough forms. Cover with a damp kitchen towel or elastic food cover and let it sit for around an hour.
- Kneading Your Farmhouse White Sandwich Dough:You can knead this dough by hand or in a stand mixer or Thermomix. Either way is fine and you'll end up with soft, elastic dough that is slightly sticky, but shouldn't stick to your hands.Kneading by hand - knead the dough for around 10 minutes or until it is soft and elastic. The dough should feel slightly sticky but not be a big mess.Stand Mixer - you'll need to use your dough hook. Knead for 2 minutes, then give your mixer a rest for 2 minutes. Knead again for 2 minutes and so on. The dough should come away from the sides of the bowl when it's done.Thermomix - knead using the dough function for 5 minutes.
- Bulk Ferment:Once your dough is kneaded sufficiently, you need to bulk ferment it. If you're using a stand mixer, it's fine to leave it in the mixing bowl. If you're using a Thermomix you'll need to tip your dough into a glass or ceramic bowl to finish its bulk ferment. At this point, you can just leave the dough as it is, covering it with some plastic wrap to stop it drying out. If you prefer your dough to be a bit neater, you can wet your hands and fold it into a neat ball.As with any sourdough bread, the bulk ferment time will depend on the temperature in your kitchen and of course the strength of your starter. You're looking for your dough to be just UNDER double.Now remember this is an enriched dough and it's a lower hydration so it will take longer than a lean dough. Try to put it somewhere warm if you can.
- Shaping:Once your dough has finished its bulk ferment you can shape your dough. Before you start shaping, lightly butter or oil your loaf tin (I've used olive oil for the loaf in the photos).Ease your dough out of the bowl using a silicone dough scraper, remembering to have the smooth side on the counter and the sticky side facing up. You shouldn't need any flour for this as your dough shouldn't stick (it's such a beautiful silky, enriched dough).Gently ease your dough out into a rough rectangle, with the shortest side in front of you.Pop any large bubbles and gently flatten the dough using your fingertips. Then roll the dough up into a log (using the short side) and tuck the ends under. Leave the dough to sit and relax for around 30 minutes. After 30 minutes, tighten up the log by pulling the dough a little, using the sticky underside to create tension. Then simply plop the log into your buttered tin.
- Second Rise:Once your bread has been shaped and is in the tin, you'll need to let it rise again so that it fills up the shape of the tin. This should only take a few hours, but like the bulk ferment, this will depend on the strength of your starter and the temperature of your kitchen. You'll know it's done when it's risen above the lip of the tin (if you're using an open tin). It will be rounded on the top. When you poke it it will leave a slight indent but spring back nice and slowly. If you shaped it quite tight, you'll see some tension on the top of the dough as it's risen.
- Baking Your Sandwich Bread:Preheat your oven to around 180C/350F. Let your oven warm for around 10 minutes and then place your sandwich loaf in the oven and bake for approximately 40 minutes or until the top is golden brown. It may take a little longer depending on your oven - you'll know it's done when it's golden brown on top and sounds hollow when you tap the base.
- Once your dough is baked, remove it from the tin and leave to cool on a wire rack. Brush the top with some melted butter for a richer flavored, softer crust.Ideally, leave it for at least 90 minutes before you cut into it. Enjoy!
Nutrition



![Sourdough Cinnamon Rolls [with sourdough discard option]](https://www.pantrymama.com/wp-content/uploads/2021/11/FLUFFY-SOURDOUGH-CINNAMON-ROLLS-12-768x1152.jpg)

Don't you need to score the top of the dough before baking. Thought it was required for sourdough.
No you don't need to score this bread, that's more like a boule or batard that you're thinking of. Sandwich bread doesn't require scoring.
I would love to understand better the suble differences in your sourdough sandwich bread and how the affect the bake.
Can this be made vegan friendly using almond milk and vegan butter?
That should work, Candi!
Will a pampered chef stoneware loaf pan work?
I'm not sure as I've never used one but you'll find all the measurements of the pan I use in the main post so you can compare sizing 🙂
Well I’ll try and post how it goes. Thanks for the response.
I bake my sandwich bread in a PC loaf pan, and it works great!
It will work great.
What size loaf tin do you use?
I've got all the info on the pan I use (including sizing and links) in the post 🙂 Let me know if you can't find it 🙂
Would this loaf bake ok in a dutch oven? Or would it lose its soft sandwich style?
It's designed to be a sandwich loaf so much better to bake in a pan 🙂
Would it be possible for you to add the approximate volume measures to the weights of every ingredient?
Baking by volume is inaccurate, using a scale with yield you much more success, hence I do not provide volume measurements 🙂
Benefits of Weighing Sourdough Ingredients: Why Not To Use Cups When Baking Sourdough
I wish this was measured with cups
Please read this so you understand why I don't write recipes in volume measurements. Grab a scale - it's one of the best things you can do for your sourdough journey!
Easy to make and delicious. I had a hard time not slicing it when it came out of the oven.
Can you please tell my WHY my loaves are splitting length wise along the rim of the pan. I would love to send you a photo. Both sides along the top edge of the pan are totally split open. WHY??
Otherwise the bread is FANTASTIC!
How to make sourdough bread less sour taste?
Try these tips - How To Make Sourdough Less Sour: A Guide To Making Your Sourdough Less Tangy
Is this recipe good if I use plant based milk?
Yes plant based milk is fine.
John, I just baked this recipe this morning in a Pampered Chef loaf pan and it looks/baked great!
First, the flavor is fantastic with a nice crumb. I did have to bake it quite a bit longer to get the correct temp or it would have been ruined. Last night, I don't know what happened. Same measurements, same starter/hydration, same ingredients. The dough was so sticky I ended up kneading in about an extra cup of flour before it was slightly sticky instead of pulling off my hands and table sticky. The rises were still the same, it still required the extra baking time to reach the proper temp. My daughter especially loves it, saying how amazing it is on a daily basis. I've found that a few tweaks can be expected with any bread recipe and yours is definitely worth it!
First, I want to say I’ve made this recipe 10 to 12 times and it turns out great every time. I do have a request. There are so many questions that are unanswered in your comments that I would love to know the answers to. I’m sure those that come to your site for the first time, would find the answers very helpful also. I hope you consider this. Thank you..
Thank you Joanne. I'm doing my best to get through all the comments 🙂 Thank you so much for your feedback 🙂
Can you cut down or leave out the sugar?
Hi, I am new to sourdough baking. I have a starter that doubles in volume about 8 hours after feeding (50g starter: 50g water 50g organic AP flour). In your timeline you show feeding the starter at 7:00 am and then using it at 10:00 am, will my starter work in this timeline or do I need to allow it to double before carrying on? Very informative site. Thanks.
How long should I bulk rise? (step 5)
Hi!
I just purchased and received this same farmhouse pan. I love it! I have a question though. Are you using a double recipe in EACH of those pans? I followed the 1X recipe and there is no way this dough would make it to the top of this pan on the second rise like your photo indicates in this pan. I’m just wondering if maybe it is a double recipe in each pan. This loaf is in the oven now, I can’t wait to try it!! Thanks for any info.
I have made this multiple times and gotten honeycomb texture ☺️
I love this recipe. Can I complete the second rise in the refrigerator overnight? I usually won’t get to the recipe until late morning or afternoon and I’d rather put them in the fridge and complete the next morning.
Is the nutritional facts based on the whole loaf or per slice?
Thanks!
How many servings in loaf, it shows in nutrition info calories etc, but doesn’t show a serving size that correlates with nutrition info, also I try to do low carb and would like to know grams of sugar per serving/slice. Can I substitute a low no carb sugar, like allulose, monk, erythritol in this or nay of your recipes? Thanks
The servings will really depend on how you slice the loaf and everyone slices their loaf differently, so it's best to weigh your slices and then use an app. to work out the information accurately if you rely on the information for dietary reasons. I'm sorry but I haven not used a low or no carb sugar as a substitute in my recipes so I'm not sure what the results would be 🙂
Is the ferment time on this long enough to effectively break down the phytic acid, etc? I can’t do bread unless it’s long fermented for better digestibility. Do I need to also refrigerate it after the bulk ferment to facilitate this better? I’ll probably use honey instead of processed sugar as well, if that affects anything.
If you are wanting a longer ferment, you might be better off doing a long fermented sourdough loaf like this one. You could also place this loaf in the fridge to cold ferment once it's shaped, but you will need to allow it to rise on the counter at some point either before or after cold fermentation 🙂
Is there a way to make this without sugar?
You can omit the sugar if you prefer, however I have used the sugar to develop the taste and texture of this recipe so it will affect the resulting bake.
This is the first recipe I tried after a few successful boules. After 15 hours bulk, this farmhouse loaf had only 50% rise. I remembered that I had doubled the starter in my boules and used 10% rye flour due to cold temps. I assume I can increase the starter in this recipe. Would you decrease the water in this case?
Hello, I'm wanting to know if I can use a Pullman pan with the lid on to create a square sandwich loaf with this recipe ?
Yes, but you may need to scale the recipe down so that you don't overflow the pullman pan 🙂 You can use baker's math to do this 🙂
Can you cold proof? Also, what temperature do you set your Brod and Taylor? This will be my first bake in mine! 🙂
Would this recipe work with all purpose flour?
Yes you can bake this with all purpose flour as it's a sandwich loaf 🙂
My loaf just came out of the oven. Smells great. The top didn’t rise up. The top is flat. I did refrigerate for 10 hrs.
This worked beautifully, thank you! Question - can I lower the sugar at all or is it integral to the recipe? Trying to keep added sugar as low as possible in my house 🙂
You can reduce the sugar if you prefer 🙂
I would love it if you would add a honey sub for sugar on your recipes
Been reading though your blog the past few months and learning so much!! One question about this recipe - I’m trying to get the max nutritional benefit from sourdough. Is an overnight second rise enough for this? Could I leave it longer, or would that mess with the integrity of the dough?
My dough is super wet, it’s not shaggy at all 🙁
This may be odd, but how would I make the loaf more sour? We love an extra sour bread, I've been unable to do it in a sandwich loaf.
Thank you for all the wonderful recipes, and information you have on your website. 🙂
Sandwich bread is generally made to not be sour (especially if it's aimed more at kids like this one). I would recommend making this sourdough loaf pan recipe and doing a long cold ferment for a more sour loaf.
I love this recipe but I am having one small problem. I have looked all over the internet looking for a jumbo loaf pan with the dimensions you’ve stated and they just do not exist. Could you share where you got your pan with us?
I purchased my pan from an online store in Australia called Kitchen Warehouse. The pan is a brand called Bakemaster. I'll try and find some suppliers in the US - I'll come back to you on this 🙂
Hello, can I substitute fresh milled flour for this recipe? Would I use the same grams or a little less since fresh milled will absorb more water? Thanks!
Could this be made dairy free? Maybe Almond milk and olive oil?
Yes you can use almond milk and olive oil if you want to.
Did you use the Pampered chef pan? I wanted to use mine....
I'm sorry I haven't tried a Pampered Chef pan for this loaf. But if you try yours, maybe you could come back and let us know how it goes 🙂 I hope you enjoy the recipe 🙂
Can this cold proof in the fridge overnight? Like the second rise?
I’ve been making sourdough artesian loaves for months now, but this was the first time I’d tried making a sourdough sandwich loaf. And oh my goodness was this the most soft, flavorful, delicious loaf I’ve ever made or tasted! It was so easy to put together too! Thank you so much for this recipe, which I’m certain will become a staple in our home!
Have you tried inclusions in the sandwich bread?
What have you tried?
Could you make this dough the day before? If so, would you allow it to second rise before putting it in the fridge?
Yes you can make the dough the day before. You could shape it and then place in the fridge. Take it out and allow it to do the second rise before baking so that it's nice and puffy and soft and you don't risk under fermentation. It's really easy to under ferment sandwich loaves.
What if i dont have a Jumbo loaf pan? Will this yield 2 medium loaves?
Yes you could bake as 2 medium loaves for sure.
Can I place it in the fridge overnight then do second rise in morning?
Yes you can do this - just make sure that you really do get that second rise so that it's nice and puffy before you bake it.
My oven has a 'Proof' function. Would this be ok to allow my dough to rise in??
You can, but sometimes these are too warm. I do use my oven to proof in, but what I do is I switch it on for a little bit and then I switch it off but leave the dough in there, that way it doesn't get too warm.
Hi! As always, thanks for all your fabulous recipes and hints and tips! You help make sourdough baking less stressful 🙂 i’d really like to bake this loaf and have two 9x 5 x 3 loaf pans. Is it worth purchasing the big farmhouse loaf in order to get the best bread? I also bake for two so sometimes smaller is better although i find sourdough freezes well. Don’t want to sacrifice flavor but I wonndered if maybe i could scale the quantities a bit to fit the pans i have? Or i can also purchase a bigger loaf pan if that might be best.
Thanks again!
Hi Lisa - thanks so much for your kind words! You can definitely split this in two, which might be more convenient if there are only two of you. That way you can freeze one and eat one. Just split the dough in two at shaping. You won't sacrifice any flavor by doing this. Enjoy xo
Was tired of crunchy crust. Wanted something soft and a bit easier than the longer proofed sourdough. BOOM this recipe is it. Easy, tasty and so soft.
Thanks!
If I am not ready to bake, can I leave the dough in the refrigerator and finish the next day?
How long do you recommend doing the stand mixer 2 minutes on, 2 minutes off, for? I believe I may have over kneaded. Granted the dough was not dense or firm, but this morning when I went to shape it, it was very sticky and would not hold shape well. I still put it in loaf pan for second rise, and will bake anyway in hopes I get something edible out of it.
Is this supposed to be dense/heavy? Mine seems heavy
Since I’m so new to sourdough baking, why does this recipe not require a stretch and fold? Forgive my ignorance as this is a real learning curve for me.
This recipe is a keeper.
My family loves this bread. It doesn't have any sourdough taste at all. The only change I made was that I raised the water percentage to 70% and used organic coconut sugar.
Should the oven be fan forced or top/bottom heat please?
Also have you ever used steam for the first 10/15 mins for a sandwich loaf?
Kate uses a fan forced oven generally. She doesn't use steam for sandwich bread, although sometimes will spritz them with water.
This recipe was a GREAT SUCCESS! I have just started my SD bread journey abt 6 months ago … while I have been able to do well with boules - I wanted a good SD sandwich bread and THIS IS THE ONE ! Thank you for sharing ALL your knowledge with us newbies ❣️
I'm so excited for you 🙂 And glad you're loving this recipe 🙂 Thank you so much for taking the time to comment xo
I’m new to sour dough baking and this recipe was my first and best loaf so far. Why is the dough kneaded and not stretched and folded?
This is a sandwich loaf and a lower hydration dough so it needs to be kneaded rather than stretched and folded. Due to the lower hydration, there isn't enough moisture in the dough for it to be kneaded 🙂 I hope that helps 🙂 x
Oh my goodness 💕 so easy! So delicious. My question is why so much sugar? It’s the first thing everyone said they tasted. But I love love love this recipe!
The sugar is just based on the best taste/texture after testing the recipe. Feel free to leave it out, or reduce the amount if it's too sweet 🙂
I,m making the Farmhouse bread, can I put it in the fridge for the 2nd rise and bake it in the morning ???
You can. Place the loaf in the fridge once it's shaped. Allow the loaf to rise around half way up the tin, then place in the fridge for up to 12 hours. When you're ready to bake it, allow it to rise over the lip of the pan and then bake.
Starter or levain? This confuses me in recipes. will recipes say Levain instead of starter?
Starter 🙂 You can read about the difference between starter and levain here 🙂
This recipe sounds just like I need. I love making your Simple SD Bread, but want something softer. I’m a little confused about pan size, though. I have several loaf pans that are 9” x 5” x 2.5”. Are they too small or should I double your recipe and divide it into 2 loaves?
I pre-heat my oven @ 475* and when I put the bread in, I turn it down to 375*. I get an incredible rise and crumb!
Why can’t we just bulk ferment in the loaf pan instead of rising twice?
This is now my favorite!!! Beautiful soft crust, sturdy crumb without being tough, cuts thin slices easily, mild flavor. Absolutely fantastic!!! Thank you!!!
Have you ever made this without the sugar and butter? Wondering how to adjust the other ingredients if those are left out? Thanks
You can leave them out, but they are there for flavor and texture so the resulting loaf will be different without them. If you're looking for a loaf without those ingredients, you might like to try this one 🙂
I love this recipe. I am out of bread flour so can use King Arthurs all purpose flour instead?
Yes you can use all purpose flour - King Arthur is actually pretty high in protein so that should be fine 🙂
I just reread the whole recipe and I see that you addressed the AP flour vs Bread flour. Sorry for the redundant question. I do love this recipe.
This recipe turned out EXACTLY as you describe each step. Lovely, tall, fluffy sandwich loaf. My friends and hubby are hooked!
Hi can I omit milk and use water only?
For butter can I use olive oil instead?
I'm not sure about replacing the milk with water. That could work, but if you can use another type of milk (plant based also works great), that's a better substitute. You can use olive oil instead of the butter.
The Sourdough Farmhouse White Sandwich Loaf baked beautifully and is delicious! Thank you for such a wonderful sourdough recipe; this bread will now become a staple for us. I know you mentioned this is your legacy loaf for your children, but you are already famous in our house!!
That is so sweet, Ann! Thank you so much for your comment. 🙂
PLEASE send me a recipe for a sourdough spelt flour bread in a 9×5 loaf pan !!! PLEASE PLEASE.