Sourdough Fruit Bread: The Only Sourdough Raisin Bread Recipe You'll Ever Need!
This post may contain affiliate links.
This sourdough fruit bread is absolutely next level.
It has all the makings of not only the perfect sourdough, but also the perfect breakfast.
It pairs the wonders of sourdough with the sweetness of raisins and the delicate hint of cinnamon. Ready to try it?
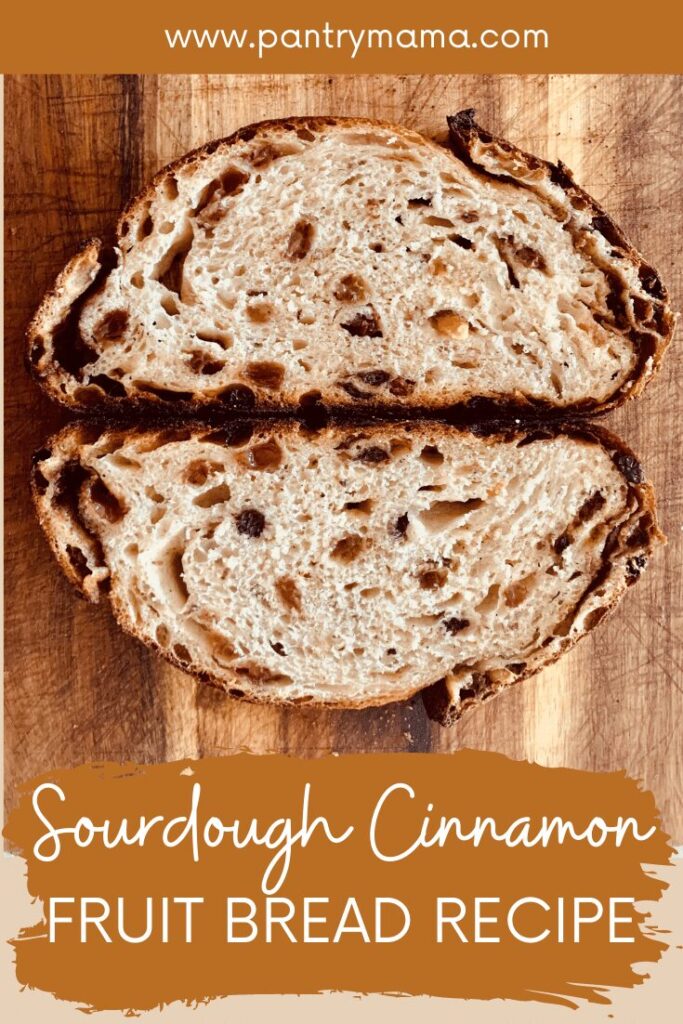
This recipe came about because my husband absolutely LOVES raisin toast.
You know, the generic store bought stuff. It's sweet, easy and tasty ... but really doesn't fill you up.
You can eat half the loaf and still wonder what's for breakfast, right?
Well, I set about developing a loaf of sourdough bread that would not only satiate his love of all things cinnamon and raisin, but also fill up his belly so he was set to achieve great things for the day.
This is a bread that is loved by everyone in my household.
It is delicious to eat fresh - with it's delicate crust and soft squishy crumb. It's perfect toasted. It freezes really well - sliced or as a whole loaf to "refresh" later.
The smell when this loaf bakes will have you peering through the oven door, just waiting to get a glimpse of the sweet, sourdough goodness that lies within.
If you love sourdough bread with fruit and nuts, why not try some of these combos - sourdough walnut raisin bread, orange cranberry sourdough bread or even this chocolate walnut sourdough bread.
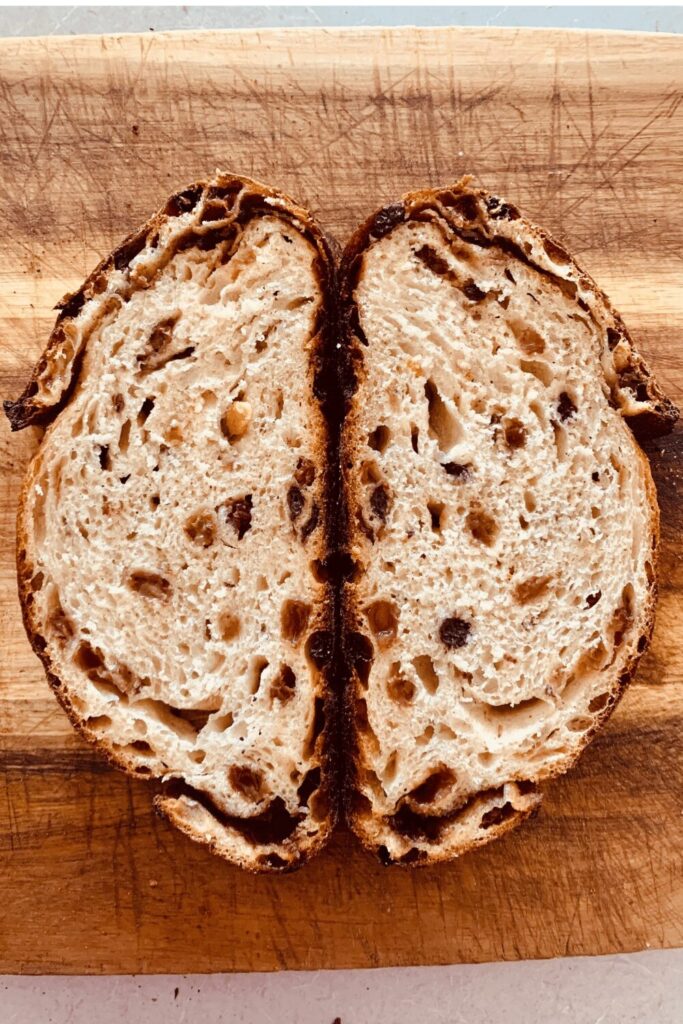
Fruit Bread with Cinnamon Filling
To bring the cinnamon flavor to this loaf, I have chosen to add it after the bulk fermentation, just before shaping.
The reason for this is that cinnamon can hinder fermentation so by adding it after the bulk ferment you can ensure that your bread rises as much as possible.
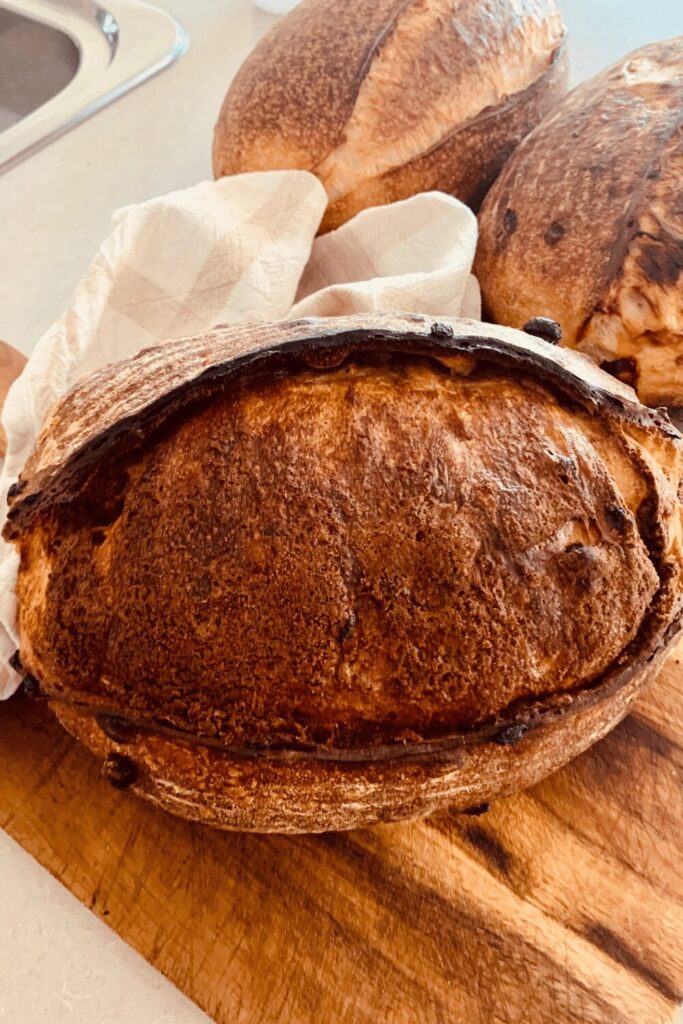
The cinnamon is mixed with butter and flour to ensure that the filling sticks to the bread dough and does not create separate layers when you shape the bread.
Depending on how you shape your bread, you will end up with a delicious cinnamon butter belly.
I prefer shaping this bread as a batard because it's easier to slice for toasting - but it will work in any shape you'd like.
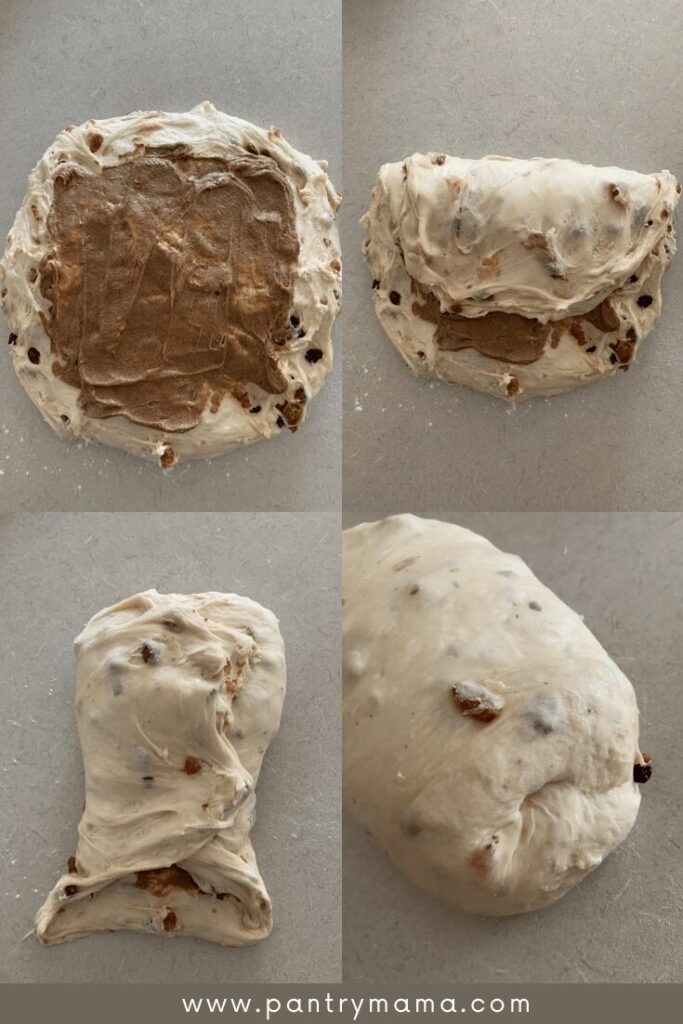
Here are a few photos of my dough as its being shaped. You can see that it's light and pillowy making it very easy to shape.
Using A Sweet Starter (Levain)
If you've been in my Facebook Group for a while, you might know I'm not a fan of "levain".
Just feed your starter and let's bake bread!
However, sometimes I do like to play with variations to my sourdough starter (hello Pasta Madre) and I have played around with a sweet sourdough starter recently.
I used the sweet sourdough starter to bake a few loaves of this sourdough fruit bread and I have to say that it turned out very well (it does however work just as well with a regular sourdough starter).
To build a sweet levain I simply fed 50g of my mature sourdough starter with 25g of raw sugar, 50g of flour and 50g of water. Stir it vigorously to ensure that the sugar is mixed throughout. You can use this when it peaks or you can choose to repeat the process to really get the sweet starter moving.
Even when I use a sweet levain, I still add the honey in the recipe to sweeten the bread.
This starter is also really lovely in these sourdough pancakes.
I prefer to just build this sweet levain when I want it - as opposed to constantly feeding two sourdough starters.
You can read more about adding sugar to sourdough here and there's a full guide to the differences between a levain and a sourdough starter here.
You could also try this sourdough fruit bread with a chocolate sourdough starter.
Sourdough Fruit Bread Recipe Variations
This sourdough fruit bread recipe makes a fantastic loaf - but there are so many ways you can tweak it. This recipe is literally the only sourdough fruit bread you'll ever need! Check out some of these sourdough fruit bread variations:
Heavy Sourdough Fruit Bread - if you prefer a heavier fruit bread, you can double the amount of dried fruit you add. Instead of a generic "mixed dried fruit" you could also include some chopped apricots and figs. This will add to the heaviness of the sourdough.
Rye Fruit Bread - if you love the earthiness that rye flour brings to your sourdough, substitute up to 30% of the Bread Flour with Rye Flour. You can read about Baker's Math here.
Sourdough Raisin Toast - love a traditional raisin toast. Substitute the mixed fruit with plain raisins. You don't have to soak them before you add them, but if you want to, you could soak them in maple syrup, vanilla essence or even just some warm water to plump them up.
Fruit & Nut Sourdough Loaf - love some crunch? Substitute half the dried fruit with your favorite chopped nuts. We love a combination of walnuts and pecans.
For an aromatic twist, why not try adding flavored tea instead of water? You'll find a full guide to using tea in sourdough bread here.
I recommend this sourdough fruit bread be baked in a Dutch Oven for maximum oven spring.
If you have whey available to use, this cinnamon fruit bread is beautiful when you replace the water content with acid whey. You can read more about using whey in sourdough here.


Sourdough Fruit Bread Recipe with Cinnamon {plus variations}
Equipment
- Mixing Bowl
- Digital Scales
- Banneton
- Dutch Oven
Ingredients
- 500 g Bread Flour
- 350 g Water
- 100 g Sourdough Starter fed and bubbly (see levain alternative in notes)
- 10 g Salt
- 30 g Honey
- 100 g Mixed Dried Fruit
Cinnamon Filling
- 40 g Butter
- 10 g Cinnamon
- 30 g All Purpose Flour
Instructions
- Autolyse:Weigh out your starter, water and honey in a glass or ceramic bowl. Mix them together so that the honey is dissolved in the water (or at least really well distributed).Then add your flour and salt and mix altogether with the end of a wooden spoon. The dough will be fairly shaggy and only just brought together.Cover your bowl with cling film or a damp tea towel and let it sit for around 1 hour.
- Forming Up Your Dough:Work your way around the bowl, grabbing the dough from the outside, stretching it up and over itself until a smooth ball is formed. You shouldn't need more than about 20-25 folds to form the ball.Once the dough has formed into a smooth ball, pop the cling film back on and let it rest for 30 minutes.
- Stretch & Fold / Adding the Fruit:You need to add the dried fruit to your dough during the stretch and fold phase. It's very easy to do! Try to add the fruit around the second or third set of stretch and folds. So do your first set of stretch and folds with the dough as is and then add the fruit on the second (or third) set depending on how your dough is behaving. Try to do around 4 sets of stretch and folds with around 15 to 30 minutes between each set.
- Bulk Ferment:Once you've finished your stretch and folds, place the cling film or damp tea towel back over your dough and let it rest and ferment. See notes below.
- Shaping Your Dough:Once your dough has finished its first ferment, it's time to give it some shape and surface tension. This loaf is a little different in that you will now add some cinnamon to the dough before you shape it. I think this recipe lends itself to a batard however it's completely up to you what shape you would like.Before you shape your dough - mix the butter, cinnamon and all purpose flour into a paste. Set aside.Ease your dough out of the bowl with the smooth side on the counter and the sticky side up. Pull it into a loose rectangle and spread with the butter and cinnamon mixture. Be careful to leave a border around the edges so that when you shape it the cinnamon is contained and does not leak out of the dough.Once you have shaped your loaf, make sure you tension the dough tightly to ensure that the cinnamon does not leak out. Place it into a floured banneton.If you need help with shaping, you'll find instructions for a batard here and boule here.

- Cold Ferment:Now your dough is in it's "shaping container" cover it loosely with a plastic bag or damp tea towel and place into the fridge. I use a large plastic bag to cover it - I just reuse it each time.Try to leave it in the fridge for a minimum 5 hours up to a maximum of around 36 hours. The longer you leave it the better your bread will be! A longer cold ferment creates beautiful blisters on your crust and a deeper sourdough flavour.

- Preparing To Bake:Once you're ready to bake your sourdough, you'll need to preheat your oven to 230C/450F. Place your Dutch Oven into the oven when you turn it on so it gets hot. Try to preheat for around 1 hour to ensure your oven is super hot - but you know your oven so just adjust this time if you need to.Leave your dough in the fridge until the very last minute - placing a cold dough into a hot oven will give you a great "spring".
- Time to Bake!When your oven is at temperature. Take your sourdough out of the fridge. Gently place it onto a piece of baking paper.Gently score your bread with a lame, clean razor blade or knife - a single slash or cross is perfect for this loaf.Carefully take your dutch oven out of the oven. Place the sourdough into the pot using the baking paper as a handle. Put the lid on and place into the hot oven. If you want to you can spritz your dough with extra water before you put the lid on.BAKE TIME:30 Minutes with the lid on at 230C/450F plus10-15 Minutes with the lid off at 210C/410F
- Finishing The Bake:When you remove your dough from the oven, carefully remove it from the dutch oven as soon as possible and place on a wire rack to cool.

Notes
- Notes on Sourdough Starter
This recipe is based on you having an active starter that you have fed a few hours before starting your bake. For information on whether your starter is ready, go here.
- Notes on Stretch & Folds
If you are going to do the stretch & folds on your bench top, spray your surface with water mist rather than using flour.
- Notes on Bulk Fermentation:
If your home is warm then your dough will ferment a lot faster and could be done in as little as a few hours. If it's colder, it will take longer, possibly overnight. I would recommend that you try to do your first few bulk ferments during daylight hours so that you can watch your dough closely.
Once you're more familiar with the process - and the temperature of your home - you will be able to do overnight ferments.
You will know your dough is ready to move to the next stage when it has *just* doubled in size. It will be fairly wobbly and full of bubbles. You should be able to see large air bubbles under the surface of the dough.
You don't want to let it go any further than doubled as it will be over fermented. If you want to do an overnight ferment, but your home is warm, consider using a little less starter (ie 25g).
Less starter means your dough will take longer to ferment and you will reduce the risk of over fermenting your dough. You'll find more information on these topics here:
When is my bulk ferment finished? What is the difference between cold ferment and bulk ferment? Why does the amount of starter matter?
- Notes on Baking
If you're worried about the base of your bread burning, place a baking sheet on shelf underneath your Dutch Oven - it works! If you're worried about your bread not being cooked all the way through, turn the oven off and place your dough straight onto the oven rack. Leave the door ajar and let your bread rest there for a few hours. Remember not to cut into your loaf too soon - you'll need to let it cool for at least a few hours (4-6 is best).





Just finished a loaf of this wonderful bread and my husband and I both love it! Thank you for the recipe! Can you tell me the proper steps needed to make two small loaves for gifts, instead of one large loaf? Would anything change except for pan size and baking time? Thank you so much for your help. Sincerely, Deborah
Hi Deborah - so glad you love it 🙂 So you would just divide the dough into two pieces at shaping and proceed from there. I would cook as normal, just reduce the lid on time by 5 minutes and then judge how cooked it is from there to ascertain lid off time. I'd love to see your mini fruit loaves, that sounds like such a lovely idea xo
Do you soak the dried fruit first?
you can, but you don't have to soak the fruit first for this sourdough bread. TPM x
just to confirm, reading this, if I am understanding correctly there is only 1 shaping happening? No initial shaping, bench rest, then final shaping... I have been doing initial shaping with a bench rest and a final shaping so far.
You only need to do one shaping 🙂
I do not have raw sugar to use in starter. Can I use regular white sugar?
yes this will work 🙂
I am confused. I just made this and the cinnamon spread for the last step tasted awful after baked. The bread itself is beautiful. The next time I will certainly mix sugar in with the cinnamon, butter, and flour mixture. Otherwise I guess I’ll have to make a bread pudding out of it. Always had great success with everything else on your site. Thank you!
Kate, Looking forward to baking my fruit bread today. I had a bit of a challenge spreading the cinnamon paste. Do you melt the butter? Thanks
This has been my best loaf yet! Halved the recipe as only half of the house will like it and wanted to try out a smaller banneton.
Great ear, great smell and can’t wait to try it!
Hi Kate,
Lovely recipe Thankyou! Just wondering if there is any tips to get the cinnamon evenly distributed through the loaf- mine seems to clump up in chunks.
Thanks
Hi, To add sweetness, is it okay to add a bit of sugar to the cinnamon mixture?
Or, will that cause additional rising during the cold fermentation?
Thanks
Made your Sourdough Fruit Bread with Cinnamon recipe and was pleased with the result. Great flavour and I had good spring, ear and colour. Layering the cinnamon paste was my major issue. Butter was at room temperature when mixed to a paste with the flour and cinnamon but it was far too heavy to spread effectively on the dough prior to shaping into a batard. I ended up with large dried clumps in the final loaf. Any hints?
Is the butter cold or room temp when weighing and when using to spread? Excited to try this recipe.
Hello. I was wondering if I could put walnuts in the bread? And if so, how much should I put in? I really love all of your recipes!! I am new at this. I made 3 starters. I just started a chocolate starter. I love all of this. You are so great!! Than you so much!!!
Kimberly
Hi Kimberly - yes you can add walnuts, I'd probably add around 75g of chopped walnuts to the dough. I'm so glad you love my recipes - that's so kind! And I love that you're enjoying your sourdough journey xx
Hi! I baked this today. The cinnamon leaked out and was seen on the crust when baked. When I cut open, there was no trace of mixed fruits. The crust got separated from the bread and I could see some fruits underneath the crust. Please help me to improve. I want to do again. So please help me. Thanks
What a delicious loaf of bread. Have been sharing this with family. The directions and video are great! Your site is wonderful!
Found this recipe be used with Einkorn wheat flour? Sounds delicious!!😋
Do you have a variation for cranberry-orange with almonds? Not a fan of raisins. Thanks!
If I make the levain, do I subtract the amount of flour/water used for the levain from the total flour/water listed in your ingredient list?
I love this recipe and am making it again today - two loaves for Christmas presents.
The reminder about sealing in the filling is very valid as I was too hurried with the first loaf and in the last proving it all slid to the base (LOL), Today will have the attentive cook on task.
"If you're worried about the base of your bread burning, place a baking sheet on shelf underneath your Dutch Oven - it works! "
You can also sprinkle polenta over the base of your Dutch oven and then lift and place baking paper with loaf, on top of that, it does stop your bottom crust from going really hard.
This tasted similar to Vogel's (iconic New Zealand Band!) Fruit & Spice Bread only better and for about 1/5 of the cost. Absolutely amazing. I added half of the filling (after reading comments here) and had very little leakage. I also placed the dough into a large sandwich tin (27cm x 11cm x 11cm - the Thermomix pan although I don't have a Thermomix!) and baked straight from the fridge into a cold Dutch Oven for 55 minutes at 220c in my Fan Oven. Thank you Pantry Mama - every single one of your recipes has turned out beyond fantastic. Not one fail - you've boosted my confidence no end!
Thank you for this recipe, my loaf turned out beautifully.. I wished I could share the picture .. it was a stunning loaf. I followed the recipe exactly up until the final refrigeration time, after 12hrs overnight on my counter I added the cinnamon mix then baked, the cinnamon paste didn’t thoroughly mix in to the loaf? I also added chopped walnuts, chopped dates and chopped apricots it was sooo super delicious.
I don't have a Dutch Oven! can I cook this just on a tray, or best to go for a loaf tin? Thank you so much!
Thank you so much for this recipe!💖 I've brought so much joy to my family and friends with it... it really is pure happiness in a bun💖😍🍞🍇
Happy baker
Jacqui
The bread turned out amazing! Thanks for the recipe. If I wanted to sweeten the cinnamon paste could I just add a little more butter and brown sugar? Thanks.
I see in step nine reference to oats but I don't see oats as an ingredient. In a comment I saw reference to sugar but I only see honey as a sweetener in the ingredients. Was this recipe updated? I'm confused.
Sorry this was a typo and has now been rectified.
Question I want to make this recipe with apricots and without the cinnamon. Trying to re creat on of my dav breads honey apricot spur dough. Am I OK to admit the cinnamon past or will that be too big of a chance to the recipe?
You can leave the cinnamon out if you would like.
Hi, can I just bake on oven trays as I don't have a Dutch oven 🙁
Yes you can do an open bake if you prefer 🙂
I do a super lazy version of this and it's still yummy. Just put the the bread ingredients (without the cinnamon filling), in the breadmaker on dough setting, adding 100g raisins & 100g candied orange peel, and I sub honey for brown sugar. Leave to prove for a day and then bake. I've made it about three times now. Thank you 😊
Ohhh great tips! Thank you, Kate!
I have baked a fair amount of sourdough within a year and “Pantry Mama” has the recipes down to a science. Each, different loaves, attempted come out to perfection compared to recipes from other sites. Delicious, manageable and no disappointment. Thank you!