Sourdough Garlic Bread Bites {with a discard option}
This post may contain affiliate links.
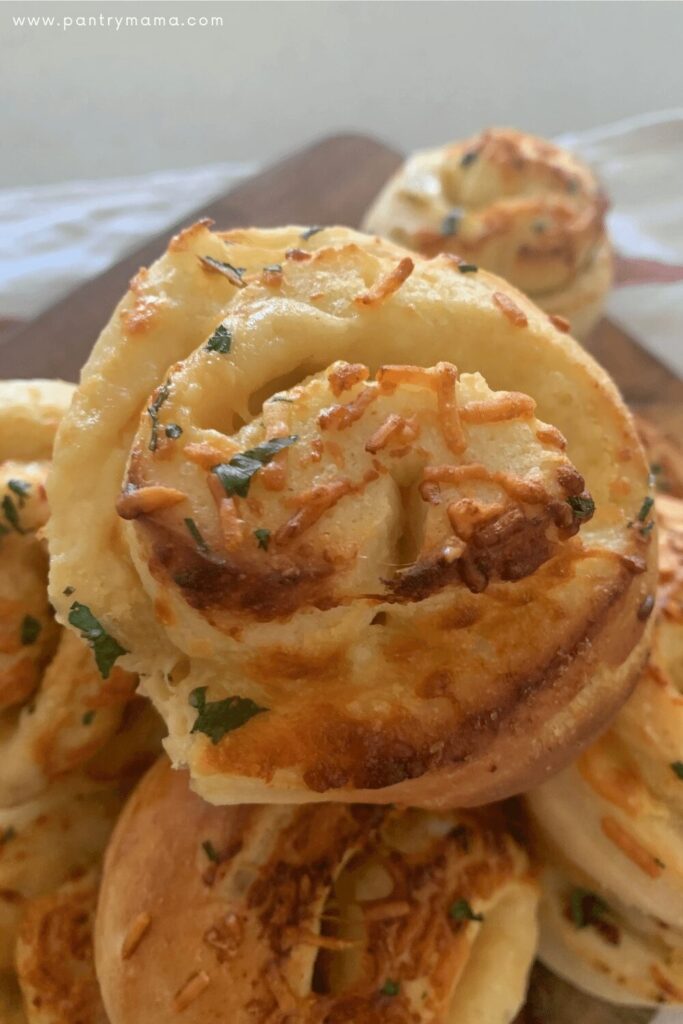
Sourdough Garlic Bread Bites are a fun way to enjoy garlic bread with a sourdough twist. Similar to sourdough garlic knots, but so much easier to make!
They can be made very simply with minimal ingredients, yet pack a big flavor punch!
If you want to use sourdough discard you can add some yeast to help them rise. Let's get baking!
My kids love garlic bread - they would seriously eat it at every meal if I let them.
These sourdough garlic bread bites came about when I was doing some back to school baking (did someone say sourdough ham and cheese pinwheels?). I had some extra dough left over and started experimenting.
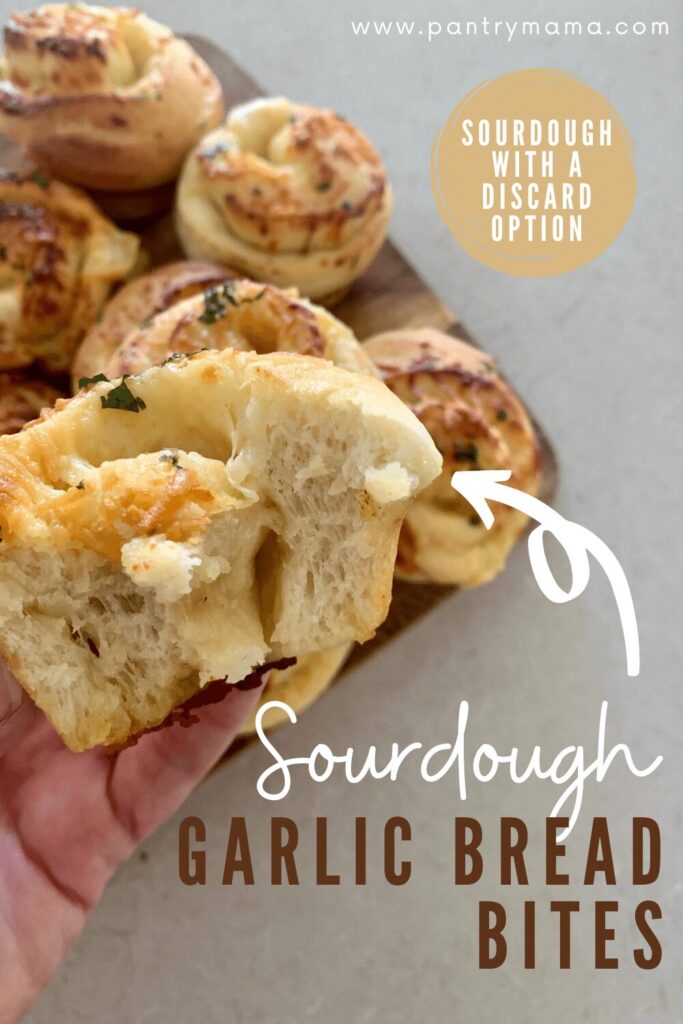
It took a few gos to get these perfect ... but my oh my are they delicious!
A super fun way to enjoy garlic bread (in a similar way to garlic knots) - whether it's as a side to your fave Italian food, with dip while you watch the big game or even for school lunches. You can make them big or small - depending on what you're going to eat them with.
I love to make giant ones for a simple lunch or for eating with pasta or parmigiana. I make mini ones for dipping in marinara or ranch sauce (OMG someone take the plate away from me lol). They also make a great host gift if you're heading to a friend's place for dinner. The smell is incredible!
If you love all things garlic and sourdough make sure you try this Sourdough Herb and Garlic Twist or this sourdough roasted garlic bread! And these sourdough focaccia bread muffins are delicious too!
Using Discard for Sourdough Garlic Bread Bites
If you are still waiting on your sourdough starter to mature - or you just haven't fed your starter - then you can use your discard to make these.
You will just need to make some adjustments to the process to accomodate using dried yeast.
They taste great either way. I must admit I do prefer the true sourdough version - I love the depth of sourdough flavor that comes from a slow rise.
But there's certainly no shame in using a bit of yeast if you need to.
Discard yeasted version is great if you have to get them done in a hurry for an unexpected dinner party or that afternoon snacking platter!
Here are the adjustments you need to make when using dried yeast:
- replace the sourdough starter with sourdough discard and add 7g of yeast (I prefer instant yeast).
- the rising of the dough will be much faster with dried yeast so you will only need to wait around an hour for the dough to be ready to shape.
- Once they are shaped, they won't take long to puff up and be ready for the oven, so don't leave them too long.
- If you want to shape them and then bake them later, you can store them in the fridge for up to 24 hours from when they're shaped. When you want to bake them, let them return to room temp and then pop them in the oven.
If you're looking for other sourdough discard recipes, you'll find loads of inspiration here.

A Few Other Things To Note:
- You can use bread flour for these, but I find that All Purpose flour gives them a softer texture that my kids prefer.
- I use powdered garlic for a few reasons - it doesn't have the "garlic burn" and my kids prefer the flavor, I always have it on hand (I bulk buy it) and it is just easy to sprinkle on in this instance. You can of course use fresh garlic but I would advise roasting it in some olive oil first. You could also use garlic granules if you don't have powder.
- You can add chopped/dried parsley to the tops before you bake for the "garlic bread look". I use it if I have some on hand ... but sometimes my kids won't eat the green stuff so it's easier to leave it off.
- Try using this Jalapeño Honey Butter instead of plain butter when making these garlic treats for a spicy twist!
- If you want to delay baking these, you can put them in the fridge once they've completed the second rise. You can hold them in the fridge for around 24 hours before baking.
Freezing Sourdough Garlic Bread Bites
You can freeze these in two different ways:
Bake them, let them cool and then freeze (I like to snap freeze on a tray first and then place into a zip loc bag). These are great for popping into lunch boxes or just grabbing for a snack.
Alternatively you can freeze the sourdough garlic bread bites after the second rise. When you want to bake them, thaw and let them come to room temp before baking.
If I know I am going to be freezing them, I place them into a disposable foil tray lined with parchment paper. That way they can rise and then I can freeze them. They can be defrosted and baked in the tray. This is also perfect if you're gifting them.
You'll find lots more tips for freezing sourdough bread here.


Sourdough Garlic Bread Bites
Equipment
- Mixing Bowl
- Digital Scale
- Muffin Tin
Ingredients
For The Dough
- 100 g Sourdough Starter fed and bubbly
- 500 g All Purpose Flour You can sub bread flour
- 250 g Water
- 20 g Sugar
- 20 g Olive Oil
- 10 g Salt
For The Filling
- 100 g Butter Room Temp
- 50 g Mozzarella Grated
- 50 g Parmesan Grated
- 10 g Garlic Powder
For The Topping
- 20 g Butter Melted
- 20 g Parmesan Grated
- 5 g Garlic Powder
- 10 g Salt
Instructions
- Autolyse:Add your sourdough starter, flour and water into your stand mixer or Thermomix. Mix the ingredients for around 30 seconds until they are just combined into a shaggy dough. Leave to autolyse for around 30 minutes.If you are in a hurry you can skip the autolyse and go straight to step 2.
- Now add the rest of your dough ingredients - salt, olive oil and sugar. Mix the ingredients for around 1 minute or until they are combined together. Now leave to rest for around 30 minutes.
- Kneading the Dough:Using your stand mixer or Thermomix, knead the dough for around 3 minutes. If you are using a stand mixer, you'll need to use your dough hook. The dough should become very elastic. If the dough is getting a little warm from being mixed in the mixer, give it a 10 minute rest. If it seems ok, knead for the full 3 minutes. Now give your dough a 30 minute rest.
- Knead your dough in the mixer for another 2-3 minutes. You'll know it's ready when it is slapping the sides of the bowl of your Thermomix or Stand Mixer. The dough will be very elastic and quite silky and smooth. It shouldn't be sticking to the sides of the bowl at all. If it's not quite there, it's ok to knead for a few more minutes to develop the gluten and get it to where it needs to be.
- Bulk Ferment:Once your dough is kneaded sufficiently, you need to bulk ferment it. If you're using a stand mixer, it's fine to leave it in the mixing bowl. If you're using a Thermomix you'll need to tip your dough into a glass or ceramic bowl to finish its bulk ferment.At this point, you can just leave the dough as it is, covering it with some plastic wrap to stop it drying out. If you prefer your dough to be a bit neater, you can wet your hands and fold it into a neat ball.As with any sourdough bread, the bulk ferment time will depend on the temperature in your kitchen and of course the strength of your starter. You're looking for your dough to be just UNDER double (this is because you want the dough to rise again when you've shaped it into your "bites".
- Assembling the Garlic Bread Bites:Once your dough has finished its bulk ferment you will be able to assemble your Garlic Bread Bites. Ease the dough out of the bowl using a silicone dough scraper, remembering to have the smooth side on the counter and the sticky side facing up. You shouldn't need any flour for this as your dough shouldn't stick (it's such a beautiful silky, enriched dough).Gently ease the dough out into a rough rectangle, with the longest side in front of you. If you feel like the rectangle is too big to handle, or you want to make smaller bites, divide the dough into two rectangles. This will make them easier to roll once you've added the toppings. It just depends if you want bigger bites or mini bites.Pop any large bubbles and gently flatten the dough using your fingertips. It definitely doesn't need to be perfect, it will all even out when you roll up the dough so don't stress about a perfect rectangle.Let the dough rest for 10 minutes.
- Make the Filling:While your dough is resting, add your butter, mozzarella, parmesan and garlic powder to a bowl and mix together to form a paste. Spread this paste over the rectangle(s) of dough, leaving about an inch (2.5cm) strip at the top of the rectangle. You'll need this section of the dough to be bare so you can join your rolls together.
- Rolling the Dough:Once you've spread the topping, roll the dough up tightly into a spiral or scroll. When you get to the bare edge, use wet hands to moisten the dough and seal it up. Place the log seam side down on the counter.Slice your log into smaller pieces (you want them around an inch (2.5cm) thick. But of course you can make them thicker or thinner if you like.
- Place your scrolls into a non-stick muffin pan. You can use a regular muffin pan for your bites - or you can use giant ones - it just depends on how big you want them to be. Once you've placed your scrolls in the holes, flatten them down a little so they squish out and fill up the holes. This also gives them more surface area for you to top before you bake them!
- Second Rise:Once your scrolls are squished in your tin, you will need to let them rise again. The time it takes for the second rise will depend on the strength of your starter and the temperature of your home. You want them to be soft and puffy, but still with some shape. It should only take a few hours - unless your house is very cold!
- Adding the Topping:Once your bites have risen for the second time, brush them with melted butter, sprinkle with more garlic powder, parmesan cheese and a little salt. You can also add fresh chopped parsley if you want a more authentic garlic bread look.
- Baking Your Bites:Bake them in a 180C (350F) oven for around 15 minutes (decrease this time if they are small, or at least watch them closely).
Nutrition





These were absolutely delicious! My family gobbled them up! I'm going to make more and freeze for my kids lunches. Thank you for the great recipe!
The amount of pages that printed when I just wanted the recipe were downright ridiculous. If had know 24 pages double-sided later I’d finally get the recipe I would have kept on moving. Please do some due diligence and fix this huge waste for future folks. So frustrating and totally took my excitement to get started on these delicious looking rolls started.
I'm sorry you had that experience, but it's definitely not an issue with the recipe. I've just tested it and it printed out a single page (PDF). Did you hit print on the actual recipe or at the top of the blog post? When you hit print, it should open a separate webpage with a concise printable version with no images 🙂
It’s really not that difficult, at the beginning of the page it specifies “jump to recipe”. Easy peasy! Pantry mama I love your recipes and find them so easy to follow. Made the sourdough sandwich bread and it’s the best I’ve made. Making these cheesy garlic bites for New Years, keep the recipes coming!Happy New Year and a blessed And healthy 2022
You can choose what you print. Recipe and nutrition options only are available. You probably didn't unselect all the text that just talks about the recipe.
Fantastic recipe. On my second time making it and it's hands down the best garlic bread recipe. I love the sourdough flavor that comes out but isn't over powering. Tastes like very rustic bread you would get at a fancy Italian restaurant. I used the yeast version for a quicker rise and it worked like a charm!
Do your due diligence and see the page your printing or at the very least the number of pages when you print preview.
This looks great! I think I will add some pepperoni to make it a throwback to a WV favorite. Thanks for the inspiration!
Hi , I am wondering if after I have put in muffin tin can I put in fridge to cook the next day ?
Hi, the recipe looks amazing and I can’t wait to try it for a party I’m having next weekend! I’d like to bake and then freeze beforehand. Can you please let me know how I should then heat the rolls up when I want to serve them? Thank you so much for your advice.
So you actually knead the dough in this recipe and not stretch and fold to incorporate air like we learn in creating sour dough bread?
I made these today & they are delicious! Instead of putting them in a muffin tin I opted to just leave them as pinwheels. They are huge but amazing flavor!
Can I refrigerate to bulk ferment for a longer amount of time without over fermenting?
Hi Kate
I made these bites and a small loaf.
They turned out fabulous .Will be making again just reducing the salt a little and adding bacon bits.
Thank you
Kelly
Me again. Thoughts on making this without sugar? Maybe with honey instead?
What are the kneading times by hand? I have made the pizza dough with the dough hook and it is still so sticky, so I want to try these kneading by hand. Thanks!
Yaaaaaasssss BACON!!!!
Can't wait to try these. How long approx. does your bulk ferment take? I realize it can be different in each kitchen but just wanting an idea. Thanks!
Looking to do a cold ferment so I can stretch it out and fit it into my workday schedule. Would I do that during the bulk ferment or after they are shaped? Thanks!
This was so good. I made garlic rolls instead of muffin tins. I am going to try this same recipe as cinnamon rolls soon!
I made these as instructed. They rose beautifully but after baking 15 minutes they were still totally doughy. I baked for another 15 minutes and then desperately turned up the temp to 400 degrees to try and get some sort of browning which I finally did. But after removing from the oven the center was still somewhat doughy. Do you honestly only bake these for 15 minutes at 350??
These are REE-dic-u-lously good!!! Oh, my goodness! The recipe is easy to follow and the dough...so light...so fluffy...so delicious! The only caveat - at 350 degrees they took closer to 30 minutes to get golden and "done" looking. I will ABSOLUTELY be making them again. So. Good.
Oh yes, I had to increase the bake time too. Glad it was not just me. Mine were super large and turned out great with extra bake time.
Can this be made easily by hand? I don't have a stand mixer.
I am not sure if my muffin pans are non-stick, should I use baking spray or cupcake liners?
I made this recipe and it was a huge hit at a recent dinner party. Instead of a muffin tin, I placed them in a cast iron skillet and they baked beautifully. Great recipe! (Your discard sandwich bread, cinnamon rolls, and pizza dough are favorites too. 👍) Thanks and keep the recipes coming!
Prepared these last night using discard. They rose nicely, but after refrigerating overnight, they deflated 🙁 I brought them to room temp, hoping for a re-rise before dinner, which they did not achieve. Hopeful, I baked at 350 degrees for 15 minutes, no rise and not done. Baked another 3 minutes ... still not quite done. Baked another 2 minutes ... smoking up my oven, so I took them out. After resting, they were "somewhat" done, but not quite. Tasted good, but I think it would have been better if I timed it out better to prep and bake the same day. Love the recipe, though. Great flavor!!! I'm still a "newbie" so no hard criticism. I hope to get some feedback on what I may have done wrong.
Seriously THE BEST sourdough recipe I’ve ever made. My kids wouldn’t stop eating them! That’s a WIN ! This is going to be a staple in my home now. Thank you!
Ive just started experimenting with sourdough, so some of the terminology is new to me. I want to put them in the fridge for 24 hours prior to baking. You say to do that after shaping. Is this after instruction no. 9 or after instruction 10, Your imput will help. Thanks,
These are a hit with my family, who appreciate the very mild sourdough taste. (I used the discard option). I cut the dough in half and made two rolls, which resulted in 24 pieces that fit perfectly in standard muffin tins. Will definitely make these again.
My only issue with the recipes on this site is the printing. I wish, when printing, the first 2/3 of the 1st page could be minimized or omitted. Most of the recipes are so long already - I’d prefer a 2 page printout instead of 4 or 5 pages.
Can the dough or formed garlic bites (at any point) be refrigerated and baked the next day? Thanks!
I have made these probably 8x, and each time they have great flavor (and everyone loves them!), but I’m not happy with the rise. They just seem dense! I’m an experienced sourdough baker (thanks to you for starting me out!) and get perfect loaves, as well as every other recipe I try. But something about these stump me. Any advice? Any specific part of the recipe/process I should be watching out for? I’m doing everything as written but I’m stumped why they aren’t turning out as fluffy as I’d like.
Can we use straight pan instead of using muffins pan to bake garlic knots?
Absolutely you can 🙂
These are so great. Thankful for the discard option today as I was using up discard with crackers, pancakes, and now these rolls to freeze. The muffin tins allowed for nice second rise. I frozen 12 on parchment and the two extra I cooked in airfryer at 325 for 12 min for dinner tonight. The yeast option with discard made for quick work kf this dough. Not sticky, easy to work with. Great find today! Thank you for sharing with us.
Can you please give the dimensions for the rectangular dough
What can you do if your doing everything by hand no mixer?
I’m wondering if I can stick the dough in the fridge overnight and bake them tomorrow.. the dough has definitely doubled maybe even tripled.
Has anyone figured out the weight amounts to cup/tsp/tbsp that they will share?
I don't have a stand mixer and will knead by hand. What should I look for to know I've kneaded it long enough but not too long?
I'm going to try to make these this weekend, but will double the recipe for a church function. Do you think I could put these on a large sheet pan close together like u would cinnoman rolls, and let them rise and then bake?
Absolutely you can 🙂
Could I somehow make these into dinner rolls?
Can I mix by hand? I don't have a stand mixer or anything like that yet.
Yes, you can mix/knead by hand. 🙂
We really loved these. Mine looked like big cinnamon rolls!
Has anyone used fresh garlic with the powdered garlic?
Thank you for sharing such a fun recipe!
I'm new to sourdough baking and I just wanted some clarification. I've tried your ap flour sourdough recipe and it turned out great and eoukd love the same success here. When you say 100g starter isn't that essentially a discard? I'll need to build up my starter to get that amount and I just want to make sure I'm doing the right thing here. Thank you so much for putting out recipes that help us newbies! ❤️
You're right, the starter you're taking out is kind of like discard, but you really want it to be active when you remove it. This post explains it best.
10000% my favorite sourdough recipe!!! Everyone loves them. I do a variation with Gruyere and Monterey Jack cheese - cheff’s kiss!😘
These are absolutely delicious! Definitely keeping those on hand and taking to all gatherings!