This post contains affiliate links. Please see our disclosure policy.

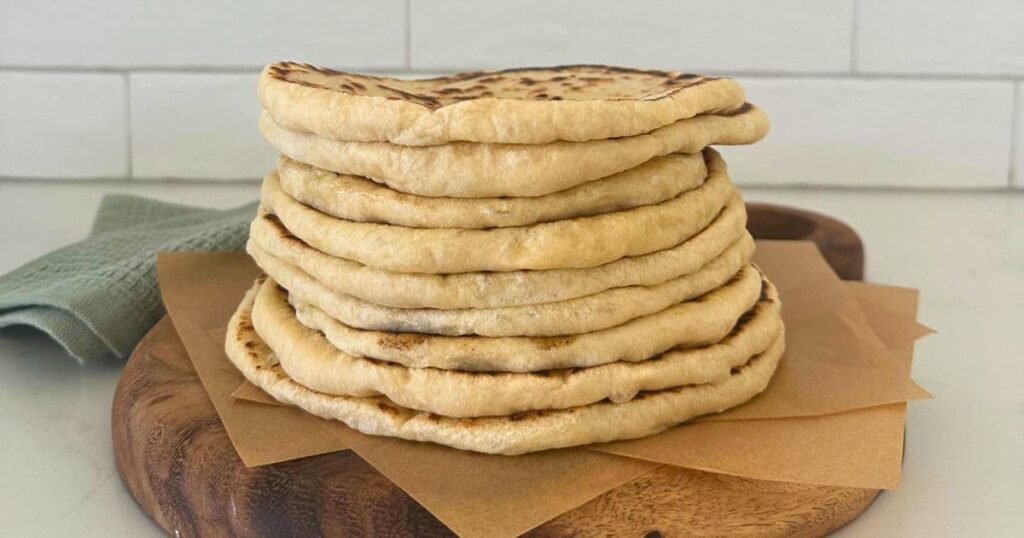
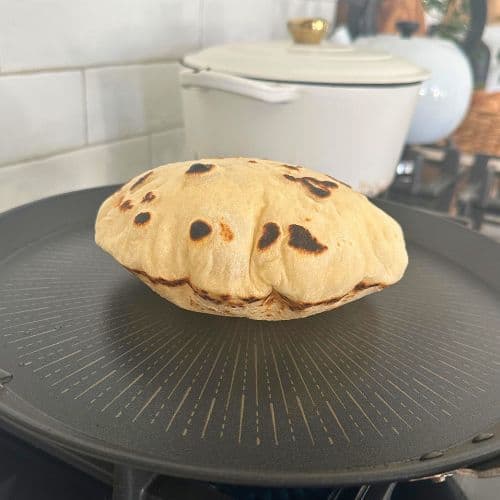
Making your own sourdough pita bread with your sourdough starter is a great way to get creative in the kitchen. There’s just something about watching sourdough pita bread puff up in a hot skillet. It’s mesmerising and something we make often in my family.
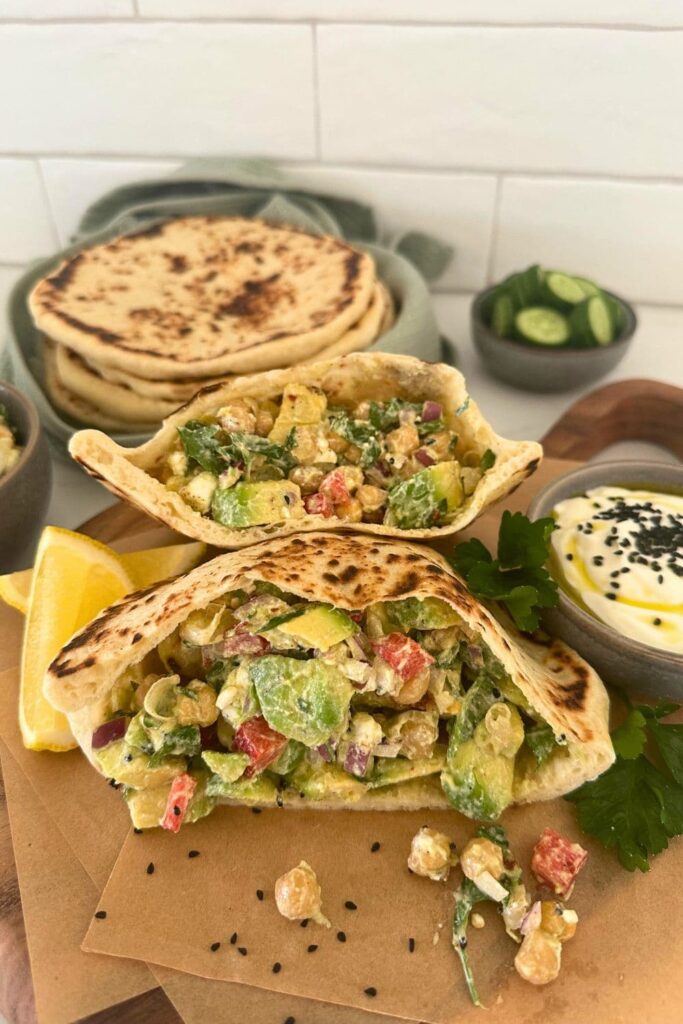
You can fill the pockets with meat, cheese and salads or brush them with garlic butter and dip them in soups and casseroles. Even when one or two of the sourdough pita breads don’t puff up, you can still enjoy them!
Why You’ll Love This Recipe!
Save Money – making your own sourdough pita breads is so economical and will save you so much money, as opposed to buying them from the store.
They’re So Soft – You are going to love the soft texture of these sourdough pita breads. You don’t have to warm them up, they are just naturally soft and delicious.
No Waste – It’s easy to use up the leftovers by freezing them or turning them into these delicious sourdough pita chips, reducing food waste in your kitchen.
Ingredients
There are very few ingredients in these sourdough pita bread, which is one of the reasons I love them so much! Something so delicious and creative comes from putting simple pantry ingredients together, just like these sourdough discard tortillas and sourdough flatbread.
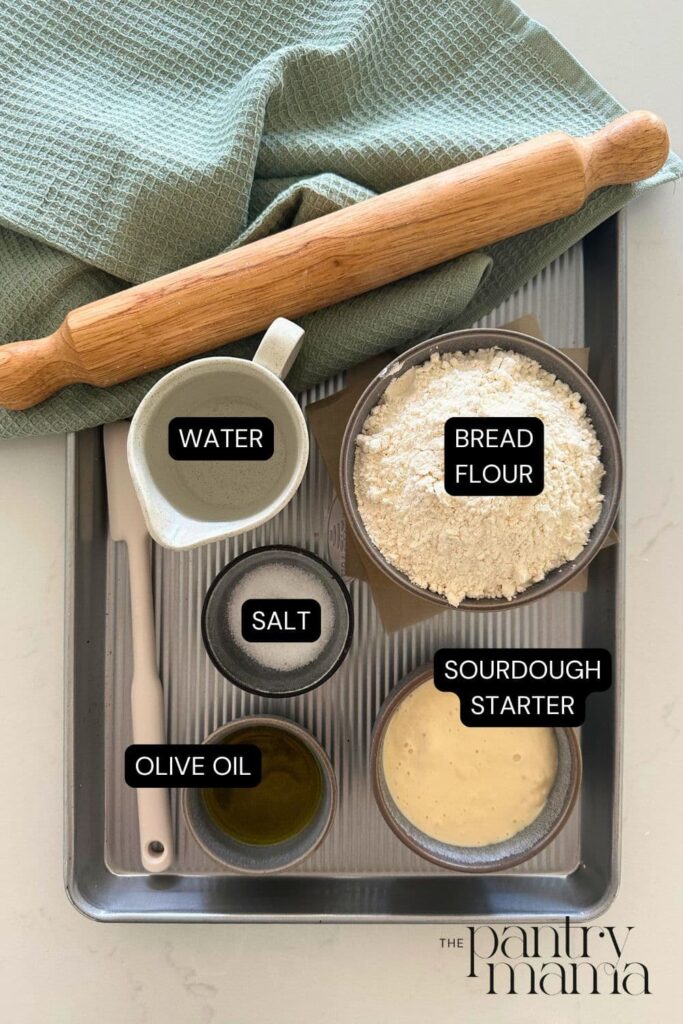
- Bread Flour – I get the best results from using bread flour. You can use all purpose flour if you prefer, but you will need to reduce the amount of water you use.
- Water
- Sourdough Starter (or sourdough discard) – I’ve made this recipe using active sourdough starter and fermenting the dough. You’ll get the best results from using a fed and active sourdough starter. You can use sourdough discard if you prefer, I’ve added notes for using discard in the recipe card notes. You can read more about the difference between active starter and discard here.
- Olive Oil – adding olive oil to this sourdough pita bread recipe makes the dough beautifully elastic and very easy to work with.
- Salt – you can adjust the salt to suit your own taste, I like it salty, but if you don’t, then reduce the salt by half, so down to 7g.
How To Make Sourdough Pita Bread
In creating this recipe, I have cooked the sourdough pita bread in a skillet. I know that some recipes will show you instructions for baking them in the oven, but I don’t like doing this as I feel that it’s a lot of fiddling around and can be hard to get the pita bread in and out of a hot oven. The only caveat here is if you’re using a pizza oven – they do work really well in a wood fired or gas fired pizza oven.
It is easy to cook them on a hot skillet. They are very quick to cook so you can cook a big batch fairly quickly, even with a single skillet. You can also use a BBQ plate if cooking a large batch as well.
This recipe has been developed from my sourdough flat bread recipe and has been tried and tested so many times!
Mixing The Dough
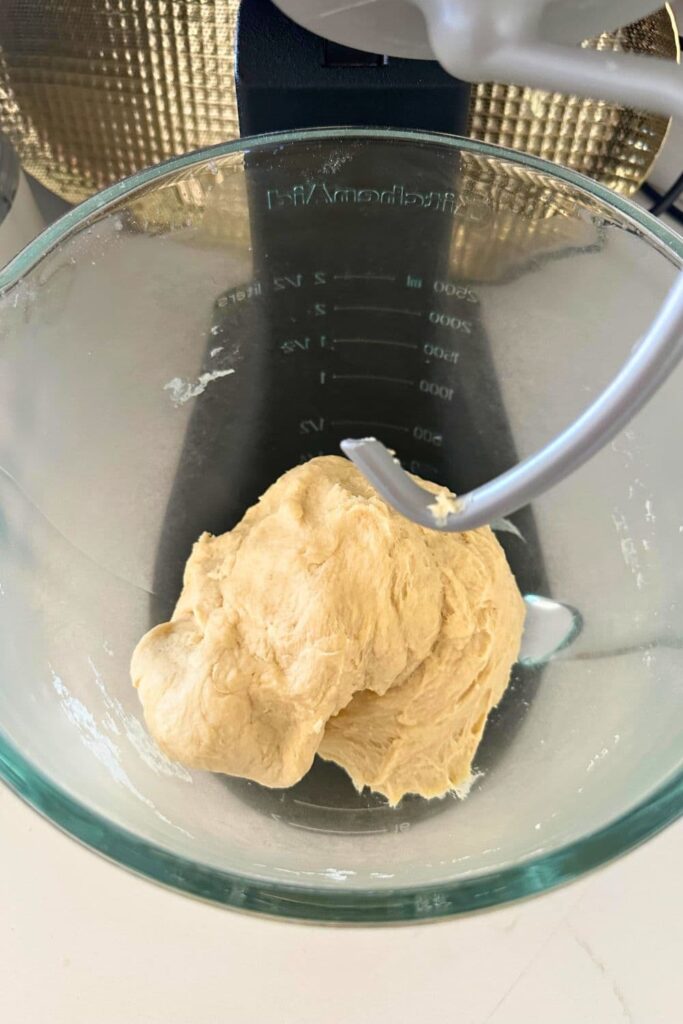
Measure out all of your ingredients into a large mixing bowl. You don’t have to pre mix, you can just add them all in on top of one another. This dough is extremely forgiving. Gently combine all the ingredients so it forms a shaggy dough. Let the dough sit covered for around 30 minutes.
Once the dough is hydrated, it’s time to knead it. You can do this by hand or you can use a stand mixer, it’s completely up to you (I prefer to use a stand mixer with a dough hook attachment).
You’ll need to knead the dough until it is smooth and silky (this is the same whether you’re doing it by hand or in a stand mixer). I find kneading by hand takes around 10 minutes, doing with a stand mixer takes around 3 to 5 minutes.
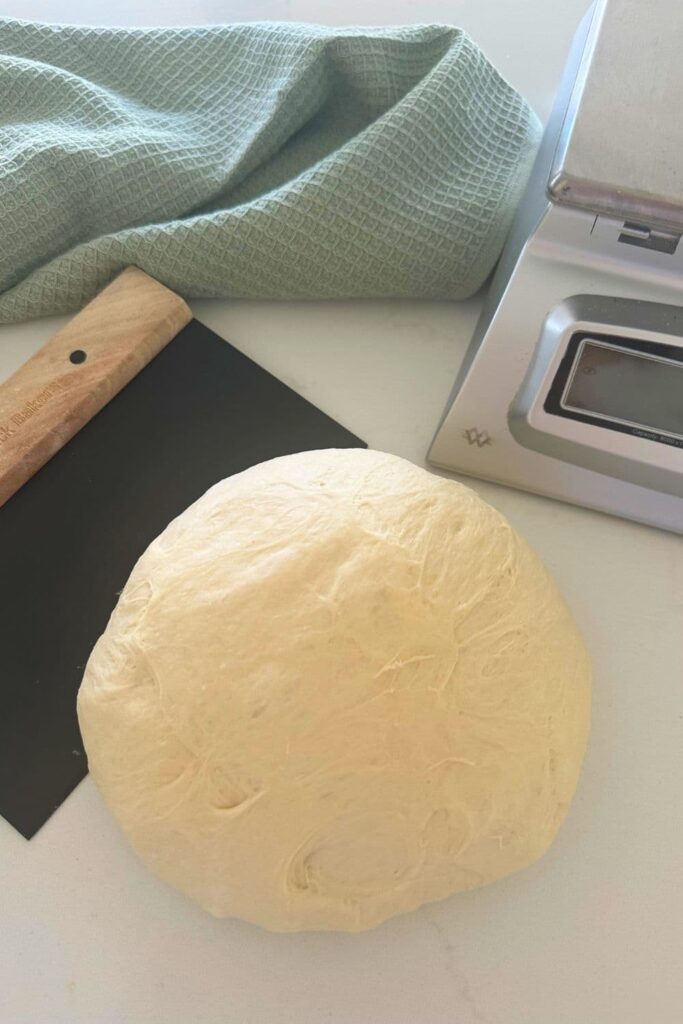
Once the sourdough pita dough is sufficiently kneaded, cover with plastic wrap or a damp tea towel and leave to rise until it has risen around 50%. This may take several hours, depending on the temperature of your kitchen. Watch the dough and it will show you when it’s ready, rather than going by a set amount of time. You’ll notice the dough will be puffy and have bubbles forming on the surface, even if it doesn’t seem like it’s risen.
Shaping The Dough
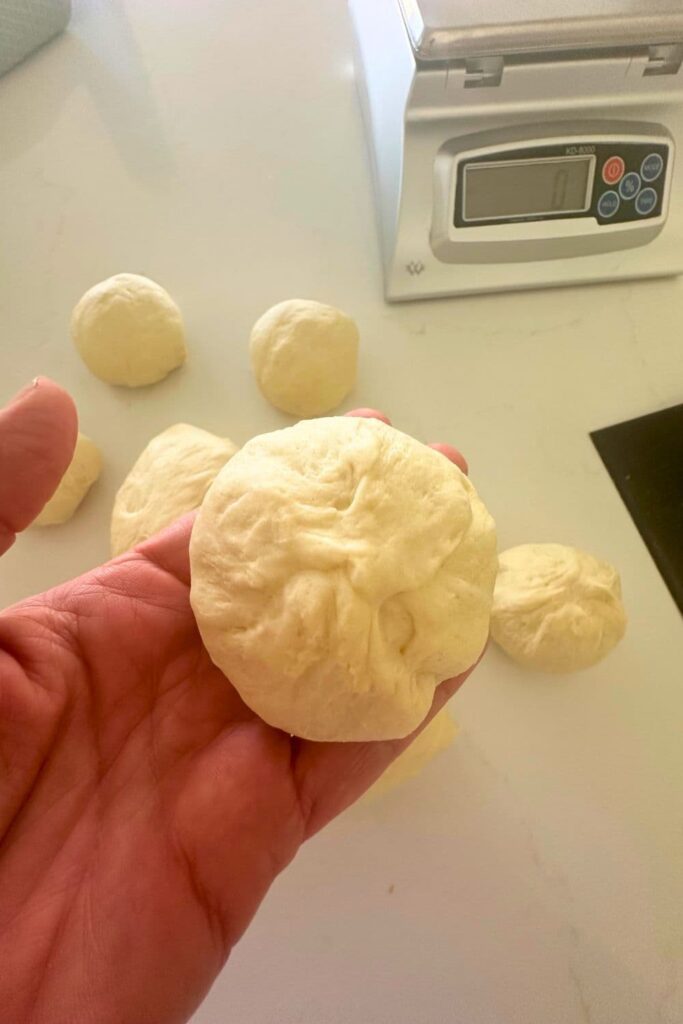
Once the dough is ready, separate the dough into smaller balls so they are ready to be rolled out. I find around 80g to be the perfect size. The easiest way to do this is to flip the dough onto your counter, making sure the sticky side is facing up.
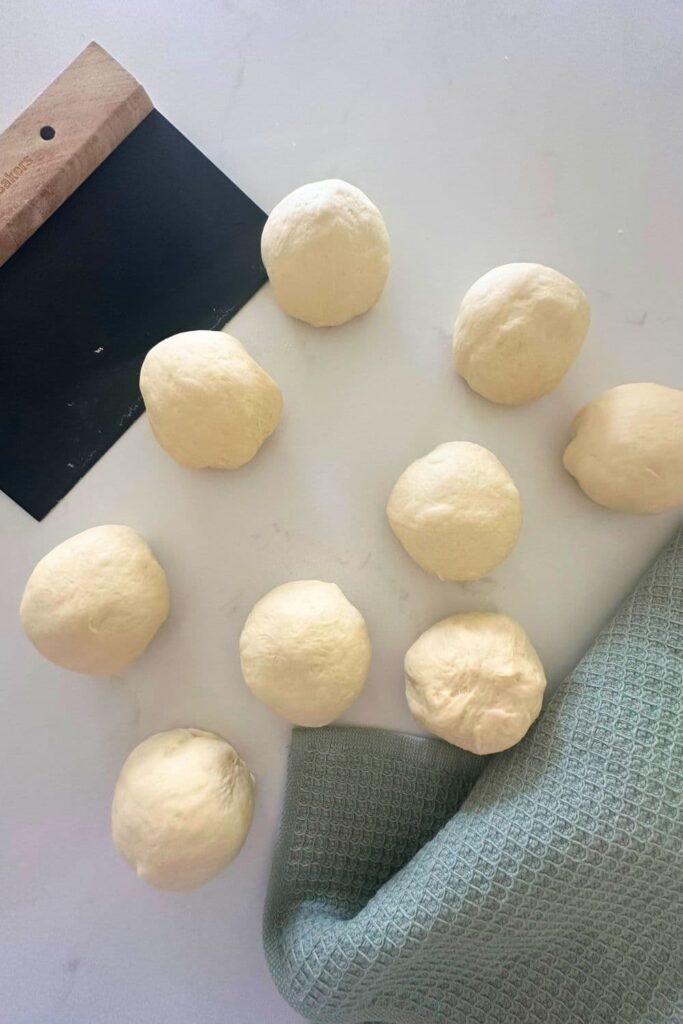
Use a metal dough scraper to gently cut chunks of the dough away. Gently form into loose balls. Leave the balls on your counter top, covered with a tea towel, for around an hour to allow the gluten to relax and the dough to proof.
Once the dough has relaxed you can easily roll them out into rounds using a rolling pin. You want them to be fairly thin, but not as thin as tortilla dough. You want them to form a pocket without tearing.
I find when I roll them out, I squash the ball into a round, then use my rolling pin to roll it flat. Leave it while I do this to another one, then come back and roll out again. When you go to throw them in the pan, you can gently stretch them out a bit more with your fingers.
Have some flour handy to use if you’re using a rolling pin so the dough doesn’t become sticky. The olive oil in the dough will make it quite elastic though.
Let’s Cook Sourdough Pita Pockets!
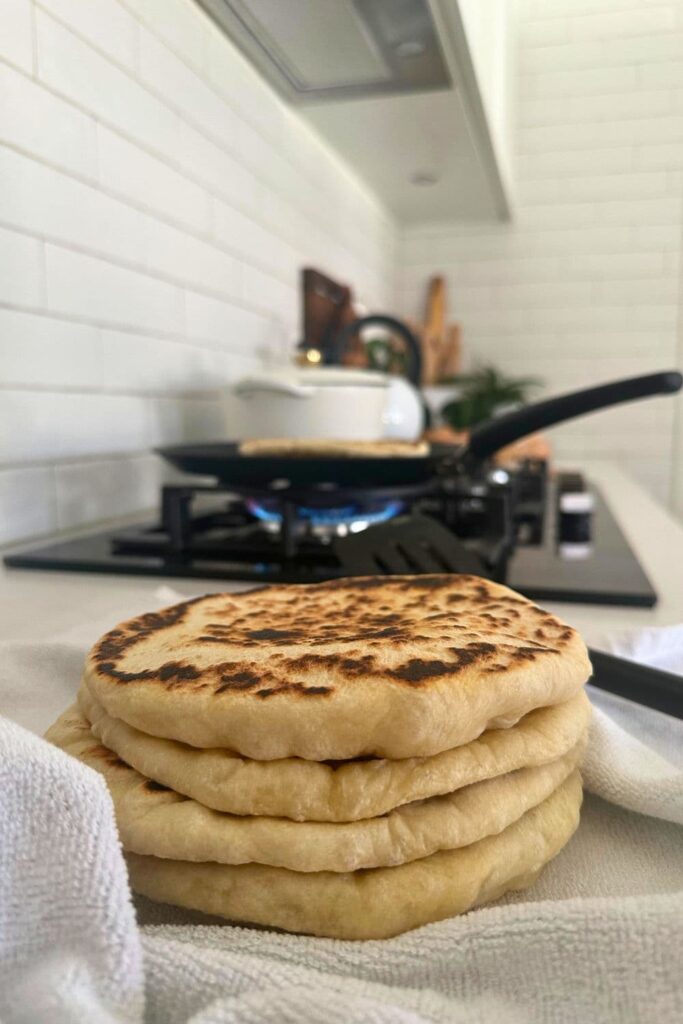
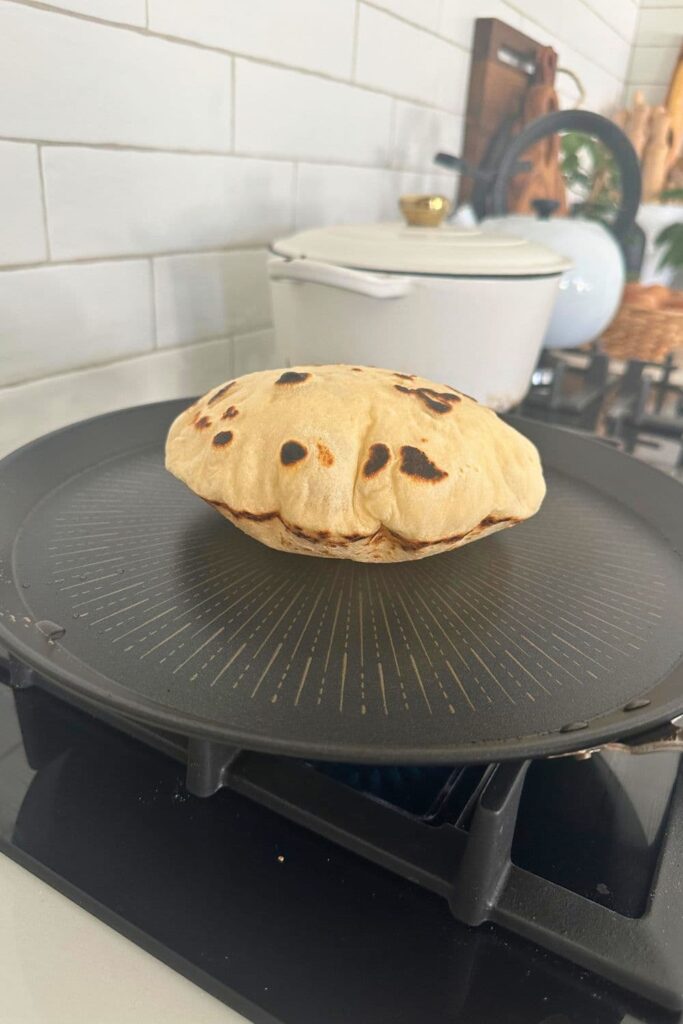
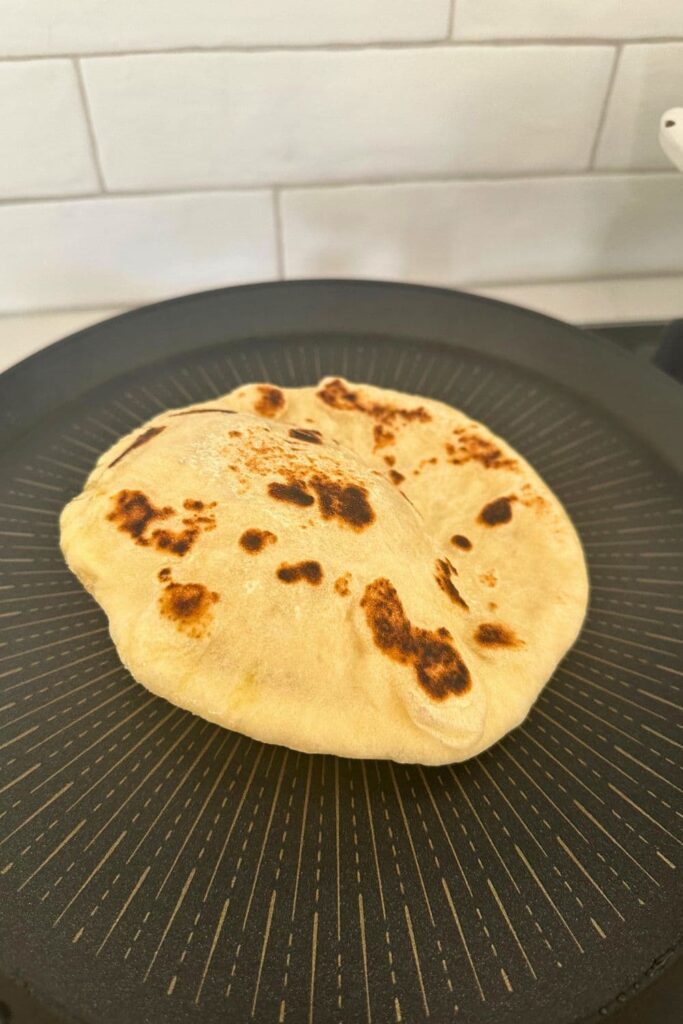
When you’re ready to cook, heat a frying pan, skillet or bbq plate until it’s HOT! These sourdough pita breads need a hot, fast cook.
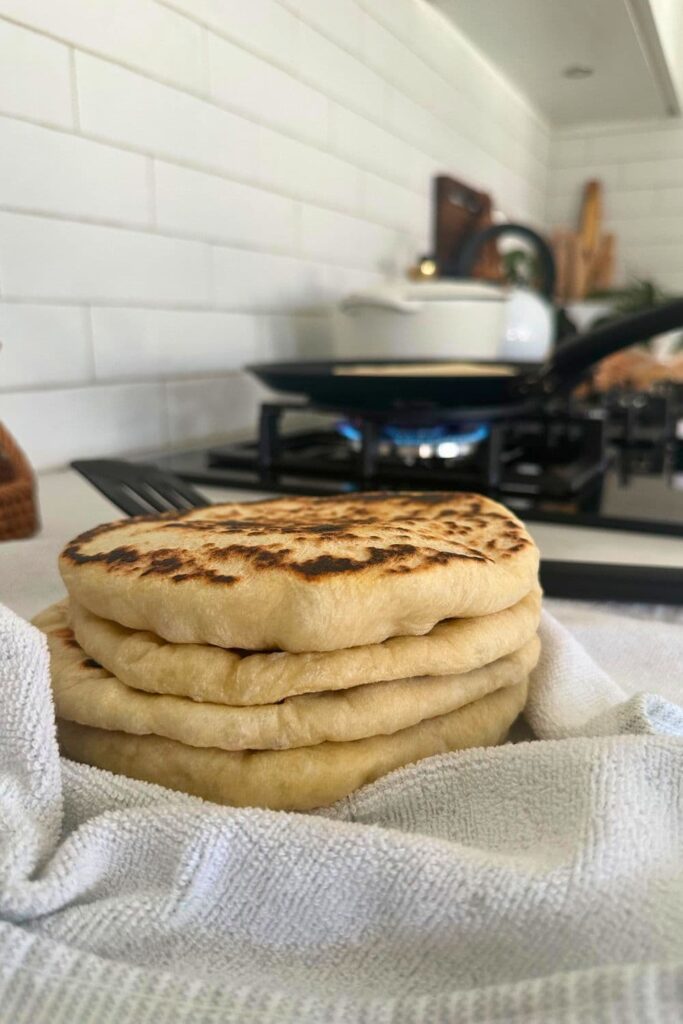
Gently use your hands to stretch out each pita bread before you drop it in the pan (they do shrink up a bit when they are resting). They will only need around 1 minute each side. They will bubble up and brown very quickly. Once it bubbles, flip to the other side to brown and then remove and keep warm in a towel while cooking the rest.
If you aren’t eating them straight away, keep the sourdough pita breads stacked and wrapped in a dish towel to ensure they stay nice and soft and pliable.
Tips For The Best Sourdough Pita Bread
While this recipe is fairly straight forward, I wanted to add some tips and tricks to make sure you get soft, puffy sourdough pita breads that you’re able to split and fill. Of course even the pita breads that don’t fully puff up are still delicious to eat, but if you’re after the hollow centre, then make sure you read these tips!
- Don’t Over Ferment The Dough – Make sure you don’t let the dough ferment for too long. You want to make sure that the yeast have plenty of energy when they hit the heat. Ensuring the dough isn’t over fermented will also ensure the gluten network is still strong and able to hold all the air that the yeast create when they hit the skillet.
- Create Lamination – when you shape the sourdough pita, make sure you pull the dough into a ball and then laminate the dough by rolling it out. This creates layers of dough that then creates the pocket when you bake them.
- Let’s Get Hot Hot Hot – When cooking them on a skillet, make sure your skillet is HOT! You need a hot surface to force the dough to bubble. If the dough is cooking on the second side and is only bubbling a little bit, don’t be afraid to flip it back over and see if it will bubble up even more.
Baking Timeline For Sourdough Pita Bread
| TIME | PROCESS |
|---|---|
| 9 PM | Feed sourdough starter before bed. |
| 8 AM | Mix dough for sourdough pita bread. |
| 8:30 AM | Knead the dough |
| 9 AM | Leave dough on counter to bulk ferment. |
| 2 PM | Cut dough into portions, shape into rough balls, cover and leave on counter to proof. |
| 3 PM | Use a rolling pin to gently roll the balls into rounds of dough. |
| 4 PM | Heat a frying pan and once HOT, cook the sourdough pita breads until puffy and golden. Wrap cooked pita breads in a dish towel to keep warm. |
| 6 PM | Enjoy for dinner. |
Remember that this is just a sample baking timeline. When creating a sourdough baking timeline you’ll need to take into account your own sourdough starter rhythm, strength and the temperatures in which you are working.
How To Store + Freeze
These sourdough pita bread are best eaten fresh out of the skillet. I like to bake them and wrap them in a dish towel and eat them within at least a few hours. They will stay soft for a few hours, as long as they are wrapped up.
To store them longer than this, you will need to freeze them. Place each sourdough pita bread between a layer of parchment paper and then place the stack into a ziploc bag. You can freeze them for up to 2 months.
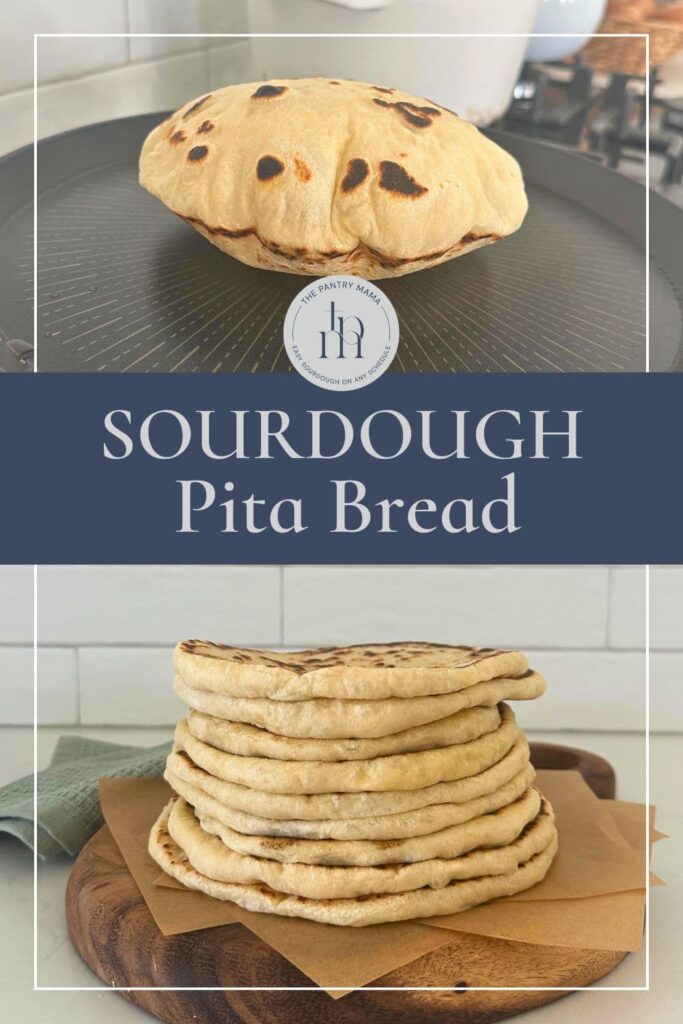
Sourdough Pita Bread
Equipment
- Stand Mixer (optional)
- Rolling Pin
- Cast Iron Skillet (or frying pan – optional)
- Pizza Stone (optional)
Ingredients
- 500 g Bread Flour
- 280 g Water
- 200 g Sourdough Starter, (or sourdough discard)
- 15 g Olive Oil
- 15 g Salt
Instructions
- Measure out all of your ingredients into a large mixing bowl. You don't have to pre mix, you can just add them all in on top of one another. This dough is extremely forgiving.Gently combine all the ingredients so it forms a shaggy dough. Let the dough sit covered for around 30 minutes.
- Once the dough is hydrated, it's time to knead it. You can do this by hand or you can use a stand mixer, it's completely up to you (I prefer to use a stand mixer with a dough hook attachment). You'll need to knead the dough until it is smooth and silky (this is the same whether you're doing it by hand or in a stand mixer). I find kneading by hand takes around 10 minutes, doing with a stand mixer takes around 3 to 5 minutes.
- Once the sourdough pita dough is sufficiently kneaded, cover with plastic wrap or a damp tea towel and leave to rise until it has risen around 50%. This may take several hours, depending on the temperature of your kitchen. Watch the dough and it will show you when it's ready, rather than going by a set amount of time. You'll notice the dough will be puffy and have bubbles forming on the surface, even if it doesn't seem like it's risen.
- Once the dough is ready, separate the dough into smaller balls so they are ready to be rolled out. I find around 80g to be the perfect size. The easiest way to do this is to flip the dough onto your counter, making sure the sticky side is facing up. Use a metal dough scraper to gently cut chunks of the dough away. Gently form into loose balls.Leave the balls on your counter top, covered with a tea towel, for around 1 hour to allow the gluten to relax and the dough to proof.
- Once the dough has relaxed you can easily roll them out into rounds using a rolling pin. You want them to be fairly thin, but not as thin as tortilla dough. You want them to form a pocket without tearing.I find when I roll them out, I squash the ball into a round, then use my rolling pin to roll it flat. Leave it while I do this to another one, then come back and roll out again. When you go to throw them in the pan, you can gently stretch them out a bit more with your fingers.Have some flour handy to use if you're using a rolling pin so the dough doesn't become sticky. The olive oil in the dough will make it quite elastic though.
- When you're ready to cook, heat a frying pan, skillet or bbq plate until it's HOT! These sourdough pita breads need a hot, fast cook. Gently use your hands to stretch out each pita bread before you drop it in the pan (they do shrink up a bit when they are resting). They will only need around 1 minute each side. They will bubble up and brown very quickly. Once it bubbles, flip to the other side to brown and then remove and keep warm in a towel while cooking the rest.
- If you aren't eating them straight away, keep the sourdough pita breads stacked and wrapped in a dish towel to ensure they stay nice and soft and pliable.
Notes
If your dough is still sticky, sprinkle a little extra flour and knead for a further minute or two until it becomes silky smooth. You’ll know it’s ready when you can hear it slapping the sides of the bowl. Generally it takes 4-6 minutes of kneading but the time will depend on your dough as well as the strength of your machine.
Notes on Bulk Fermentation This recipe uses 200g of sourdough starter, which means that your dough will ferment fairly quickly. For more information on how the amount of starter affects fermentation time, go here. I recommend using some commercial yeast with your sourdough discard if you are going to use it – unless your starter is mature.
Nutrition
Nutrition information is automatically calculated, so should only be used as an approximation.
Like this? Rate and comment below!


Looking forward to making this. Could I use all whole wheat flour instead of bread flour to increase the fiber content?
You would need to increase the water if you want to use whole wheat flour for this recipe, I would experiment by adding 20g more to start with and see how you go from there 🙂
Something to be aware of… If using all whole wheat flour, the dough will ferment faster.
Can the dough be left in the fridge until the next day to proof? I need the longer time to make flour easier to digest. I thought I would start it in the evening, but wouldn’t make it until the next evening for dinner.
Also, thanks for the idea with whole wheat for more fiber. Good to know that it will need a little more water.
Hi Nancy – yes you can leave it in the fridge until the next day. To ensure that your dough retains enough energy for puffing up when it hits the hot pan, I wouldn’t let it completely finish the bulk ferment on the counter, but pop it in the fridge a few hours earlier 🙂 xx
Hi, can they be frozen once fried?
Thanks
Andrea
They can! Just make sure to put a piece of parchment paper between each one so they don’t stick together. Then store in an airtight container (a Ziploc works great). They can be frozen for up to two month.
I’d like to make this later today. If I use discard, how much yeast do you recommend adding?
I generally add up to 7g of instant yeast if you’re using discard 🙂
I left the dough for the first rise on the counter for a few hours, then stuck it in the fridge overnight. Next morning, I took the bowl out of the fridge, waited a couple of hours, and then proceeded to form the rolls.
Turned out great. I will probably double the recipe next time, as this is a great bread to serve at a party with a bunch of dips like hummus and babaganoush.
Your measurements and instructions are wonderfully clear! Thank you!
What is the recipe for the pita bread stuffing pictured near the end. I see garbanzo beans, avocado, mushroom, celery, chopped tomato, onion or scallions. What is the dressing?
This was one of those “throw together” recipes that I made on the fly! But it is dressed with natural yogurt mixed with a little garlic powder, salt and pepper. It’s sooooo good!
I want to use my stand mixer, but the bowl is metal. Will that be an issue?
No no issue – the bowl is stainless steel so it won’t interfere with the dough 🙂
Excited to try out this recipe! Can you use all purpose flour instead of bread flour? Would this cause any problems with the recipe?
You will love it! If you are going to use all purpose flour, you’d need to reduce the hydration as all purpose flour can’t handle as much water as bread flour. I would leave aside 50g of water when mixing the dough and then slowly add it until you are happy with the dough 🙂
Have you had any luck (or even tried) freezing as dough balls or rolled out (not cooked) and stored between parchment in the freezer? Looking to make a very large quantity and was hoping to get a jump start, and would prefer to cook fresh the day I need them.
I haven’t frozen them like this no, but I do freeze them once they’re baked. I just pop some parchment paper between them to stop them sticking together and they thaw perfectly 🙂