Whey Sourdough Bread Recipe: How To Use Whey In Sourdough Baking
This post may contain affiliate links.
Are you looking for a whey sourdough bread recipe?
If you make your own yoghurt or cheese at home, you may have wondered about using whey in sourdough bread baking.
This blog will give you some ideas on how you can use it to improve your sourdough bread, as well as some ideas for using it in sourdough discard recipes too.
What is Whey?
Whey is the liquid remaining after milk has been curdled and strained. It contains lactose, vitamins, protein and minerals. You can read more about whey here.
There are two types of whey, with one more common in a home kitchen.
Sweet whey is the whey from the hard cheese making process utilising renet.
Acid whey is the whey from cottage cheese, ricotta and strained yoghurt.

This blog concentrates on using acid whey in sourdough bread baking as it is the most common type of whey in a home setting.
The whey I have used to conduct experiments for this blog is whey from making strained Greek yoghurt, but the whey from making homemade ricotta works really well too.
My yoghurt is made from an organic, pot set yoghurt culture in an electric yoghurt maker (which I also use to keep my starter at a constant temperature).
I strain my yoghurt quite heavily until it is super thick so I get a lot of whey on a daily basis (the yoghurt maker has a super handy strainer for this purpose).
I generally use my whey in smoothies for my kids (it's a great source of protein & nutrients for fussy kids), pancakes and to feed to my chickens.
But I started to wonder what would happen if I added whey to my sourdough baking, as I was accumulating quite a bit.
Feeding A Sourdough Starter Whey
I decided to feed my sourdough starter with whey instead of water for a few days to see what happened. Given that whey is full of beneficial bacteria (and particularly lacto acid bacteria) I thought it would be a way to boost the good bacteria in my sourdough starter.
You can't have too much of the good stuff, right?
I have a mature sourdough starter that is very well established and makes great sourdough bread. It doubles easily after feeding.
I put 50g of sourdough starter into a jar and fed it 50g of flour and 50g of whey (I used whey in place of water). It doubled within an hour. It tripled in 2 hours. I repeated this for 3 feeding cycles over 36 hours.
Some things that I noticed about my starter when I fed it with whey:
- it tripled easily (my starter is super strong, but never triples with regular feeding)
- it smelled much sweeter than normal (even though my whey had no sugar)
- the whey produced a "marshmallow" spongy bubble pattern on the side of the jar
If you are experimenting with feeding your starter a different food, always keep a backup as sourdough insurance. That way if your experiment doesn't work, you haven't killed your sourdough starter. I've always got a jar in the fridge and a jar of dried starter - just in case!
Baking Sourdough Bread with Whey
After feeding my sourdough starter whey for a few days I then started to think about using whey in my actual bread.
Feeding my starter used a little whey, but I literally have litres of it some days, so being able to use large amounts is great.
I used my Simple Sourdough Bread Recipe and swapped 350g of water for 350g of acid whey. I've written the recipe for Whey Sourdough Bread below.
My dough rose as per normal during bulk ferment and was very easy to shape. I couldn't really notice any difference in the dough made with whey, except that it smells a lot sweeter than sourdough made with just water.
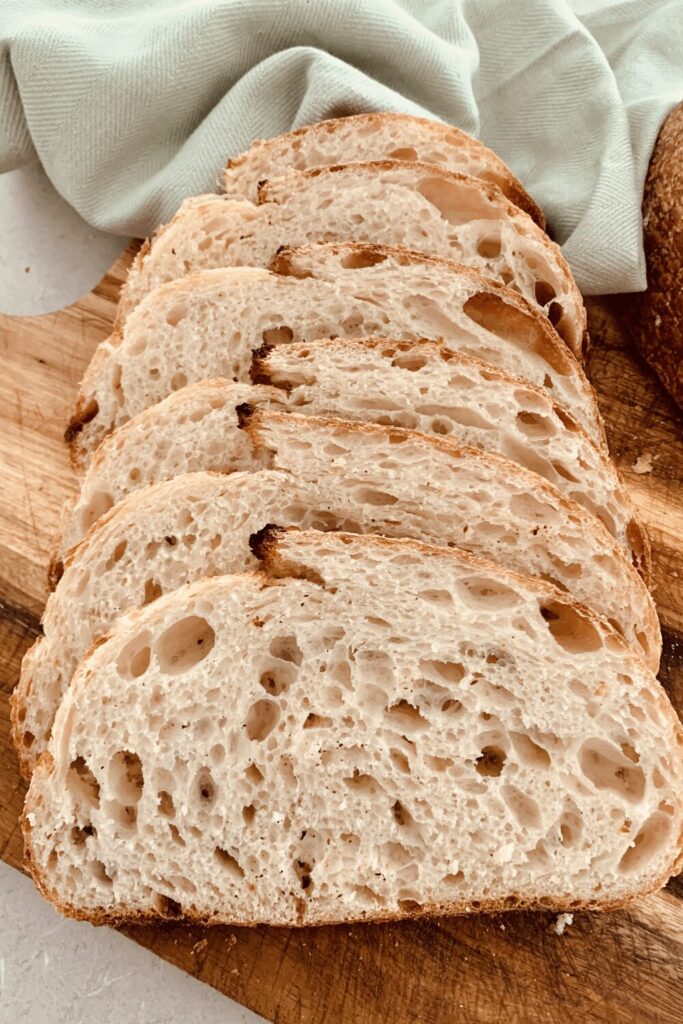
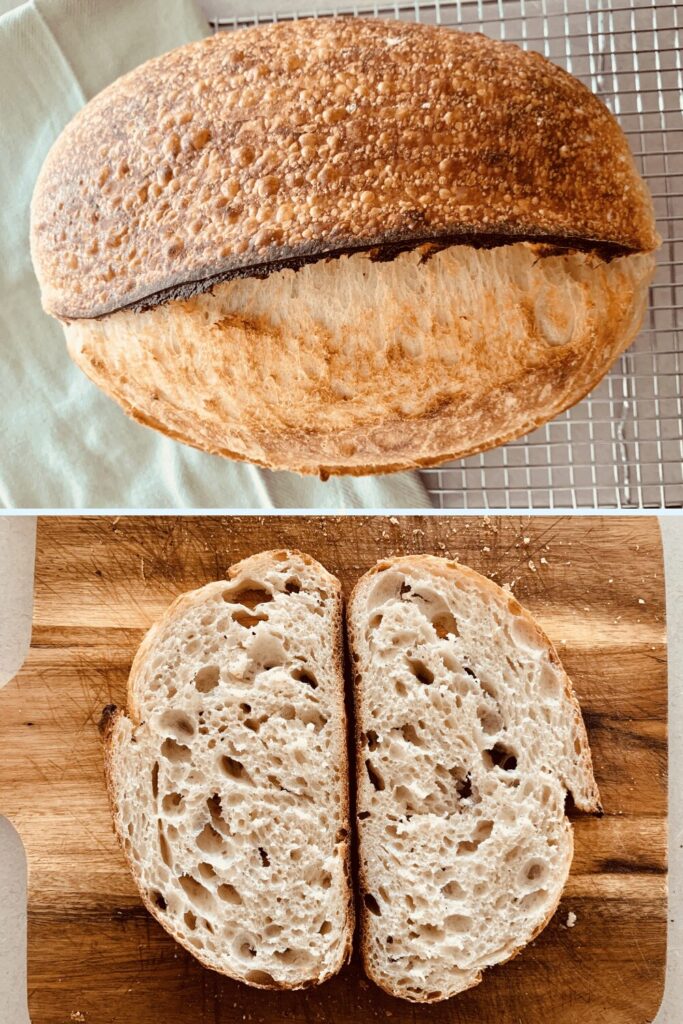
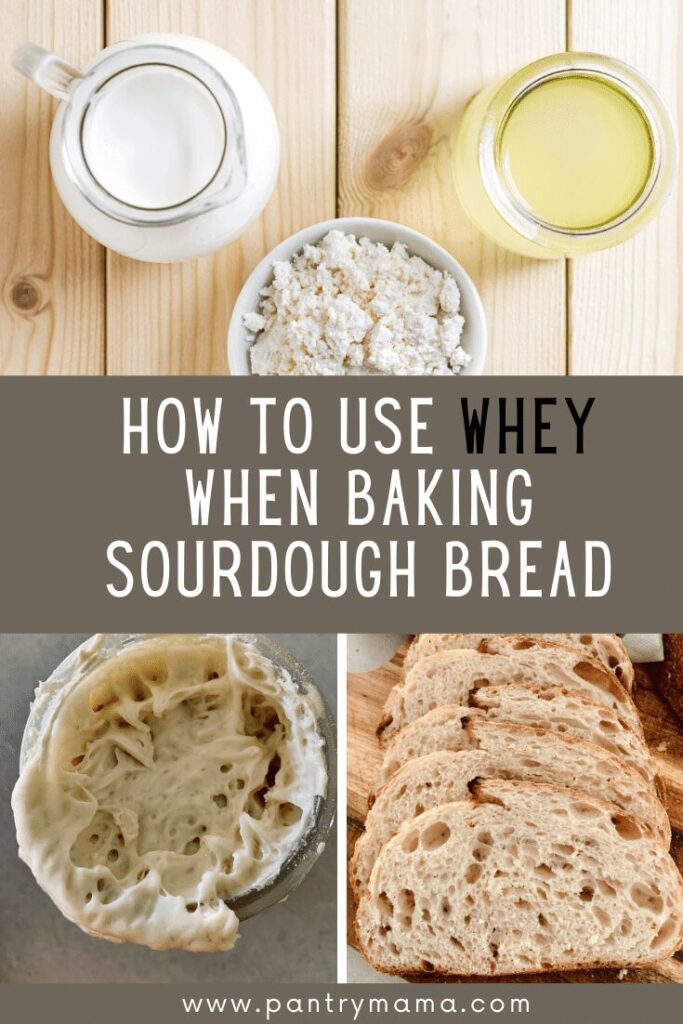
However, once I baked it, I noticed that my bread had a much crisper crust and a softer, slightly more open crumb than I would normally get with that level of hydration.
It also gave me a delightful number of blisters on the crust.
The bread was super soft and silky inside - honestly you wouldn't be able to resist the texture!
How To Use Whey In Sourdough Starter and Sourdough Bread Baking
Based on my research and experiments, here are my tips for using whey in sourdough bread.
- You can feed your established starter with whey. Using the 1:1:1 ratio you can replace water with whey. It's up to you whether you feed an offshoot of your starter or just feed the original starter. As always, I advise you to have a starter back up. I found that after 3 feedings of whey my starter wasn't as active so I went back to water and now just give my starter occasional whey feedings for a "boost". You could even just add half water, half whey if you wanted to feed your starter whey at every feed.
- If you are trying to make a sourdough starter from scratch, whey can be a great boost to your starter. You can either replace the whole water component or just do half water half whey. The whey will help the bacteria to establish a lot faster. As above though, you don't need to use it forever, just the first few days as the bacteria establish.
- You can replace some or all of the water component in your sourdough bread recipe with whey. It's a great way to use up excess whey, given how much liquid is in sourdough bread. Using the whey as part of your sourdough bread will increase the protein and available nutrients in your sourdough bread. In my experience they whey will give your bread a crisper crust and a softer crumb.
Just a note on baking sourdough bread with whey. Remember that if the yoghurt you make has sugar or any flavorings, then your whey will have these in it too.
If you have whey with sugar or honey added to it, it will make your sourdough ferment faster and will have an effect on the finished crumb.
Sourdough Recipes That Work Well With Acid Whey
The following recipes work really well when you replace the water content with acid whey. You'll also find a simple sourdough bread recipe using whey at the bottom of this article.
- Fluffy Sourdough Pancakes (replace half the milk with whey)
- Sourdough Pizza Dough (whey pizza will be the best pizza you've ever eaten)
I hope this information helps you to navigate using whey in your sourdough baking.

Further Reading:
If you enjoyed reading about using whey in sourdough bread, you might enjoy these articles:
- 10 Different Types of Sourdough Starter and How To Use Them
- Ever wondered about using beer in your sourdough bread? You'll find the ultimate guide to using beer in sourdough bread here.
- 5 Ways to Strengthen Your Sourdough Starter (other than adding whey).
- Learn how to bake sourdough with a thinner crust here.
Whey Sourdough Bread Recipe
Equipment
- Mixing Bowl
- Digital Scales
- Banneton
- Dutch Oven
Ingredients
- 500 g Bread Flour
- 350 g Whey
- 50 g Sourdough Starter Fed and bubbly
- 10 g Salt increase or decrease according to your taste
Instructions
- Autolyse - Premixing The DoughWeigh out your sourdough starter and whey into a large ceramic or glass bowl. Glass is always good as you can see what's happening underneath your dough. This recipe is based on you having an active starter that you have fed a few hours before starting your bake.Mix the whey and starter together briefly. Then add your flour and salt and mix whole lot together to form a shaggy dough. I find a dough scraper the easiest way to mix it as you can keep the sides of bowl clean.The dough will be fairly shaggy and only just brought together (see photo). You might wonder how this will turn into bread, but just wait, time is your friend and the dough will change in around an hour.
- Cover your bowl with cling film or a damp tea towel and let it sit for around 1 hour. It's ok if it's a little bit longer, it's not going to matter too much.This process is called the "autolyse" and allows your flour to soak in all the water and become hydrated. You can see how the dough has changed in this photo.
- Forming Up The DoughAfter the dough has been through autolyse you need to bring it together into a ball. Work your way around the bowl, grabbing the dough from the outside, stretching it up and over itself, into the centre, until a smooth ball is formed. You shouldn't need more than about 20-25 stretches to form the ball.You'll notice that the dough is fully hydrated after soaking all the water up. It will be fairly sticky but as you bring it into a ball, it will become smoother and shinier.
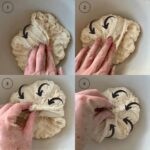
- Once the dough has formed into a smooth ball, pop the cling film back on and let it rest for 30 minutes.
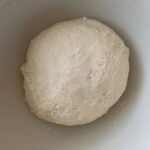
- Stretch & Fold - Creating StructureOver the next few hours you need to create some structure for your dough by "stretching and folding". Aim to do around 4-6 sets of stretches and folds. For each set, stretch the dough up and over itself 4 times. Leave around 15 minutes in between each set. Again you do not have to be exact with time, but you need to do at least 4 sets over 2 hours.I like to be fairly liberal with my timings as I am generally cooking amongst the chaos of family life and therefore sometimes timing does go astray!
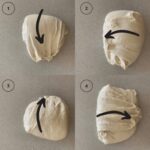
- Bulk FermentOnce you've finished your stretch and folds, place the cling film or damp tea towel back over your dough and let it rest and ferment. See notes below for more info on this step.
- Shaping The DoughOnce your dough has finished it's first ferment, it's time to shape it into either a boule or a batard. You'll need to flour your counter top with rice flour for this (we use rice flour because it has no gluten). Try to be quite sparing with the rice flour, you only need a very light dusting.Use a silicone dough scraper to gently ease the dough out of the bowl. You want it to land upside down on your counter so that the smooth top of the dough is on the countertop and the sticky underside is facing up. This will make it easier to shape.You want to pull the edges of the dough into the centre and then flip it over so that the sticky side is now underneath. Using the stickiness, gently pull the dough into a tight ball.You will need a banneton to put your dough into. If you do not have a banneton, then a bowl or basket lined with a floured tea towel is perfectly fine. Make sure your bowl isn't too big though, you want your dough to retain some shape.Whatever you're using needs to be liberally floured with your rice flour. If you're using a banneton - liberally sprinkle it with rice flour. If you're using a cloth or tea towel, rub the flour into it to ensure it becomes non stick.
- Placing Into A BannetonOnce the dough is shaped into a tight ball, place it into your banneton smooth side down, so your seam is on the top - this way the top of your dough will get the pretty lines from the banneton. If you're using a cloth or tea towel in a bowl it's ok to put your dough with the smooth side up. Just make sure the dough is tight.Lift your dough around the edges to pop a little more rice flour if you feel it needs it. Just try to handle the dough as little as possible and be really gentle as you really want to preserve all the gases and air bubbles that have formed during your bulk ferment.
- Cold FermentNow the dough is in its "shaping container" cover it loosely with a plastic bag or damp tea towel and place into the fridge. I use a large plastic bag to cover it - I just reuse it each time. Try to leave it in the fridge for a minimum 5 hours up to a maximum of around 36 hours. The longer you leave it the better your bread will be! A longer cold ferment creates beautiful blisters on your crust and a deeper sourdough flavour. It will also ensure your dough forms a skin which makes it easier to score.
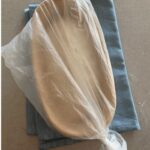
- Preparing To BakeOnce you're ready to bake your sourdough, you'll need to preheat your oven to 230C/450F. Place your Dutch Oven into the oven when you turn it on so it gets hot. Try to preheat for around 1 hour to ensure your oven is super hot - but you know your oven so just adjust this time if you need to.Leave your dough in the fridge until the very last minute - placing a cold dough into a hot oven will give you a great "spring".
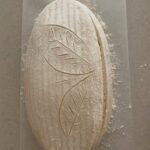
- Bake Time!Now it's time to bake!When your oven is at temperature, take your sourdough out of the fridge. Gently place it onto a piece of baking paper. Make sure that you make the baking paper big enough to use the edges as a handle to lower to dough into your Dutch Oven.Gently score your bread with a lame, clean razor blade or knife. At minimum a large cross is sufficient, but you can get as artistic as you like. Try to score it fairly deep to ensure the dough opens up.Carefully take your dutch oven out of the oven. Place the sourdough into the pot using the baking paper as a handle. Put the lid on and place into the hot oven. If you want to you can spritz your dough with extra water before you put the lid on.BAKE TIME:30 Minutes with the lid on at 230C/450F plus10-15 Minutes with the lid off at 210C/410F
- Finishing The BakeWhen you remove your dough from the oven, carefully remove it from the dutch oven as soon as possible and place on a wire rack to cool.
Notes
- Notes on Flour: This recipe is written using strong Bread Flour. Bread flour has a higher protein content than All Purpose flour. If you choose to use All Purpose flour you may have a different result because of this.
- Notes on Sourdough Starter: This recipe is based on you having an active starter that you have fed a few hours before starting your bake. For information on whether your starter is ready, go here.
- Notes on Stretch & Folds: If you are going to do the stretch & folds on your bench top, spray your surface with water mist rather than using flour. You can leave the dough in the bowl if you want to. Wet your hands to stop the dough sticking - although it shouldn't be too sticky. It will get less sticky as you do your stretches and folds.
- Notes on Bulk Fermentation: If your home is warm then your dough will ferment a lot faster and could be done in as little as a few hours. If it's colder, it will take longer, possibly overnight.
I would recommend that you try to do your first few bulk ferments during daylight hours so that you can watch your dough closely.
Once you're more familiar with the process - and the temperature of your home - you will be able to do overnight ferments. You will know your dough is ready to move to the next stage when it has *just* doubled in size. It will be fairly wobbly and full of bubbles. You should be able to see large air bubbles under the surface of the dough.
You don't want to let it go any further than doubled as it will be over fermented.
If you want to do an overnight ferment, but your home is warm, consider using a little less starter (ie 25g).
Less starter means your dough will take longer to ferment and you will reduce the risk of over fermenting your dough. You'll find more information on these topics here:
When is my bulk ferment finished? What is the difference between cold ferment and bulk ferment? Why does the amount of starter matter?
- Notes on Baking: If you're worried about the base of your bread burning, place a baking sheet on shelf underneath your Dutch Oven - it works! If you're worried about your bread not being cooked all the way through, turn the oven off and place your dough straight onto the oven rack. Leave the door ajar and let your bread rest there for a few hours. Make sure you don't close the door or your sourdough will sweat and you'll get a wrinkly, soggy crust. Remember not to cut into your loaf too soon - you'll need to let it cool for at least a few hours (4-6 is best).
Nutrition


