How To Shape A Christmas Tree Sourdough Bread [Easy Scoring]
This post may contain affiliate links.
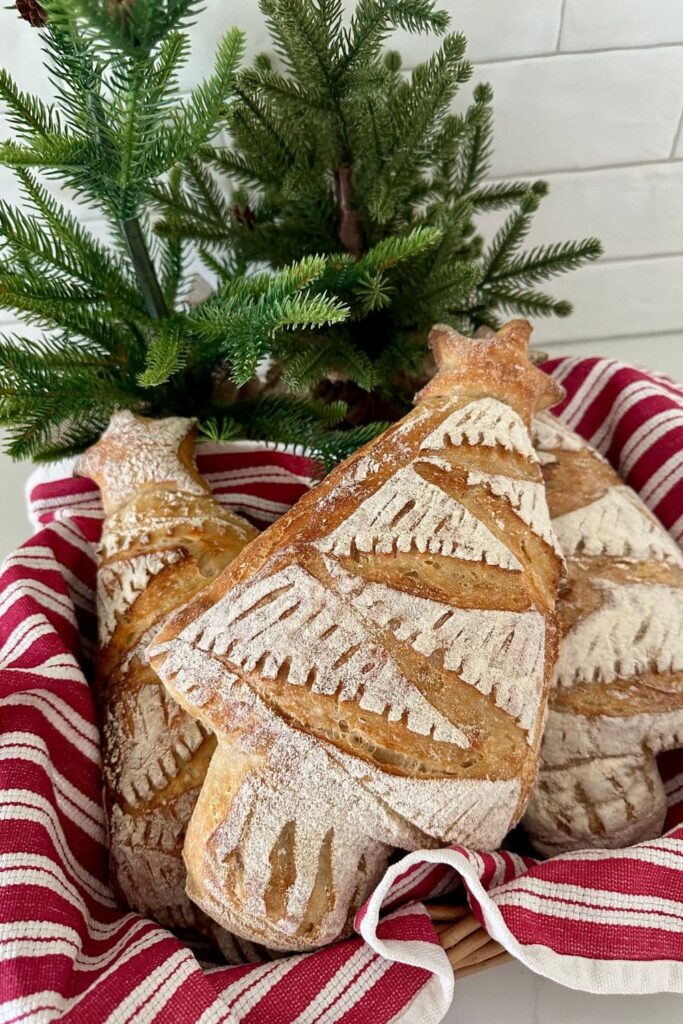
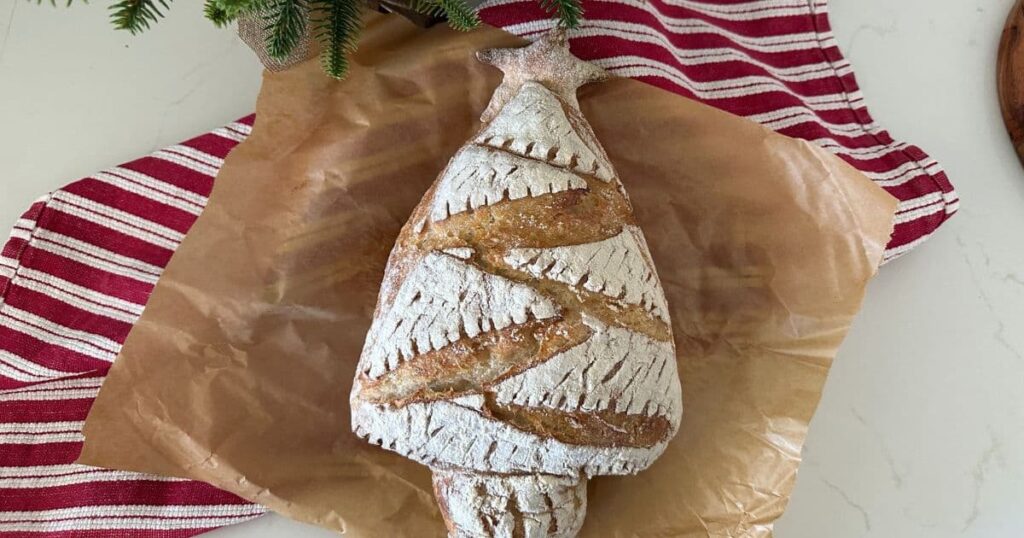
Let's shape a loaf of sourdough bread into a Christmas Tree! Using a few simple cuts and some easy scoring you can create a beautiful sourdough Christmas Tree loaf, worthy of a place at your festive table.
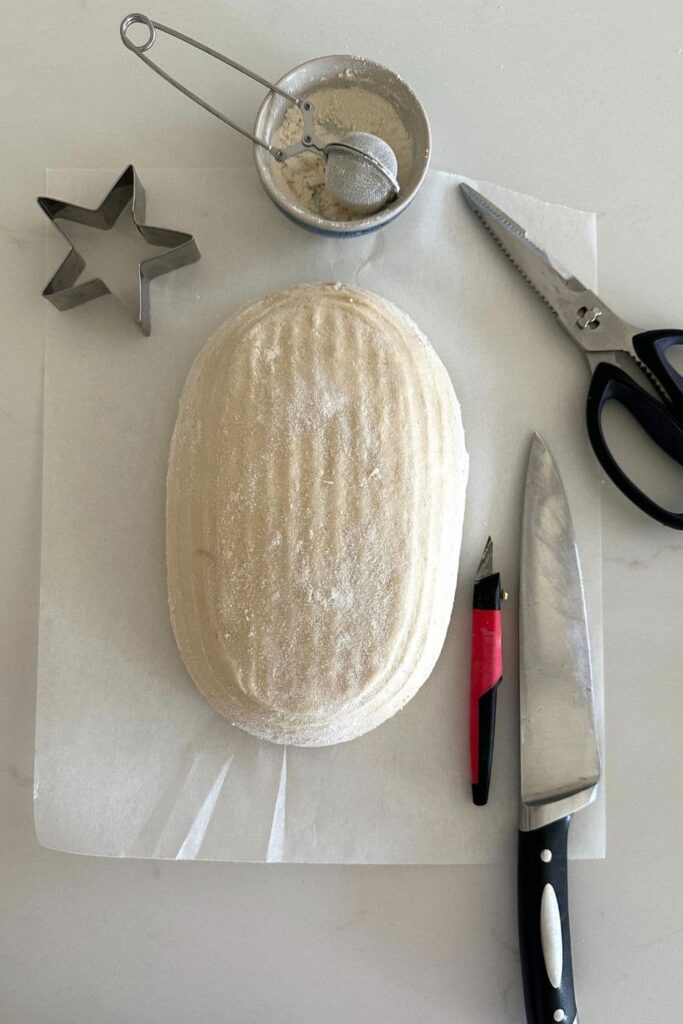
The best place to start is with an oval shaped sourdough loaf. I've used a 10" oval banneton to create the base for this Christmas Tree Sourdough Bread.
If you're in the festive spirit then you might also like these sourdough Christmas recipes, as well as these sourdough recipes that make fantastic Christmas gifts. This sourdough cinnamon roll Christmas Tree makes a lovely Christmas dessert.
Why You'll Love This Recipe!
Learn New Shaping & Scoring Techniques - If you're only new to shaping and scoring sourdough, this is a great introduction into getting a little more adventurous with your sourdough bread!
Beautiful Gifting Opportunity or Table Centrepiece - make this beautiful sourdough Christmas tree as a unique baked Christmas gift or centrepiece for your festive table.
Easy to Freeze - This sourdough Christmas Tree bread freezes very well and looks beautiful even after being frozen and refreshed in the oven. This means you can make this well ahead of Christmas and pop it away in the freezer for a less stressful lead up to Christmas!
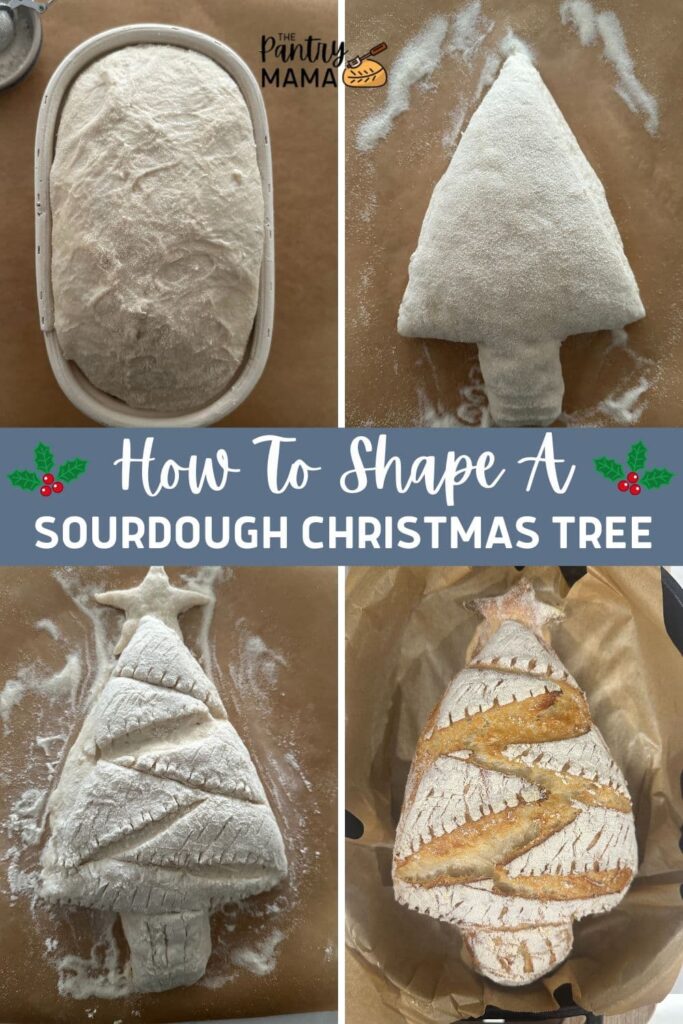
How To Shape A Christmas Tree Sourdough Bread [step-by-step photo guide]
Start with an oval shaped sourdough loaf. I've used my basic sourdough recipe to create this loaf. I've also added the recipe at the end of this post.
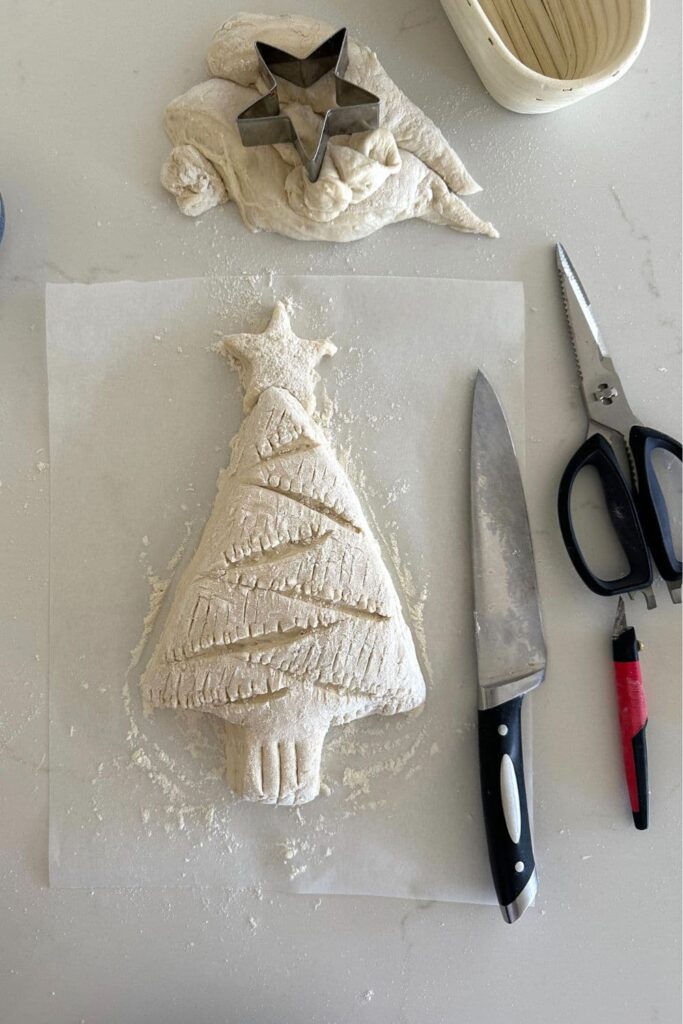
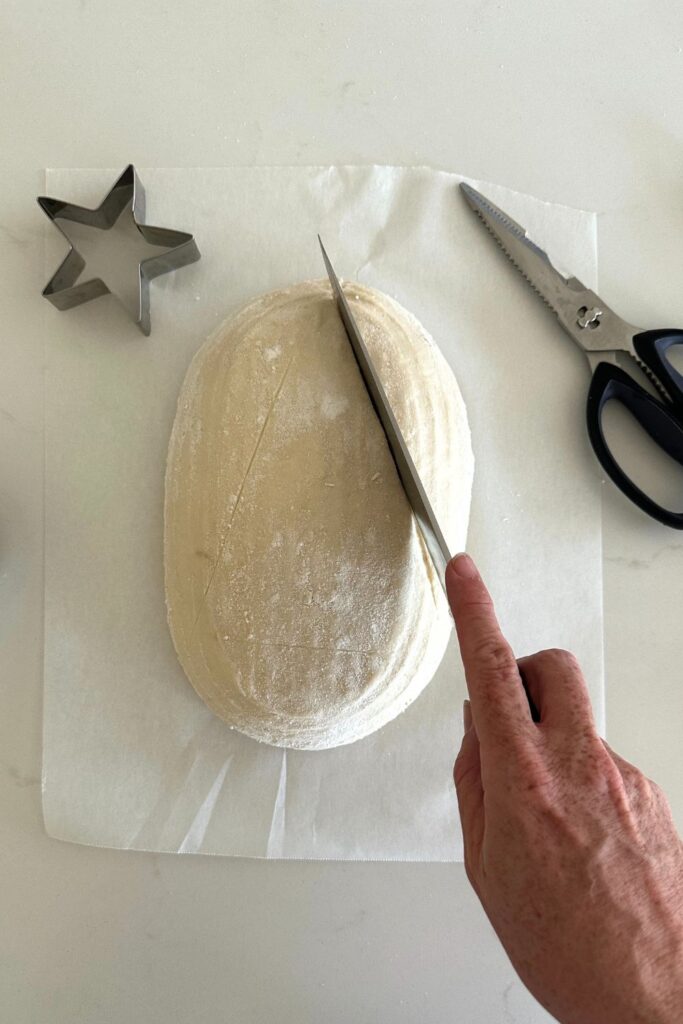
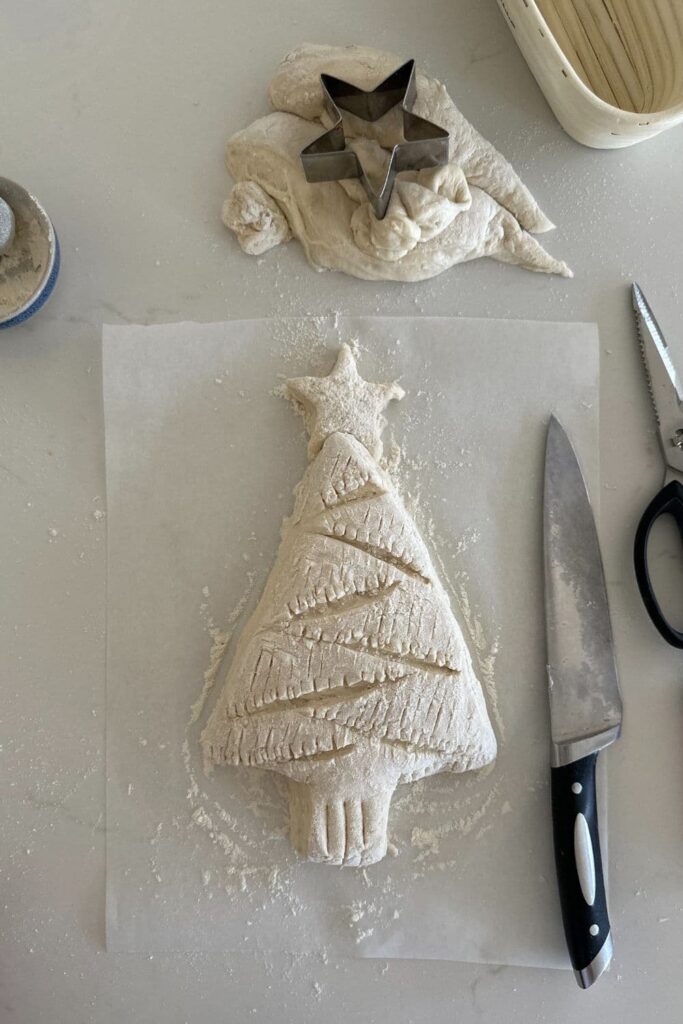
Use a piece of dental floss or string to mark out a tall triangle that will form the main part of your Christmas Tree. Then, use a large kitchen knife to cut the two sides of the dough away to form the triangle.
Then cut the bottom of the loaf to form the stump of the tree. Kitchen shears are also handy to neaten up the edges for this step.
Use a star shaped cookie cutter to cut a piece of the off cuts into a star shape and place that on the top of the tree.
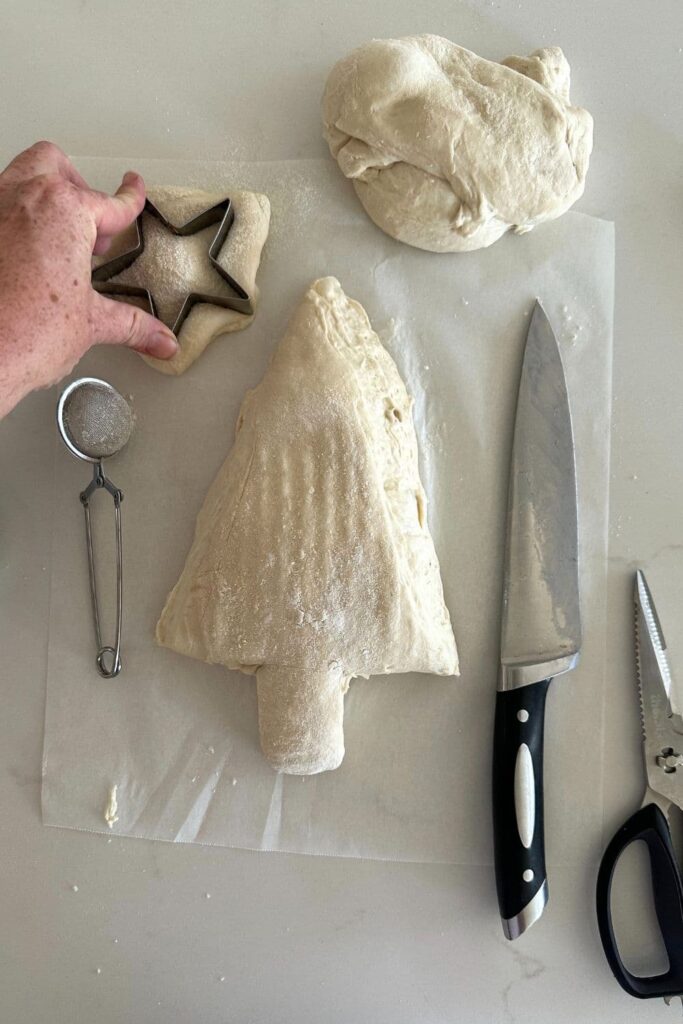
Now, use a knife to cut diagonal slashes into the dough. You want these to be fairly deep.
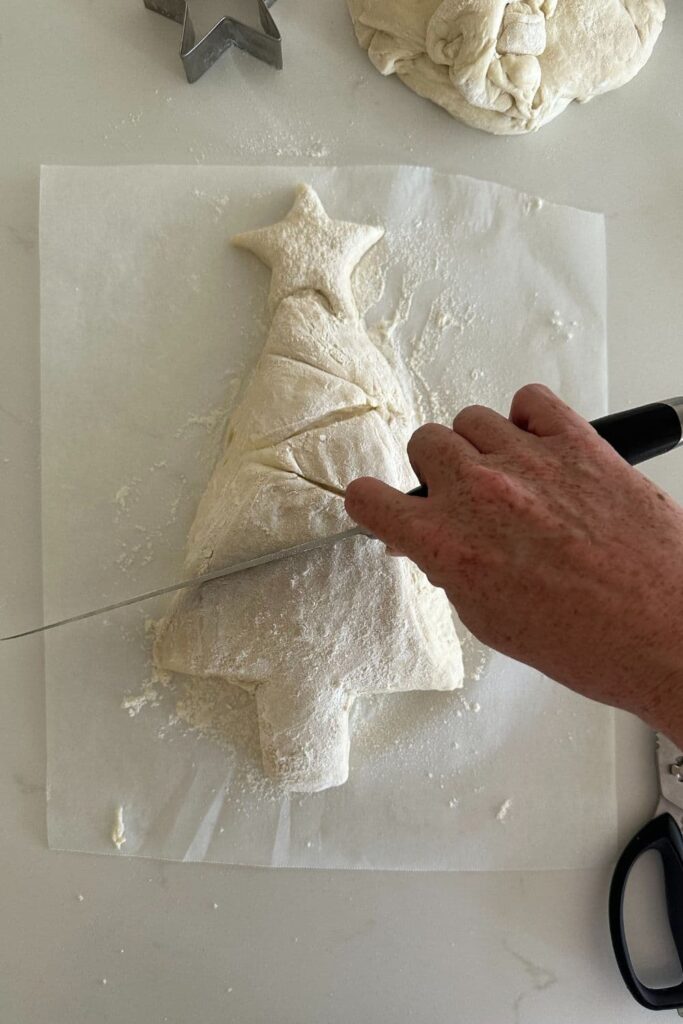
Now use kitchen shears to snip the bottom edge of each section.
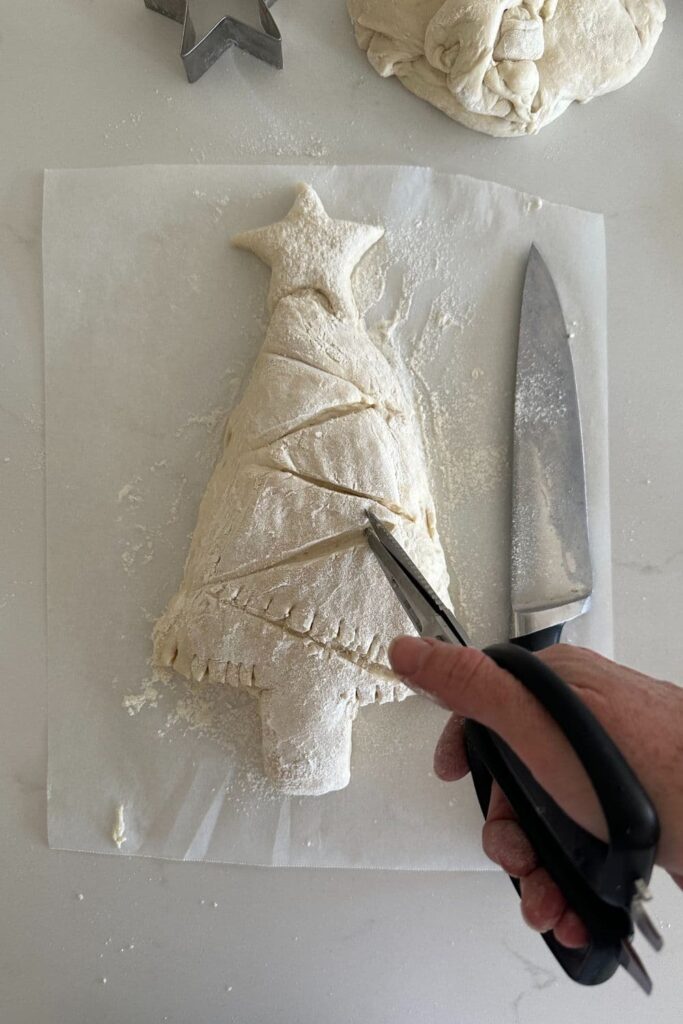
Use a small blade or lame to make vertical slashes over the triangle sections of the dough.
I've added a video of this process here.
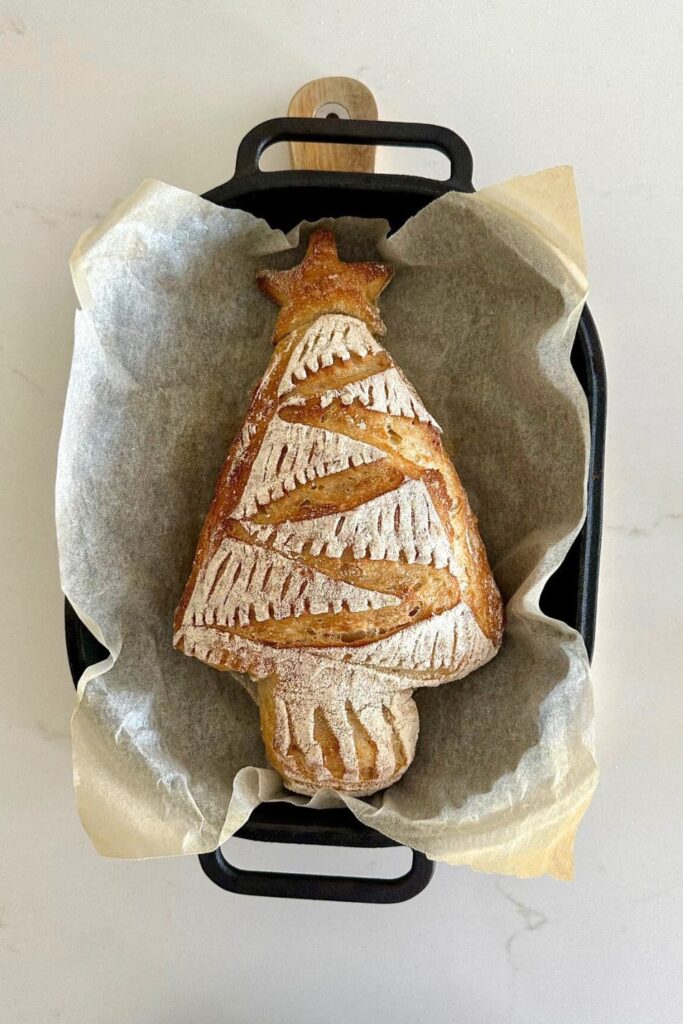
Tips for Making A Christmas Tree Shaped Sourdough Loaf
- Work out how you're going to bake the loaf before you shape and cut it. I've used a cast iron bread pan because I like baking in a Dutch Oven. You can bake it on an open cookie tray if you need to. You just need to make sure that your banneton is the right size for whatever you're going to bake it in so that the loaf isn't too big for your vessel. You can see all of the equipment I use to bake sourdough bread here.
- Don't spray the dough with water or use ice in your baking vessel as this will dissolve the flour and erase the decorative effect of the floured accents.
- Have fun! If it doesn't turn out perfectly, you'll still have a beautiful loaf of sourdough bread to share with family and friends!
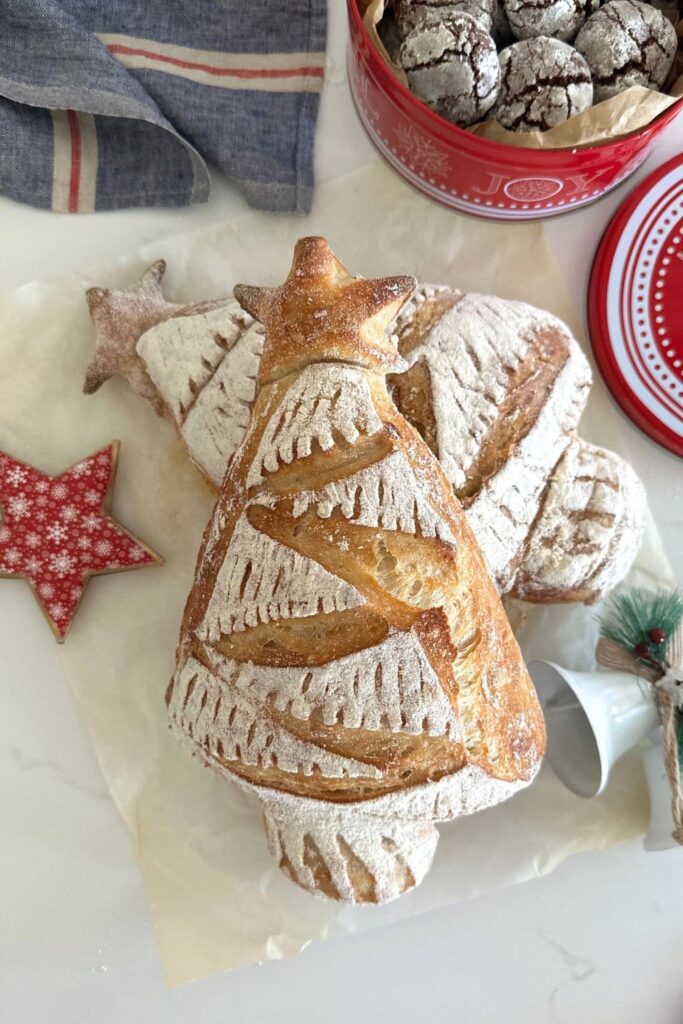
How To Freeze Sourdough Christmas Tree Bread
If you want to freeze this sourdough Christmas Tree bread, you will find full instructions for freezing and refreshing sourdough bread here.
The only caveat to freezing this bread is that when you are wanting to thaw it and warm it in the oven, don't spray it with too much water or it will dissolve the white flour accents.
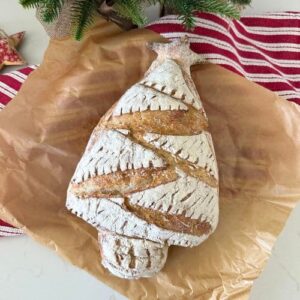
Crusty Sourdough Christmas Tree Bread
Equipment
- Mixing Bowl
- Digital Scales
- Oval Banneton (see notes below for size options)
- Cast Iron Bread Pan (see notes below for size options)
Ingredients
- 500 g Bread Flour
- 350 g Water
- 100 g Sourdough Starter
- 10 g Salt
Instructions
PREMIX THE DOUGH
- Weigh out your sourdough starter and water into a large mixing bowl and mix together briefly.
- Now add your flour and salt and mix whole lot together to form a dry dough.
- Cover your bowl with cling film or a damp tea towel and let it sit for around 1 hour.
FORMING UP THE DOUGH
- Bring the dough together into a ball. Pull the edges of the dough into the centre until it's smoother and more formed.
- Once the dough has formed into a smooth ball, pop the cling film back on and let it rest for 30 minutes.
STRETCH & FOLD PHASE (STRENGTHENING PHASE)
- Over the next few hours you need to create some structure for your dough by "stretching and folding". Aim to do around 4-6 sets of stretches and folds. For each set, stretch the dough up and over itself 4 times. Leave around 15 minutes in between each set. Again you do not have to be exact with time, but you need to do at least 4 sets over 2 hours.
BULK FERMENTATION (RISE PHASE)
- Once you've finished your stretch and folds, place the cling film or damp tea towel back over your dough and let it rest and ferment at room temperature (a plastic cover is a better option for this stage). You want the dough to double during this stage.
SHAPE THE DOUGH
- Once your dough has finished its first ferment, it's time to shape it so that it will fit into your oval bannton. It's this shape that will form the basis of your Christmas Tree. Try not to use any flour for shaping (it's ok to use a light dusting, but you'll get a better shape if you don't use any at all).Sprinkle a little rice flour or semolina into your oval banneton. Use a plastic dough scraper to ease the sourdough out of the bowl and flip it onto the counter top so that the sticky, underneath of the dough ends up on top and the smooth side is on the counter (this will help you manoeuvre your dough much more easily).Use your hands to gently ease the dough out into a rough rectangle, with the short side opposite you.Now, flip the top of the rectangle down.Take the right side of the dough and flip it in and then do the same with the right side. This is creating structure in the dough.Now pick up the bottom of the rectangle and gently roll it upwards, creating surface tension as you come to the top. As you reach the top, gently roll the batard so that the seam is positioned underneath.Now, tighten the surface of the dough by gently putting your hands on the back of the dough and pulling it towards you without taking it off the counter.Now pick up the dough and flip it into the floured banneton with the seam at the top. Use your fingers to bring the base of the dough together to create a tighter seam if you need to.Lift your dough around the edges to pop a little more rice flour if you feel it needs it. Just try to handle the dough as little as possible and be really gentle as you really want to preserve all the gases and air bubbles that have formed during your bulk ferment.
PROOFING
- Now you need to allow your dough to proof - we generally do this in the fridge. Place an elastic food cover over your dough (shower cap) and place it into the fridge.Try to leave it in the fridge for a minimum 5 hours.
PREPARE TO BAKE YOUR DOUGH
- Once you're ready to bake your sourdough, you'll need to preheat your oven to 230C/450F.Place your Oval Dutch Oven or Cast Iron Loaf Pan into the oven when you turn it on so it gets HOT. Leave your dough in the fridge until the very last minute - placing a cold dough into a hot oven will give you a great "spring".See notes for alternative ways to bake your sourdough Christmas Tree bread.
SCORING INTO A CHRISTMAS TREE
- When you're ready to bake your sourdough bread, you'll need to cut and score the dough into the Christmas Tree shape before placing it into the oven. You can see the process I use to cut and score the dough into a Christmas Tree in the post above, complete with step by step photos.I find that a large, straight edged knife is best for cutting the dough into the basic Christmas Tree shape and making the diagonal cuts. Large kitchen shears work well for snipping the edges of the dough.
BAKE YOUR SOURDOUGH BREAD!
- Carefully take your dutch oven out of the oven. Place the sourdough into the pot using the baking paper as a handle. Put the lid on and place into the hot oven.Do not spritz the dough with water before baking as it will dissolve the white flour and you'll lose the decorative effect on your Christmas Tree sourdough bread.BAKE TIME:30 Minutes with the lid on at 230C/450F plus10-15 Minutes with the lid off at 210C/410F
LET YOUR BREAD COOL
- When you remove your dough from the oven, carefully remove it from the dutch oven as soon as possible and place on a wire rack to cool.
Notes
- Notes on Flour: This recipe is written using strong Bread Flour. Bread flour has a higher protein content than All Purpose flour. If you choose to use All Purpose flour you may have a different result because of this. You can read more about the differences between All Purpose Flour and Bread Flour here.
- Notes on Sourdough Starter: This recipe is based on you having an active starter that you have fed a few hours before starting your bake. For info on how to make a sourdough starter, go here.
- Notes on Stretch & Folds: If you are going to do the stretch & folds on your bench top, spray your surface with water mist rather than using flour. You can leave the dough in the bowl if you want to. Wet your hands to stop the dough sticking - although it shouldn't be too sticky. It will get less sticky as you do your stretches and folds. For more information on how to do stretch and folds, go here.
- Notes on Bulk Fermentation: If your home is warm then your dough will ferment a lot faster and could be done in as little as a few hours. If it's colder, it will take longer. You will know your dough is ready to move to the next stage when it has *just* doubled in size. It will be fairly wobbly and full of bubbles. You should be able to see large air bubbles under the surface of the dough.
You don't want to let it go any further than doubled as it will be over fermented.
You'll find more information on these topics here:
When is my bulk ferment finished? What is the difference between cold ferment and bulk ferment? Why does the amount of starter matter?
- Cast Iron Bread Pan: I have used a rectangle Cast Iron Bread Pan to bake this sourdough Christmas Tree. The sizing details are - internal dimensions 30cm length x 24cm width x 14cm height which equates to 11.8" x 9.4" x 5.5" height. Banneton - I have used an oval banneton to shape this dough. The banneton measures 10" (25cm).
Nutrition


![Beginner's Sourdough Baguette Recipe [easy step by step]](https://www.pantrymama.com/wp-content/uploads/2022/05/BEGINNERS-SOURDOUGH-BAGUETTE-RECIPE-5-768x1152.jpg)
