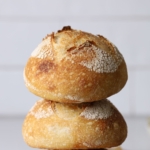
Mini Sourdough Loaves
Learn how to make the cutest mini sourdough loaves! Whether you want to make 4 or 6 minis, this recipe will guide you through everything you need to know, no matter what stage of your sourdough journey you're at!
Servings 4 Mini Loaves
Calories 474kcal
Equipment
- 4 Small Shaping Containers (small bowls, 6 hole muffin pan or mini bannetons)
Ingredients
- 500 g Bread Flour
- 350 g Water
- 100 g Sourdough Starter (active and bubbly)
- 10 g Salt
Instructions
- Fermentolyse - Premixing The DoughWeigh out your sourdough starter and water into a large mixing bowl Mix the water and starter together briefly. Then add your flour and salt and mix whole lot together to form a shaggy dough.
- Cover your bowl with a damp tea towel and let it sit for around 1 hour. It's ok if it's a little bit longer, it's not going to matter too much.
- Forming Up The DoughAfter the dough has been through fermentolyse you need to bring it together into a ball. Work your way around the bowl, grabbing the dough from the outside, stretching it up and over itself, into the centre, until a smooth ball is formed. You shouldn't need more than about 20-25 stretches to form the ball.
- Once the dough has formed into a smooth ball, pop the damp tea towel back on and let it rest for 30 minutes.
- Stretch & Fold - Creating StructureOver the next few hours you need to create some structure for your dough by "stretching and folding". Aim to do around 4-6 sets of stretches and folds. For each set, stretch the dough up and over itself 4 times. Leave around 15 minutes in between each set. Again you do not have to be exact with time, but you need to do at least 4 sets over 2 hours.
- Bulk FermentOnce you've finished your stretch and folds, cover the dough with a plastic cover and allow the dough to double at room temperature.
- Shaping The DoughOnce your dough has finished its first ferment, it's time to shape it into mini sourdough loaves!Use a dough scraper to gently ease the dough out of the bowl (your hands work just fine if you don't have one). You want it to land upside down on your counter so that the smooth top of the dough is on the countertop and the sticky underside is facing up. Cut the dough into 4 or 6 even pieces (I usually just do this by eye, rather than weighing the dough). Take each piece of dough and gently form it into a mini boule (or batard if you prefer). For the smaller loaves, I find it's easier to make a boule by bringing the edges into the centre and then gently rolling it over into a ball, pulling it towards you to create plenty of surface tension.
- Placing Into A Proofing ContainerOnce the loaves are shaped, use plenty of semolina or rice flour to dust any sticky edges and place it into your proofing baskets or containers smooth side down, so your seam is on the top.
- Cold FermentNow the dough is in its "shaping container" cover it loosely with a plastic bag and place into the fridge. Try to leave it in the fridge for a minimum 5 hours up to a maximum of around 36 hours. The longer you leave it the better your bread will be! A longer cold ferment creates beautiful blisters on your crust and a deeper sourdough flavour. It will also ensure your dough forms a skin which makes it easier to score.
- BakeOnce you're ready to bake your sourdough, you'll need to preheat your oven to 230ºC/450ºF. Place your Dutch Ovens into the oven when you turn it on so they get hot. When your oven is at temperature, take your mini sourdough out of the fridge. Gently place each one onto a piece of parchment paper.Score each mini loaf with a simple cross.Carefully take your dutch ovens out of the oven. Place the sourdough into the pot using the parchment paper as a handles. I usually put 2 or 3 in each pot, leaving a little room around each one. Put the lid on and place into the hot oven. BAKE TIME:30 Minutes with the lid on at 230ºC/450ºF plus10-15 Minutes with the lid off at 210ºC/410ºF
- Finishing The BakeWhen you remove your dough from the oven, carefully remove it from the oven as soon as possible and place on a wire rack to cool.
Video
Nutrition
Serving: 200g | Calories: 474kcal | Carbohydrates: 95g | Protein: 16g | Fat: 2g | Saturated Fat: 0.3g | Polyunsaturated Fat: 1g | Monounsaturated Fat: 0.2g | Sodium: 976mg | Potassium: 125mg | Fiber: 3g | Sugar: 0.4g | Vitamin A: 3IU | Calcium: 22mg | Iron: 1mg
