This post contains affiliate links. Please see our disclosure policy.

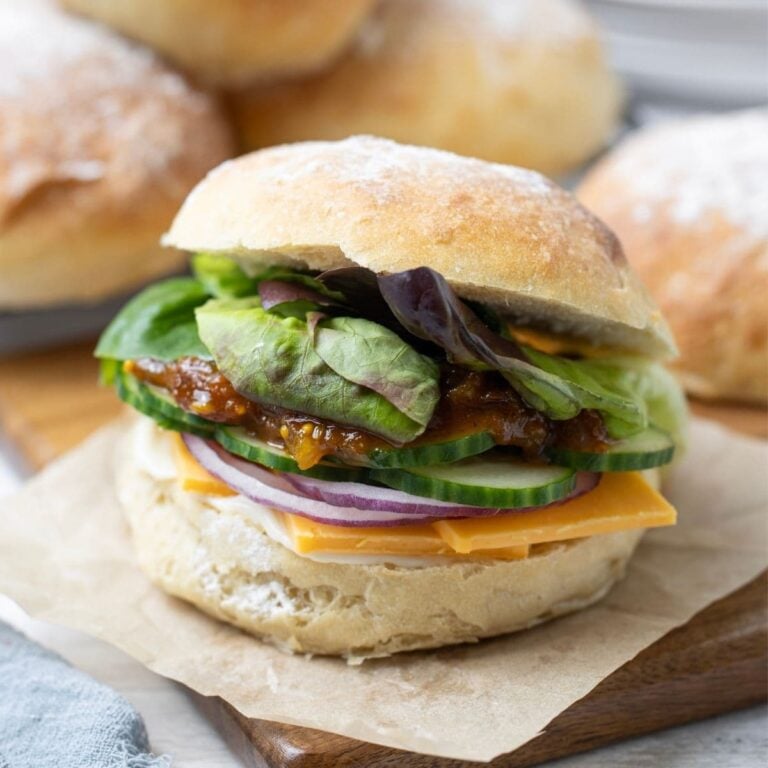
These no-knead sourdough discard rolls are soft, fluffy and incredibly easy to make using just a few simple pantry ingredients and very little effort. They’re perfect for anyone wanting fresh, homemade rolls without the fuss of kneading, and they bake up light and airy, with a golden, slightly chewy crust.
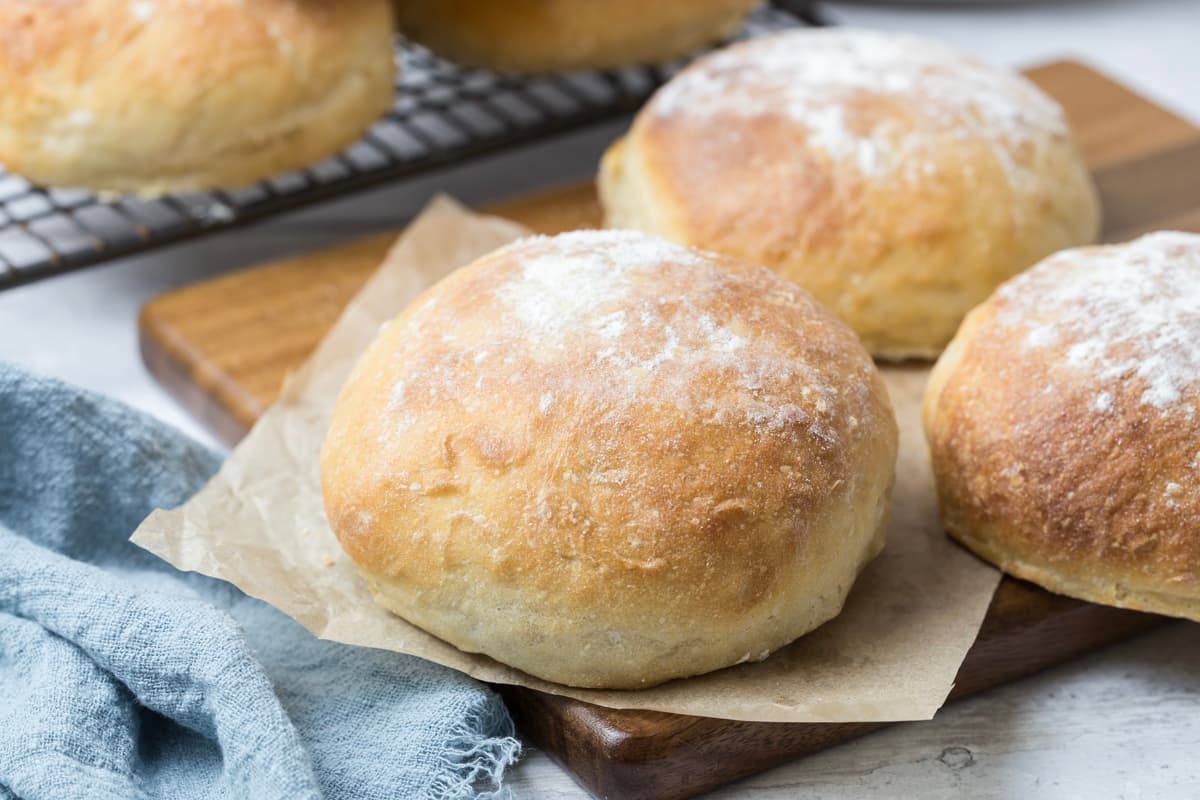
Table of Contents
Why You’ll Love These Sourdough Rolls!

I have made these rolls literally hundreds of times and they are foolproof! If you love my easy sourdough discard loaf, then you are going to absolutely LOVE these!
These sourdough discard rolls have the perfect soft and fluffy texture with a golden slightly chewy crust, almost like sourdough ciabatta rolls. Perfect for a lunchtime treat!.
They’re made with literally 3 ingredients (not counting water) – water, flour, salt, plus sourdough starter of course! Just mix the ingredients together, leave to rise for around an hour. Tip out the dough, shape and bake! Voila!
You want to spray with water before putting in the oven and then again when you remove them. It gives that lovely, slightly chewy crust.
I hope you love them as much as my family does!
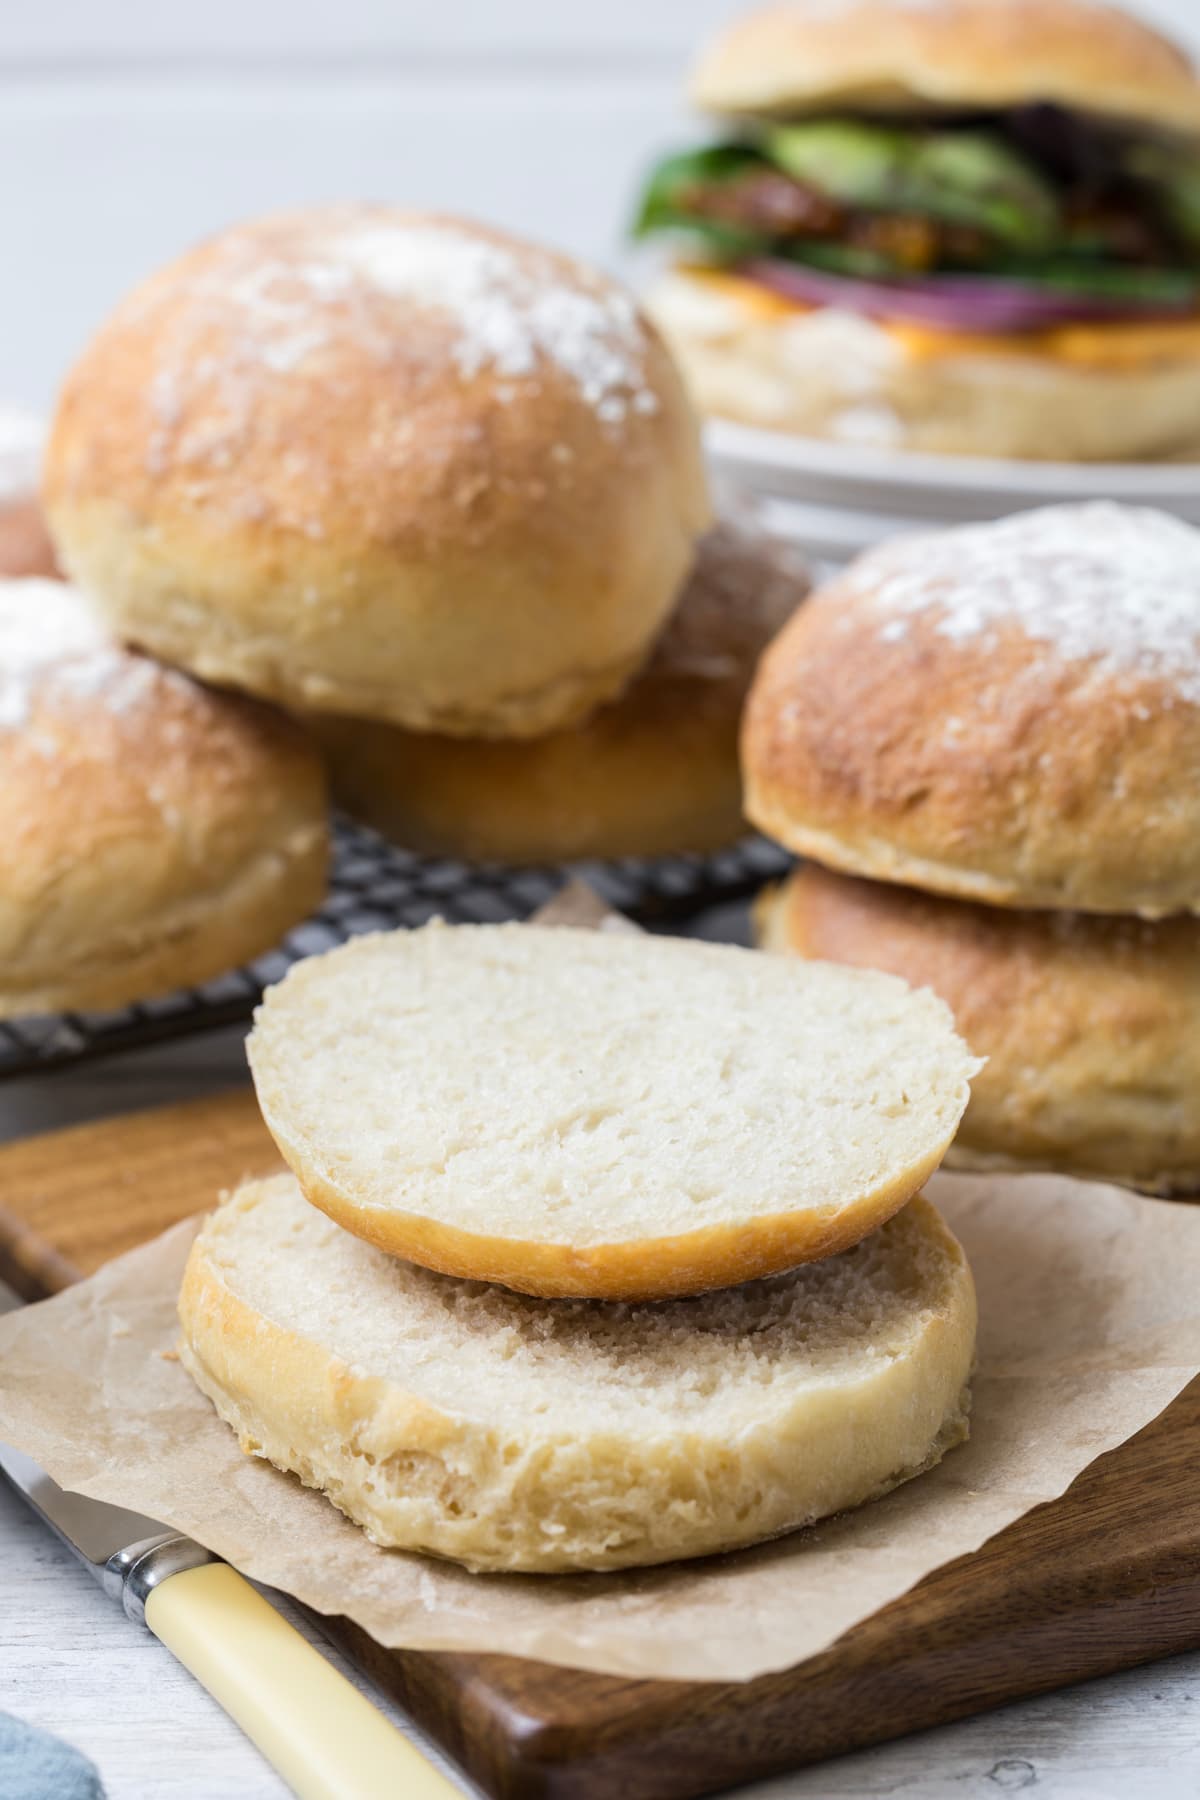
These rolls are so easy to make and delicious. They are also the perfect size.
Ingredients
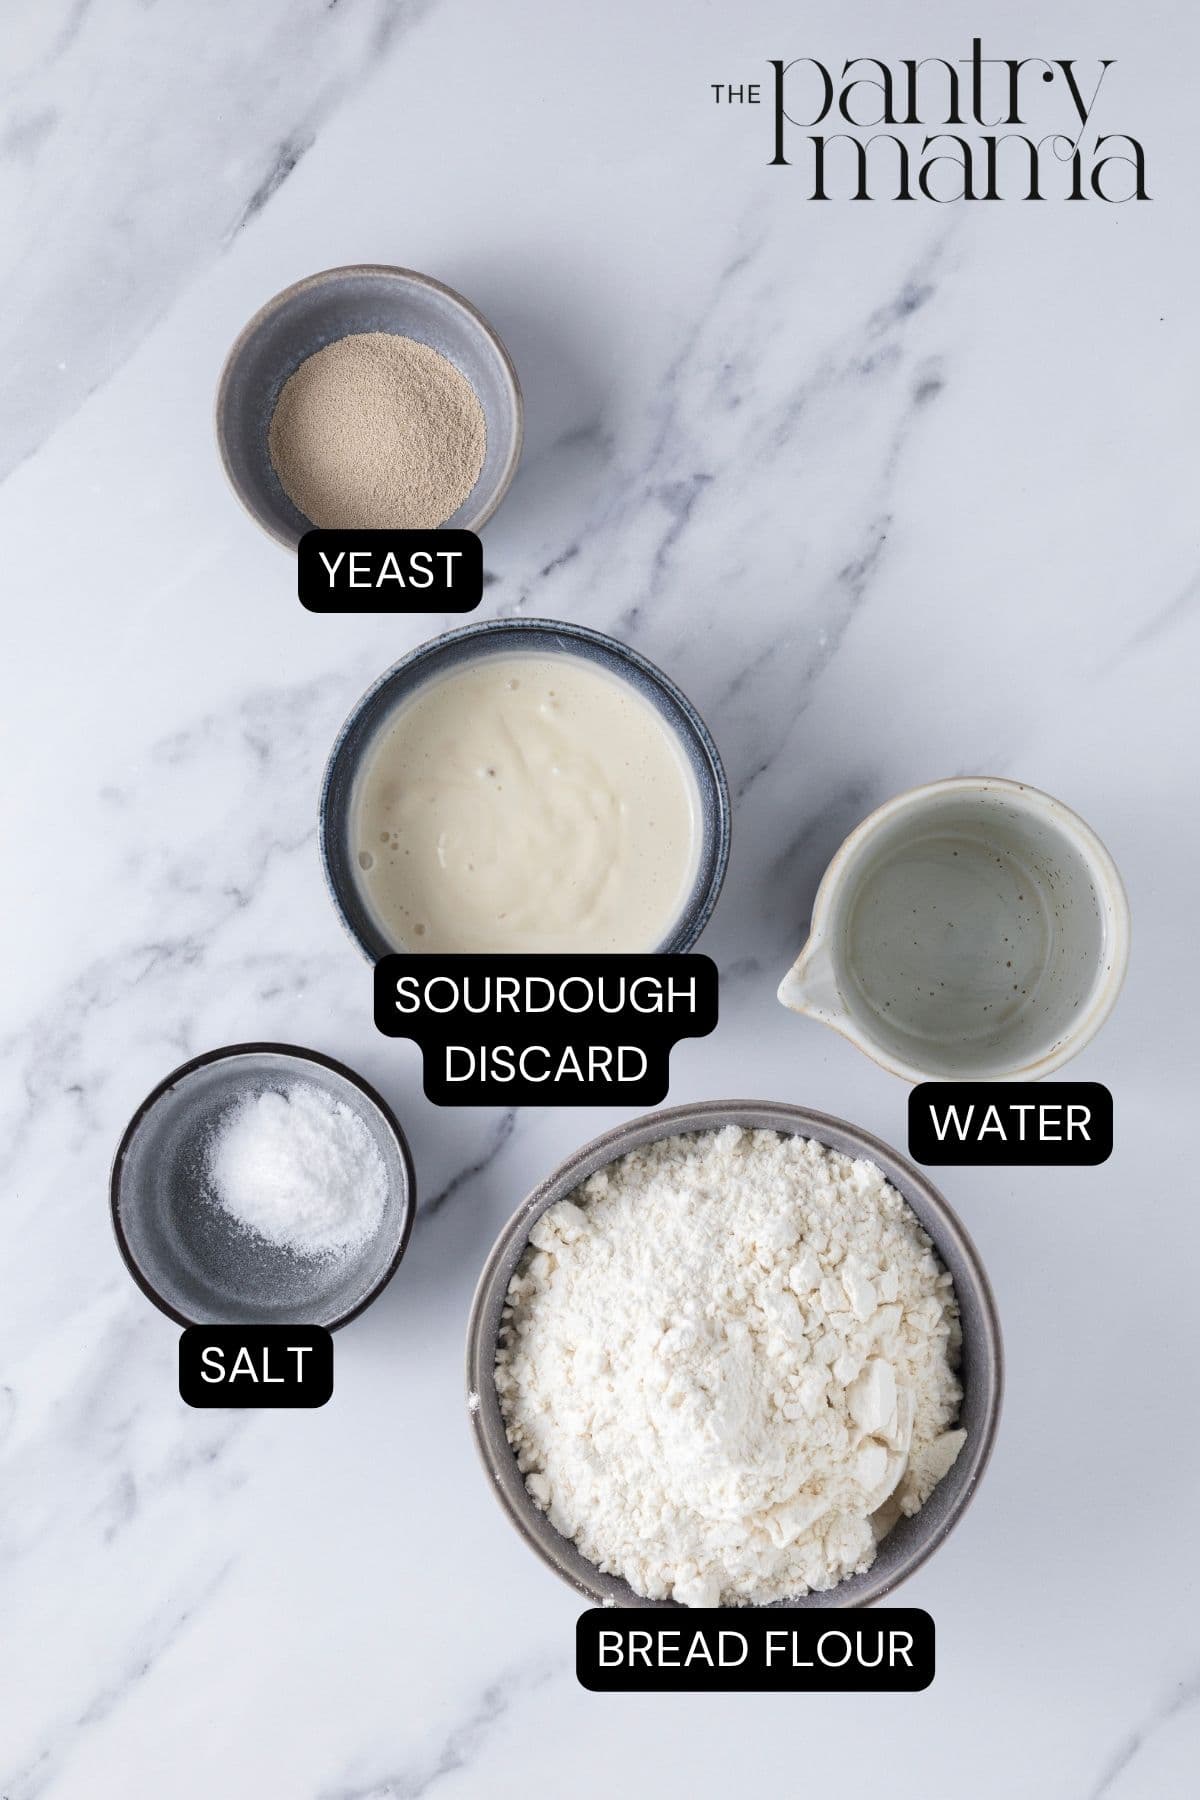
- Sourdough Discard – Unfed starter straight from the fridge is perfect here and adds flavor without needing a long fermentation.
- Warm Water – Helps activate the yeast and bring the dough together quickly.
- Instant Yeast – Gives these rolls a reliable and really quick rise.
- Bread Flour – Creates structure and that soft, chewy texture you want in a roll.
- Salt
How To Make No-Knead Sourdough Discard Rolls
These are so easy to make and will give you ready to use rolls in 2 to 3 hours, depending on how warm your kitchen is.
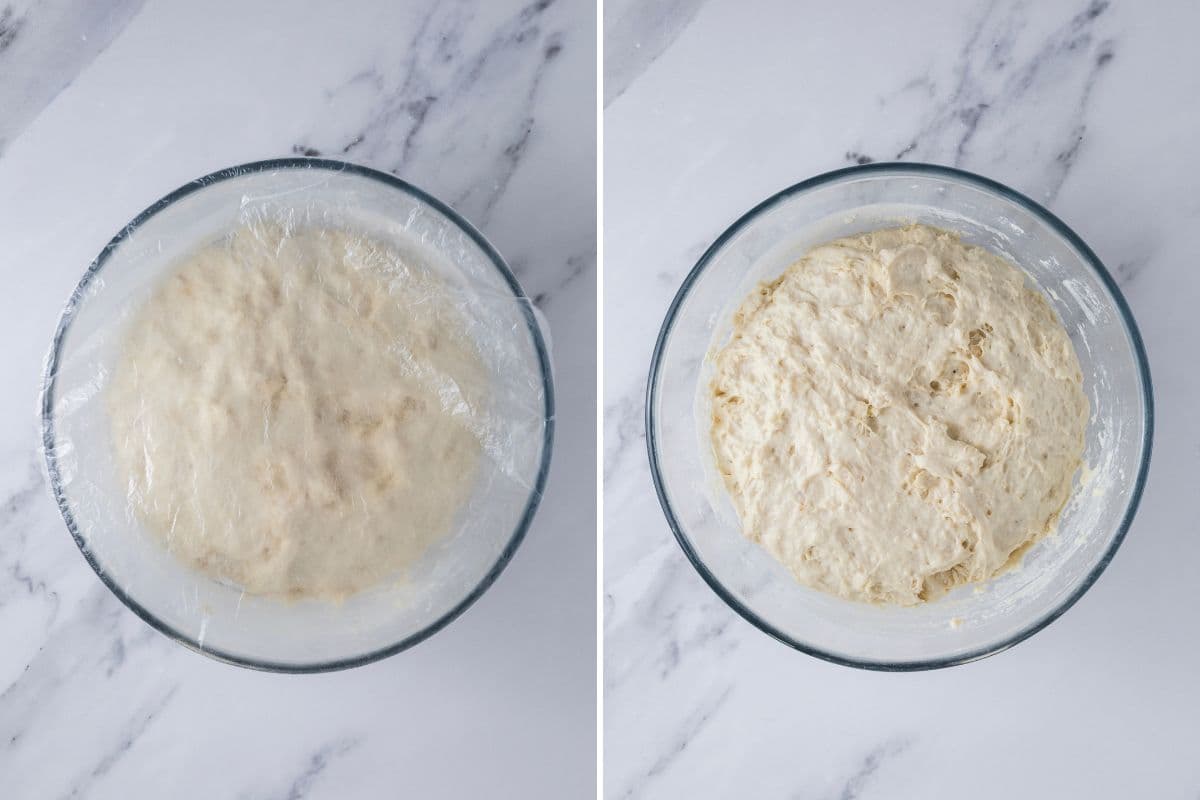
Take a clean ceramic or glass bowl and add your flour, warm water, instant yeast, salt and sourdough discard, gently bringing all the ingredients together into a shaggy dough. You don’t need to it be fully smooth, just ensure that all of the flour is wet.
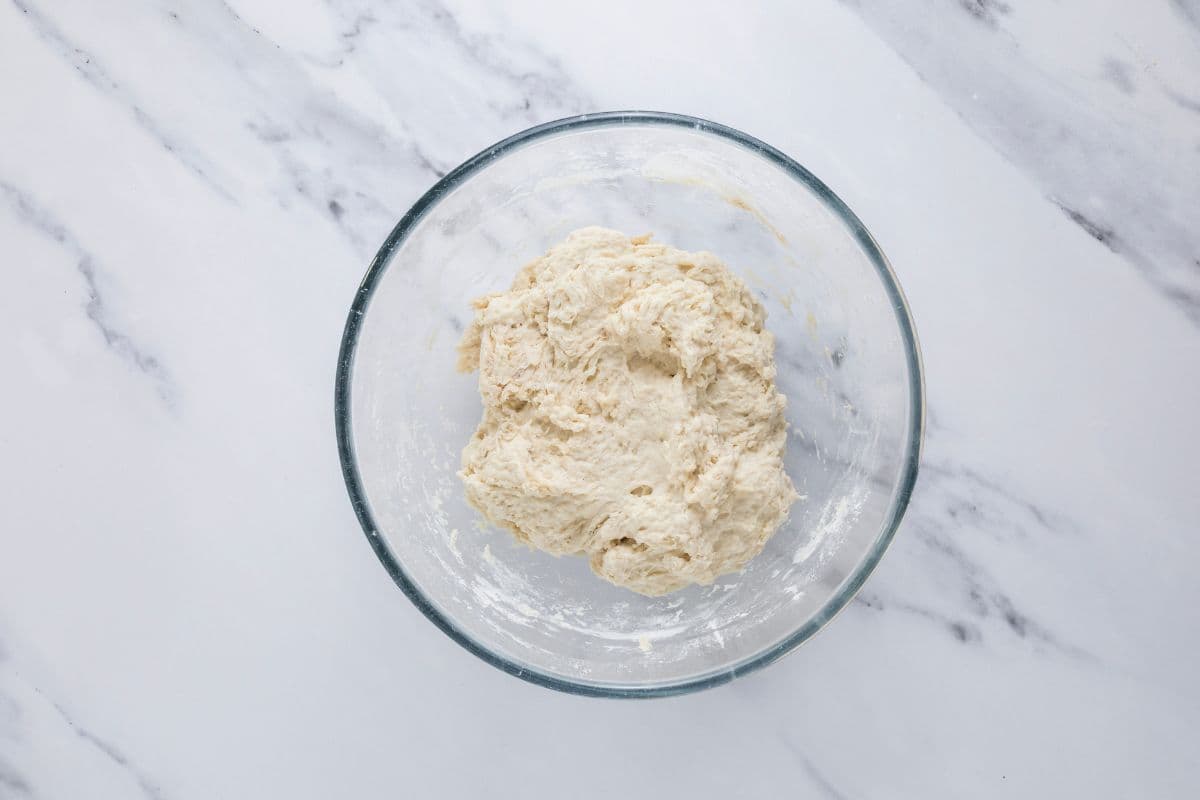
Cover the bowl and set it somewhere warm to double in size (about 1 – 2 hours).
Kate’s Timing Tip
Watch the Dough, Not the Clock
You just want your dough to double in size, no more or it won’t rise in the oven. Timing really depends on the temperature of your house with this one. If your house is warm, 1 hour will be plenty. In the depths of winter or with air conditioner, you may need more than 2 hours.
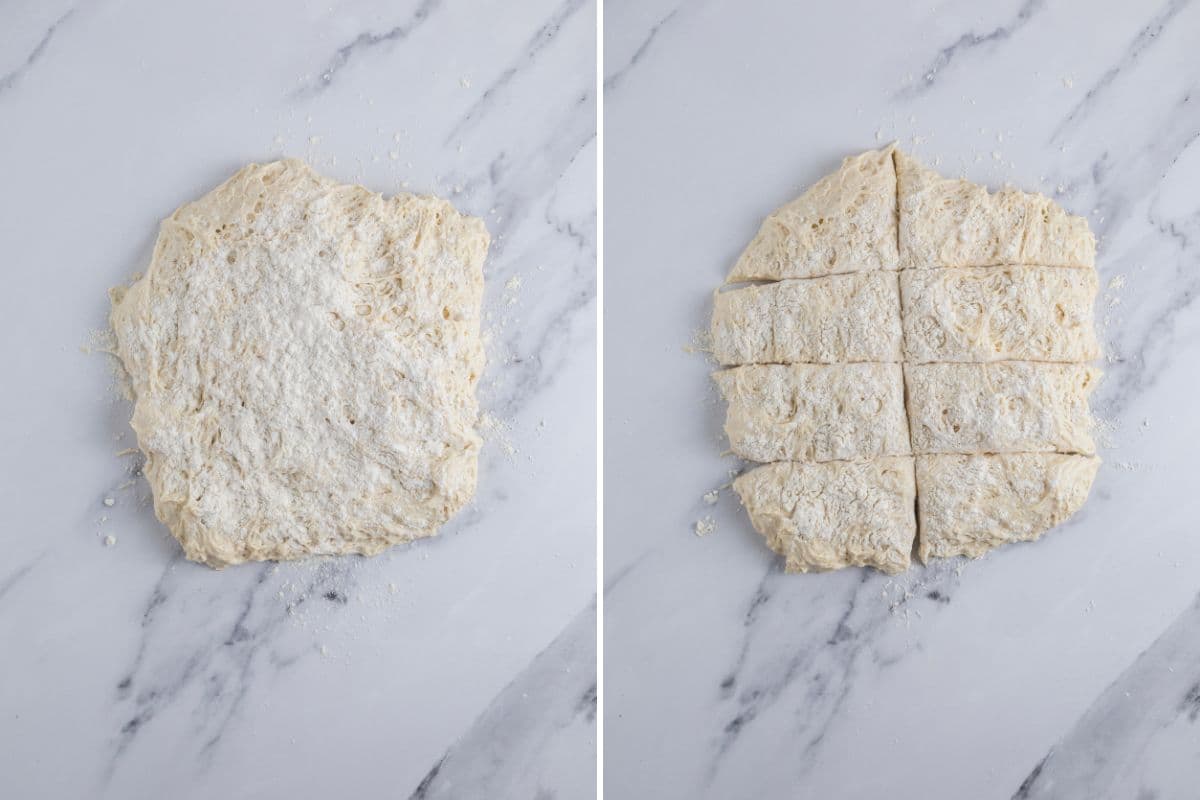
Once the dough has doubled, flour the top of the dough (this is just so that the dough doesn’t stick to your hands).
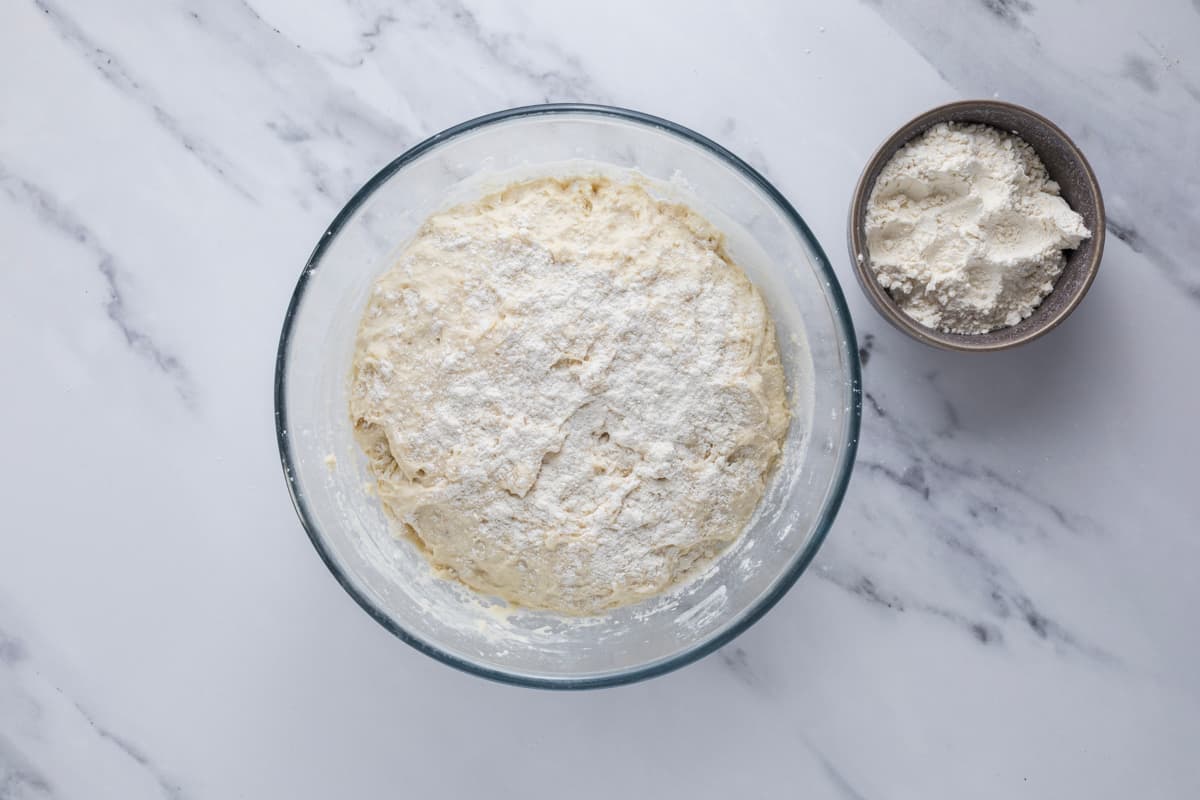
Tip it out onto the counter so that the sticky side is facing up (just like when you make simple sourdough bread).
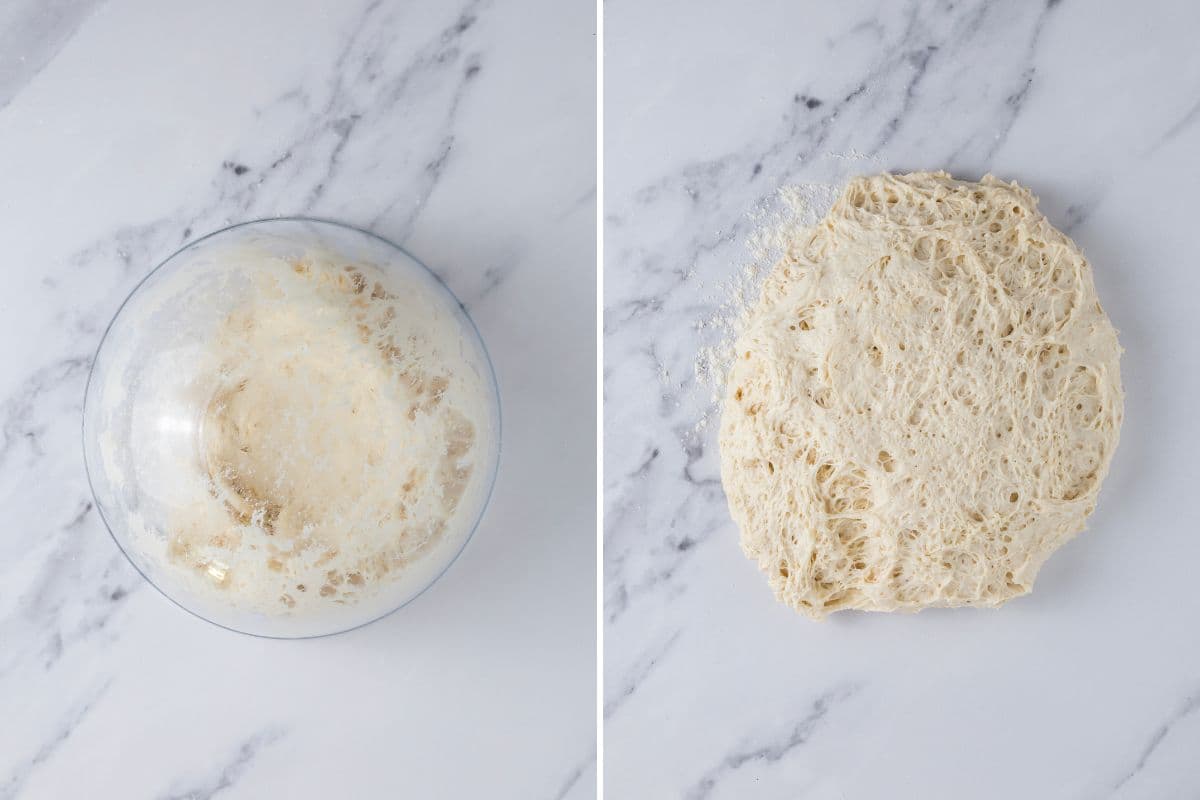
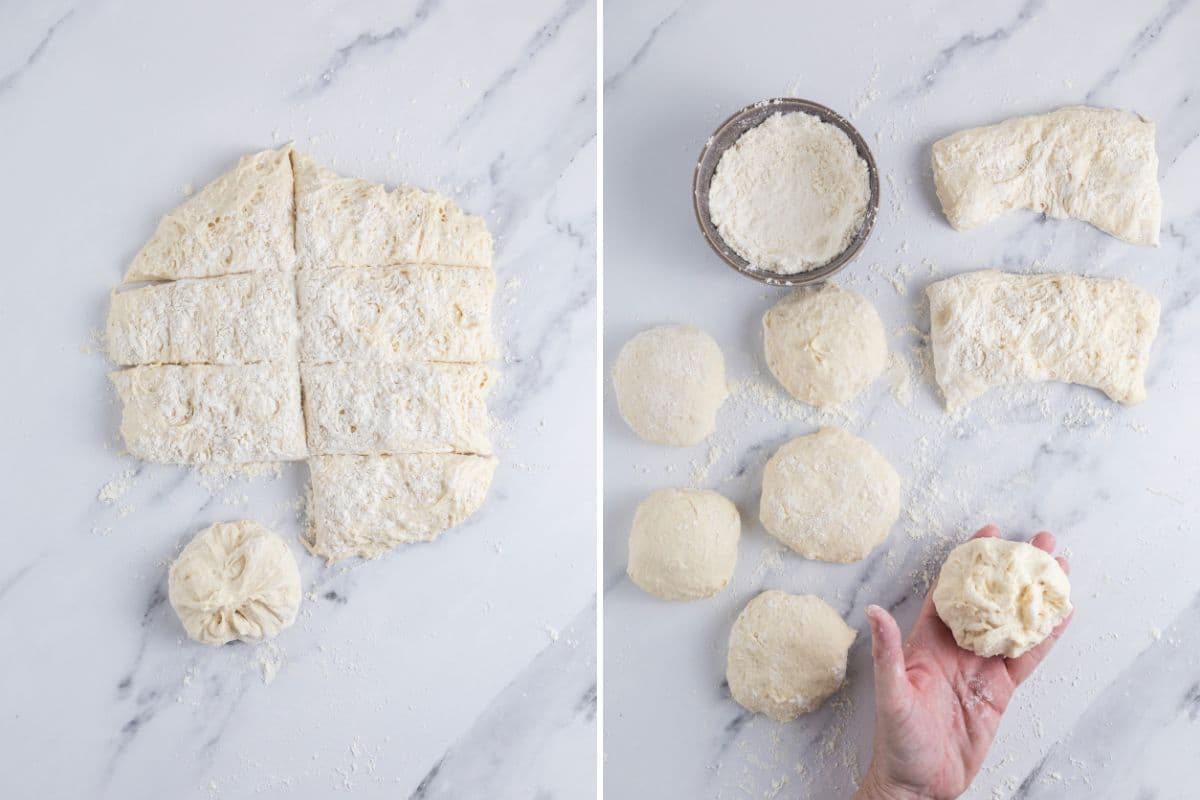
Divide the dough into 8 even pieces using a dough scraper.
Shape each piece into a bun. Pull the edges into the center to form a rounded top and then place each piece on the counter and roll to shape (like you’d shape a boule).
Kate’s Pro Tip
Shaping Tip
Try not to overwork the dough during this step. Gentle handling will keep the rolls light and airy. Use extra flour if you need to – it doesn’t matter with these easy sourdough discard rolls.
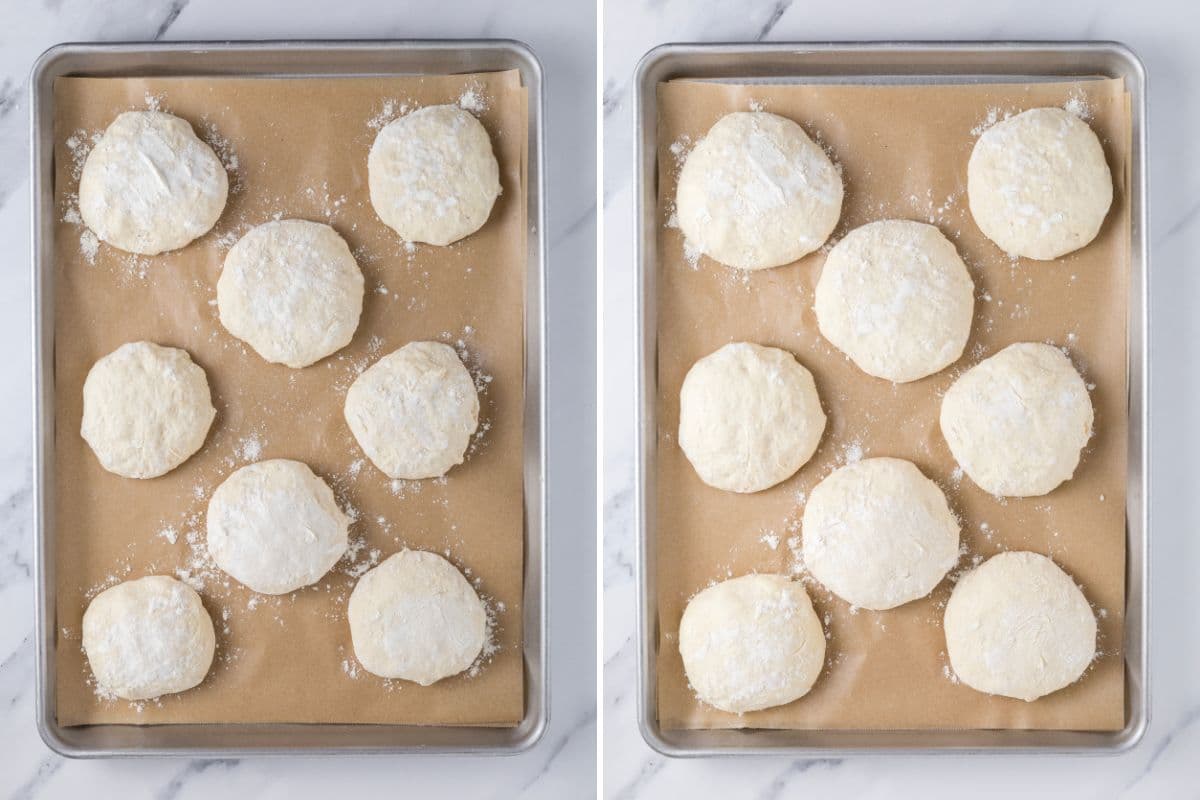
Place your rolls on a baking tray lined with parchment paper, sprinkle with a bit more flour for that rustic look and cover with a plastic bag or wrap. Set aside to rise for around 30 minutes. They will be plump and round when they’re ready to bake.
Preheat the oven to 180ºC/350ºF.
Spray each bun with water and bake for around 22 minutes.
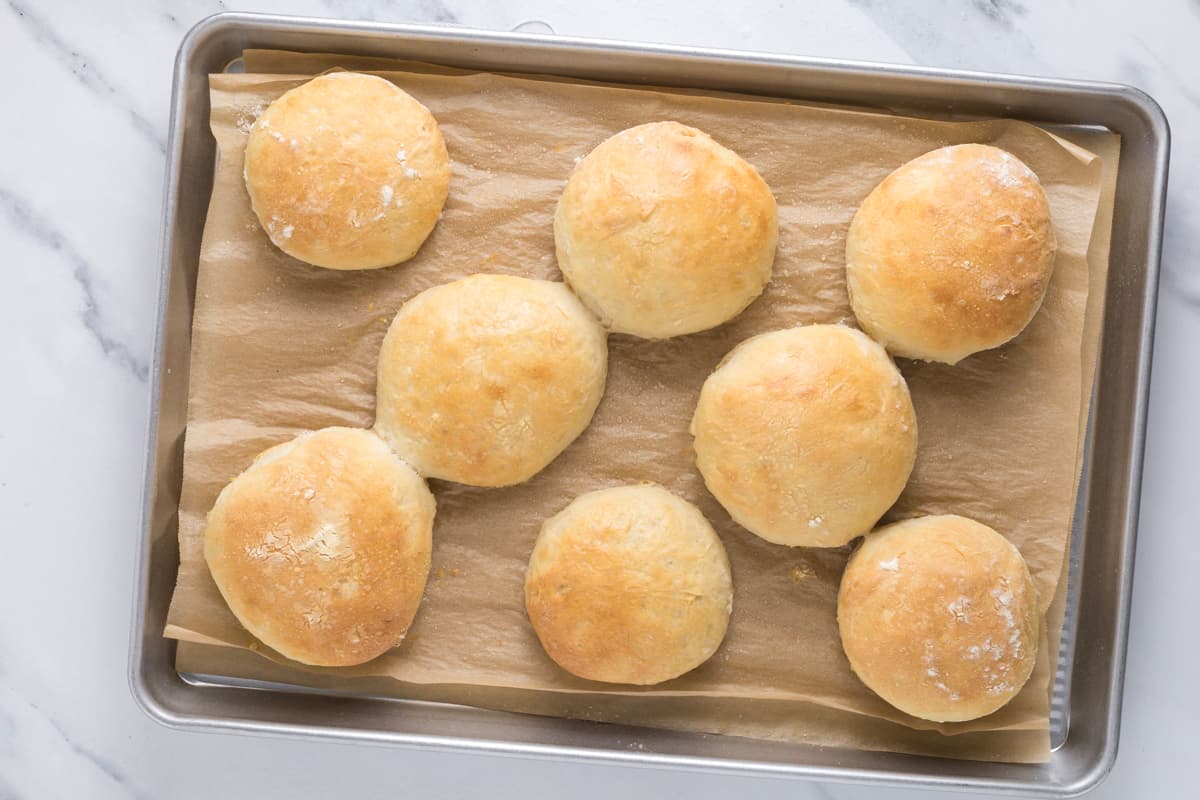
Spray each bun again with water right when removed from the oven. This keeps them soft and gives them a chewy crust (seriously it’s so good).
How to Store + Freeze
Room Temperature – Store the rolls in a bread bag or airtight container for up to 3 days. A paper bag inside a container works well to keep the crust from going too soft.
Freezer – These rolls freeze really well. Allow them to cool completely, then place in a freezer-safe bag for up to 3 months.
To reheat, let them thaw at room temperature and warm in the oven for a few minutes to bring back that fresh baked texture.
Frequently Asked Questions
Yes! I’ve developed these rolls using sourdough discard and instant yeast to make them quick and easy, but you can use active sourdough starter if you prefer.
The yeast gives you a quick, reliable rise, which is what makes this recipe so fast and beginner-friendly.
Yes. You can bake them earlier in the day and warm them before serving, or freeze them and reheat when needed.
You can use all purpose flour, but the texture will be slightly less chewy and structured. The dough will also be much wetter and stickier, so can be tricky to handle.

No Knead Sourdough Discard Rolls
Equipment
- Mixing Bowl
- Digital Scales
- Dutch Oven
Ingredients
- 100 g Sourdough Discard, (unfed sourdough starter)
- 360 g Water, (warm)
- 7 g Instant Yeast
- 450 g Bread Flour
- 10 g Salt
Instructions
- Take a clean ceramic or glass bowl and add your flour, warm water, instant yeast, salt and sourdough discard.
- Use a wooden chopstick or end of a wooden spoon to gently bring all the ingredients together into a shaggy dough. You don't need to it be fully smooth, just ensure that all of the flour is wet.
- Cover the bowl in cling film and set it somewhere warm for 1 – 2 hours. It really depends on the temperature of your house with this one. If your house is warm, 1 hour will be plenty. In the depths of winter or with air con, you may need more than 2 hours. You just want it to double in size, no more or it won't rise in the oven.
- Once the dough has doubled, transfer it to your kitchen counter for shaping.
- Divide the dough into 8 even pieces.
- Shape each piece into a bun. Pull the edges into the center to form a rounded top and then place each piece on the counter and roll to shape (like you'd shape a boule).
- Place your rolls on a baking tray lined with parchment paper, sprinkle with a bit more rice flour, and cover with a plastic bag or wrap. Set aside to rise for around 30 minutes. They will be plump and round when they're ready to bake.
- Preheat the oven to 180ºC/350ºF.
- Spray each bun with water, and bake for around 20 minutes.
- Spray each bun again with water right when removed from the oven.
- Cool on a wire rack.
Nutrition
Nutrition information is automatically calculated, so should only be used as an approximation.
Like this? Rate and comment below!


Genuinely quick, easy, and a tasty way to use discard!
I found the dough super sticky. Any recommendations? Trying to shape the buns was a challenge. Tasted great once cooked though.
They can be a little sticky, but dusting with flour helps to shape them – you can see how much flour I’ve used in the photos above. I’ll try to get a video up of these asap. You definitely need to use bread flour for this recipe and make sure you discard isn’t runny as this will make the dough too wet 🙂
Thanks for getting back to me. Tried again, still very sticky and sloppy. Maybe my house is it warm? My discard didn’t seem too runny, used rice flour on the counter as well. Would it be okay to add more bread flour to firm things up?
You can definitely add more flour if you want to 🙂
Hi,
thank you. Just trying this for the first time.
The dough rises pretty good, but it really deflates when I place it on the countertop. In addition, it is still very wet, so the formed rolls are really flat. Even after the 30 minutes rise on the baking try, they stay relatively flat and distribute in width, but not in height – not round at all.
Any idea what I am doing wrong?
Thanks!
Are you using bread flour? How runny is your discard? This can have an effect on the hydration of the dough. I’ve made these so many times and never had an issue with them deflating. If your discard is too old and or runny, this will definitely make it very difficult to shape the rolls. Try making them with discard that’s fairly fresh and hasn’t been in the fridge 🙂
Thank you, Kate – I did not use bread flour. Flour classifications in Germany are a bit different from the ones you are using, I thought the flour I used was similar to bread flour. I now know that “bread flour” is the equivalent to a “812” flour in Germany, so will look for that one. The starter is very fresh, it is just 3 weeks old – but it had been in the fridge for the last 4 days. So will consider this next time, too. 🙂
These rolls are so easy to make and delicious. They are also the perfect size.