This post contains affiliate links. Please see our disclosure policy.

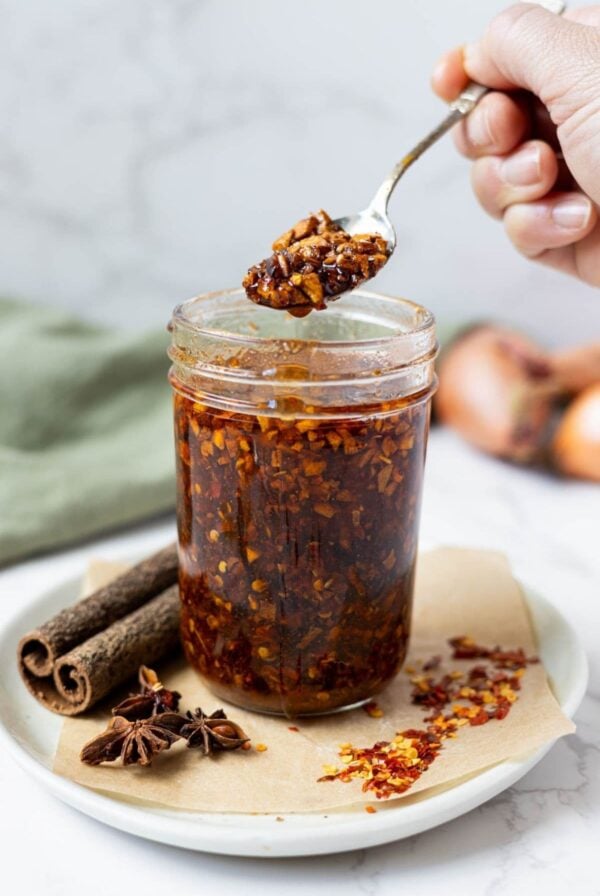
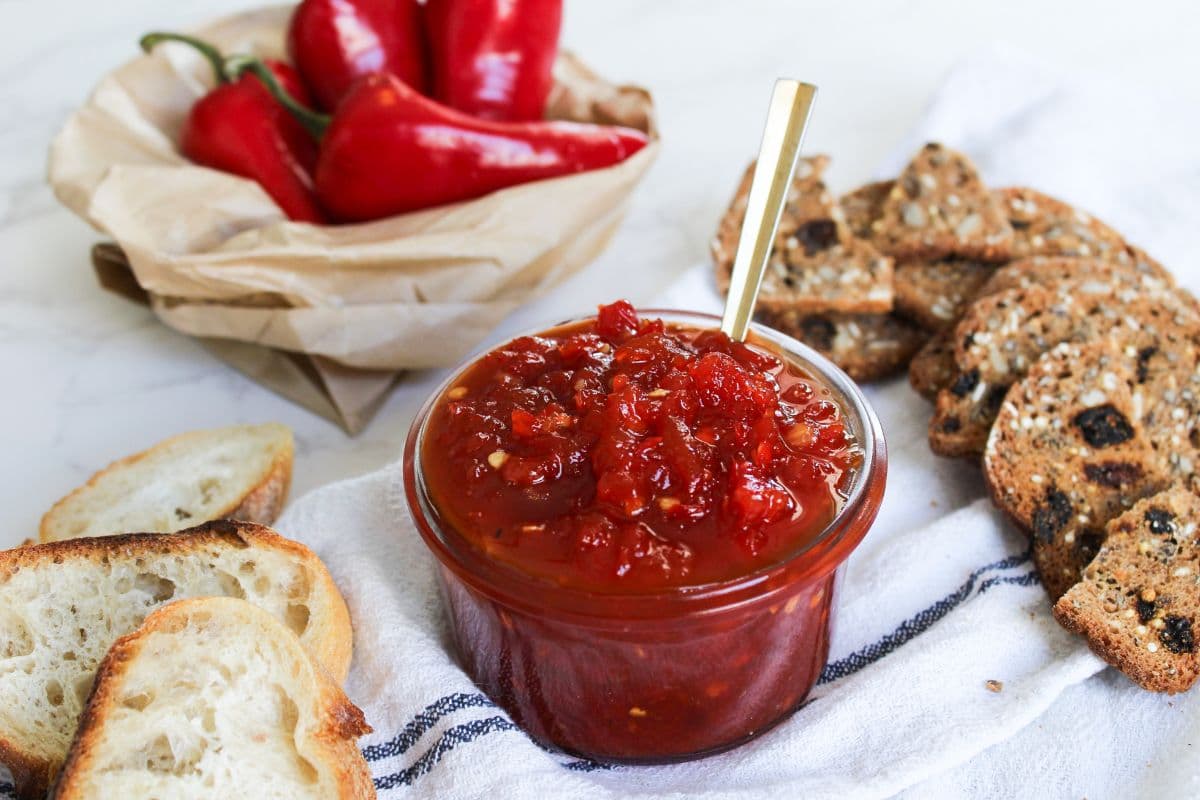
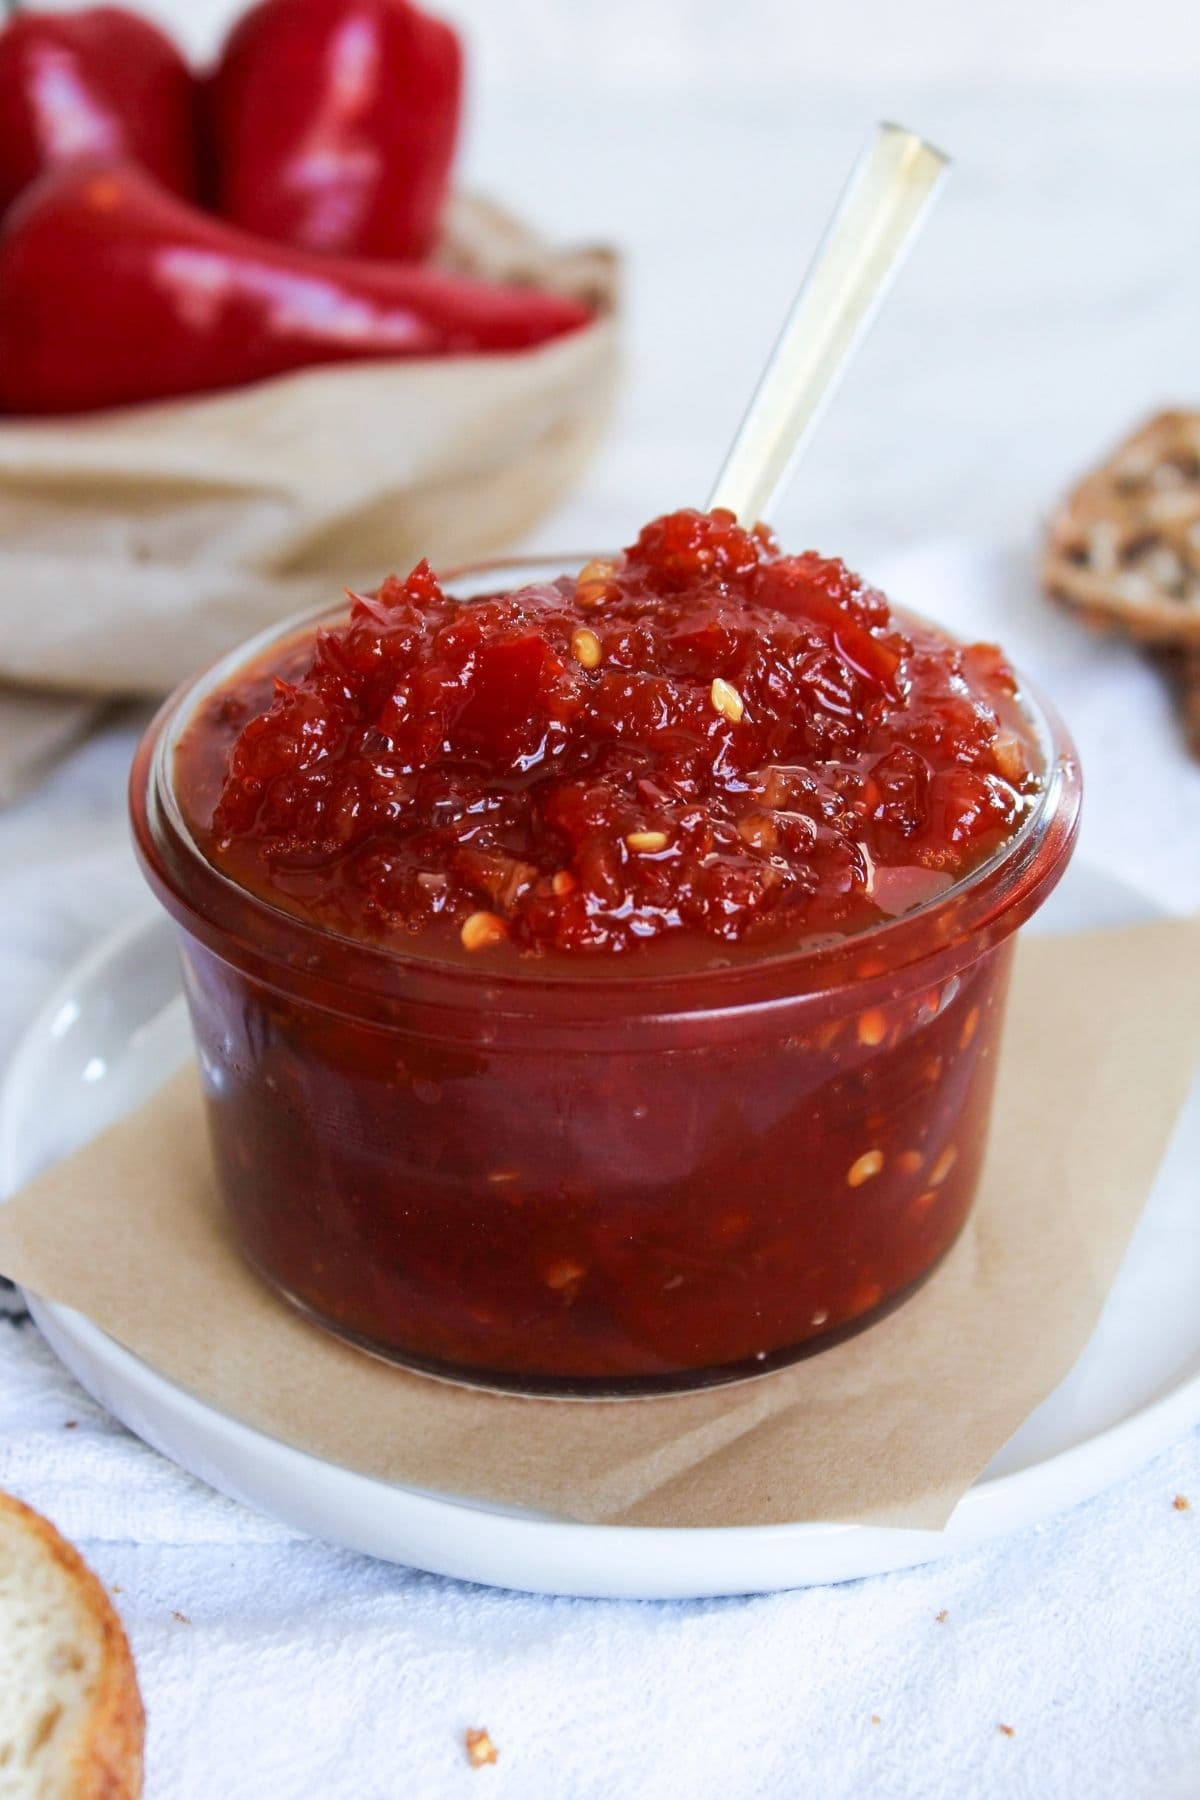
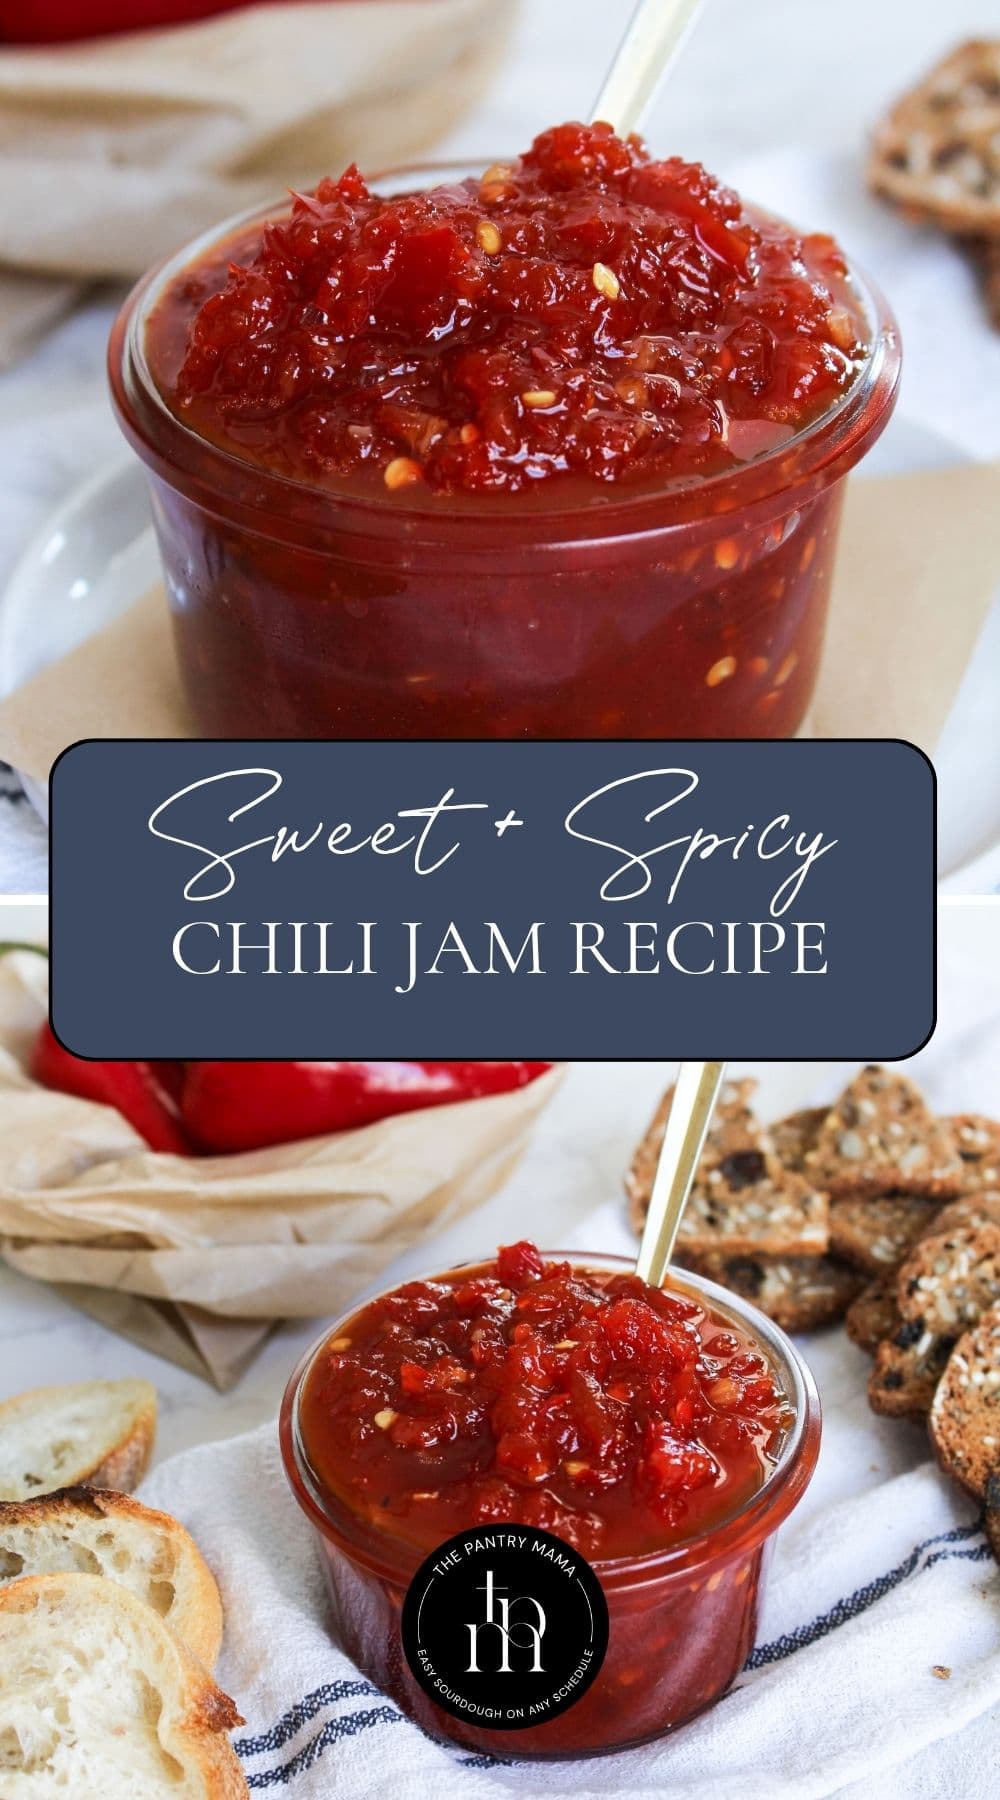
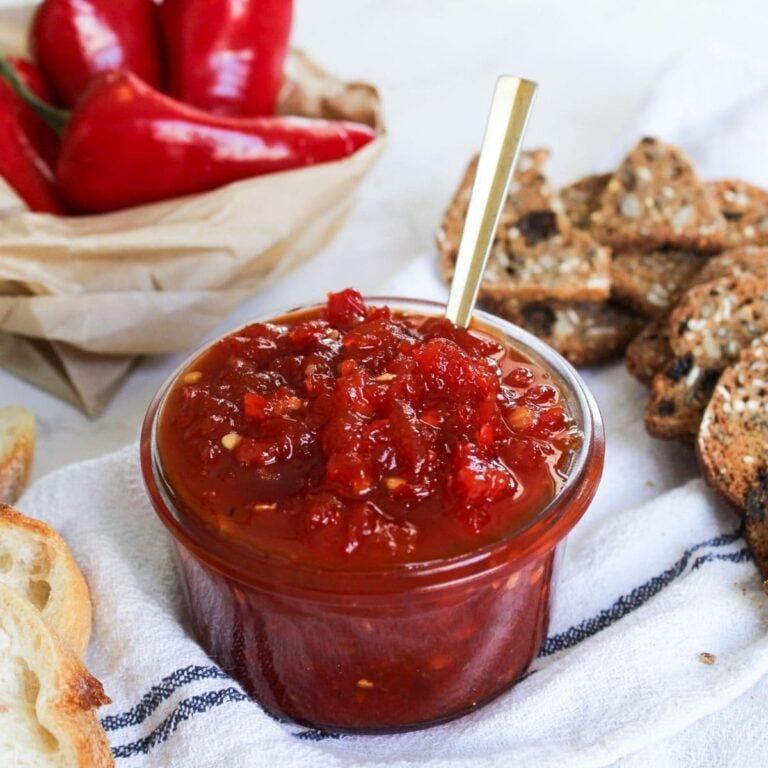
This chili jam is sweet, sticky and just a little spicy, with the perfect balance of flavor. The red peppers give it a deep sweetness, while the chilies add just enough kick to leave you going back for a second bite! It’s easy to make and even easier to use once you’ve got a jar sitting in the fridge.
Why You’ll Love This Recipe!
A Little Sweet and a Little Spicy – This jam has the perfect balance of sweetness with just a gentle kick. It’s not overly hot, which makes it great for the whole family.
So Versatile – This is a condiment you’ll keep reaching for. It’s wonderful on a cheese board, in sandwiches or spooned over eggs. It also works really well as a quick marinade for chicken or shrimp.
Easy to Adjust -You can easily tweak the recipe depending on what you have. Add extra chili for more heat, or reduce it for something milder. It’s a great “use what you’ve got” recipe.
Ingredients
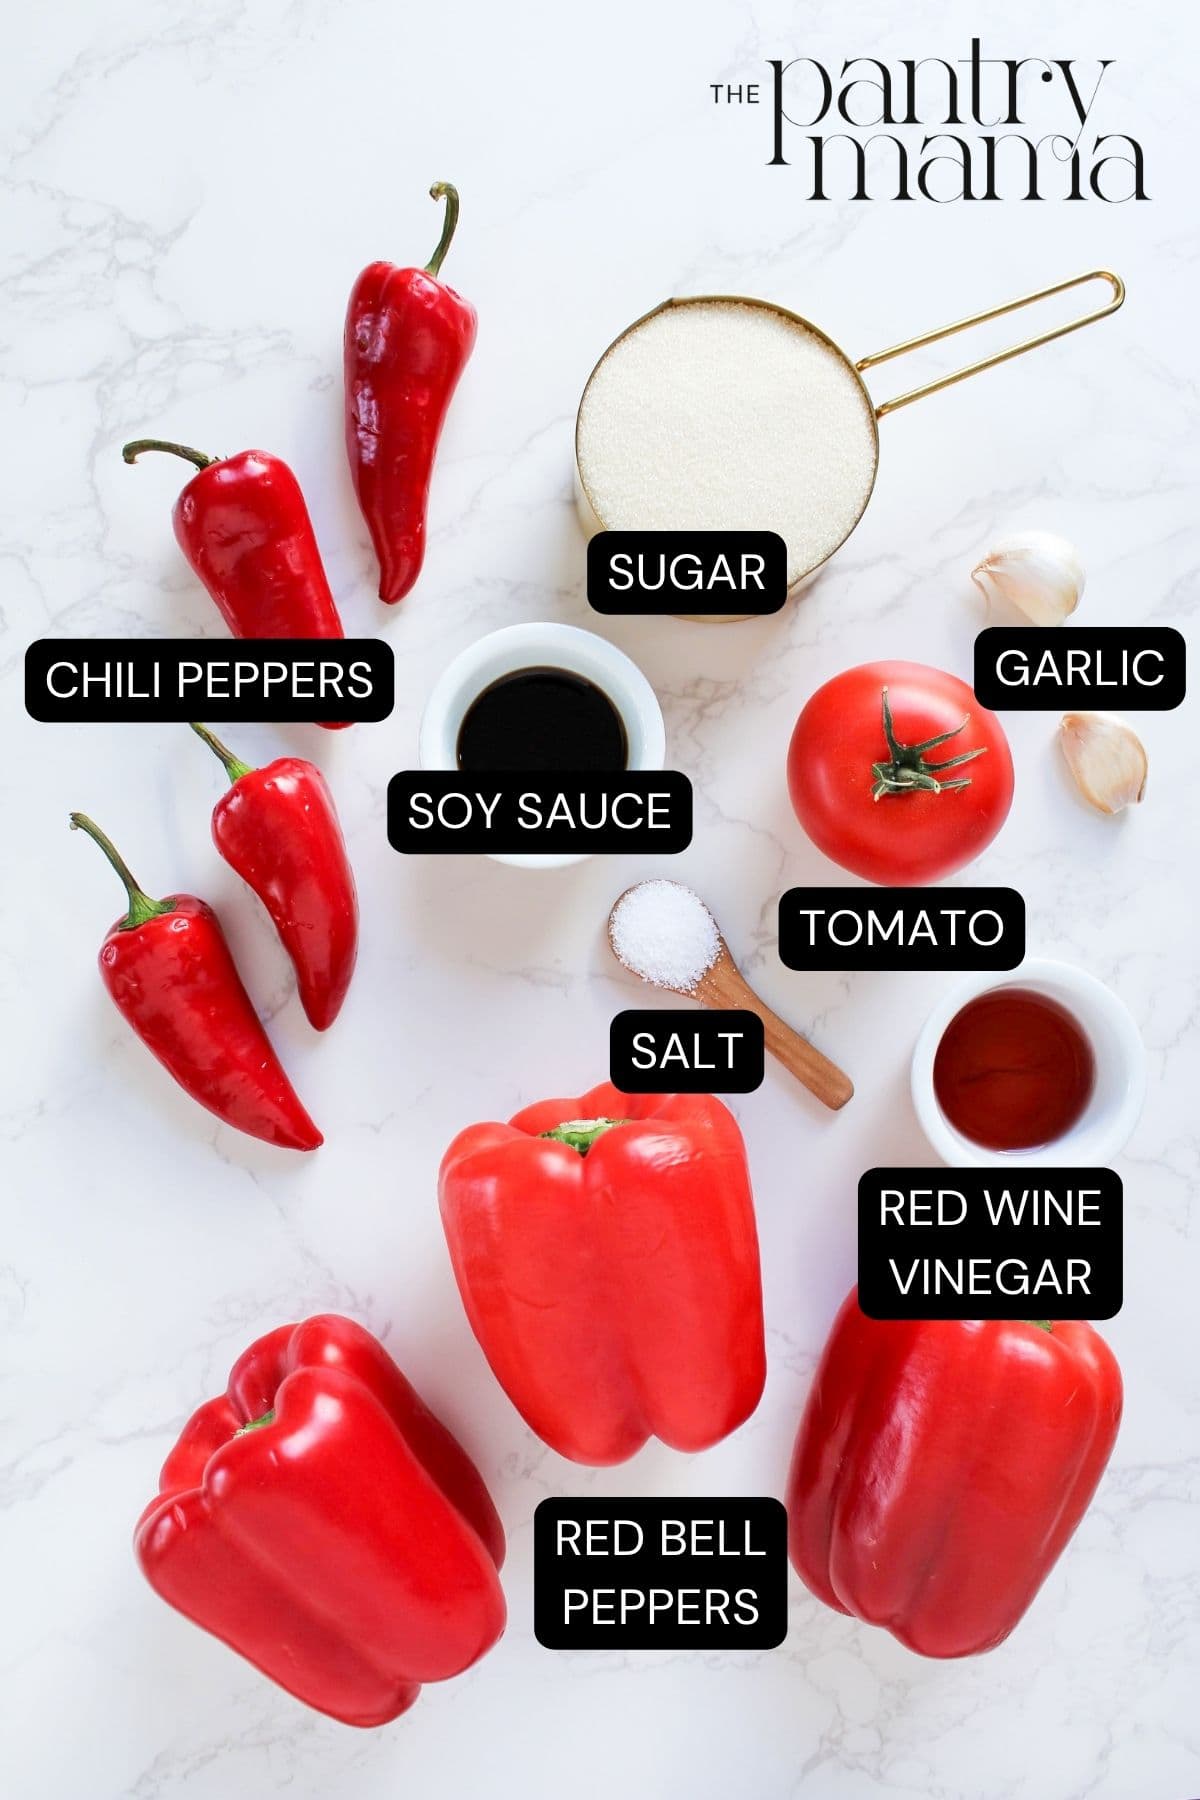
- Bell Peppers – Red bell peppers form the base of your jam. While they don’t add heat, they create that bright red color and, when cooked down, contribute a deep sweetness and savory flavor. You can substitute one red pepper for an orange or yellow one if that’s what you have on hand! However, I don’t recommend swapping all of them.
- Chilies – I used Fresno chilies because they have the perfect heat level. Seeds will make the jam spicy, so if you want it a little hotter, then only de-seed one chili. You can substitute with dried chili flakes if that’s all you can find. Chili flakes are more potent and may result in a spicier jam. Two teaspoons of dried chili flakes is a close equivalent but if you’re sensitive to spice, reduce this amount.
- Tomato – Peppers alone don’t have a lot of pectin, but tomatoes do! I don’t like to fuss with having to buy pectin and I try to keep additives out of recipes where I can. A medium tomato was the perfect amount to yield that slightly jammy texture and even adds a sweet complexity!
- Garlic – You can omit it or substitute dried garlic granules if needed.
- Salt
- Soy Sauce – I added soy sauce for a little bit of umami. It pairs well with the chilis and adds another fun twist to the jam! If you don’t have soy sauce or are allergic, you can leave it out and add some extra salt.
- Sugar – Essential for sweetness and helps create the jammy texture. Don’t skip it!
- Red Wine Vinegar – Any vinegar or acid (such as lemon juice, lime juice) works here so just use what you have on hand! White vinegar or apple cider vinegar are perfect substitutes here.
How To Make Chili Jam
Most of the work in this chili Jam recipe involves only blending and stirring! No babysitting or complicated techniques required. I use a food processor to roughly chop the chilis and red peppers. This saves so much time – and saves me from touching the chilis too much!
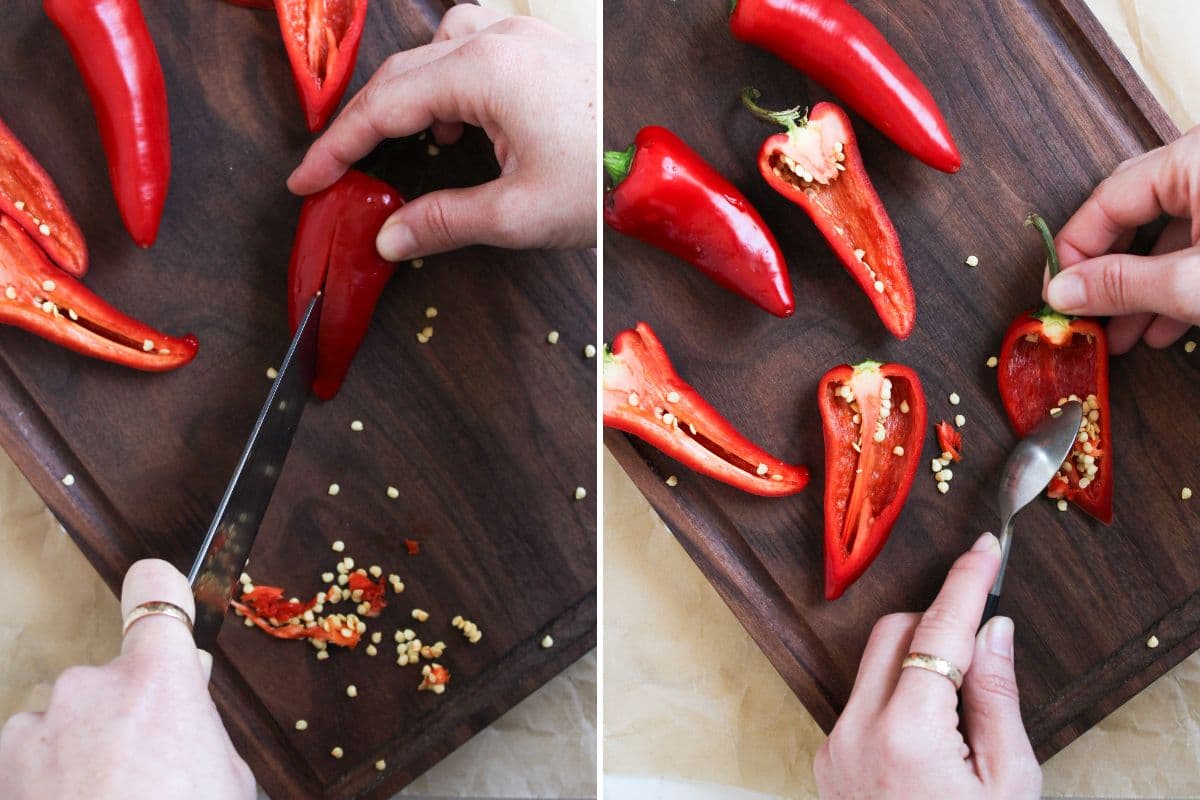
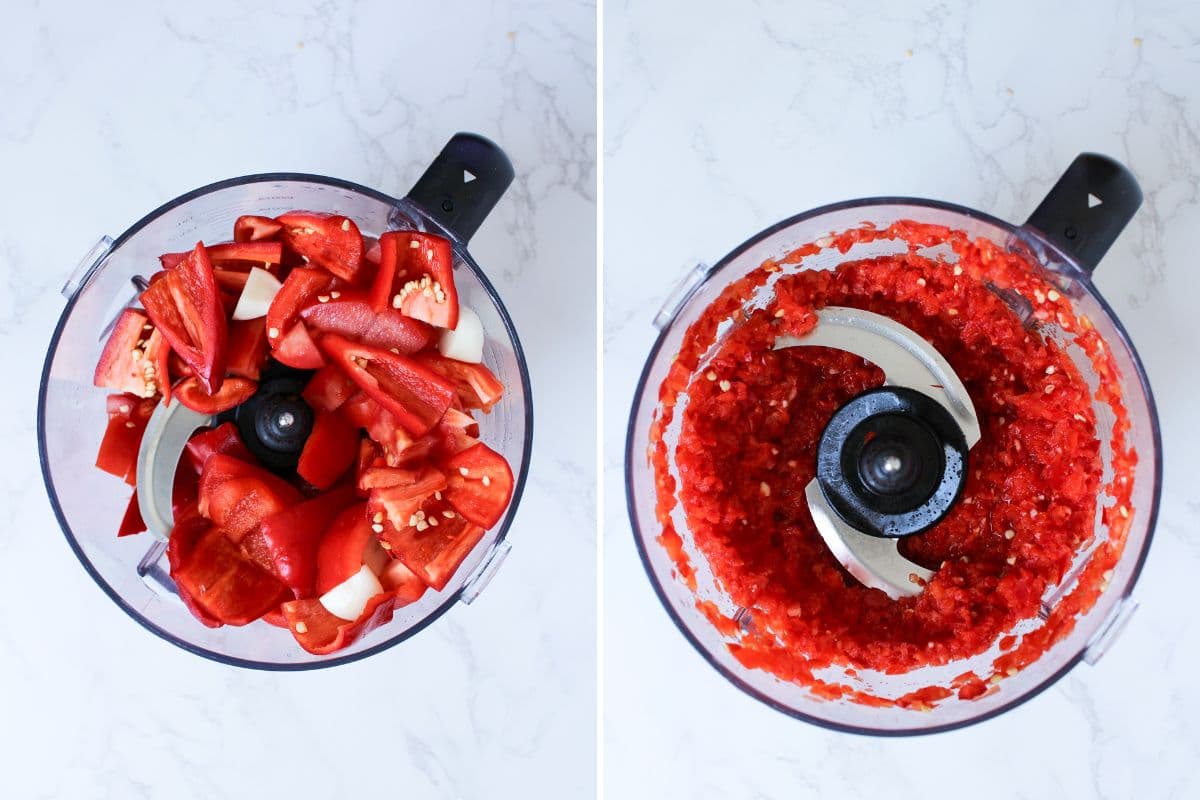
Cut the red bell peppers into large chunks, removing the seeds and core.
Slice the chili peppers in half lengthwise. Remove the seeds from half of the chilies, leaving the other half with seeds for heat. Roughly chop all of the chilies into chunks.
Kate’s Pro Tip
Pepper Tip
If you have food safe gloves (or you can put your hand in a plastic bag) it helps keep the spice off your hands! If not, just be sure to wash your hands after this step and avoid touching your face and eyes for a few hours.
Cut the tomato into large pieces and discard the core. Lightly crush the garlic cloves, remove the skins and cut them in half.
Add the bell peppers, chilies, tomato and garlic to a food processor and blend until the mixture is finely chopped and resembles a chunky salsa. You can blend longer if you prefer a smoother chili jam.
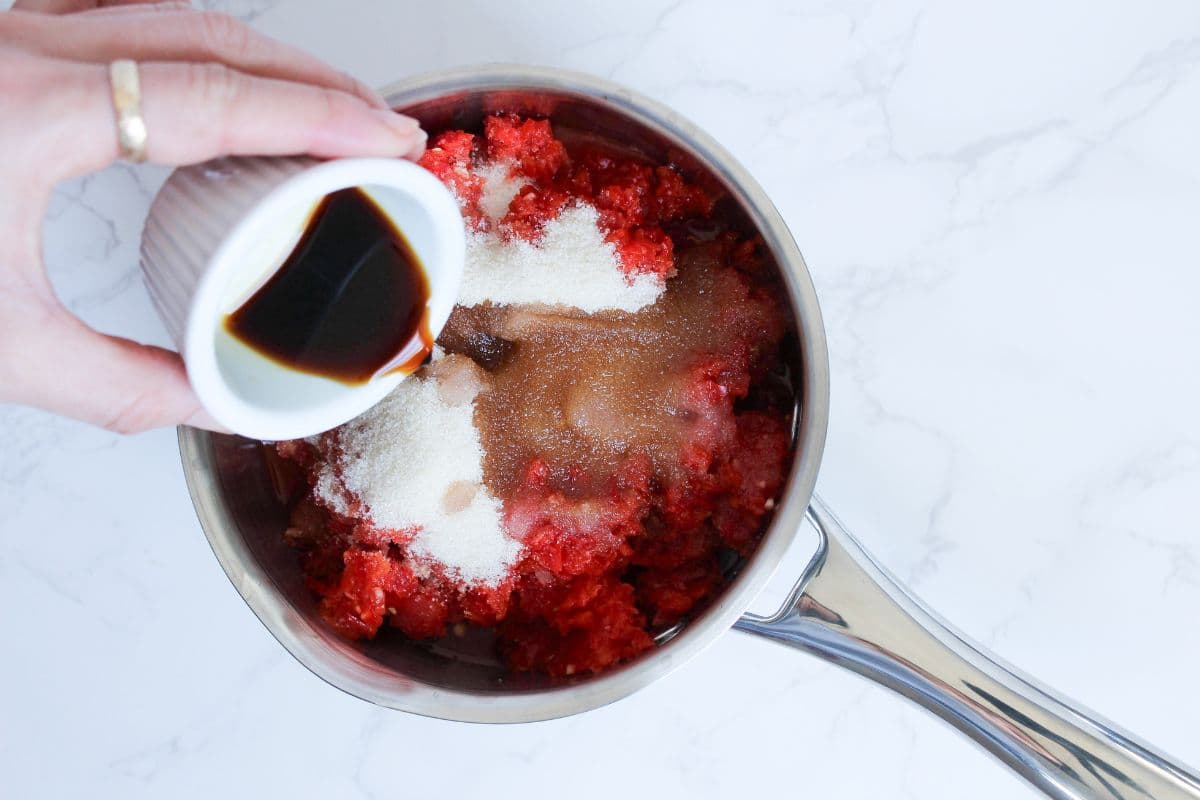
Transfer the blended mixture to a small, heavy based pot and place over medium-high heat. Add the salt, soy sauce, sugar and vinegar and stir well to combine. Bring the mixture to a boil, then allow it to cook on medium-high heat for around 35 minutes, stirring occasionally. It should become bubbly and start to reduce.
Lower the heat to medium and continue to simmer for another 20 minutes, stirring occasionally. The mixture should reduce by about half and become thick and sticky.
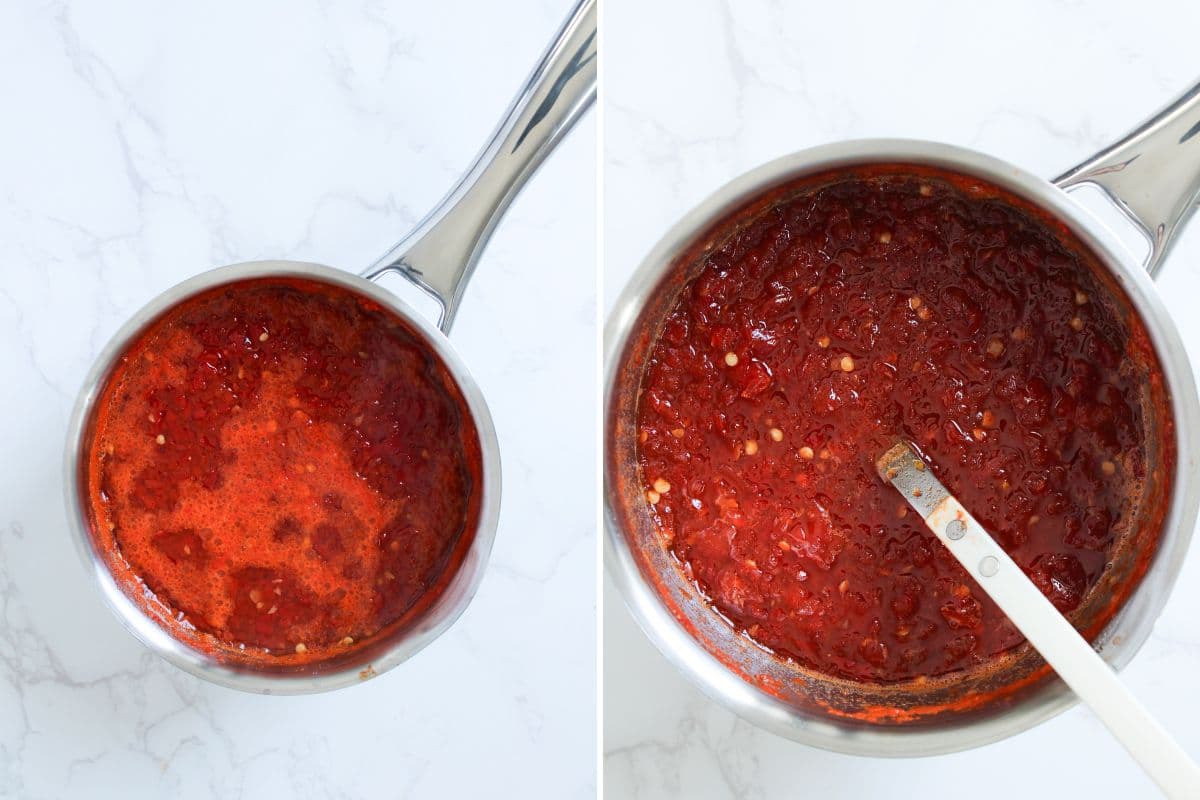
Turn off the heat and allow the chili jam to sit in the pot for around 10 minutes. If you prefer a smoother consistency, carefully use an immersion blender at this stage. The jam will continue to thicken as it cools.
While the jam is simmering, fill 3 jars with boiling water. Leave them to sit for 5 minutes before emptying.
Use a stainless steel jar funnel and ladle to fill the jars with the chili jam. Screw the lids onto the jars immediately and leave the jam to cool on the counter.
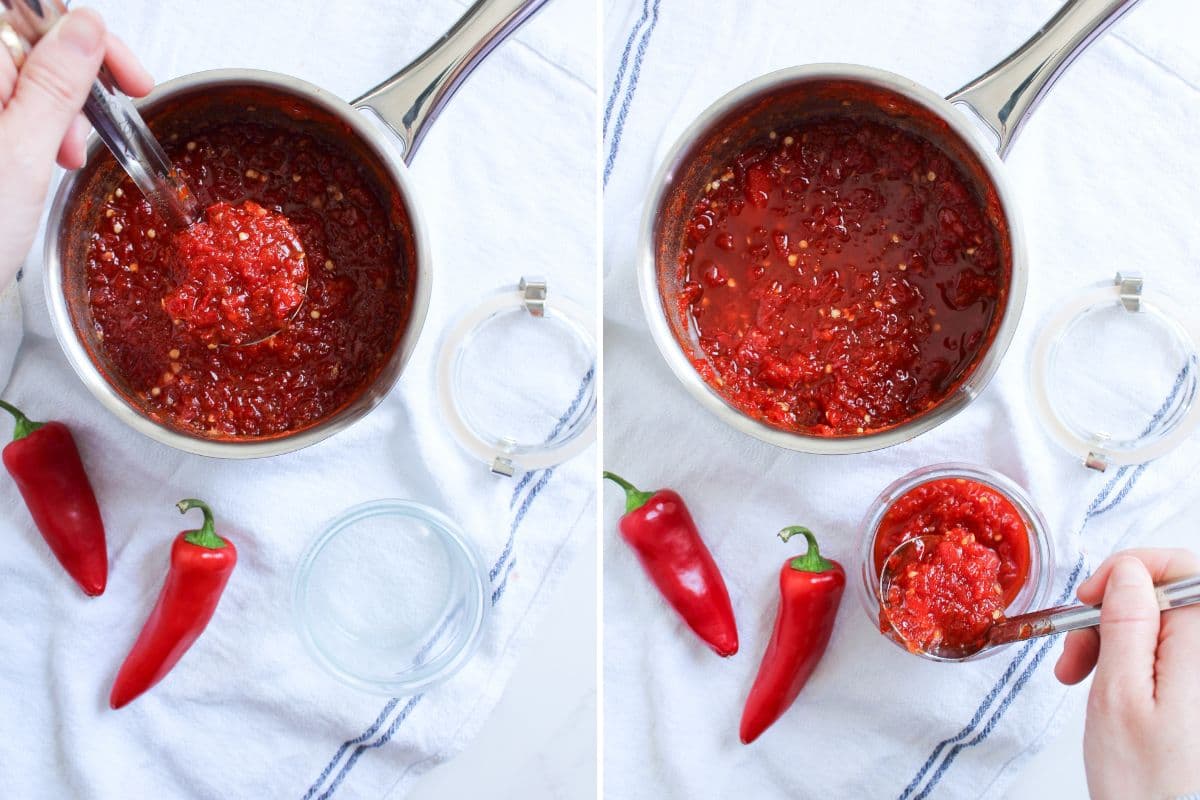
Let the filled jars sit at room temp for another 5-10 min and then refrigerate.
What To Serve With Chili Jam
This chili jam pairs with so many things! I love adding it to a sourdough grilled cheese sandwich for a little sweet heat, or using it as a dipping sauce for dumplings.
It’s also perfect as the centerpiece of a cheese board, spread onto sourdough crackers or sourdough crostini, and served alongside a wedge of cheese.
You can use it to give a bacon, egg and cheese breakfast sandwich a bit of a twist on sourdough bagels, or add a spoonful to burgers (made with sourdough discard burger buns of course!) for an extra layer of flavor.
How To Store + Freeze
Fridge – Once jarred and cooled, store the relish in the fridge for up to 2 to 3 weeks. The sugar and vinegar help preserve it, and the flavor actually improves after a day or two.
Freezer – You can freeze the relish in freezer-safe containers for up to 3 months. Thaw in the fridge before using. Just leave a little room at the top for expansion when filling the jars.
Frequently Asked Questions
As is, the fresh Fresno chili version is mild-medium in spice. Remember, seeds make up most of the heat, so if you decide to keep more seeds in, or take more out, that will change the spice level. I found the recipe to be the perfect balance of just a little kick but no uncomfortable mouth burn!
You can! Being that the main flavor components are pepper and sugar, just use a little less sugar or throw in an extra chili or bell pepper to combat the sweetness. You may need to cook it a bit longer but it will yield a less sweet jam.
Yes! Depending on the variety of the chili and your heat tolerance, you may need to make adjustments to pepper quantity, sugar amount etc. I recommend researching your chilis spice level to compare.
Chili Jam
Equipment
- Heavy Based Pot
- Stainless Steel Jar Funnel
- Stainless Steel Ladle
- 2 Glass Jars (my jars are 300mls each)
Ingredients
- 750 g Red Bell Peppers, (3 medium red peppers), seeds and core removed
- 100 g Fresno Chili Peppers, (4 medium peppers)
- 1 Tomato, (approx. 100g or 1 medium tomato)
- 2 cloves Garlic
- 12 g Salt
- 15 g Soy Sauce
- 200 g Granulated Sugar
- 15 g Red Wine Vinegar, (or apple cider or white vinegar)
Instructions
Prepare The Vegetables
- Cut the red bell peppers into large chunks, removing the seeds and core.
- Slice the chili peppers in half lengthwise. Remove the seeds from half of the chilies, leaving the other half with seeds for heat. Roughly chop all of the chilies into chunks.
- Cut the tomato into large pieces and discard the core.
- Lightly crush the garlic cloves, remove the skins and cut them in half.
- Add the bell peppers, chilies, tomato and garlic to a food processor and blend until the mixture is finely chopped and resembles a chunky salsa. You can blend longer if you prefer a smoother chili jam.
Cook The Jam
- Transfer the blended mixture to a small, heavy based pot and place over medium-high heat. Add the salt, soy sauce, sugar and vinegar and stir well to combine. Bring the mixture to a boil, then allow it to cook on medium-high heat for around 35 minutes, stirring occasionally. It should become bubbly and start to reduce.
- Lower the heat to medium and continue to simmer for another 20 minutes, stirring occasionally. The mixture should reduce by about half and become thick and sticky.
- Turn off the heat and allow the chili jam to sit in the pot for around 10 minutes. If you prefer a smoother consistency, carefully use an immersion blender at this stage. The jam will continue to thicken as it cools.
- While the jam is simmering, fill 3 jars with boiling water. Leave them to sit for 5 minutes before emptying.
- Use a stainless steel jar funnel and ladle to fill the jars with the chili jam. Screw the lids onto the jars immediately and leave the jam to cool on the counter.
- Let the filled jars sit at room temp for another 5-10 min and then refrigerate.
Notes
- If you have food safe gloves (or you can put your hand in a plastic bag) it helps keep the spice off your hands! If not, just be sure to wash your hands after this step and avoid touching your face and eyes for a few hours.
- You can adjust the heat of the jam by keeping more or less chili seeds, or by adding dried chili flakes.
Nutrition
Nutrition information is automatically calculated, so should only be used as an approximation.
Like this? Rate and comment below!