
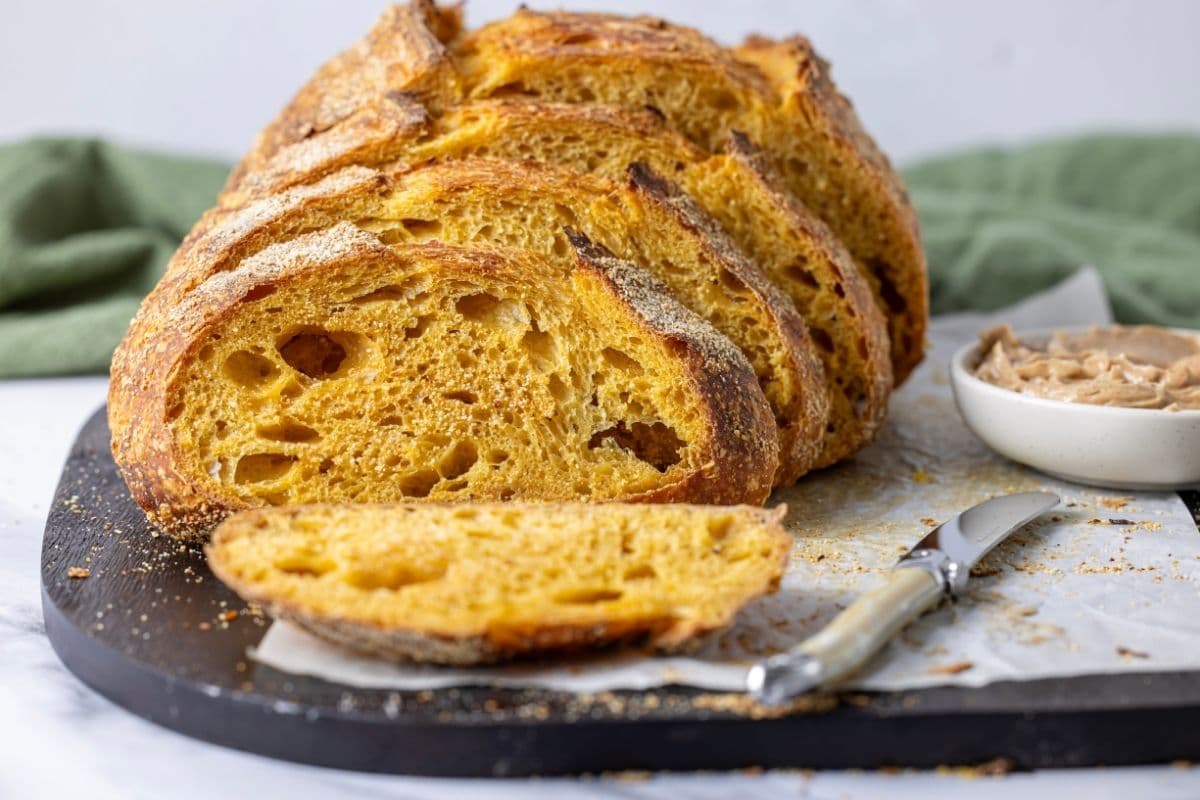
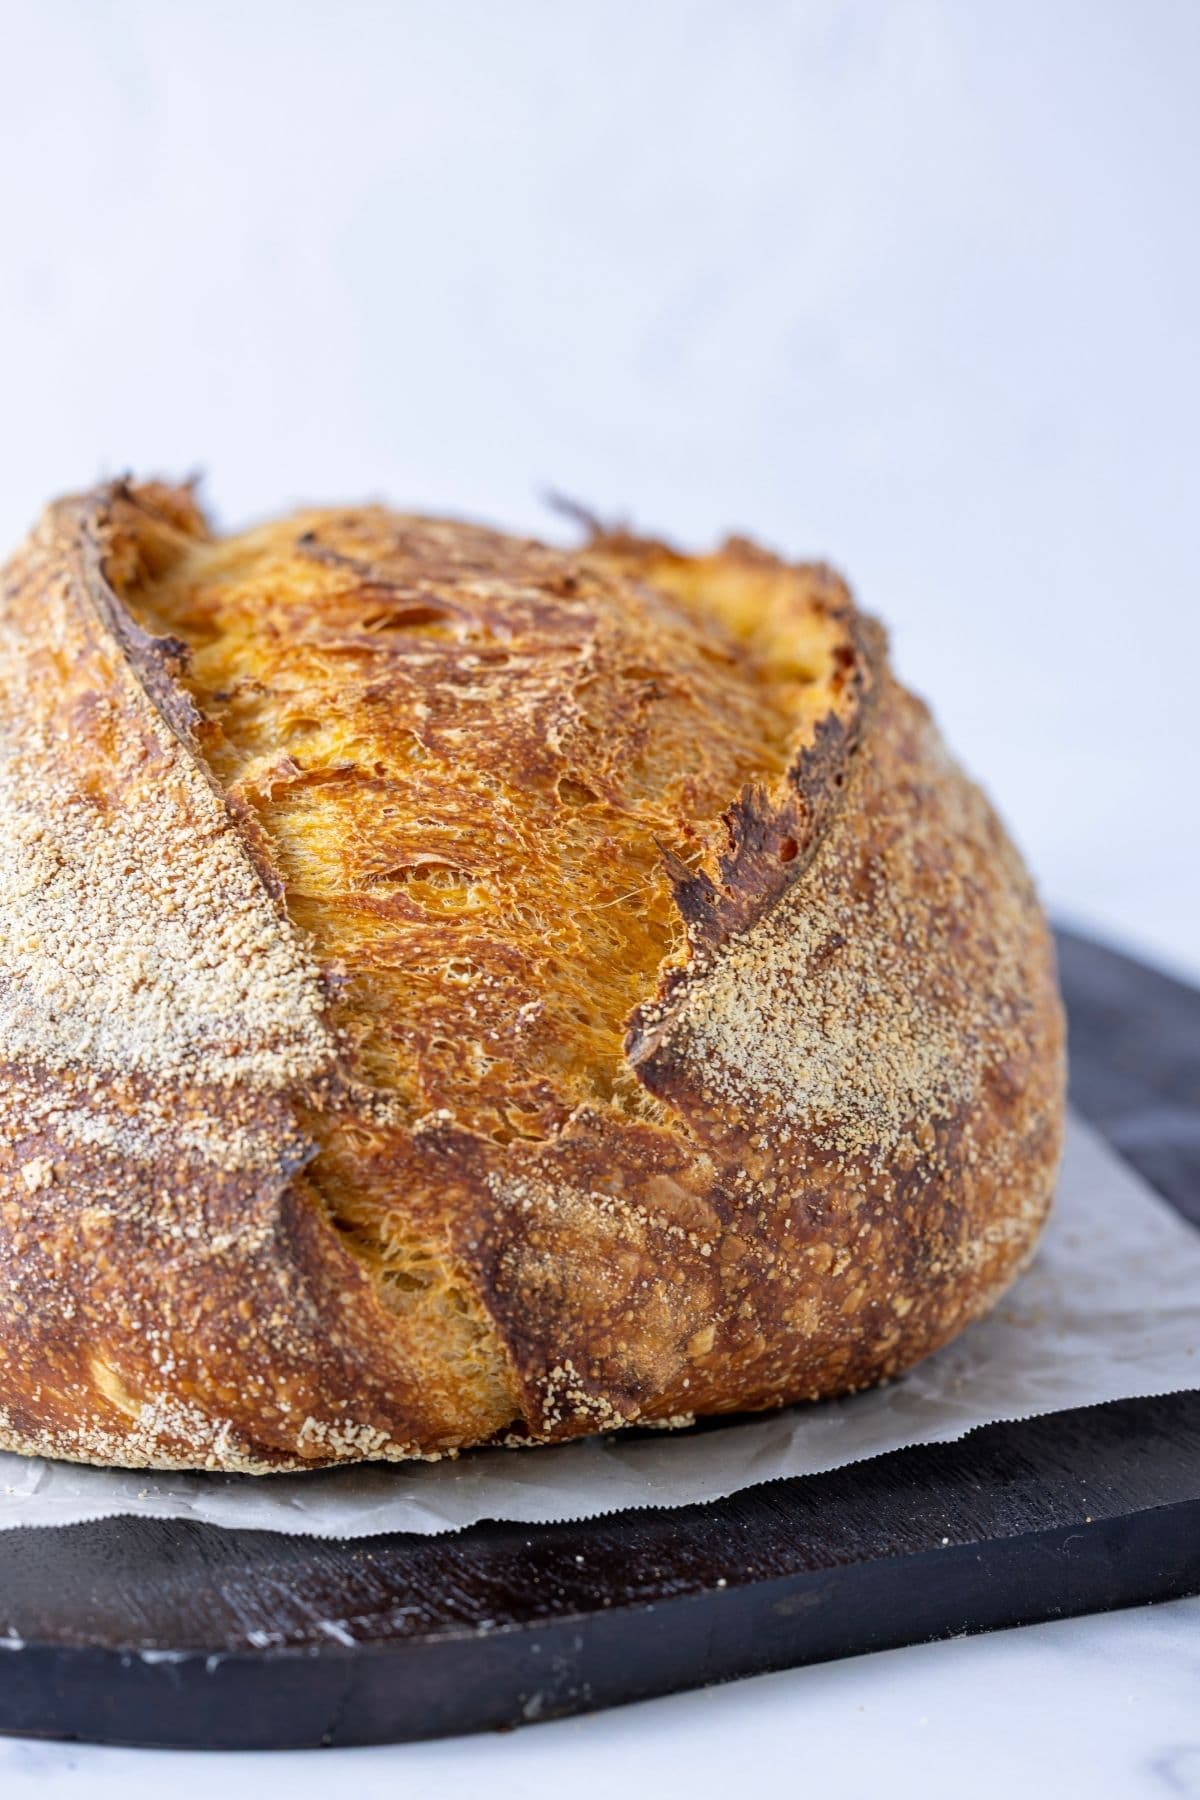
This pumpkin sourdough bread is a naturally leavened artisan loaf made with active sourdough starter and real pumpkin purée. Pumpkin and a touch of honey give the crumb a beautiful golden colour and soft texture, while the crust stays crisp and chewy.
This post contains affiliate links. Please see our disclosure policy.
You can make it with canned or homemade pumpkin purée, and despite the extra moisture from the pumpkin, I’ll show you exactly how to judge the dough through bulk fermentation so you can bake a beautifully risen loaf.
This isn’t a sweet pumpkin quick bread, it’s a true sourdough loaf that’s just as good alongside dinner as it is toasted with butter the next morning.
Why You’ll Love This Pumpkin Sourdough Bread

- True Sourdough Bread – This loaf is naturally leavened with an active sourdough starter. There’s no commercial yeast, baking powder or baking soda. If you’re looking for a soft, sweet, cake-style pumpkin bread that uses sourdough discard and can be mixed and baked straight away, you’ll want my Sourdough Discard Pumpkin Bread instead.
- Real Pumpkin – 200 g of pumpkin purée gives the crumb beautiful colour, subtle pumpkin flavour and extra softness.
- Sweet or Savory – There’s just enough honey to complement the pumpkin without turning this into a sweet loaf. It’s fantastic with butter, grilled cheese or alongside a bowl of soup.
- Flexible Schedule – Let the dough guide your bulk fermentation, then use the cold proof to pause the process and fit sourdough baking around your schedule.
Table of Contents
- Why You’ll Love This Pumpkin Sourdough Bread
- Ingredients
- Choosing the Best Pumpkin Purée
- How Pumpkin Changes Sourdough Hydration
- How To Make Pumpkin Sourdough Bread
- A Flexible Pumpkin Sourdough Baking Timeline
- Flavor Variations
- What Does Sourdough Pumpkin Bread Taste Like?
- How To Store and Freeze
- Artisan Pumpkin Sourdough Bread Recipe
Ingredients
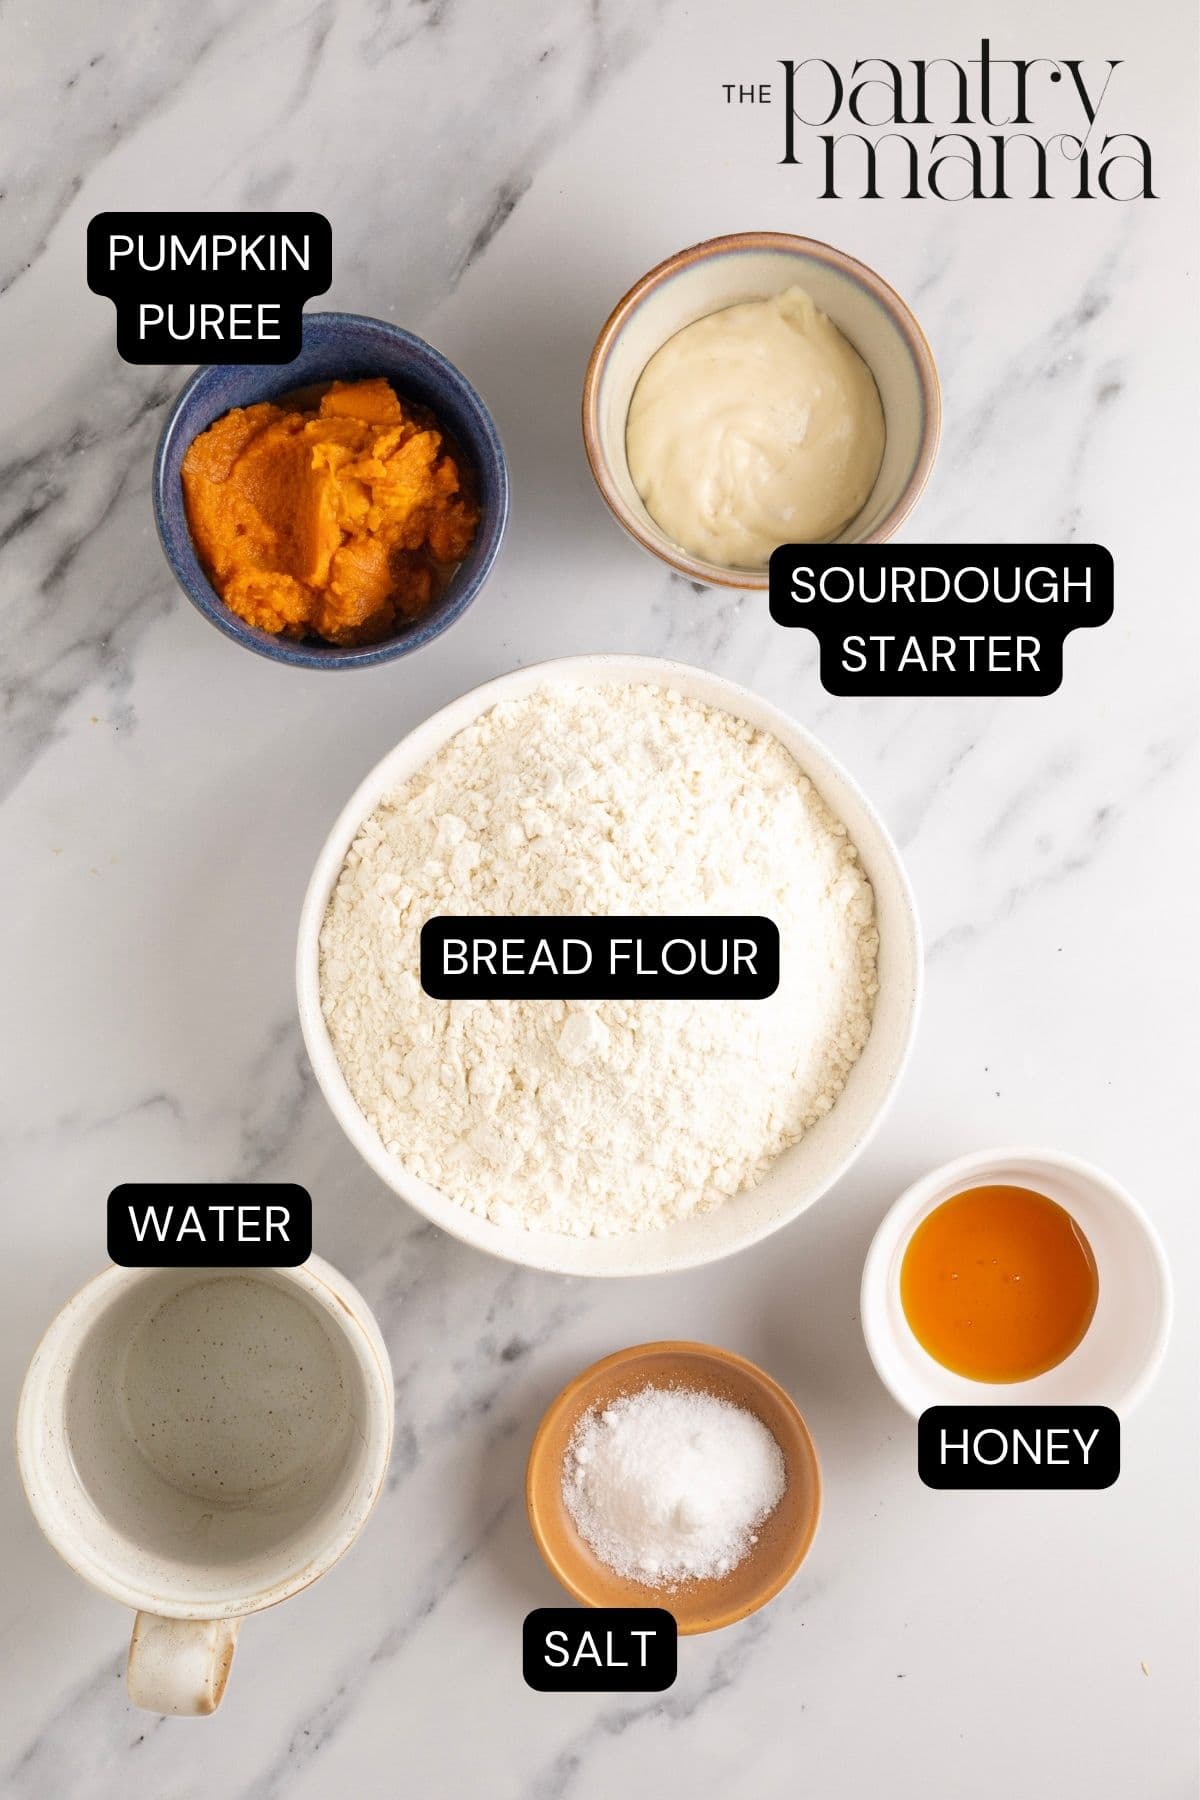
- Sourdough Starter – You’ll need an active, bubbly sourdough starter that has been fed and is at or close to its peak.
- Water – The amount of water you need can vary slightly depending on the moisture content of your pumpkin purée. I’ve included more guidance on this below.
- Honey – This recipe uses just a little honey to balance out the pumpkin. It contributes to the color of the crust once baked and gives just a hint of sweetness. You can of course leave it out if you prefer, but I urge you to try it! If you can’t eat honey, maple syrup makes a good substitution.
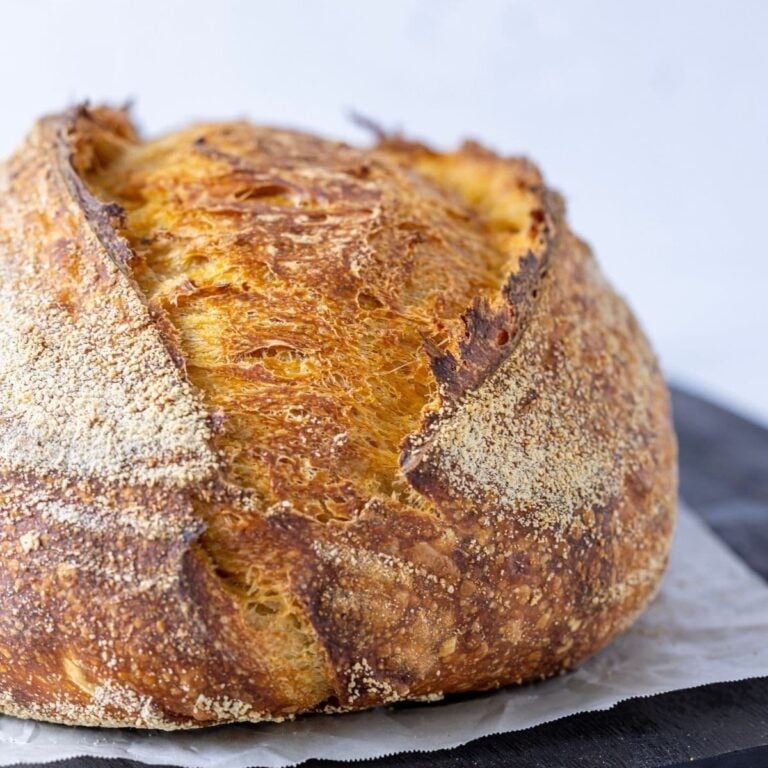
- Pumpkin Purée – You can use store-bought canned pumpkin puree or homemade. I’ve added notes further down to help you use what you have on hand with success. The added pumpkin in this loaf creates a tender crumb wrapped up in a crispy, golden crust with a gorgeous pumpkin hue.
- Bread Flour – A strong bread flour gives this softer pumpkin dough the structure it needs. I recommend using flour with at least 12% protein.
- Salt – Adds flavour and helps strengthen the dough during fermentation.
Choosing the Best Pumpkin Purée
You can use either canned or homemade pumpkin purée in this recipe. Whichever you choose, the most important thing is the consistency: Your pumpkin purée should be thick enough to sit on a spoon rather than pour from it.
Canned pumpkin is the easiest and most consistent option because it generally contains less water than homemade purée. Just make sure you’re using plain pumpkin purée rather than pumpkin pie filling.
When I first created this recipe, I used homemade pumpkin purée because we grow pumpkins and canned pumpkin wasn’t readily available where I live. If you’re making your own, I recommend roasting the pumpkin rather than boiling or steaming it. Roasting concentrates the flavour and produces a thicker purée without introducing extra water. Once the pumpkin is soft, mash or blend it until smooth, then allow it to cool completely. If the purée seems watery, drain away the excess liquid or let it sit in a fine sieve before weighing the amount you need.
When I updated this recipe in August 2026, I retested it using canned pumpkin because it’s now more readily available. I’m happy to say that the recipe will work just as well no matter when you used canned or homemade pumpkin. But just know that homemade pumpkin purée can vary considerably in moisture content, so your dough may feel a little softer depending on the pumpkin you’ve used. If you’re unsure, hold back a small amount of the recipe water when you first mix the dough. You can always add it if the dough needs it.
How Pumpkin Changes Sourdough Hydration
Pumpkin purée contributes moisture to your dough, but it can’t be treated in the same way as water. Pumpkin contains both water and solids, and its moisture content can vary considerably depending on whether you’re using canned or homemade purée.
I’ve made this recipe so many times over the 5 years (it really is a family favorite). When I first developed this recipe in October 2020, I used 200 grams of pumpkin purée and 280 grams of water. I really liked the consistency of this dough, however, I know many people struggled with it. I’ve updated this recipe in August 2026 and in this update I retested many different water and pumpkin puree ratios. After rigorous testing, I found that 200 grams of water and 200 grams of pumpkin puree was the sweet spot. It produces a dough that’s easy to work with (even for a beginner) and a finished artisan pumpkin sourdough loaf that features a golden, blistered crust and soft, aerated crumb. When the dough has finished stretch and folds it should feel soft and elastic, and most importantly, manageable, rather than soupy or shapeless.
Your dough may feel slightly different depending on whether you use canned or homemade pumpkin purée, but this ratio gives you enough flexibility to accommodate those small variations. Don’t automatically add extra flour just because the dough feels softer than your regular sourdough. If the dough feels too stiff to stretch and fold comfortably, wet your hands slightly rather than adding more water directly to the dough.
Kate’s Pro Tip
What should pumpkin sourdough dough feel like?
After your stretch and folds, the dough should feel soft, elastic and aerated while still holding its shape. It may feel softer than your regular sourdough, but it shouldn’t be soupy or spread uncontrollably.
How To Make Pumpkin Sourdough Bread
Making this artisan pumpkin sourdough bread is closely aligned with making a plain loaf, except that you’re adding both pumpkin puree and honey to the initial mix.
Initial Mix and Rest
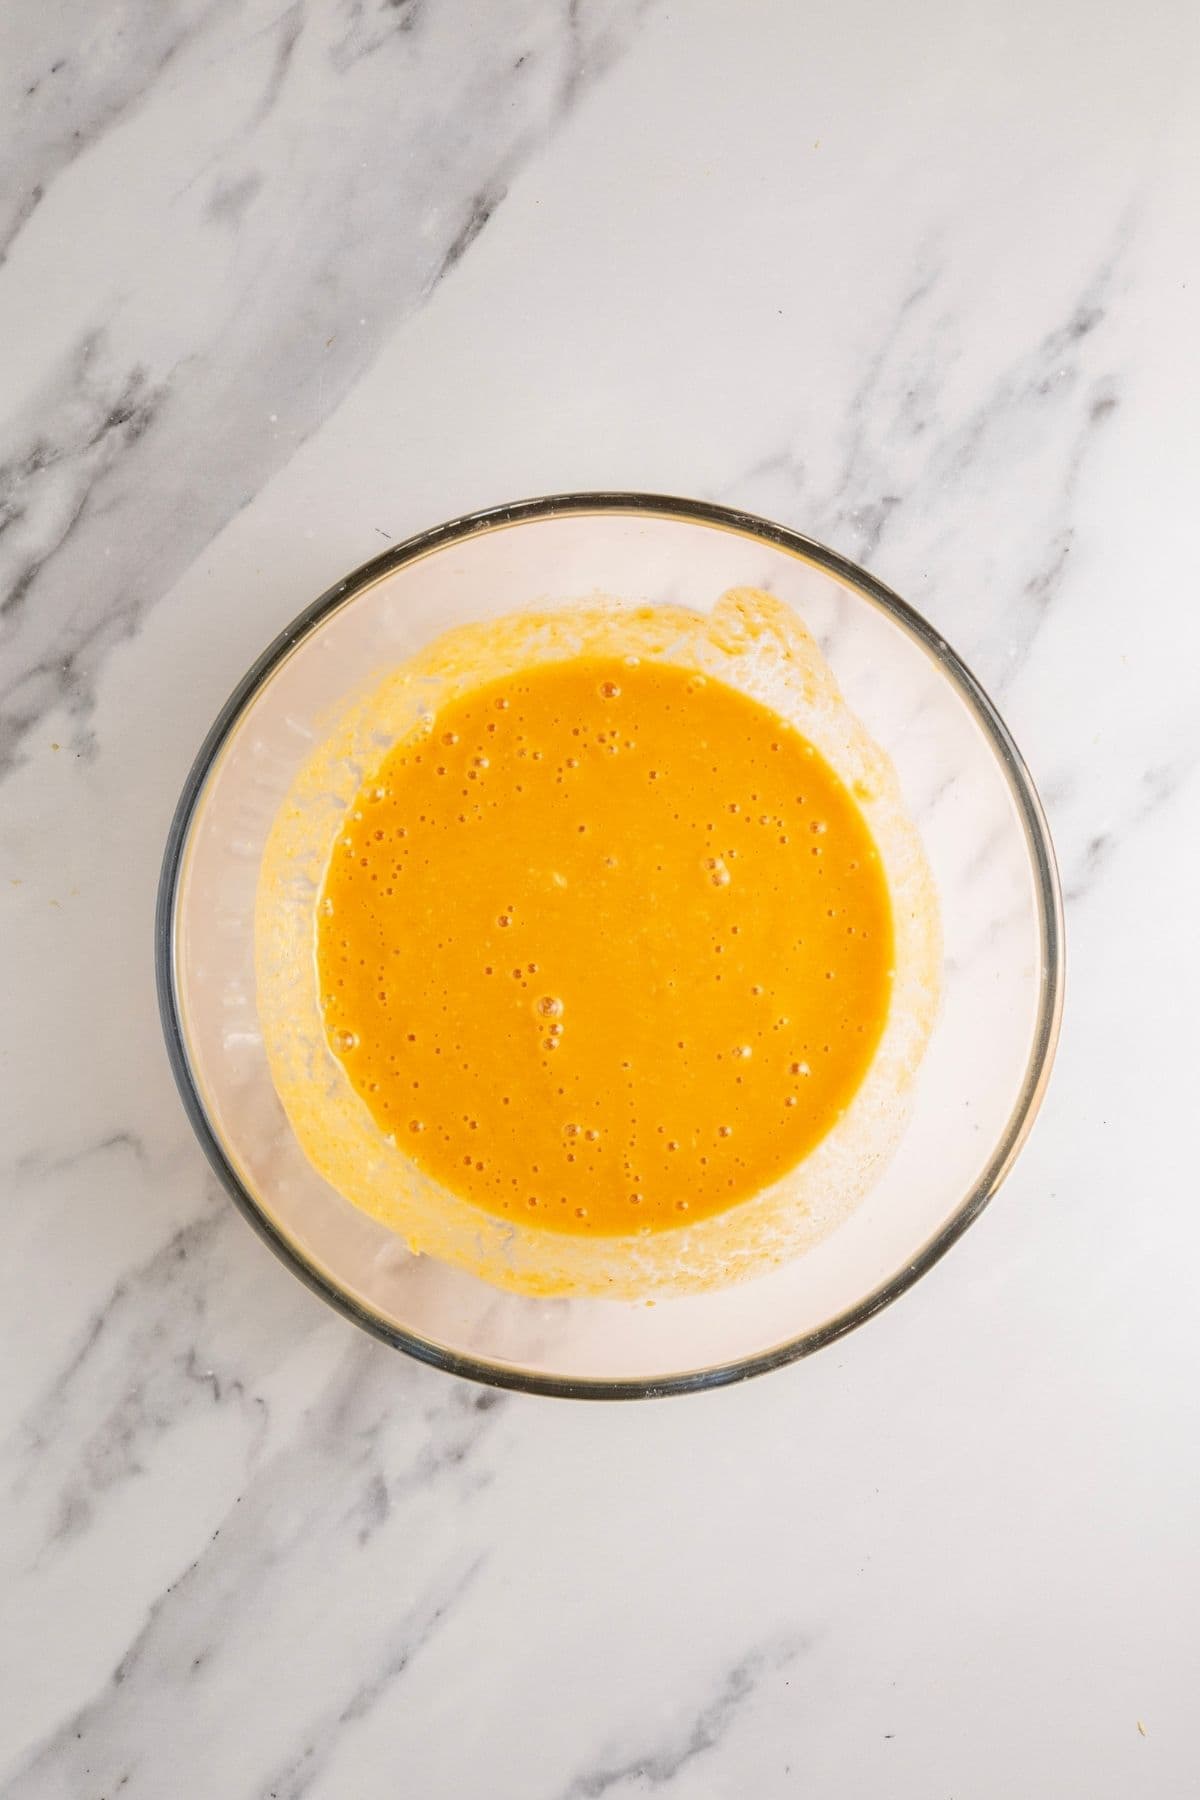
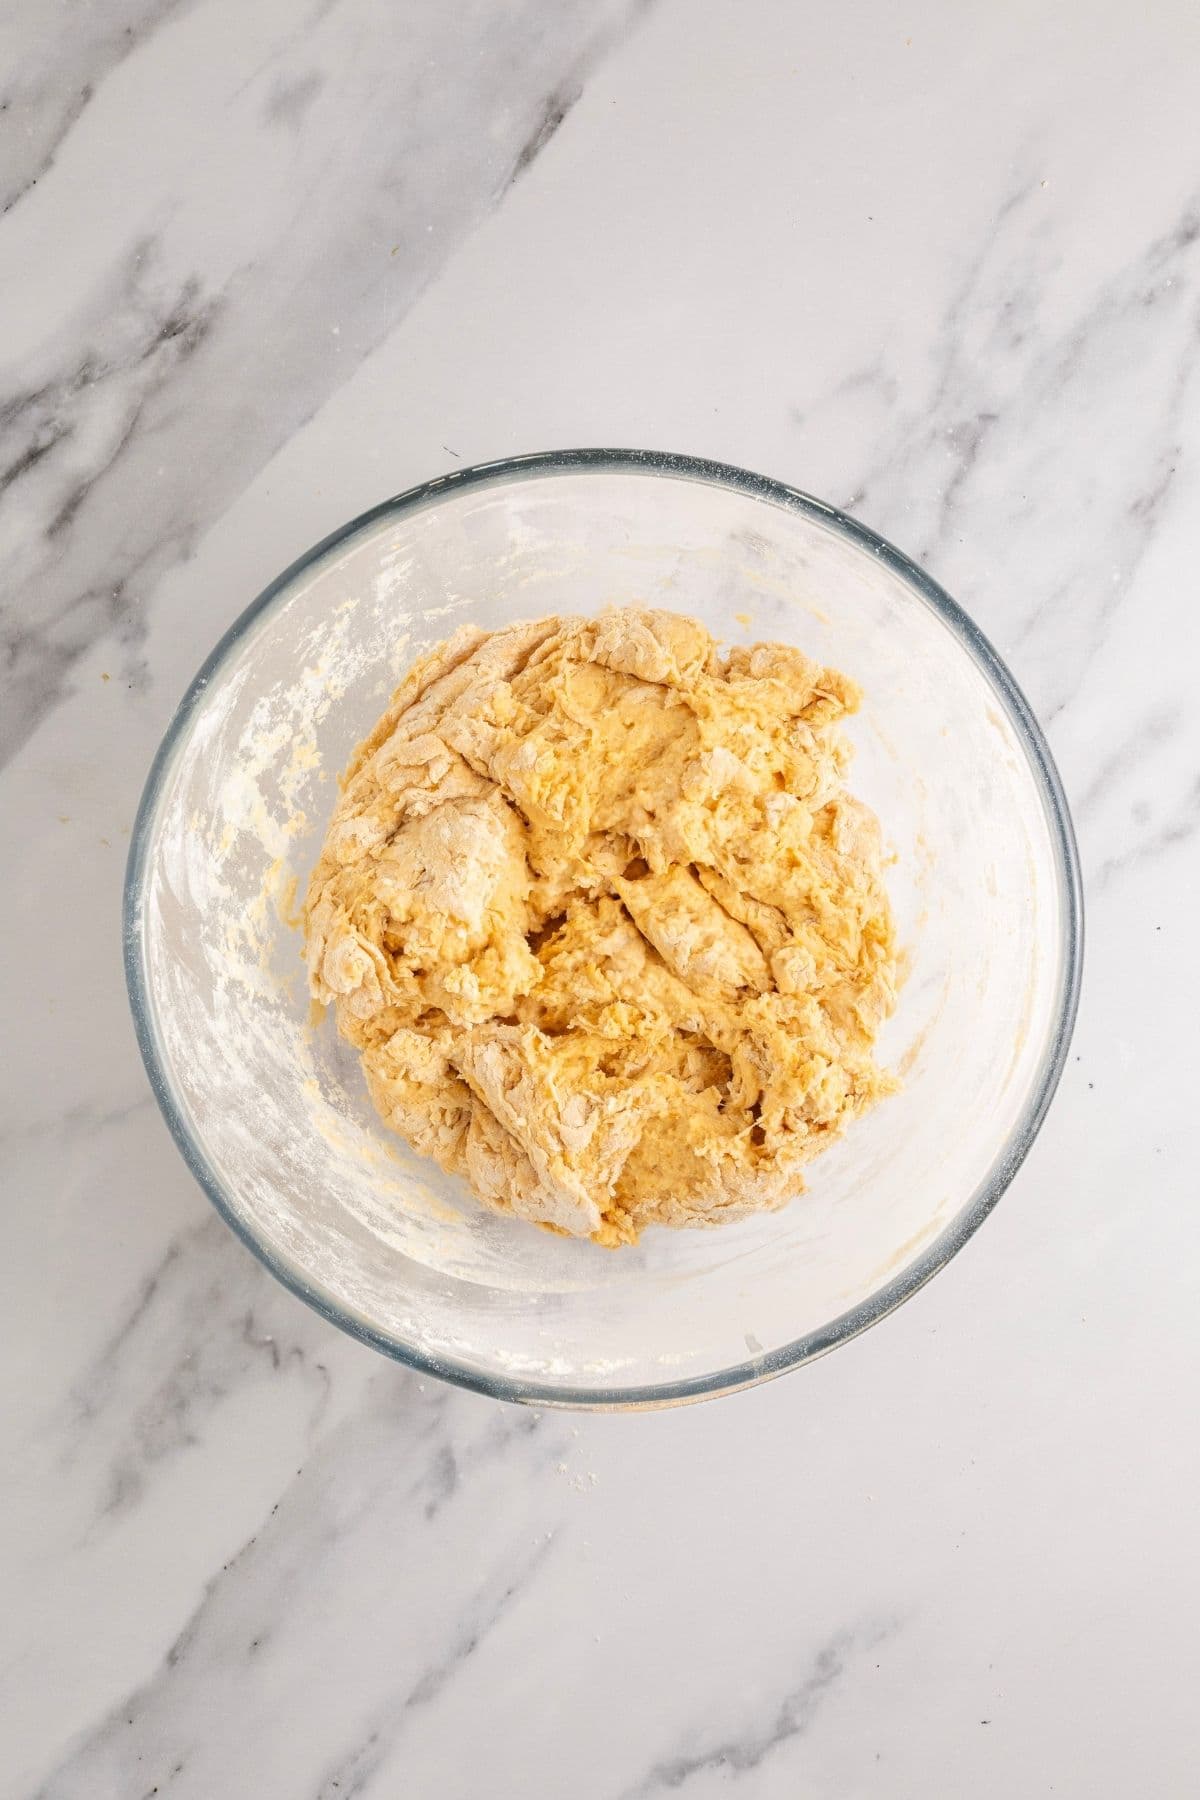
To fermentolyse the dough, you’ll need to mix the water, sourdough starter and honey together, before adding the pumpkin puree, flour and salt and bringing it all together into a shaggy dough.
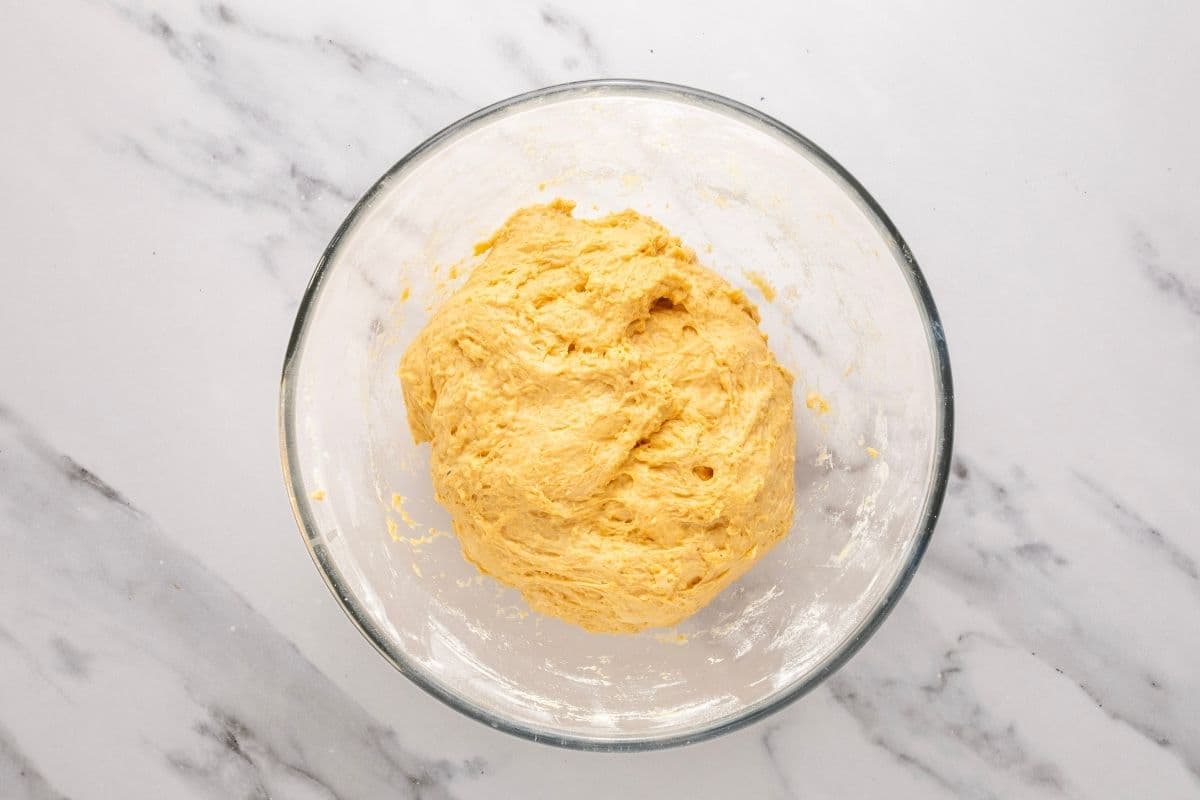
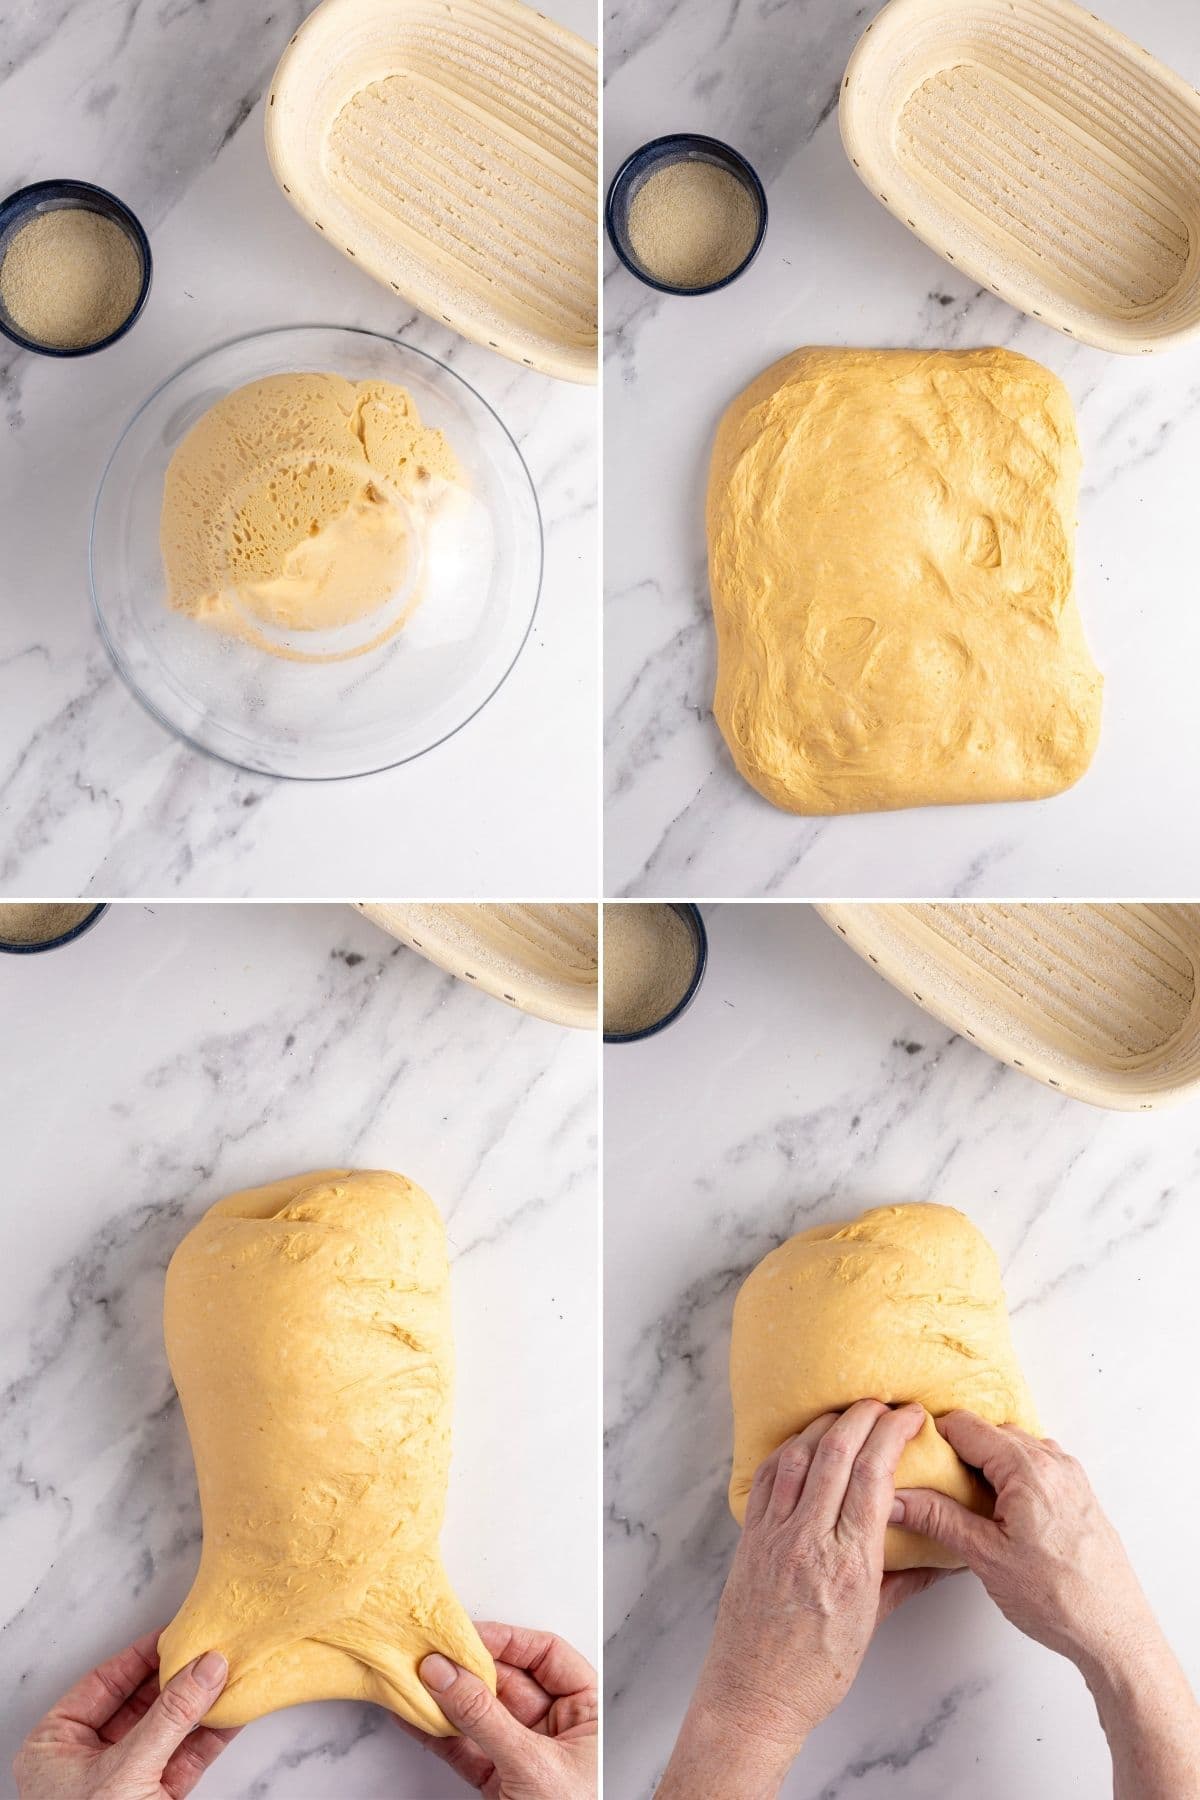
Once the dough has rested for around an hour, you’ll need to start strengthening the dough by bringing it together into a smoother dough. Let it rest again before officially starting the stretch and folds.
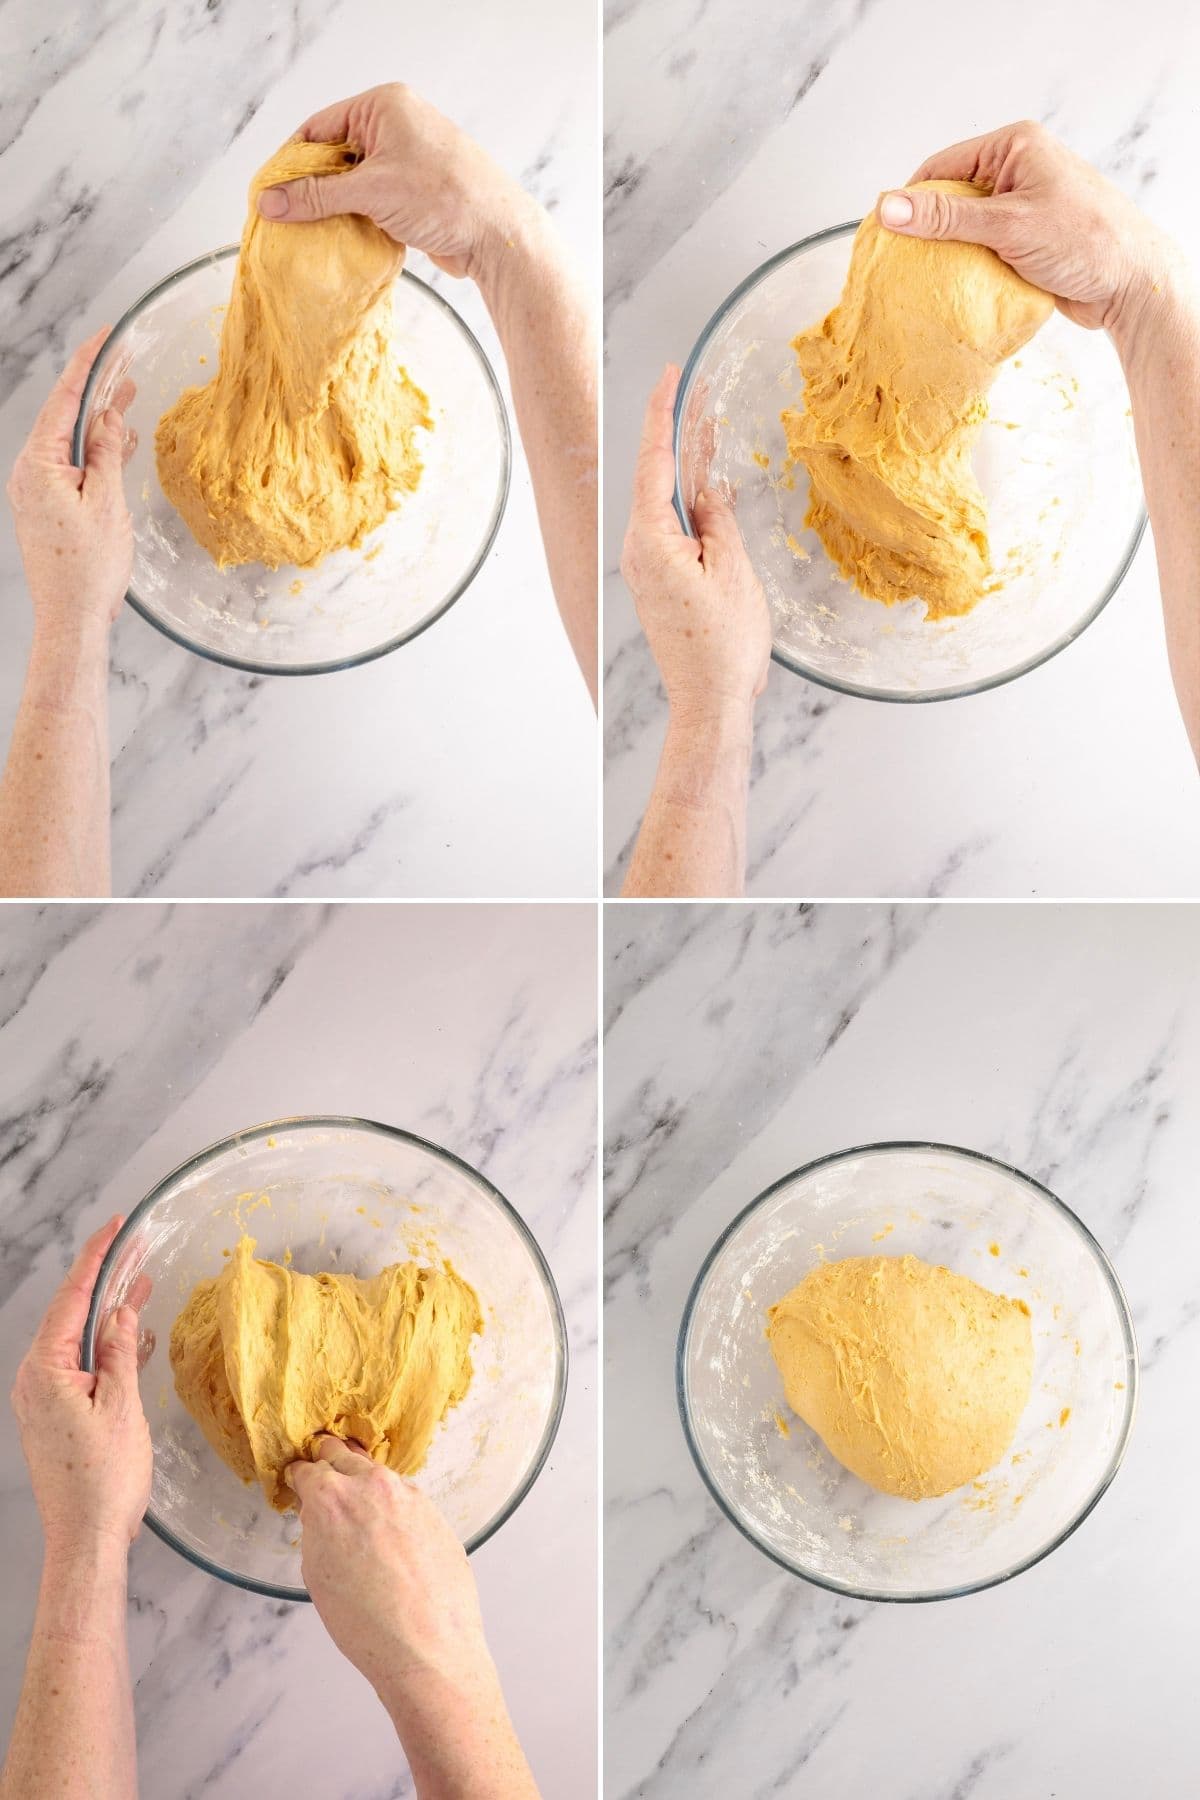
Stretch and Folds
You should aim to do around 4 sets of stretch and folds. The dough should become increasingly aerated and elastic as you move through each set.
Kate’s Pro Tip
How Do I Know When Bulk Fermentation Is Finished?
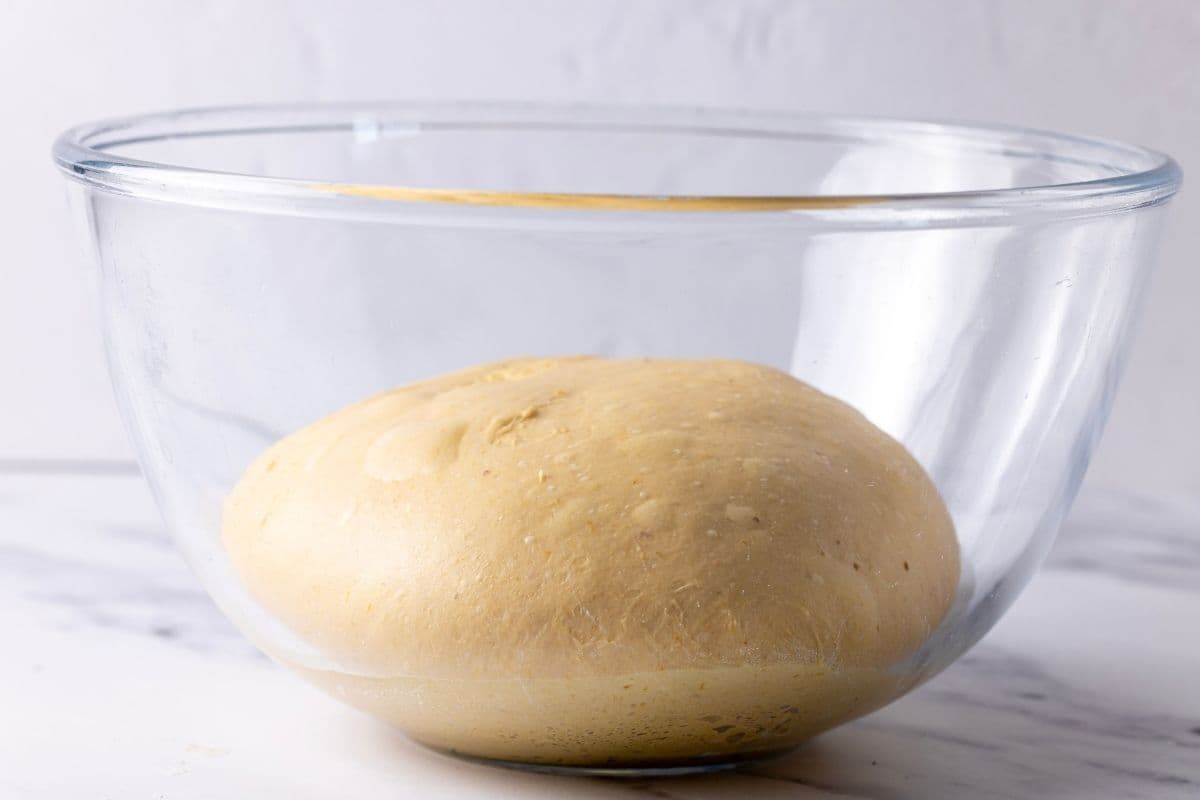
Cover the dough and let it bulk ferment at room temperature until it’s time to shape the dough. Don’t shape this dough because a set number of hours has passed. You’re looking for the dough to have increased significantly in volume. I generally allow mine to roughly double, with a slightly domed surface, bubbles around the edges and a light, aerated, jiggly feel. You can read my guide to understanding when bulk fermentation is finished.
Do I Have To Shape Pumpkin Sourdough Like A Pumpkin?
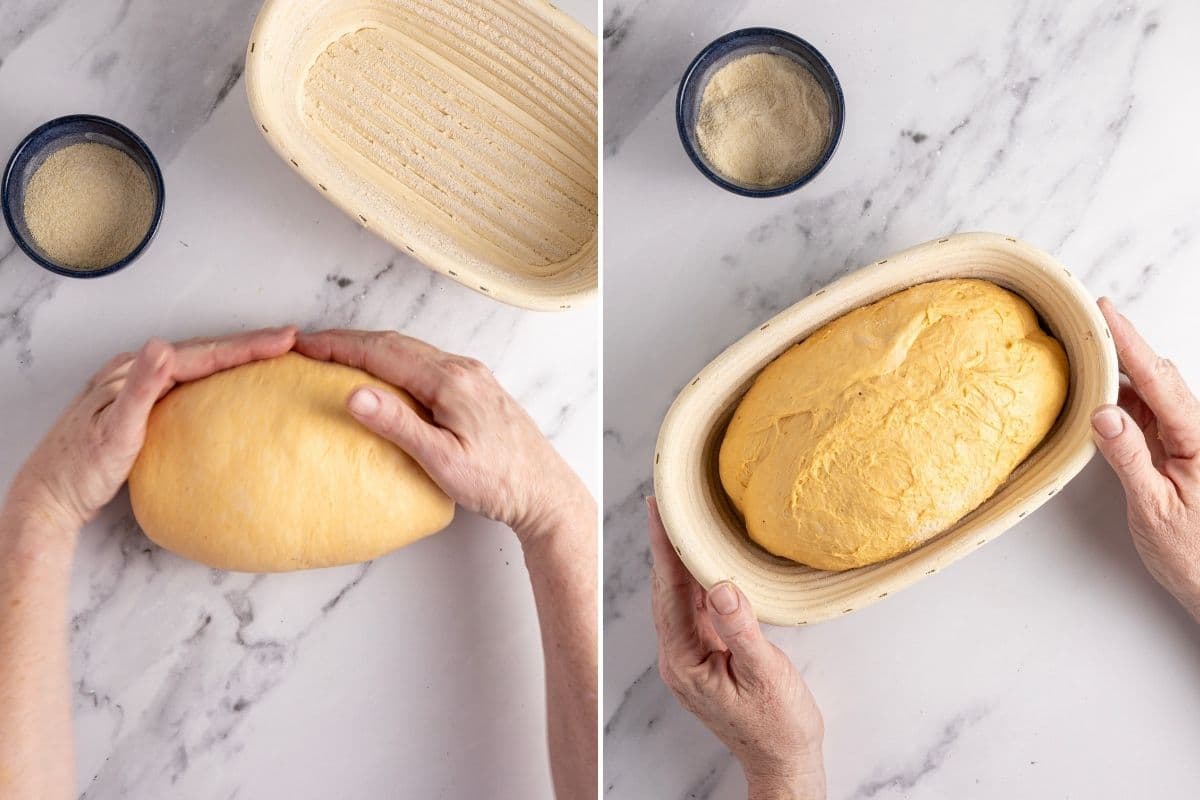
Absolutely not! Many people like to make this sourdough bread into the actual shape of a pumpkin. I’m not one of those people. I prefer the practicality of a batard for slicing and toasting and find that we eat a lot more of the bread when it is shaped in this way. But if pumpkin shaped sourdough is your thing, I say go for it!
For something festive, perhaps the centre of your Thanksgiving table, you could use a couronne banneton to shape your pumpkin sourdough bread. This will give you a beautiful wreath shaped pumpkin bread.
How To Bake Sourdough Pumpkin Bread
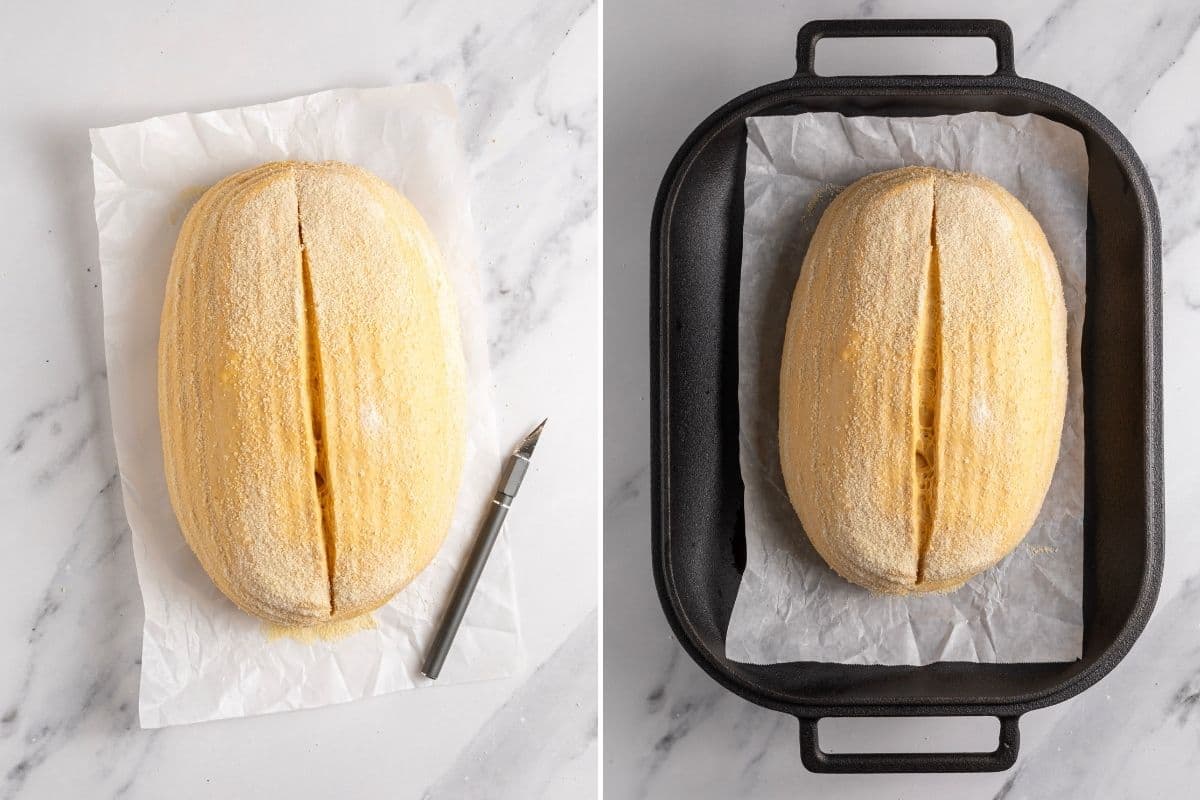
Bake this loaf straight from the refrigerator while the dough is cold. Turn it out of the banneton, score and place it into your preheated Dutch oven. I like to bake my artisan sourdough pumpkin loaf in a cast iron bread pan for the most beautifully chewy, golden crust. Bake covered initially to trap steam, then remove the lid to allow the beautiful golden pumpkin crust to develop.
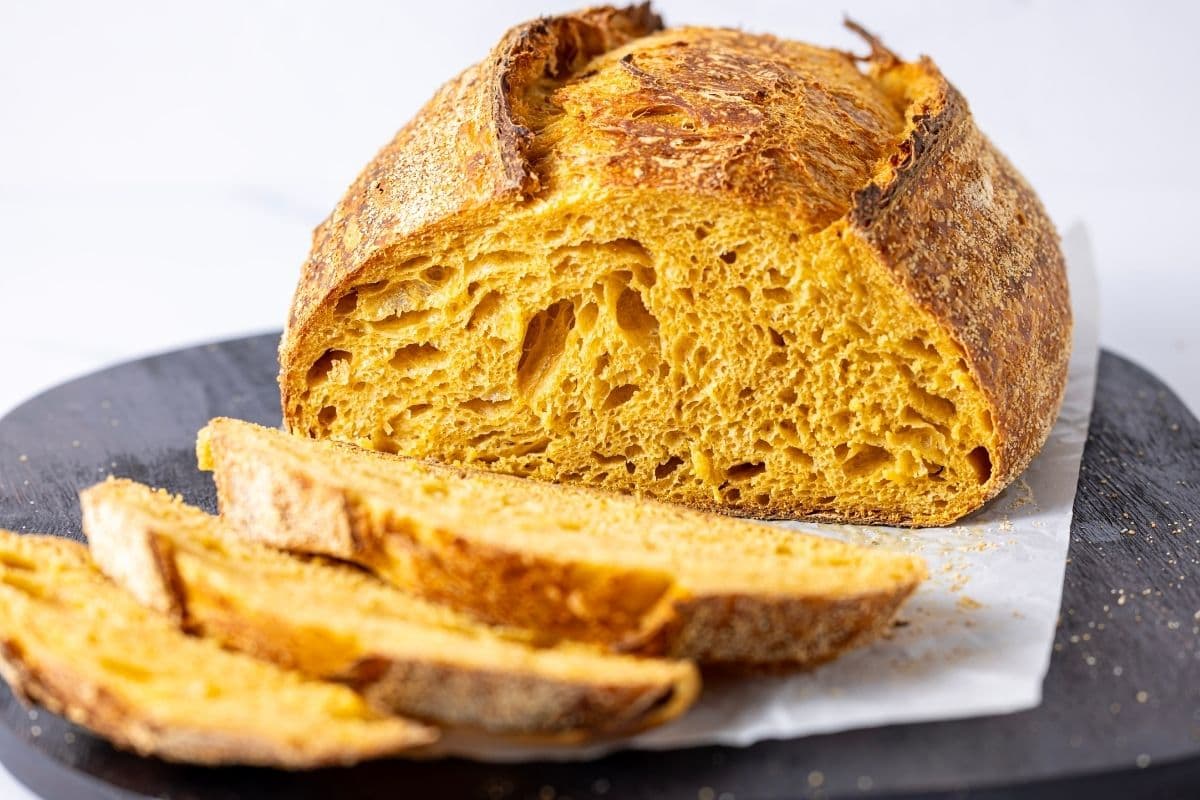
The loaf is ready when the crust is deeply golden and crisp and the bread feels light for its size. Allow it to cool completely before slicing to avoid the bread collapsing under your knife.e page.
Kate’s Pro Tip
Bake In A Loaf Pan!
This artisan sourdough pumpkin bread also works very well when baked in a loaf pan. To do this, cold ferment the loaf in an oval banneton and tip it into a loaf pan when you’re ready to bake. A second loaf pan placed on top will give you the best results.
A Flexible Pumpkin Sourdough Baking Timeline
I’ve put together this sample timeline to help you get a feel for how you could fit this artisan sourdough pumpkin loaf into your schedule. This is only an example. Your fermentation time will depend on your starter strength, dough temperature and room temperature.
| TIME | PROCESS |
|---|---|
| 10 pm | FRIDAY NIGHT Feed sourdough starter 1:3:3 before bed to ensure it’s at peak when you get up. |
| 7am | SATURDAY MORNING Initial fermentolyse and dough rest. |
| 9 am | Conduct 4 sets of stretch and folds over the next 2 hours or so (doesn’t have to be exact). |
| 11:30 am | Cover the sourdough and allow to bulk ferment until the dough has doubled. |
| 7 pm | Shape the dough, place into a banneton and place into the refrigerator covered to cold ferment. |
| 9 am | SUNDAY MORNING Wake up and preheat the oven while you make coffee. |
| 9:45 am | Bake the sourdough bread until golden brown. |
Need to bake later? Once the dough is shaped and in the refrigerator, the cold proof gives you some flexibility over when you bake your loaf.
Flavor Variations
This pumpkin sourdough bread is delicious just as it is, but it also works beautifully with both sweet and savory additions. If this is your first time making the recipe, I recommend baking the base loaf without any additions first. Pumpkin purée already changes the way the dough feels and ferments, so keeping the first loaf simple will give you a much better sense of how the dough should behave.
Additions to Mix Into the Dough
- Fresh Herbs – Rosemary or thyme pair beautifully with pumpkin and keep the loaf firmly in the savory camp. I generally add the herbs during shaping, rather than while the loaf is fermenting.
- Cheese – 100-150 g of grated cheddar or Parmesan can turn this into a richer, savory loaf that is especially good alongside soup. I add the cheese during the second and third sets of stretch and folds.
- Seeds or Nuts – Up to 100 g of pepitas (pumpkin seeds), walnuts or pecans add texture and a little extra flavor. Toasting them first will give you an even nuttier result (just remember to ensure they’ve fully cooled before adding them to your loaf). I add these during the second and third sets of stretch and folds.
Kate’s Pro Tip
Pumpkin Spice Cinnamon Swirl – Optional Sweet Variation
If you’d prefer to take this loaf in a sweeter direction, you can add pumpkin pie spice to the dough. I prefer to keep the base recipe only lightly sweet so it still feels like a true artisan sourdough bread, rather than a sweet pumpkin quick bread. If pumpkin spice is your thing, I recommend adding it during shaping – mix together 50 g of brown sugar, 5 g of pumpkin spice and 20 g of all-purpose flour and sprinkle this over the dough during shaping. You can use this sourdough cinnamon swirl loaf as inspiration.
Toppings for Pumpkin Sourdough Bread
Toppings are an easy way to add flavour and texture without changing the dough itself. To help toppings stick, lightly mist or dampen the surface of the shaped dough before rolling or pressing it into your chosen topping, or sprinkle them into the base of your banneton before laying the shaped loaf on top.
Some of my favorite toppings for this loaf include pepitas, rolled oats, black or white sesame seeds and Everything Bagel seasoning.
What Does Sourdough Pumpkin Bread Taste Like?
This pumpkin sourdough is primarily a savory loaf, with just a touch of sweetness from the honey. The pumpkin adds softness and subtle earthy flavour rather than making the bread sweet. Unless you add pumpkin spice, cinnamon or other sweet inclusions, it works beautifully as an everyday savory sourdough.
Serving Suggestions
Here are some of the ways we use this bread:
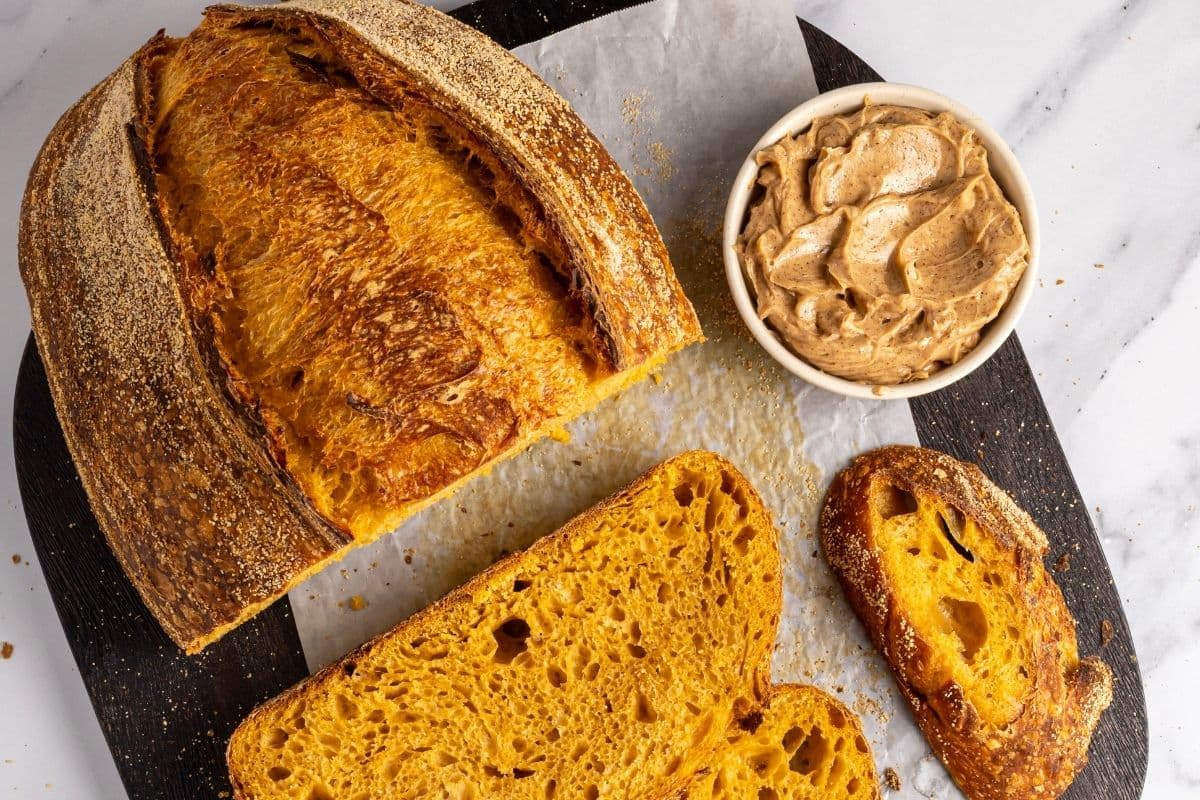
- Toasted and spread with cultured butter.
- Made into an amazing sourdough grilled cheese.
- Served alongside pumpkin or tomato soup.
- Topped with poached eggs and tomato chutney.
- Added to a holiday bread basket alongside sourdough dinner rolls.
- Used for leftover turkey sandwiches.
- Toasted and spread with spiced pumpkin cream cheese.
How To Store and Freeze
Like most artisan sourdough loaves, this pumpkin sourdough bread freezes beautifully! I love making a double batch so there’s always one in the freezer. Remember that you can click on 2x in the recipe card below and it will automatically double the recipe for you.
Room Temperature – Store this sourdough pumpkin loaf under a glass cloche for 24 hours if you’re using as fresh sourdough. After this, it’s best toasted or warmed in the oven.
Freezer – Freeze the loaf whole or sliced for up to 3 months. I prefer freezing it sliced so I can take out exactly what I need and toast it straight from frozen. If I’m freezing the whole loaf, I place the cooled loaf into a resealable plastic bag. If I’ve sliced the loaf, I place pieces of parchment paper between each slice first.
Artisan Pumpkin Sourdough Bread
Equipment
- Mixing Bowl
- Banneton
- Dutch Oven
Ingredients
- 100 g Sourdough Starter , (active and bubbly)
- 200 g Pumpkin Purée
- 500 g Bread Flour
- 200 g Water
- 20 g Honey
- 10 g Salt
Instructions
- FermentolyseWeigh out your sourdough starter, water and honey in a glass bowl. Mix them together so that the honey is dissolved in the water (or at least really well distributed).Then add your flour, pumpkin puree and salt on top and mix together to form a shaggy dough. Cover the dough and let it rest for around an hour.
- Forming Up Your DoughWork your way around the bowl, grabbing the dough from the outside, stretching it up and over itself until a smooth ball is formed. You shouldn't need more than about 20-25 folds to form the ball. Once the dough has formed into a smooth ball, cover again and let it rest for around 30 minutes.
- Stretch & FoldsAt this stage, you need to create some structure to your bread and help the gluten to develop by stretching and folding the dough. Try to do around 4 sets of stretch and folds with around 15 to 30 minutes between each set.
- Bulk FermentOnce you've finished your stretch and folds, cover the dough and let it bulk ferment at room temperature until the dough has doubled.
- Shaping Your DoughOnce your dough has doubled, you'll need to shape the dough, creating plenty of surface tension. Place dough seam side up into a well floured banneton.
- Cold FermentCover the shaped dough and place into the fridge to cold ferment. Try to leave it in the fridge for a minimum 5 hours up to a maximum of around 36 hours. The longer you leave it the better your bread will be!
- Preparing to BakeOnce you're ready to bake your sourdough, you'll need to preheat your oven to 230ºC/450ºF with your Dutch oven inside.
- Baking Your SourdoughNow it's time to bake! When your oven is at temperature, take your sourdough out of the fridge. Gently place it onto a piece of parchment paper.Gently score your bread with a lame, clean razor blade or knife before placing it into a hot Dutch oven. Put the lid on and place into the hot oven. BAKE TIME:30 Minutes with the lid on at 230ºC/450ºF plus10-15 Minutes with the lid off at 210ºC/410ºF
- Finishing Your BakeWhen you remove your sourdough pumpkin loaf from the oven, carefully remove it from the Dutch oven as soon as possible and place on a wire rack to cool.
Nutrition
Nutrition information is automatically calculated, so should only be used as an approximation.
Like this? Rate and comment below!










Thanks so much for the recipe for Pumpkin sourdough bread. I tried doing one previously by hit or miss and it was okay but now I feel comfortable following your recipe. I appreciate all you do to help us newbie bread fanatics
Can I use stiff starter here please? Thanks
Whatever you do, don’t use Jap pumpkin. Make sure it’s a dry one. I had to add more flour and less water and now I’m waiting for some action. It maybe back to the drawing board for me.
I used Jap Pumpkin – we grow them in abundance so it’s what I had. You do need to make sure that you puree it rather than liquefy it though. How did your loaf turn out?
Hi hi Kate 🙂 It’s an absolute DELIGHT to find your amazing Sourdough Pumpkin Bread recipe!!! I have been missing the lovely Pumpkin Bread I had back home in Singapore! Being transplanted in Canada, Pumpkin Bread is a very different kind here and many sourdough recipes don’t incorporate pumpkin in it 🙁 I”M SO EXCITED to find yours and I tried making my first Sourdough Pumpkin Bread two weeks and IT’S AMAZINGLY GOOD!!! My husband and toddler girl raved about it and I am onto my second loaf, and it will be a fixture in our family now, thanks to you!!! I used Japanese Kabocha for the first loaf and it was so gorgeous and fragrant! I am using Delicata squash for the second loaf and I added dried sage and cinnamon! Can’t wait to taste it! Thanks so much again for sharing your passion! Happy Valentine’s Day! Blessings Shai
Thank you so much for sharing your story, that’s so nice. And I’m so happy that you love the pumpkin bread xo
My favorite sourdough bread!!! I’m planning on making some loaves for Christmas gifts and would prefer to make a smaller loaf. I know to halve the dough. How long should I bake for?
Such a beautiful Christmas gift. I would bake for the same amount of time 🙂 xo
Hi with fall and it being pumpkin season I am going to give this recipe a try. Was wondering can you use a kitchen aid instead of the kneeling.
Thanks
Sorry should read Kneeding!!
My loaf is baking now. This has been the nicest dough I have come across in a long time! Like a pillow and getting a beautiful ear on it! Made a boule this time. Thanks for the recipe. Can’t wait to try it!
This is a great recipe! I’ve already made it twice. The first time I made enough for one loaf. I used slightly less water (200g) because I was using homemade pumpkin puree and I was worried I’d have too much water. I also added the salt (dissolved in a small amount of water) 30 min after initially mixing together the dough. It was a beautiful dough and baked up gorgeous. I didn’t turn down the temp for the last 10-15 min because I love a dark crust. I have the second batch in the oven now – this time I doubled the recipe and used slightly more water but still less than what is called for. I feel like the pumpkin flavor isn’t super strong, but it’s a really pretty color and tastes great. I bet this same formula could be used with any other squash – maybe even sweet potato (or banana if you cut the honey…hmm…). Can’t wait to experiment more!
I’ve made this three times now – first time with homemade pumpkin puree, second time with homemade sweet potato puree, and third time with kabocha puree. All were DELICIOUS and this dough is SO easy to work with! I would recommend holding back on the water to make sure your puree isn’t too wet (that’s what I always do) and I also break up the autolyse into two parts – 30 min before adding salt, and then 30 min after adding salt (and sometimes a little more water). I also don’t turn down the heat when baking without a lid because I like a dark crust.
I made sour dough potato bread, then I made sour dough sweet potato bread and this is the next on the agenda in the next month or so. I’ve made regular sour dough bread and mixed pumpkin seeds in it. This time I plan to make real pumpkin seed bread using pumpkin and the seeds.
I was looking to see how others make this sort of bread. I’m going to use a can of pumpkin. I’ll mix some starter into the pumpkin and grow a separate pumpkin starter culture as I did with the potatoes.
This bread was a delight to make turned out great. I really enjoy your recipes and great instructions. I would like to make it into dinner rolls and freeze them for a ham dinner during the holidays. Any suggestions of how to go about achieving that?
Great recipe. We have tons of butternut squash and pumpkin from the garden, so I tried using 200g of pureed butternut squash. Dough turned out great, though was less moist than yours, so the crumb of the finished bread wasn’t quite as expansive.
My goal now is to incorporate pumpkin and/or squash into my go-to Peter Reinhart-style whole grain bread. I think I will replace much of the water in the soaker with pumpkin/squash.
The flavour and texture of this bread is incredible! It’s higher hydration than I’m used to but it was beeeauuuutiful dough to work with. I did ever so slightly over ferment my loaf during bulk fermentation which made it a little tricky to shape, resulting in slightly less oven spring than I wanted but the crumb was still springy, light, and perfectly flavoured when I cut into it. Absolutely delicious toasted with butter. Making this again for sure.
Wondering how long the bulk ferment is? Is that 5 hours minimum too?
Loved making the pumpkin sourdough! It was sticky but worth it. Thank you so much!
Do you think i could bake this in my cast iron loaf pan? I don’t have a dutch oven
Does this freeze well? Looking to bake a couple and some need to last a while.
absolutely it freezes really well 🙂
Hi there! I’m excited to try this recipe but I would like to do the economics ferment on the counter instead of refrigerator. Will that mess things up too much?
Is it possible to put the pumpkin seeds inside the dough?
This is a great recipe, thank you for posting it! I also used less water (260g, but then added a bit more flour). It turned out wonderfully. I added chopped pecans and a small amount of cinnamon, nutmeg, cardamom and ginger.
What size Banneton do you use?
What would adding chocolate chips do to the dough? When CAbi add them in your opinion?
You can add them during the stretch and folds. The chocolate chips will make the dough quite heavy though so it won’t spring up as much 🙂
I made this and it came out wonderfully! Thank you for the recipe! I went the pumpkin pie spices route (cinnamon, clove, ginger, nutmeg, cardamom) and had no issues with fermentation and rise. This may be my new favorite way to make pumpkin bread!
What step did you add the spices?
how much chocolate chips did you add?
Hello!
Would you recommend this recipe if I want to add dried cranberries and seeds to the bread or do you have another better suited for those additions? I’d still like a lighter loaf. Thank you for your time.
serious question: should there be concerns of botulism? leaving pumpkin purée out for more than 2 hours has risks of bacteria-does the sourdough starter eat that bacteria?
This will be my fifth time making this bread. In this attempt, I’m shaping it into a loaf pan, incorporating raisins, and using a combination of 125g whole wheat flour and 375g all-purpose flour. What oven temperature do you recommend, and what’s the ideal internal temperature to aim for? I’ve come across recommendations ranging from 190°F to 205°F. Currently, my plan is to bake it at 400°F for 45 minutes, as my dough is ready to go in the oven. Would you advise placing it in the oven straight from the fridge or letting it come to room temperature first? I’ve had great success with this loaf so far, and I appreciate any additional tips. Thank you!
How would this recipe work at high altitude? I’ve tried several other sourdough pumpkin recipes and nothing has worked quite right. I adore your basic h.a. sourdough!
absolutely, you’d just need to follow the tips from the high altitude recipe. Everything will work at high altitude, with a few adjustments 🙂
Baking Sourdough Bread at High Altitude
Hi
Trying this recipe for the first time. I usually do between 70% to 80% hydration so I added water and did a 65% hydration with 325 g of water. It’s a very loose doe so far and I probably should have used less water or added more flour I hope it works out
Was wondering if I could use some rye flour in this recipe?
Tried this recipe out using canned pumpkin. Im thinking next time I might need to add less water because my dough was VERY sticky. I really had a hard time shaping it even with a floured surface. It’s in the fridge now so we will see how it bakes. I am new to working with more hydrated dough. Help lol
I am in the process of doing streach and folds on my second loaf of the bread. This bread is excellent! It baked beautifully. I added cranberries. This loaf cranberries and chopped Pecans oh and cinnamon. Thank you just love it!!
This was the recipe that changed making sourdough bread for me! As recommended I made this in the morning and watched as it bulk fermented and noted the time. ( I had been under fermenting). I also got a “feel” for how the dough is supposed to feel and it was life changing!! The bread turned out perfectly and is one of the most requested loaves I make. Thanks for the recipe and awesome instructions.
Hello – I’m one of those people that tries to reduce every bit of food waste possible… I use the liquid drained off of pumpkin or squash as the water in my loaves of bread. Works great and I’m not wasting all that liquid!
I’ve made this recipe now, about four times. It’s amazing. One little add in I do is a cinnamon/pumpkin spice swirl inclusion when I shape it. It makes it SO good! Perfect for toast or french toast.
Sounds delicious!
Hello, the cinnamon/pumpkin spice inclusion sounds delicious. How much did you do? like 1 – 2 teaspoons. ? thanks
Love this recipe! The pumpkin flavor is very mild. First time I made it we ate it with lentil soup and it was amazing!
What size oval banneton is best for this recipe?
A 12″ should work. This Banneton Size Guide may also help.