This post contains affiliate links. Please see our disclosure policy.

This simple potted cheese recipe is packed full of flavor and a perfect pairing for sourdough bread and crackers! If you’ve never heard of potted cheese before, it’s a bit like a cheese spread or pâté, mixed with butter, spices and a tiny splash of whiskey (although the alcohol is optional).
Why You’ll Love Potted Cheese!

Use up Leftover Cheese – Potted cheese is an excellent way to use up the last of a cheeseboard so you never let good cheese go to waste! You can mix and match cheeses or use all one kind. I used mostly sharp cheddar here, plus a little crumbly Cheshire cheese and some buttery Lancashire.
Super Versatile – You can switch up the cheeses and spices, or consider additions like fresh herbs. I love topping with a bit of chives or a rosemary sprig for serving.
So Quick and Easy – This is a great recipe to pull out when you have people coming over last-minute and want something to serve with crackers or homemade sourdough bread. Just a few minutes in the food processor and you’ve got a guest-worthy dish!

Ingredients
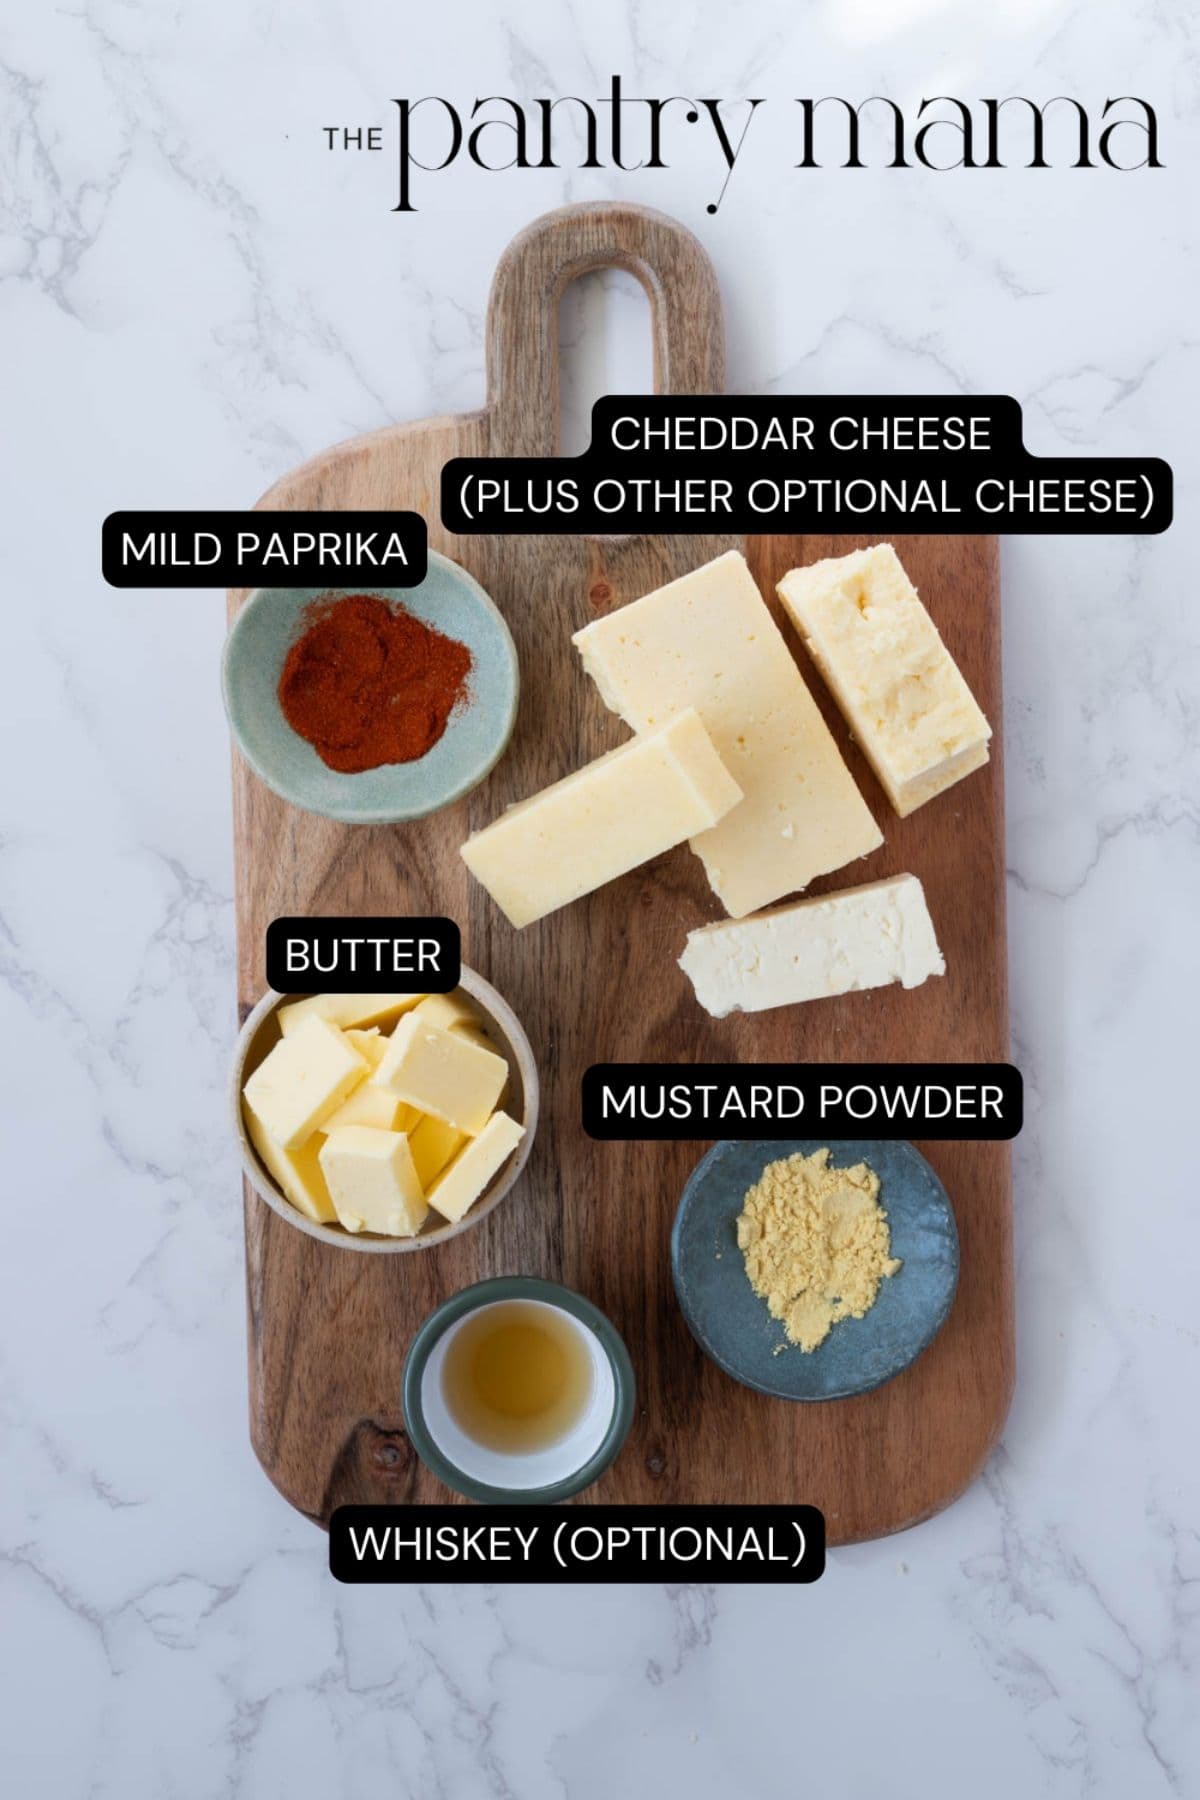
- Cheese – I always include a sharp cheddar, but you can use other cheeses, especially if you have bits to use up.
- Butter – I use good salted butter here (and love this with a fresh homemade butter), but you can use unsalted if that’s what you have, adding a pinch of salt if needed. The potted cheese whizzes up a bit smoother if the butter is at room temperature, so let it sit out a bit.
- Mustard Powder – This is sometimes called ground mustard or dry mustard.
- Paprika – I like mild paprika in this recipe, but if you prefer hot or smoky paprika, feel free to swap.
- Whiskey (optional) – a traditional potted cheese usually contains a splash of whiskey, and it adds a lovely depth of flavor without tasting too much of alcohol. If you’d prefer not to use alcohol, substitute with a small amount of Worcestershire sauce.
How To Make Potted Cheese
This recipe is so quick and easy, it’s great for last minute entertaining. And if you have some old sourdough bread, you can make easy sourdough crostini for serving in very little time.
Break your cheese into pieces and add to the food processor along with the softened butter, mustard powder, paprika, and whiskey, if using. I prefer to use hard cheeses, however, I have tried adding some Brie and Camembert to a few batches and it actually turned out ok. My tip here would be make sure 75% of the cheese you’re using is a hard cheese.
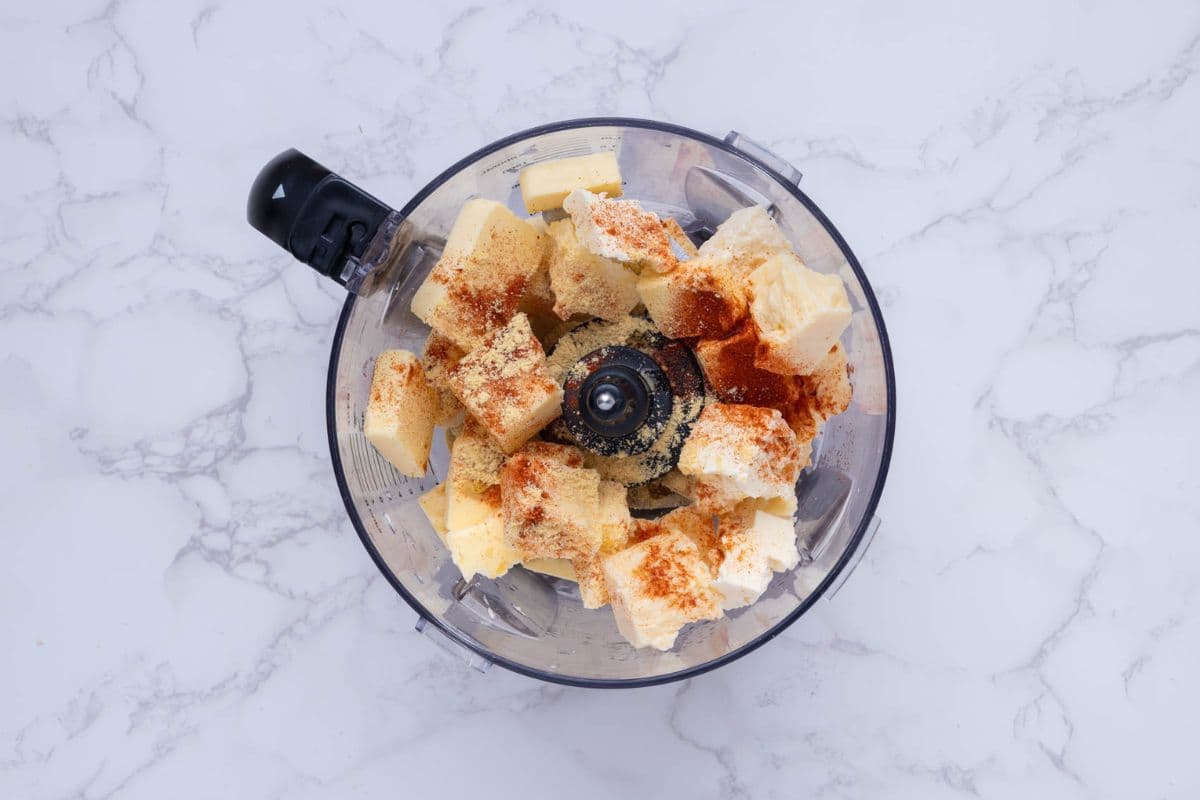
Pulse the food processor a few times to incorporate all the ingredients, stopping to scrape the sides of the bowl down with a spatula, if needed.
Once the mixture is well-combined, turn the food processor to high and whizz until the mixture is fully uniform and fairly smooth. It should be a thick, spreadable paste.

I like to eat some right away, but anything you won’t consume right away can be stored in an airtight container and will last even longer in sterilized jars.
Kate’s RECIPE TIP
Prepare Potted Cheese for A Picnic
If you want to take your potted cheese on a picnic or even gift to family and friends along with some whole wheat sourdough crackers, fill some small jars with boiling water and allow to sit for a few minutes before carefully emptying them out.
Fill the jars with the cheese mixture, leaving around 1cm head room at the top of the jar. Place the lids on and store in the fridge. I recommend letting the refrigerated potted cheese sit out at room temperature for a little while before eating so it’s easier to spread.
Serving Suggestions
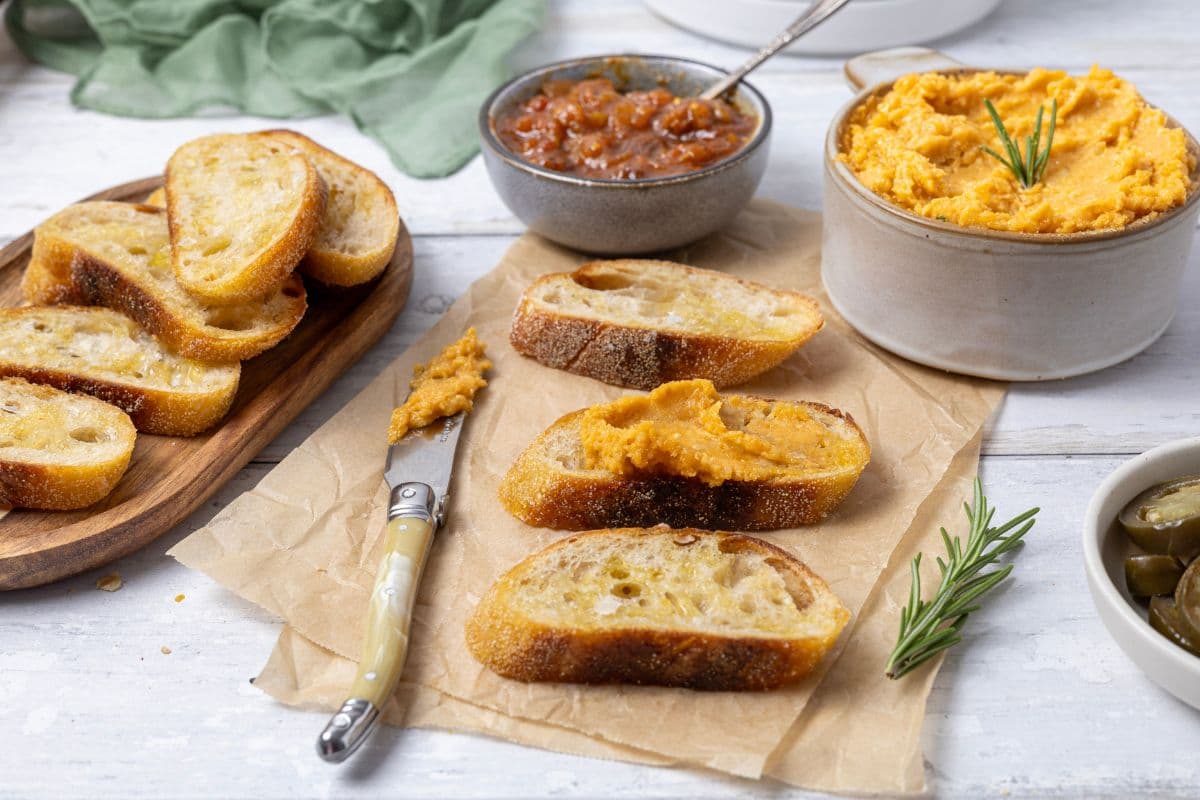
This potted cheese is so versatile and good on just about any sourdough cracker or bread! I’ve shown it in the photos with my seeded sourdough discard crackers and some sourdough crostini. But I have so many sourdough cracker recipes, and this cheese spread is delicious with just about all of them! I especially love dipping it with these sourdough grissini.
This cheese dip is really good when served with toasted sourdough French bread or a fresh sourdough baguette.
And little jars full of potted cheese are ideal gifts for loved ones, or packing into a hamper to take on a picnic.
How To Store + Freeze
The potted cheese will keep for a week or more sealed in an airtight container, longer if sealed into sterilized jars.
You can eat it straight from the fridge, but I like to let the potted cheese warm up to room temperature so it’s easier to spread.
You can freeze the potted cheese right in the jar. I recommend thawing it overnight in the refrigerator before eating. If the texture has changed once thawed, give it a brief whizz in the food processor.
Frequently Asked Questions
Potting is a traditional British method of preserving food, where ingredients were pounded into a paste and jarred for storage. Cooks would pound ingredients into a thick paste and add spices and/or alcohol, and often cover with a layer of clarified butter. Dishes like potted meat or potted shrimp were quite common and you still see them around sometimes!
It’s become one of my favorite ways to use up leftover cheese and now it’s even easier with a food processor!
You can preserve potted dishes by topping with a layer of clarified butter, which acts as a seal to keep out air and minimize bacteria growth. I don’t usually bother since I store mine in the fridge and it never lasts that long, but if you’d like to do it, the process is quite easy. Melt butter on the stovetop until it separates into white milk solids and clear yellow clarified butter. Scoop up the liquid clarified butter and spoon a layer on top of the potted cheese before sealing the jars.


Potted Cheese
Equipment
- Food Processor
- Spatula
Ingredients
- 350 g Hard Cheese, such as cheddar
- 75 g Butter, softened
- 1 tbsp Whiskey, optional, can substitute with 1 teaspoon Worcestershire sauce plus more as desired
- ½ tsp Mustard Powder
- ¼ tsp Paprika
Instructions
- Break any larger hunks of cheese into smaller pieces and add to the food processor along with the softened butter, mustard powder, paprika, and whiskey, if using.
- Pulse the food processor a few times to incorporate all the ingredients, stopping to scrape the sides of the bowl down with a spatula, if needed.
- Once the mixture is well-combined, turn the food processor to high and whizz until the mixture is fully uniform and fairly smooth. It should be a thick, spreadable paste, perfect for topping toast or crackers!
- I like to eat some right away, but anything you won’t consume now can be stored in an airtight container or even longer in sterilized jars. To prepare your jars, fill with boiling water and allow to sit for a few minutes before carefully emptying them out. Fill the jars with the cheese mixture, leaving around 1cm head room at the top of the jar. Place the lids on and store in the fridge. I recommend letting the refrigerated potted cheese sit out at room temperature for a little while before eating so it’s easier to spread.
Notes
- I recommend using primarily hard cheeses to keep the right texture, but you can always incorporate a little bit of soft cheese.
- If you’re not a big whiskey drinker but open to using alcohol, you could try a bit of beer, wine, or sherry in place of the whiskey. The recipe is very forgiving as lots of different beverages pair well with cheese!
Nutrition
Nutrition information is automatically calculated, so should only be used as an approximation.
Like this? Rate and comment below!