Sourdough Herb & Garlic Twist Loaf
This post may contain affiliate links.
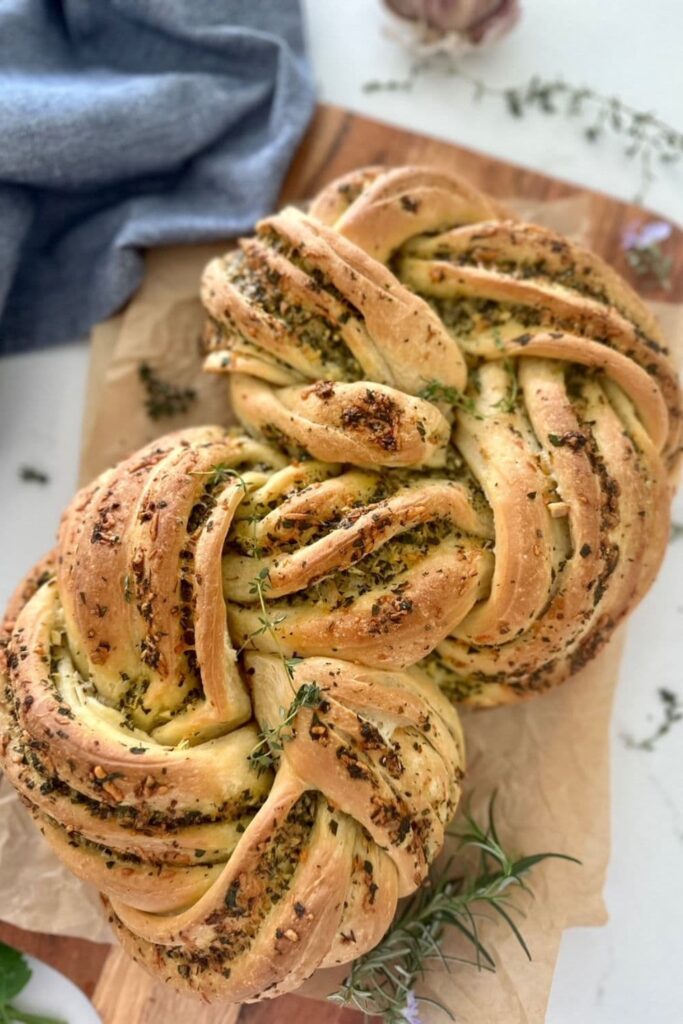
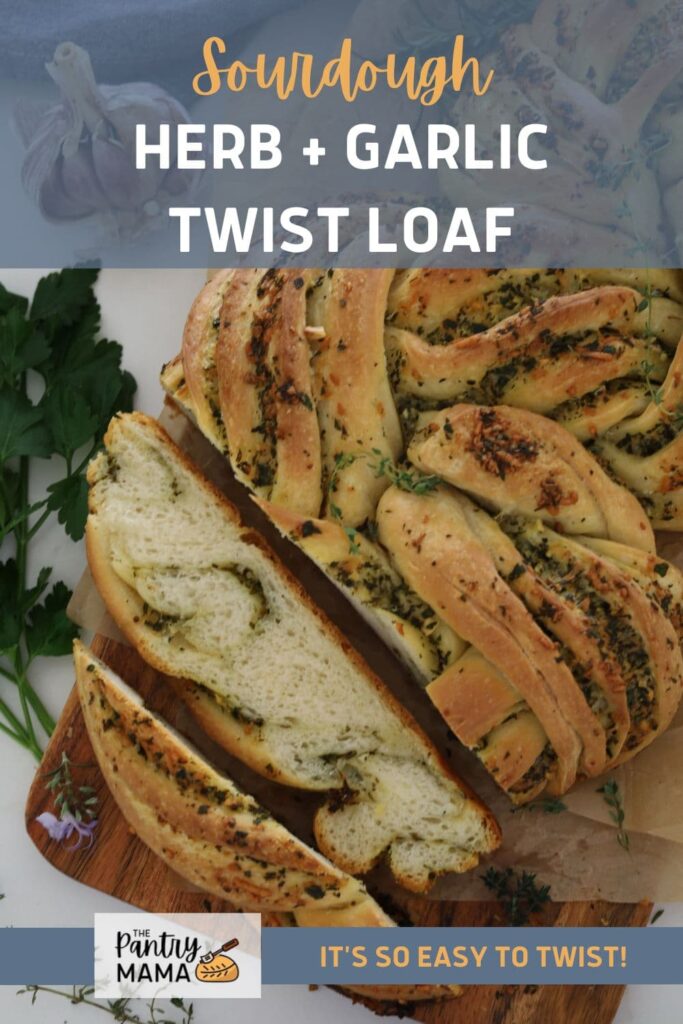
This sourdough herb and garlic twist loaf has lots of wow factor - but I'll let you in on a little secret - it's really, really easy! You can wow your family and friends at your next bbq or potluck with this delicious sourdough herb and garlic twist loaf. Garlic lovers unite ... this one is for you!!
Using a few cloves of garlic (or garlic powder if you prefer), gorgeous fresh green herbs and creamy butter, you will create ribbons of garlic herb butter through a tasty, soft sourdough bread loaf. There are instructions for using active sourdough starter , but I've also added notes in the recipe card for using discard too.
If you have lots of garlic to use up, then you might also enjoy making these sourdough recipes - roasted garlic sourdough bread, sourdough garlic bread bites (garlic knots) or this classic sourdough garlic bread recipe. If you don't have your own sourdough starter, you can find easy instructions for making a sourdough starter here.
Why You'll Love This Recipe
There are so many reasons you're going to love this recipe ... here are just a few!
Wow Factor - This sourdough garlic and herb twist loaf has total wow factor and is perfect to serve at gatherings like bbqs, potlucks or celebrations. Make it once, and people will ask you to bring it again and again ... it's definitely going to become a favorite recipe!
It's So Easy - while this twist has wow factor, it is actually really easy to make. If you can roll up dough (like making a batch of sourdough cinnamon rolls) then you can make this twist! I've included loads of easy to follow photos to show you how. It's such a great way to use up all the herbs in your herb garden.
Flavor Variations - while I've made this with fresh garlic and herbs, there are so many different combinations you can create so you can keep that wow factor going! I've added a big list of suggestions further down for you to choose from - or I'd love to know what other ones you come up with!
No Fancy Equipment - if you love recipes that don't need special equipment, then this will become a favorite. You don't need a cast iron Dutch Oven or anything special. Just grab your scales and your sourdough starter and you're ready to bake!
How To Make Sourdough Garlic & Herb Twist
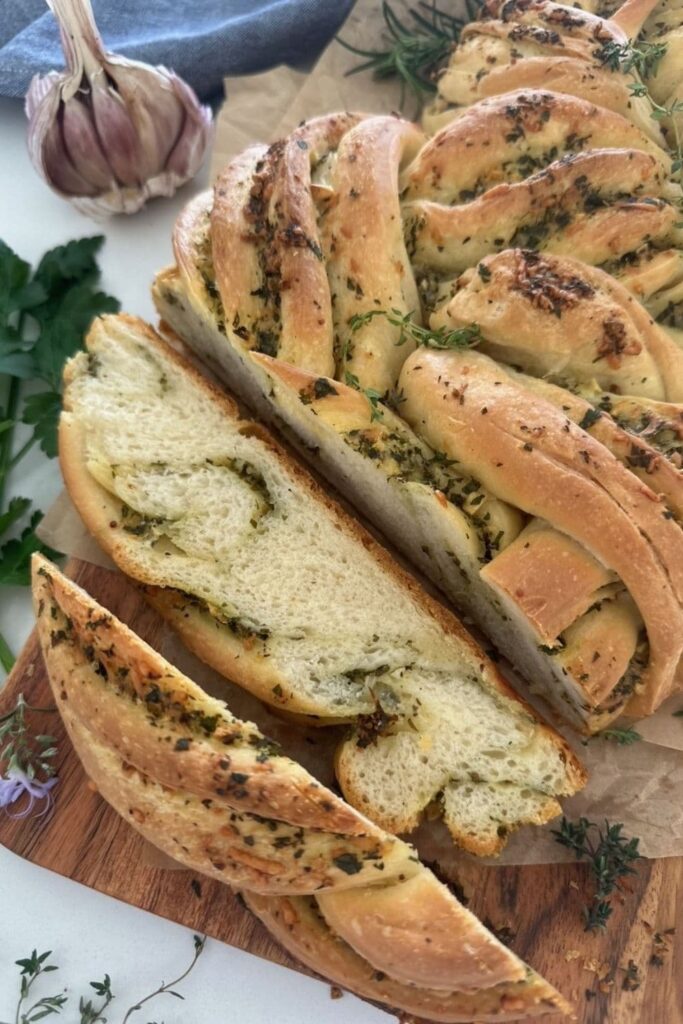
It's time to bake! And this is going to be one of the best breads you're ever going make - I promise! The delicious flavor of garlic and herbs ribboned through layers of dough ... and the best part is that it's so easy to create, just roll it up and twist!
Here's how to make this Sourdough Garlic & Herb Twist:
Making the Bread Dough
- Add the warm water, warm milk and active starter to a large bowl and stir until the sourdough starter is dissolved (it's ok if there's still a few chunks).
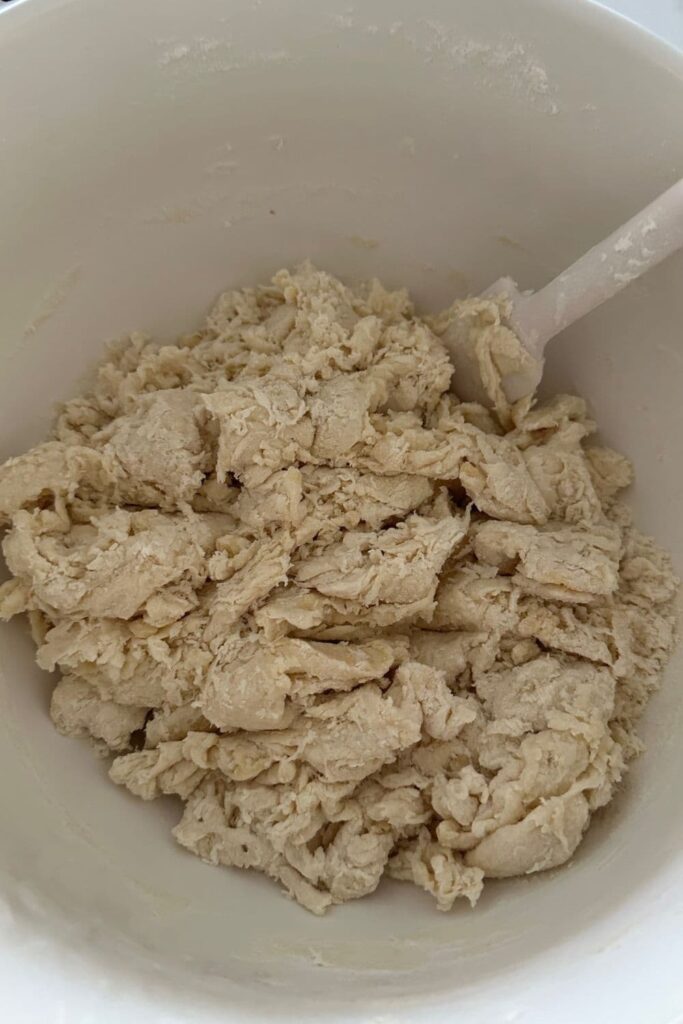
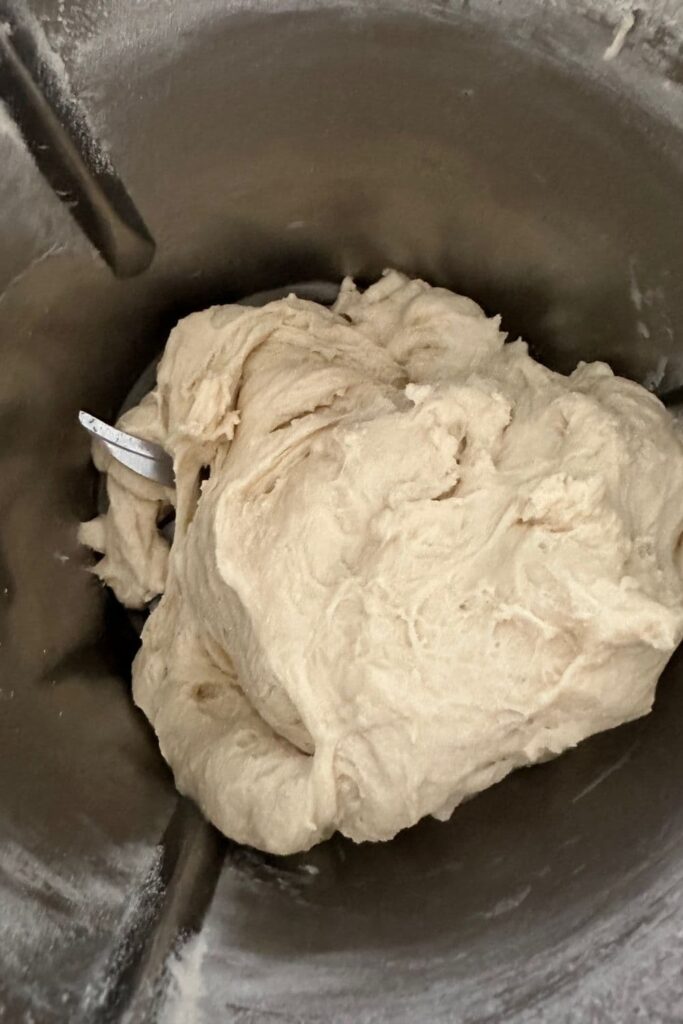
- Now add the bread flour, melted butter and salt to the liquid and bring together to form a shaggy dough. Cover with plastic wrap or a damp towel and leave to sit for around an hour.
- Tip the dough out onto a clean surface and knead it until the dough is soft and supple. You can do this step in a stand mixer or Thermomix if you prefer. It will take around 10 minutes to knead by hand and around 5 to 10 minutes in a stand mixer.
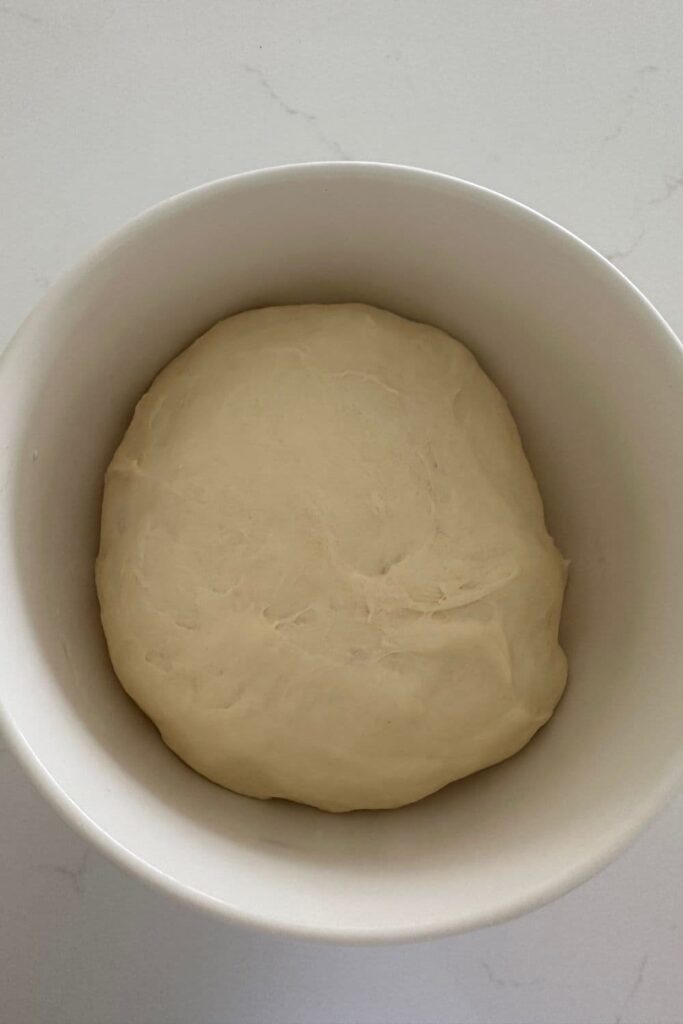
- Place the kneaded dough back into a bowl and cover. Allow it to rise around 50%. This is the bulk fermentation stage.
Making The Filling
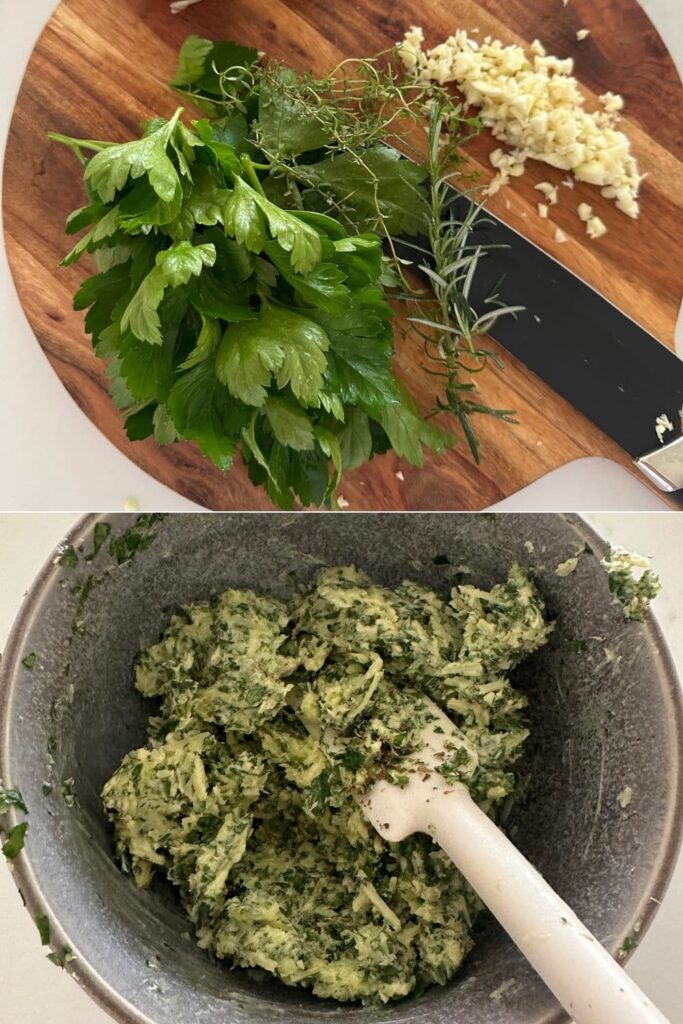
- While the dough is rising, make the filling for the dough so that it is ready to go when you need it. Simple chop all the herbs and garlic really finely (so that it's like minced herbs) and then add the herbs and parmesan cheese to the butter. Mix until well combined.
- You can do this in a food processor if you prefer. Set aside.
Shaping the Sourdough Twist
- Once the dough has risen a bit, tip it out onto a clean surface and gently shape it into a rectangle with the long edge in front of you. You're looking for a rectangle of around 25" x 8" (64 x 20 cm). Don't be afraid of degassing the dough as it will puff up in the next stage.
- Now spread the herb and garlic filling all over the dough, leaving a 1" strip at the top with no filling.
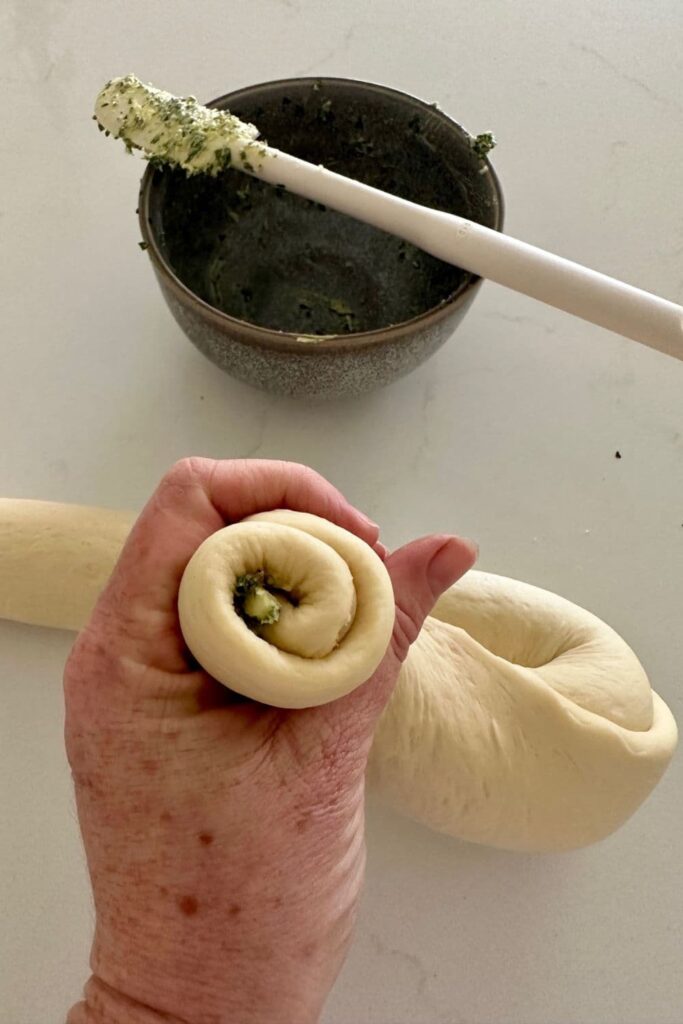
- Roll the dough up into a big log - just like you would if you were making cinnamon rolls. Make sure it's rolled fairly tightly. Seal the dough up along the seam and roll it over so that the seam is at the bottom.
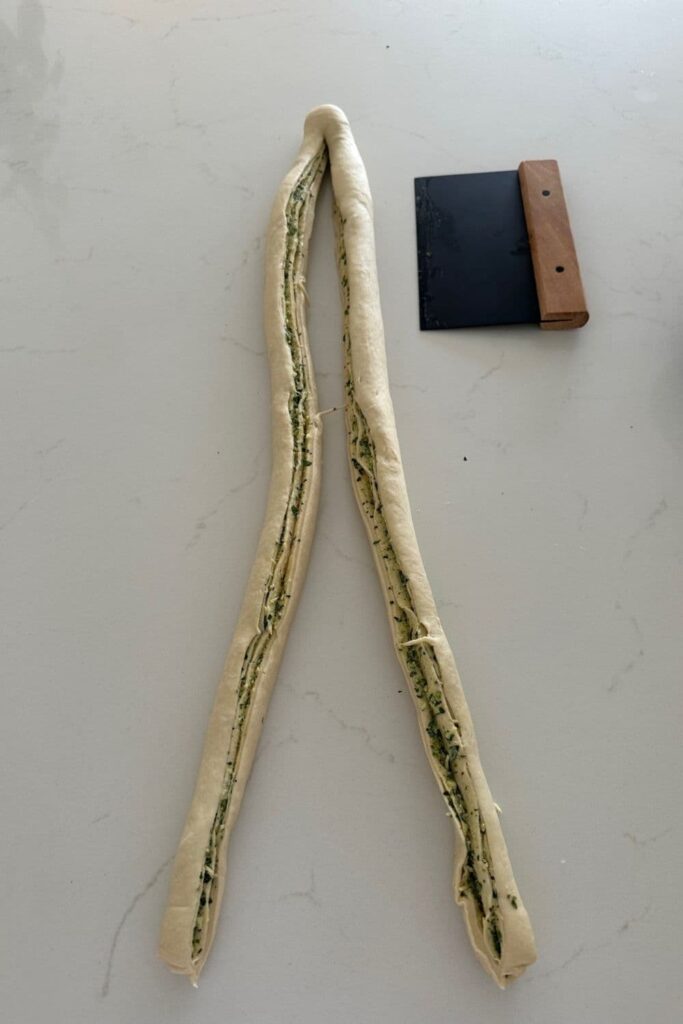
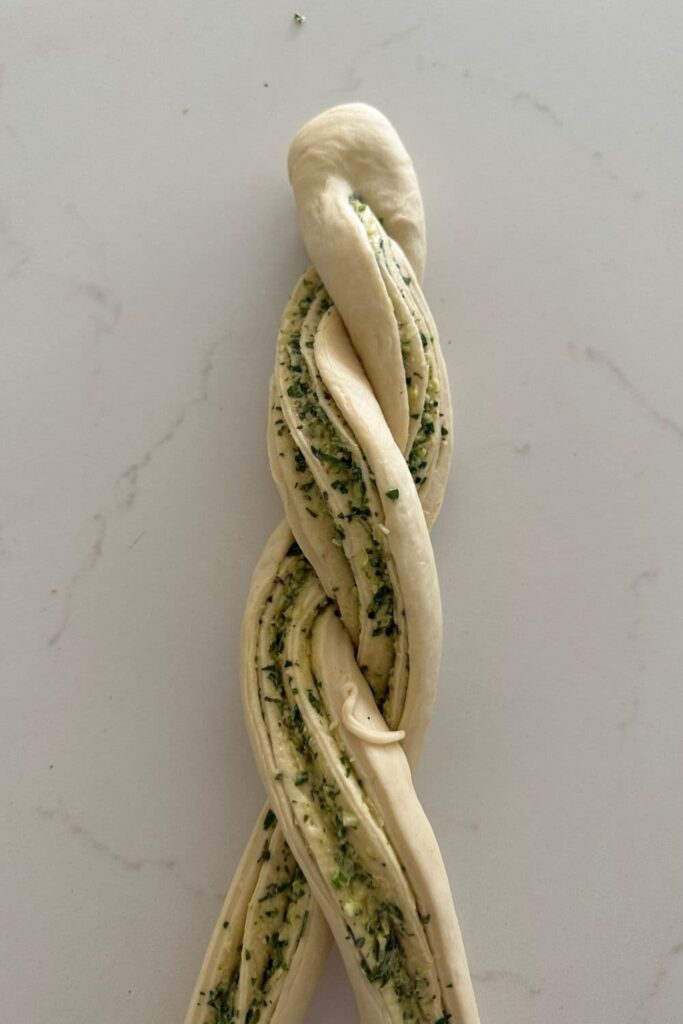
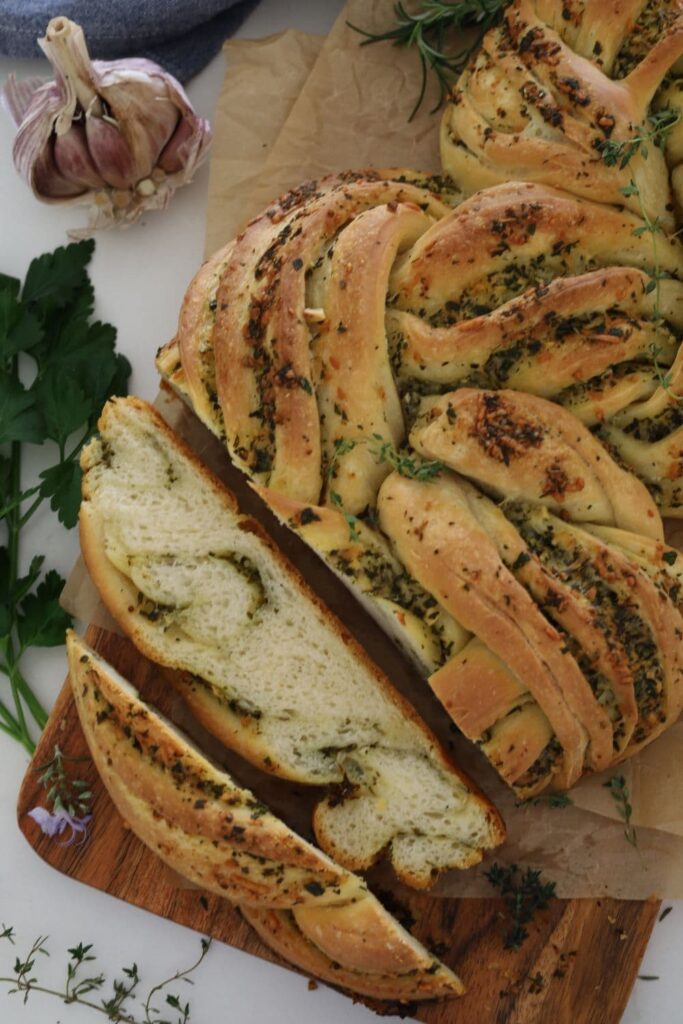
- Using a sharp knife or dough scraper, cut the log through the middle all the way up, leaving just a small part of the dough attached so you have two strands. You will be able to see the swirls of garlic and herb butter where you have sliced it (refer to step by step photos in the blog above for visual aids on how to do this).
- Now, twist the two strands of dough together to form a "rope". Gently push the ends together so that both ends of the rope are sealed. My rope was around 30" (76 cm) long when I finished (the dough does stretch a bit).
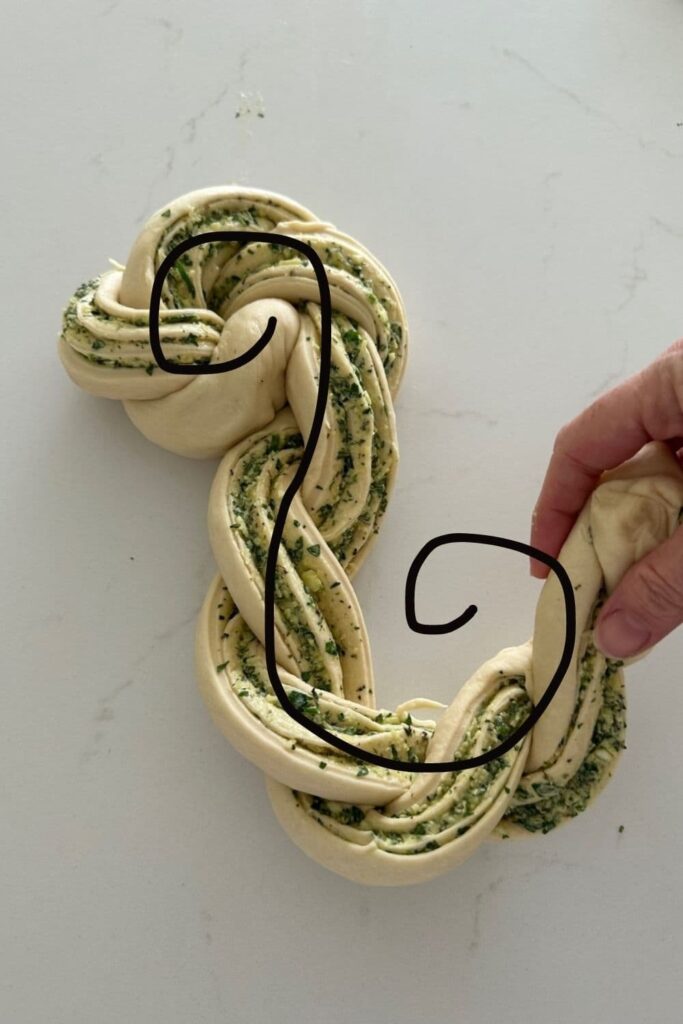
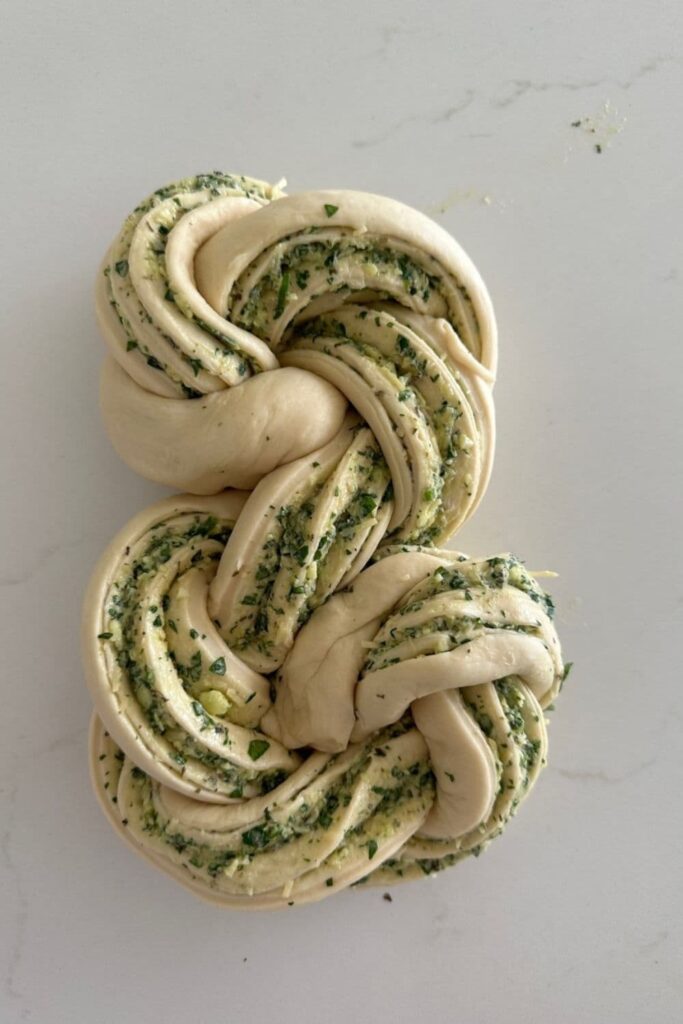
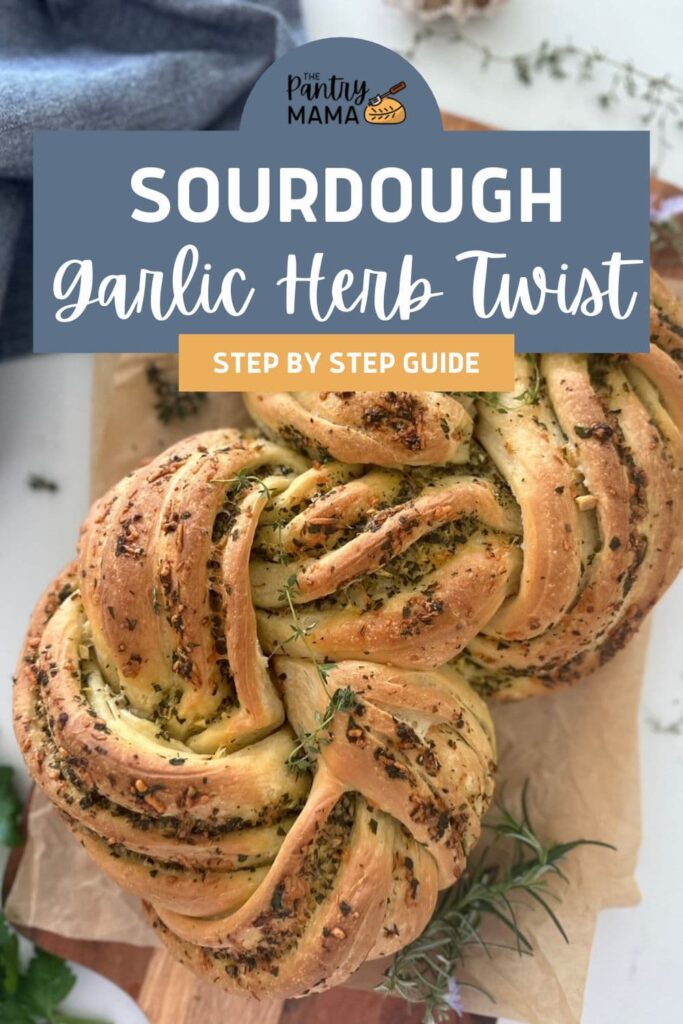
- Now form the rope into a letter "S" curling each end in towards the middle. This forms your twist. You can see how I've done this in the photos further up the page.
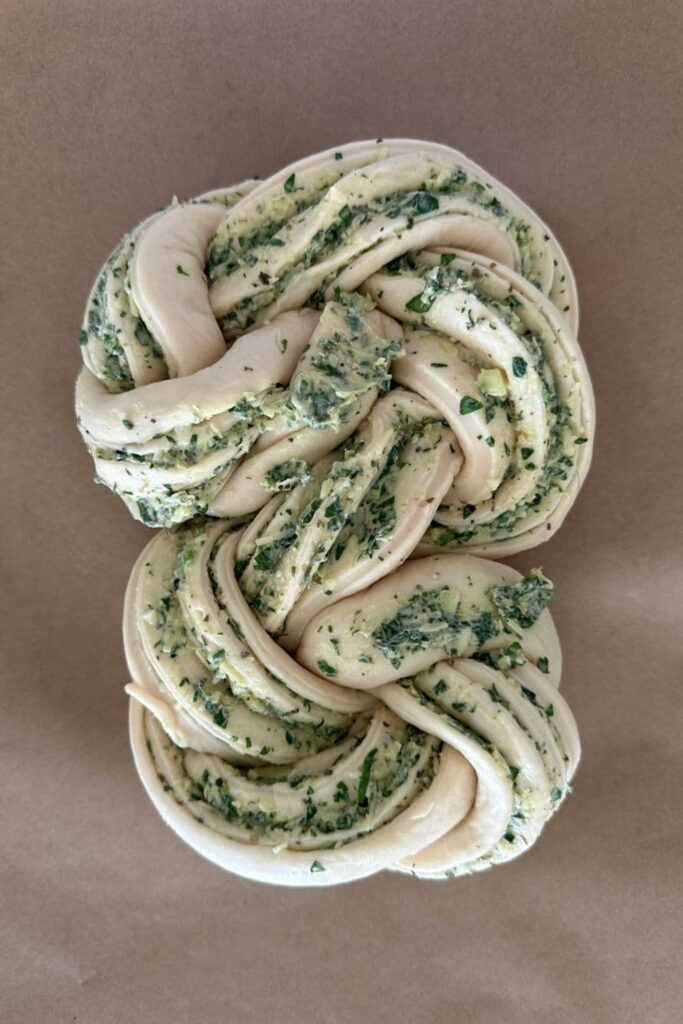
- Place your sourdough herb and garlic twist onto a baking tray lined with a piece of parchment paper, cover with a damp dishtowel and allow to proof for a few hours. You want your dough to be nice a puffy before you bake it.
Let's Bake!
- Once the dough has proofed, preheat the oven to 200C (392F) and bake for around 40 minutes or until golden. I recommend placing your twist on the lower shelf to avoid it burning. If your oven is fan forced or it runs hot, reduce this to temp to 180C (356F).
- When the twist is golden brown and cooked through, remove it from the oven. Be careful if your baking tray has no sides as some of the butter may drip over the sides.
- You can use a pastry brush to brush the finished bake with excess butter and serve warm.
Step-by-Step Photo Guide
If you like to see things more visually, these photos will guide you through the recipe.


Baker's Timeline for Sourdough Garlic & Herb Twist
This is the rough timeline I use when making this sourdough herb and garlic twist. You could adapt this timeline to suit your own situation. You might also find this article on creating a sourdough baking timeline helpful in adapting it.
Remember, you need to read your dough, not the clock when it comes to sourdough, so my timeline may be too short or too long for your bread.
The Night Before
10pm - Feed sourdough starter so it's bubbly and ready for work tomorrow morning.
The Next Morning
7am - Mix the dough, knead and allow to rise a little in the bowl
12pm - Spread your dough, roll and twist - set aside to get nice and puffy!
6pm - Bake the sourdough twist!
If you want to make this twist ahead of time, you can place it into the fridge to pause it if you want to. Once you've twisted it, allow it to proof for around an hour at room temperature before covering with plastic wrap and placing into the fridge for up to 12 hours.
When you're ready to bake, remove from the fridge and allow the twist to come to room temperature before you bake it (you still want it to be nice and puffy before it hits the oven).
Flavor Variations for Savory Sourdough Twist
While garlic and herbs are delicious in this recipe, there are so many other savory flavor combos you could try! Here are some of the other flavors I love making - they're all loved by my family and friends! I always use butter as a base and just blend my desired flavors into the butter.
- Sundried Tomato and Basil: Add chopped sundried tomatoes and fresh basil leaves along with parmesan cheese to the butter for a Mediterranean inspired twist.
- Cheese and Jalapeño: Spread the dough with butter and then sprinkle with shredded cheese (such as cheddar or Gouda) and diced jalapeños for a spicy and cheesy variation.
- Olive and Rosemary: Mix in chopped Kalamata olives and fresh rosemary leaves to give the bread a burst of Mediterranean flavors.
- Caramelized Onion and Thyme: Add caramelized onions and fresh thyme to the dough for a sweet and savory combination.
- Parmesan and Black Pepper: Incorporate grated Parmesan cheese and freshly ground black pepper into the butter for a bold and peppery twist.
- Pesto and Pine Nut: Mix in a few tablespoons of pesto sauce and toasted pine nuts for a nutty and herby variation.
- Roasted Garlic and Cheddar: Mix the butter with roasted garlic cloves and shredded cheddar cheese for a comforting and savory combination.
Ingredient Notes
This sourdough bread recipe uses really simple ingredients, but there's a few things to note to make sure that you have a successful bake, first time and every time!
Herbs - use whatever fresh herbs you have on hand. Parsley, thyme, basil, rosemary and sage work really well. You can also use some dried herbs as well, however you do need some fresh herbs to create the beautiful green swirls in the dough. I've used around 1 cup of fresh herbs (measured before chopping - so the fresh herbs picked straight from the garden would fill a cup without being squished down).
Garlic - I recommend using 3 cloves of fresh garlic but if you don't have access to fresh, 2 tablespoon of minced garlic or equivalent garlic granules or garlic powder would work too.
Sourdough Starter - I've used active sourdough starter that was fed a few hours before baking and at peak. If you want to use sourdough discard, use 100g of discard with a teaspoon of commercial yeast. There are also over 70 sourdough discard recipes here.
Butter & Milk - you can use plant based alternatives if you prefer. Swap the butter for 50g of olive oil or vegan butter. Use the plant based milk of your choice.
Salted Butter - I've used salted butter in my dough and in the filling. I recommend using salted butter in the filling, but you can use any butter you like for the dough. I recommend making your own butter.
Egg Wash - you can use an egg wash on the top of the loaf before placing in the oven for a darker color when baked. I've chosen to keep this one egg free (mainly because my chickens didn't lay any eggs this week lol).
Sourdough Twist In A Loaf Pan
You can bake this Sourdough Herb and Garlic Twist in a loaf pan if you prefer - kind of like a herb and garlic babka. Simply twist the dough and then place into a loaf tin to allow it to proof. You will need to twist it a little tighter and squish it a bit to get it in the pan, but it will puff up when it proofs.
You might also like these instructions for making sourdough bread in a loaf pan.
How To Freeze + Store
If you're planning on making this sourdough herb and garlic twist for an event, I suggest baking it as close to when you want to serve it as possible. It's delicious warm, served as a pull apart loaf. However, it will stay fairly fresh for around 12 hours after baking time and you can gently warm it up in the oven if you want to.
You can freeze this loaf once it's baked and cooled. Wrap in aluminum foil and place into a ziploc bag. Store in the freezer for up to 2 months. Allow to thaw at room temperature and then place into a warm oven (still wrapped in foil) to warm through.

Sourdough Herb and Garlic Twist Loaf
Ingredients
Bread Dough
- 100 g Sourdough Starter
- 500 g Bread Flour
- 8 g Salt
- 50 g Butter (melted - can be salted or unsalted)
- 200 g Milk (slightly warm, around 37C)
- 50 g Water (warm)
Garlic & Herb Filling
- 3 cloves Garlic (finely diced)
- 50 g Parmesan Cheese (grated)
- 100 g Salted Butter (softened at room temp)
- 1 bunch Fresh Herbs (thyme, basil, parsley, sage etc) - see notes
Instructions
- Add the water, milk and sourdough starter to a mixing bowl and stir until the sourdough starter is dissolved (it's ok if there's still a few chunks).
- Now add the bread flour, melted butter and salt to the liquid and bring together to form a shaggy dough. Cover and leave to sit for around an hour.
- Tip the dough out onto a clean surface and knead it until the dough is soft and supple. You can do this step in a stand mixer or Thermomix if you prefer. It will take around 10 minutes to knead by hand and around 5 minutes in a stand mixer.
- Place the kneaded dough back into a bowl and cover. Allow it to rise around 50%.
- While the dough is rising, make the filling for the dough so that it is ready to go when you need it. Simple chop all the herbs and garlic really finely (so that it's like minced herbs) and then add the herbs and parmesan cheese to the butter. Mix until well combined. You can do this in a food processor if you prefer. Set aside.
- Once the dough has risen a bit, tip it out onto a clean surface and gently shape it into a rectangle with the long edge in front of you. You're looking for a rectangle of around 25" x 8" (64 x 20 cm). Don't be afraid of degassing the dough as it will puff up in the next stage.
- Now spread the herb and garlic filling all over the dough, leaving a 1" strip at the top with no filling.
- Roll the dough up into a big log - just like you would if you were making cinnamon rolls. Make sure it's rolled fairly tightly. Seal the dough up along the seam and roll it over so that the seam is at the bottom.
- Using a knife or dough scraper, cut the log through the middle all the way up, leaving just a small part of the dough attached so you have two strands. You will be able to see the swirls of garlic and herb butter where you have sliced it (refer to step by step photos in the blog above for visual aids on how to do this).
- Now, twist the two strands of dough together to form a "rope". Gently push the ends together so that both ends of the rope are sealed. My rope was around 30" (76 cm) long when I finished (the dough does stretch a bit).
- Now form the rope into a letter "S" curling each end in towards the middle. This forms your twist. You can see how I've done this in the photos further up the page.
- Place your sourdough herb and garlic twist onto a baking tray lined with parchment paper, cover with a damp dishtowel and allow to proof for a few hours. You want your dough to be nice a puffy before you bake it.
- Once the dough has proofed, preheat the oven to 200C (392F) and bake for around 40 minutes or until golden. I recommend placing your twist on the lower shelf to avoid it burning. If your oven is fan forced or it runs hot, reduce this to temp to 180C (356F).
- When the twist is cooked, remove it from the oven. Be careful if your baking tray has no sides as some of the butter may drip over the sides.
- Brush the finished bake with excess butter and serve warm.
Notes
Nutrition


