This post contains affiliate links. Please see our disclosure policy.

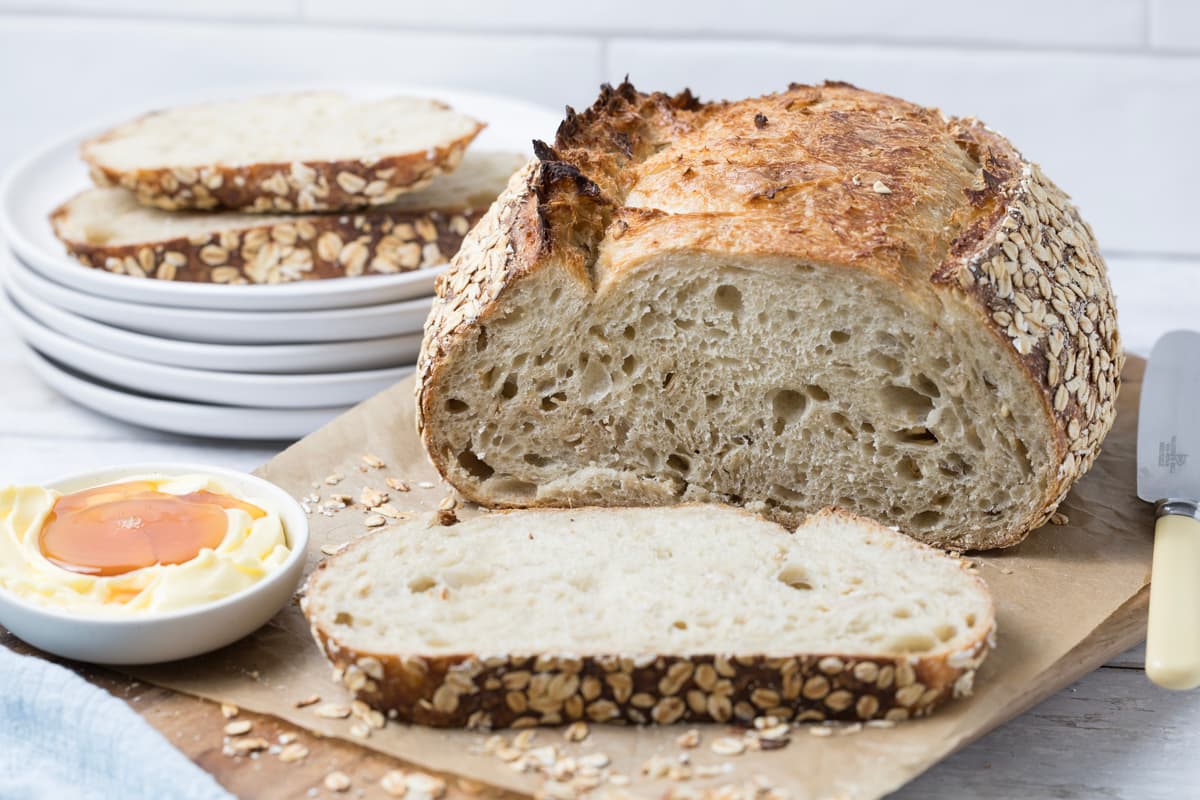
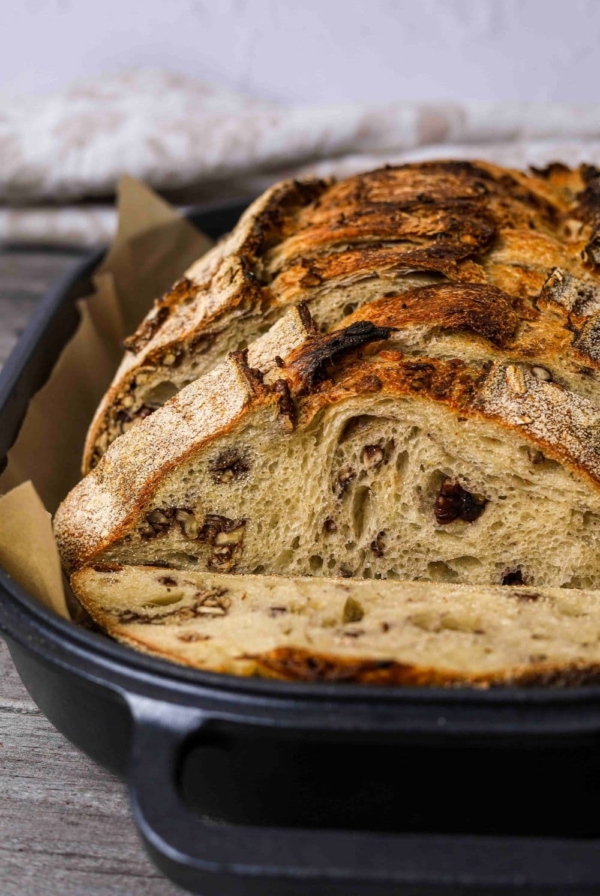
This fragrant and hearty honey oat sourdough bread will become a fast family favorite. It’s one of those sourdough recipes everyone comes back to. Whether you shape it as a batard or boule, it’s sure to be requested again and again. It’s extremely versatile. I love that it combines some extra nutrients with the oats, giving it even more brownie points!
Why You’ll Love This Recipe!
- Rich Flavor with a Hearty Texture – The addition of honey and rolled oats creates a beautifully balanced loaf with subtle sweetness, nutty depth, and a satisfyingly wholesome bite. It’s the perfect vehicle for homemade butter!
- Beginner Friendly – This sourdough inclusion loaf is perfect for a beginner. The dough is an absolute dream to shape, it’s one of my favorites!
- Flexible to Fit Any Schedule – With a cold fermentation window of 5 to 36 hours, this recipe adapts effortlessly to busy lifestyles. Whether you’re baking the next morning or a day later, the extended proof enhances flavor while giving you complete control over your timing.
Ingredients
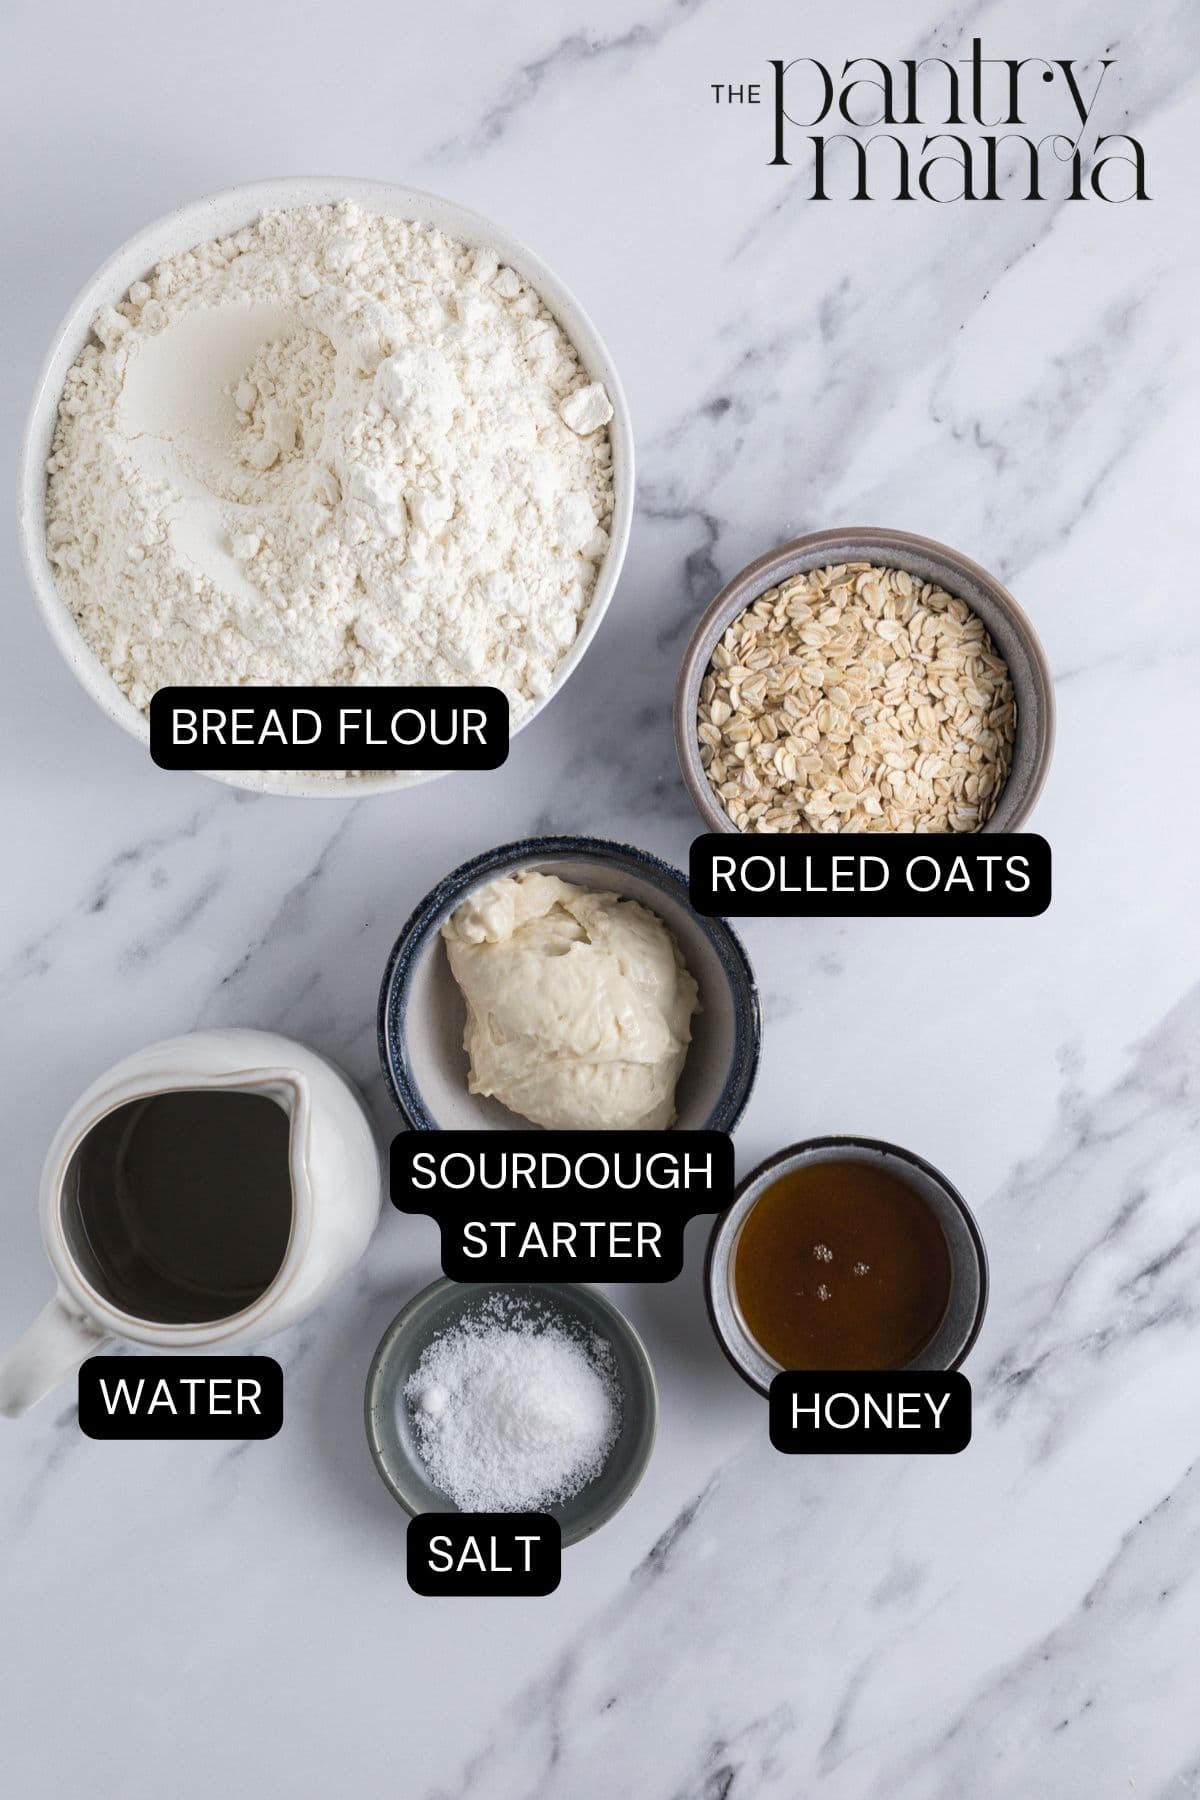
- Sourdough Starter – You’ll need to use active sourdough starter to create this delicious loaf. I recommend active starter that has been fed in the last 12 hours and is at peak. This will ensure you get the best dough rise! You can increase the amount of starter if you wish with no affect on the other ingredient measurements. You can read more about the effects of increasing the starter amount here.
- Bread Flour – I recommend using high protein bread flour for this recipe, however you can use up to half whole-wheat flour if you want to. This will give you a more nutty flavor to your loaf.
- Rolled Oats – Use traditional rolled oats, not quick oats or steel cut oats.
- Honey – Use whatever honey you like to eat. Check out this full guide to adding honey to sourdough for the best results. If you enjoy adding honey to sourdough bread, jalapeño cheddar sourdough also includes honey.
- Water
- Salt
How To Make Sourdough Honey Oat Bread
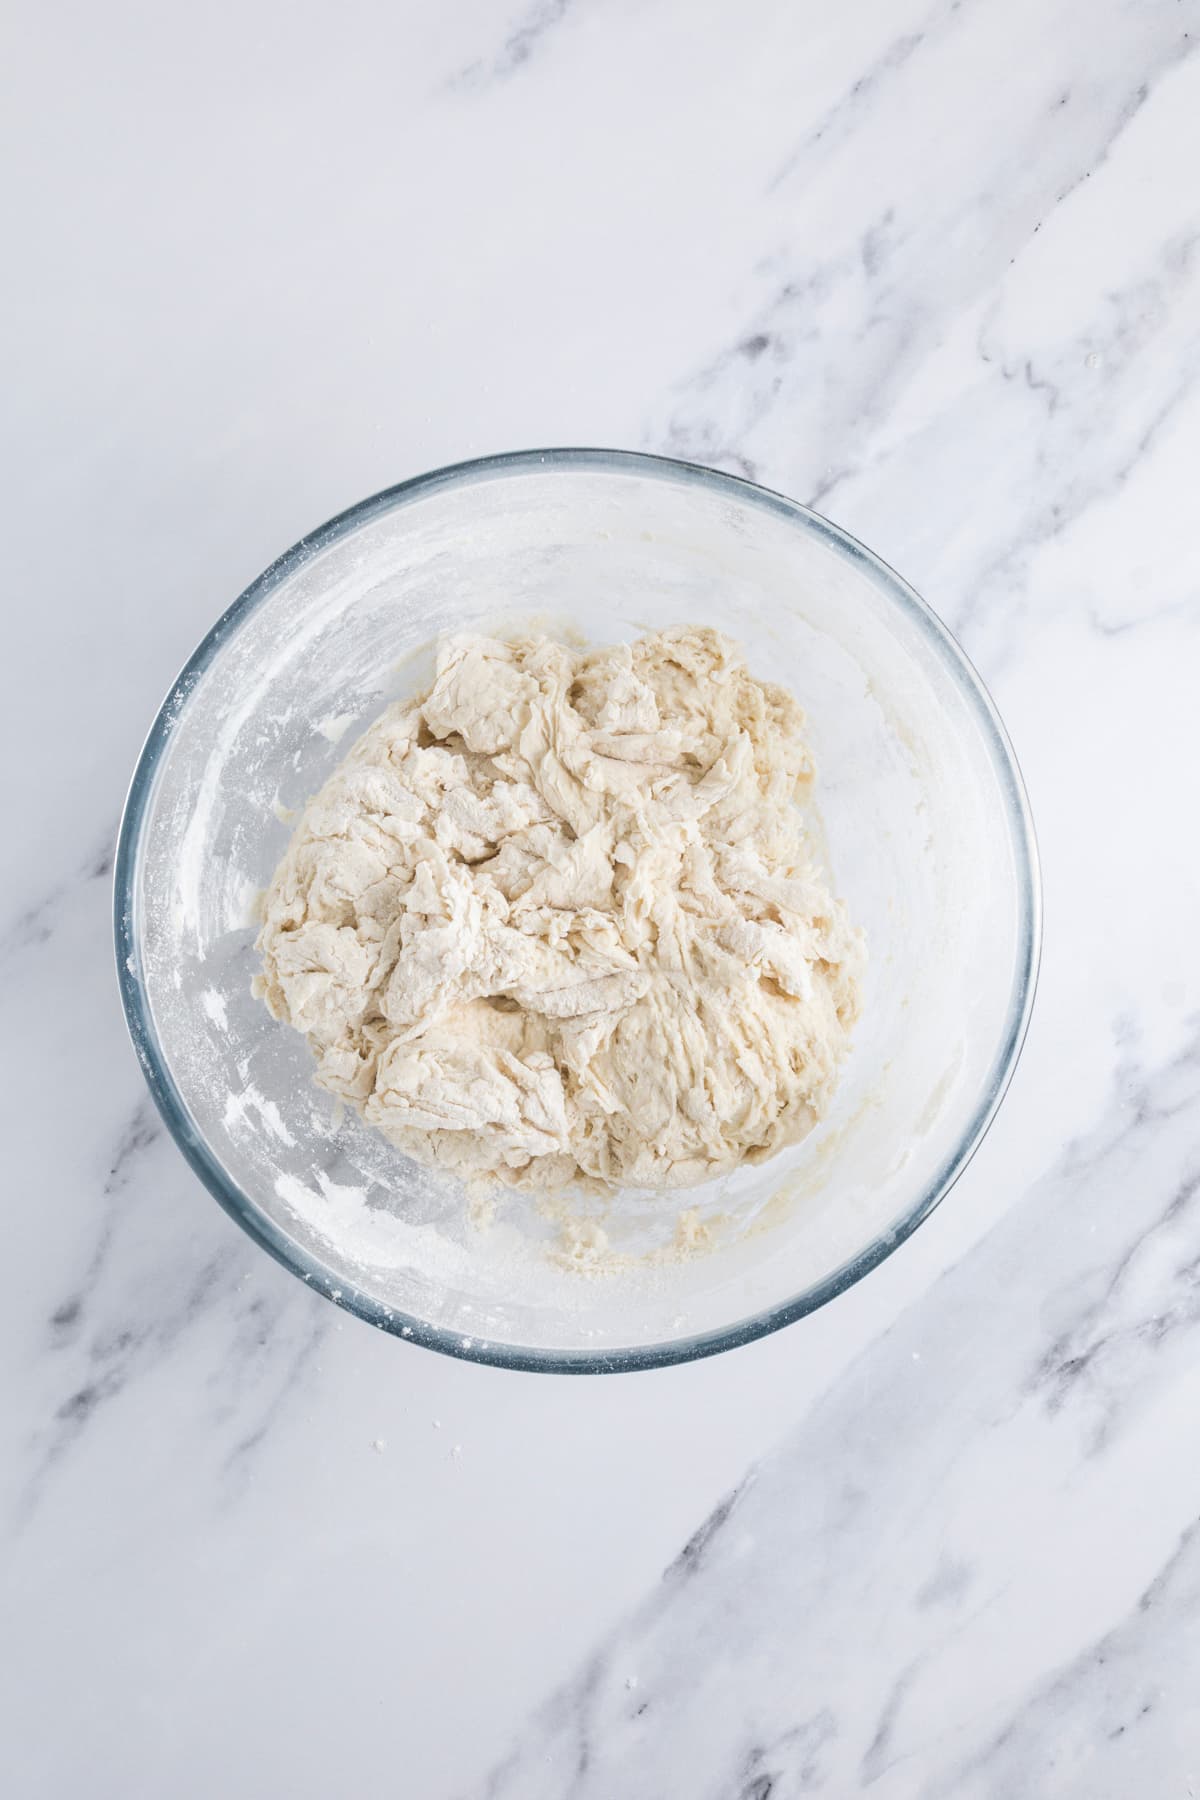
Start by adding the active starter, water and honey to a large mixing bowl and stirring until the starter and honey are dissolved into the water. Once they’re well combined, add the bread flour and salt and stir together to form a shaggy dough. I never use a Danish dough whisk because I find them ineffective and so hard to clean! I recommend using a silicone jar spatula or even a dough scraper to mix the dough together.

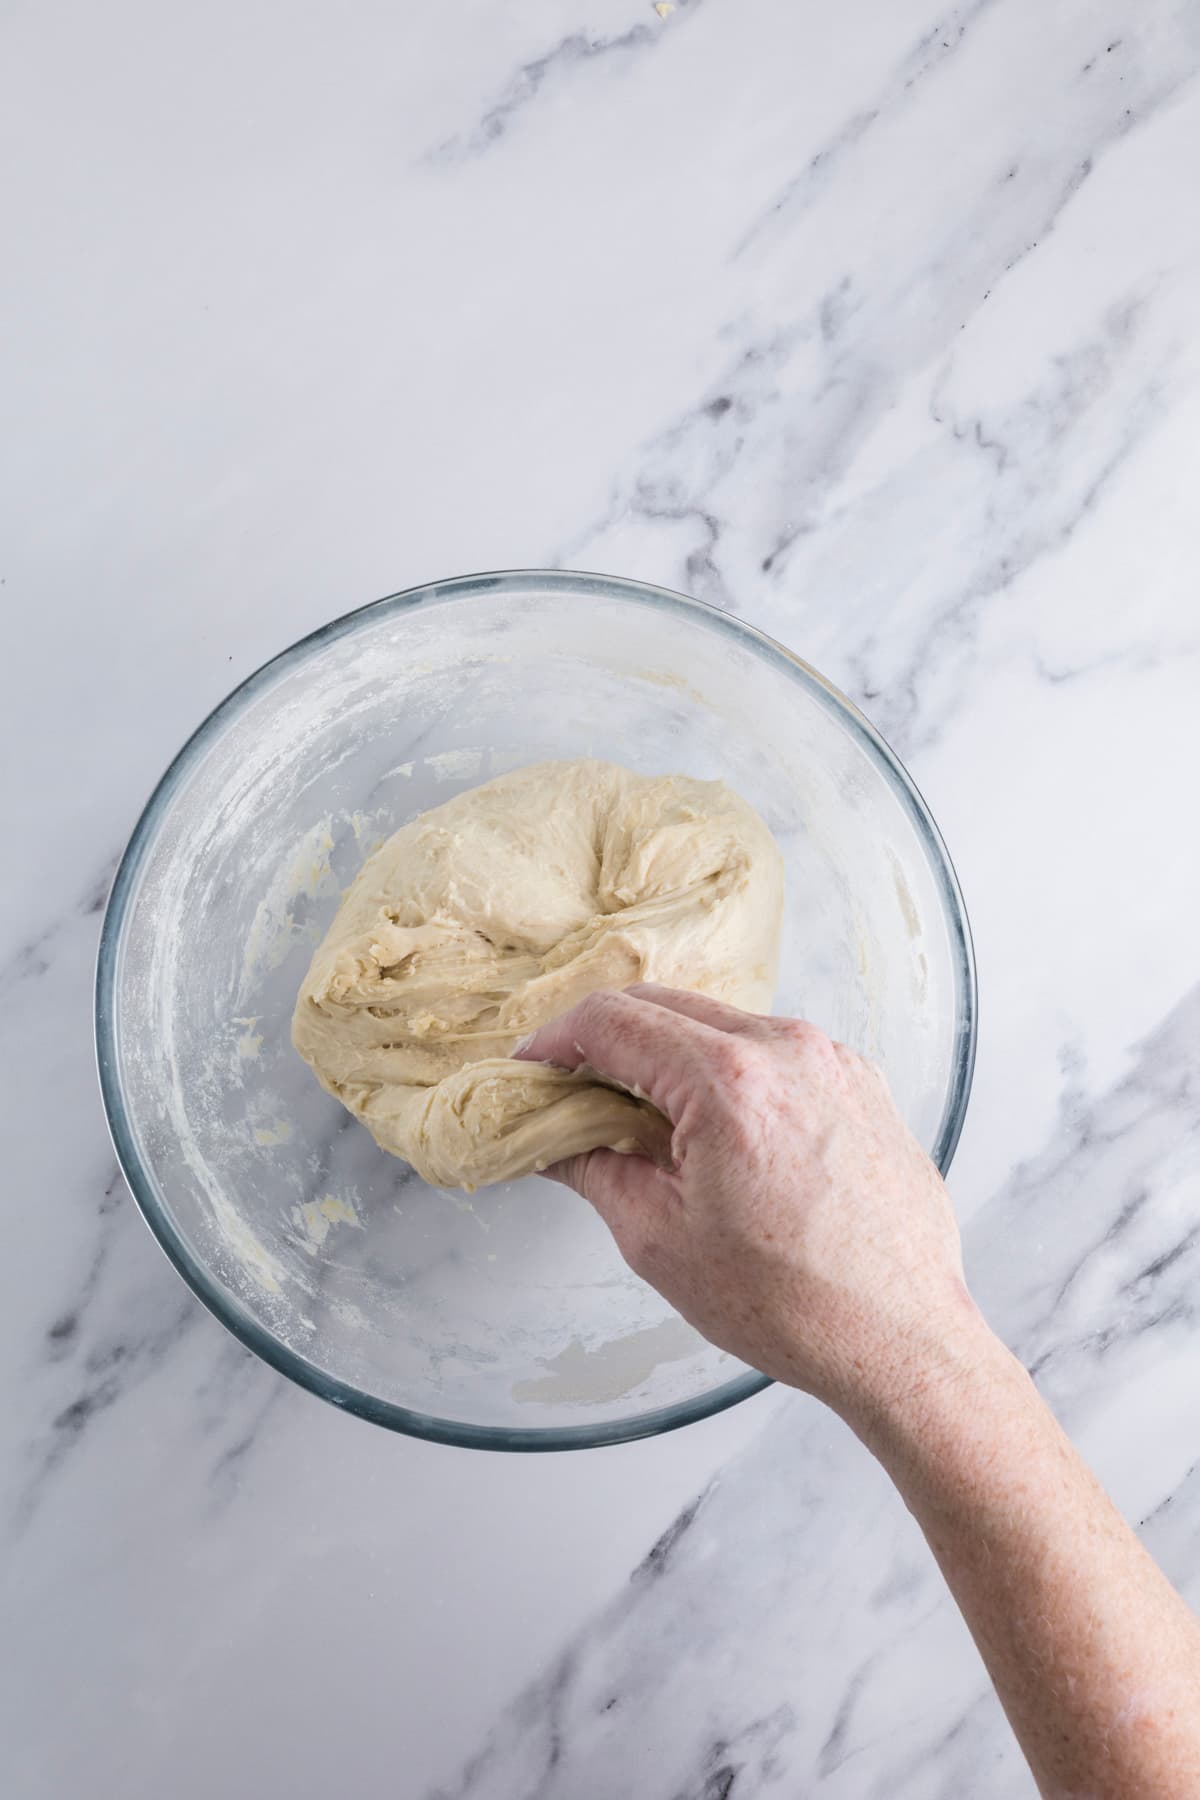
After resting for around an hour, the dough is gently strengthened by stretching and folding it into a smooth ball, followed by another short rest.
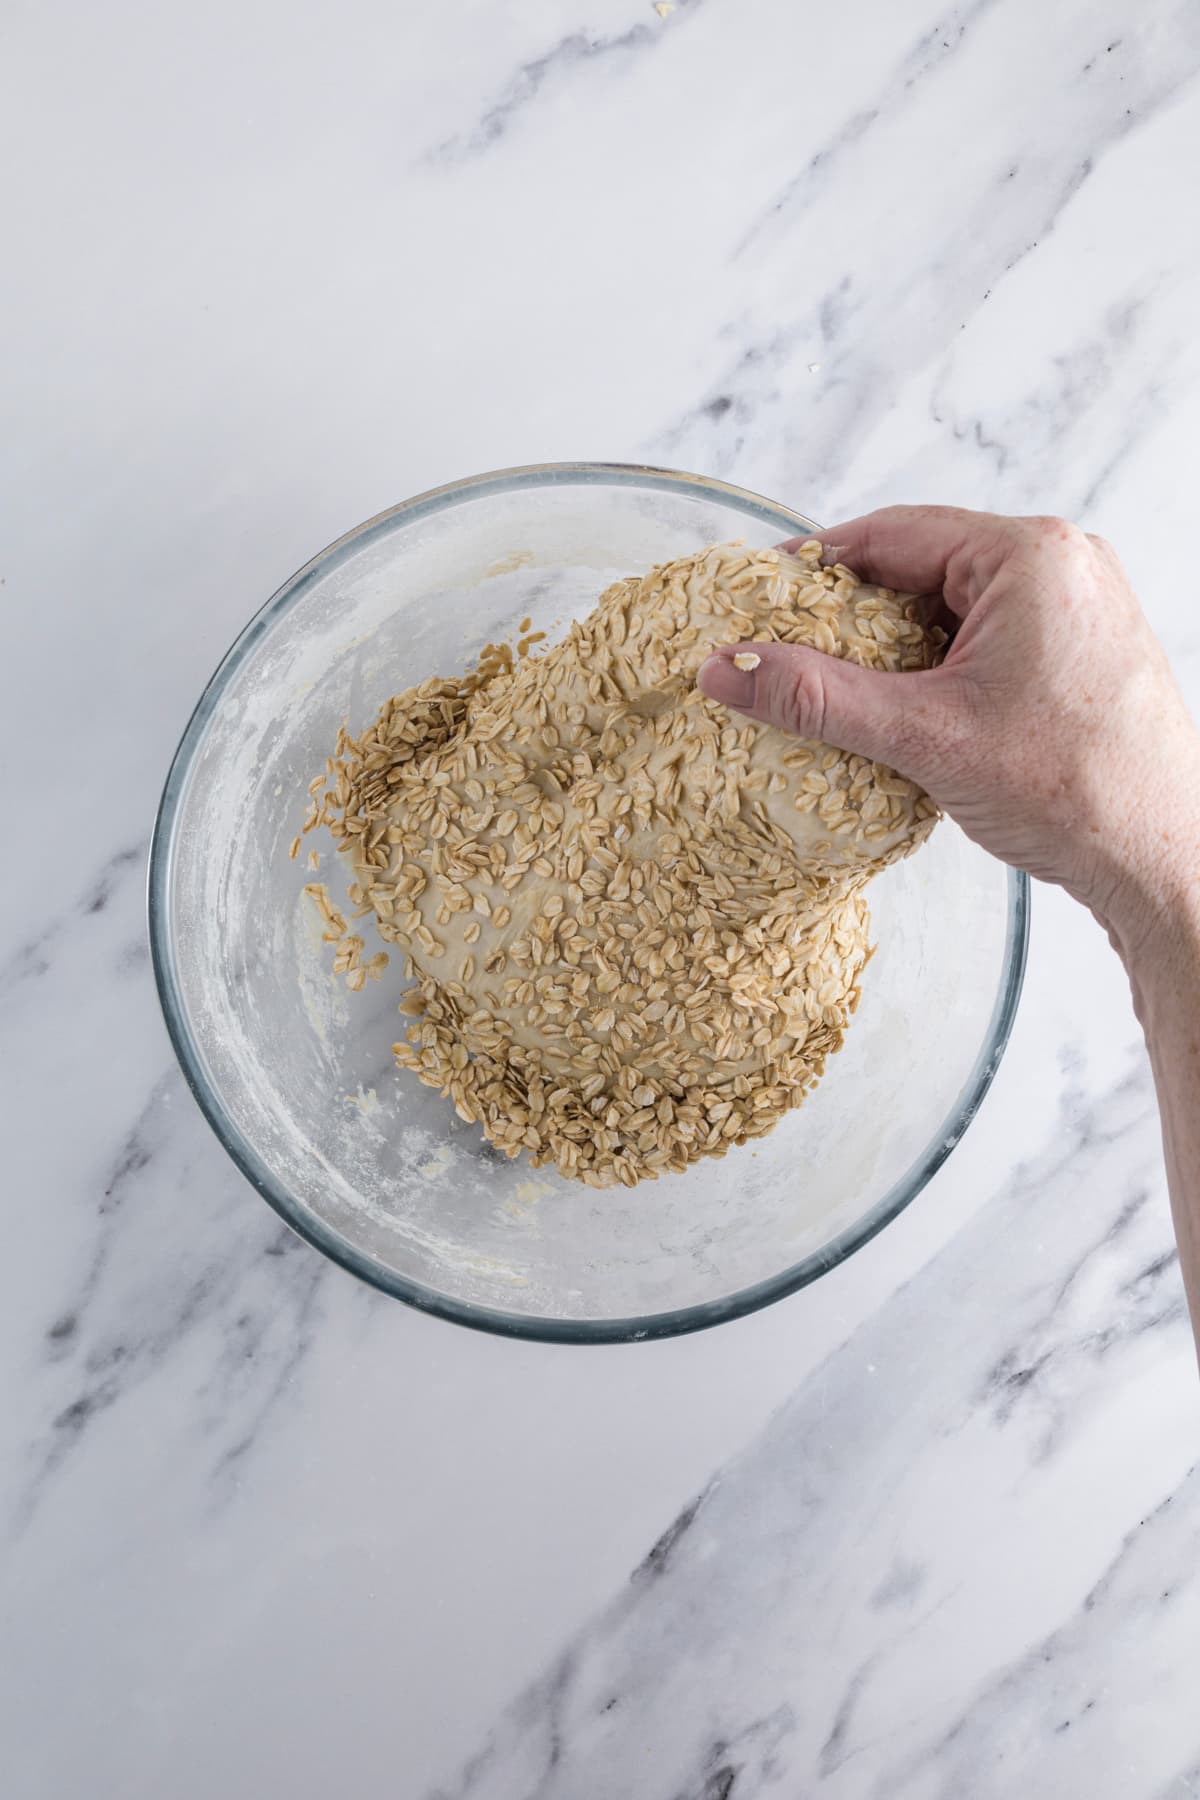
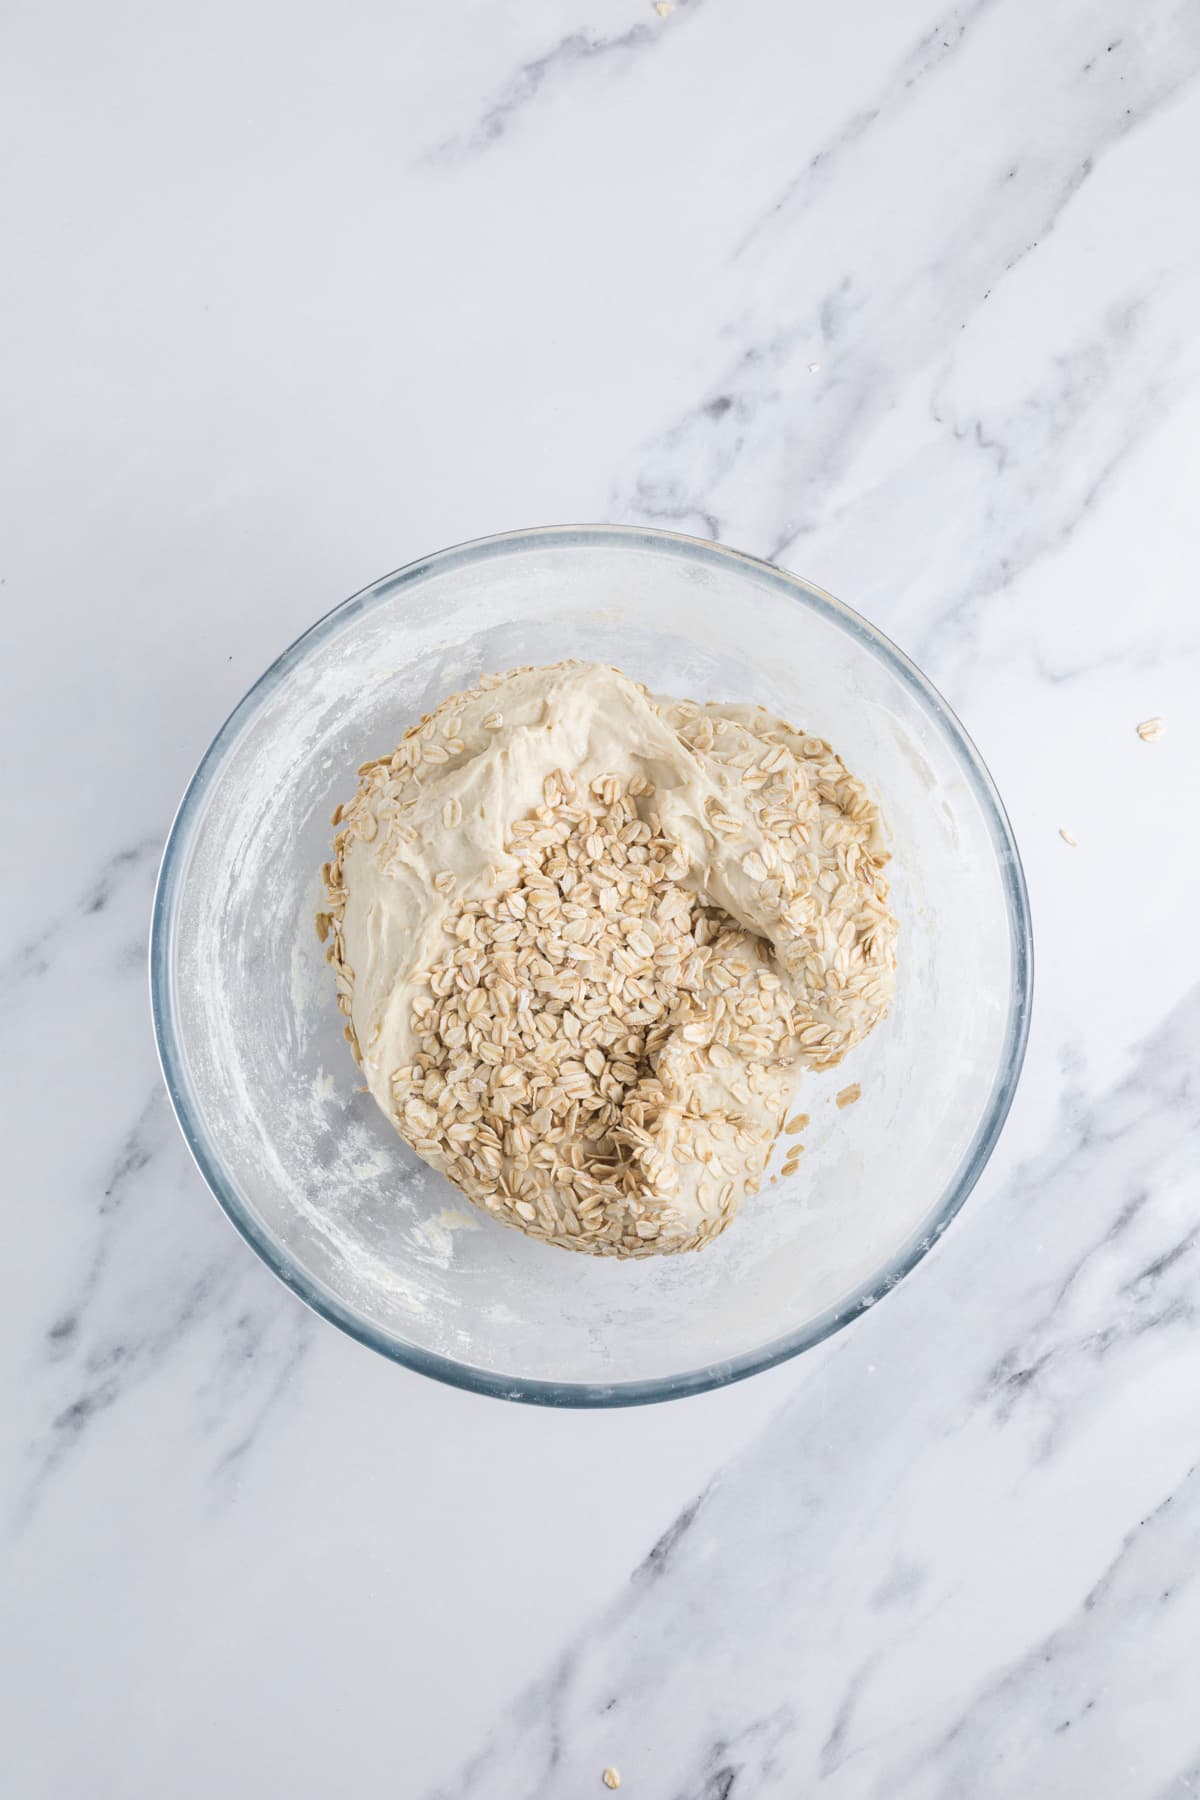
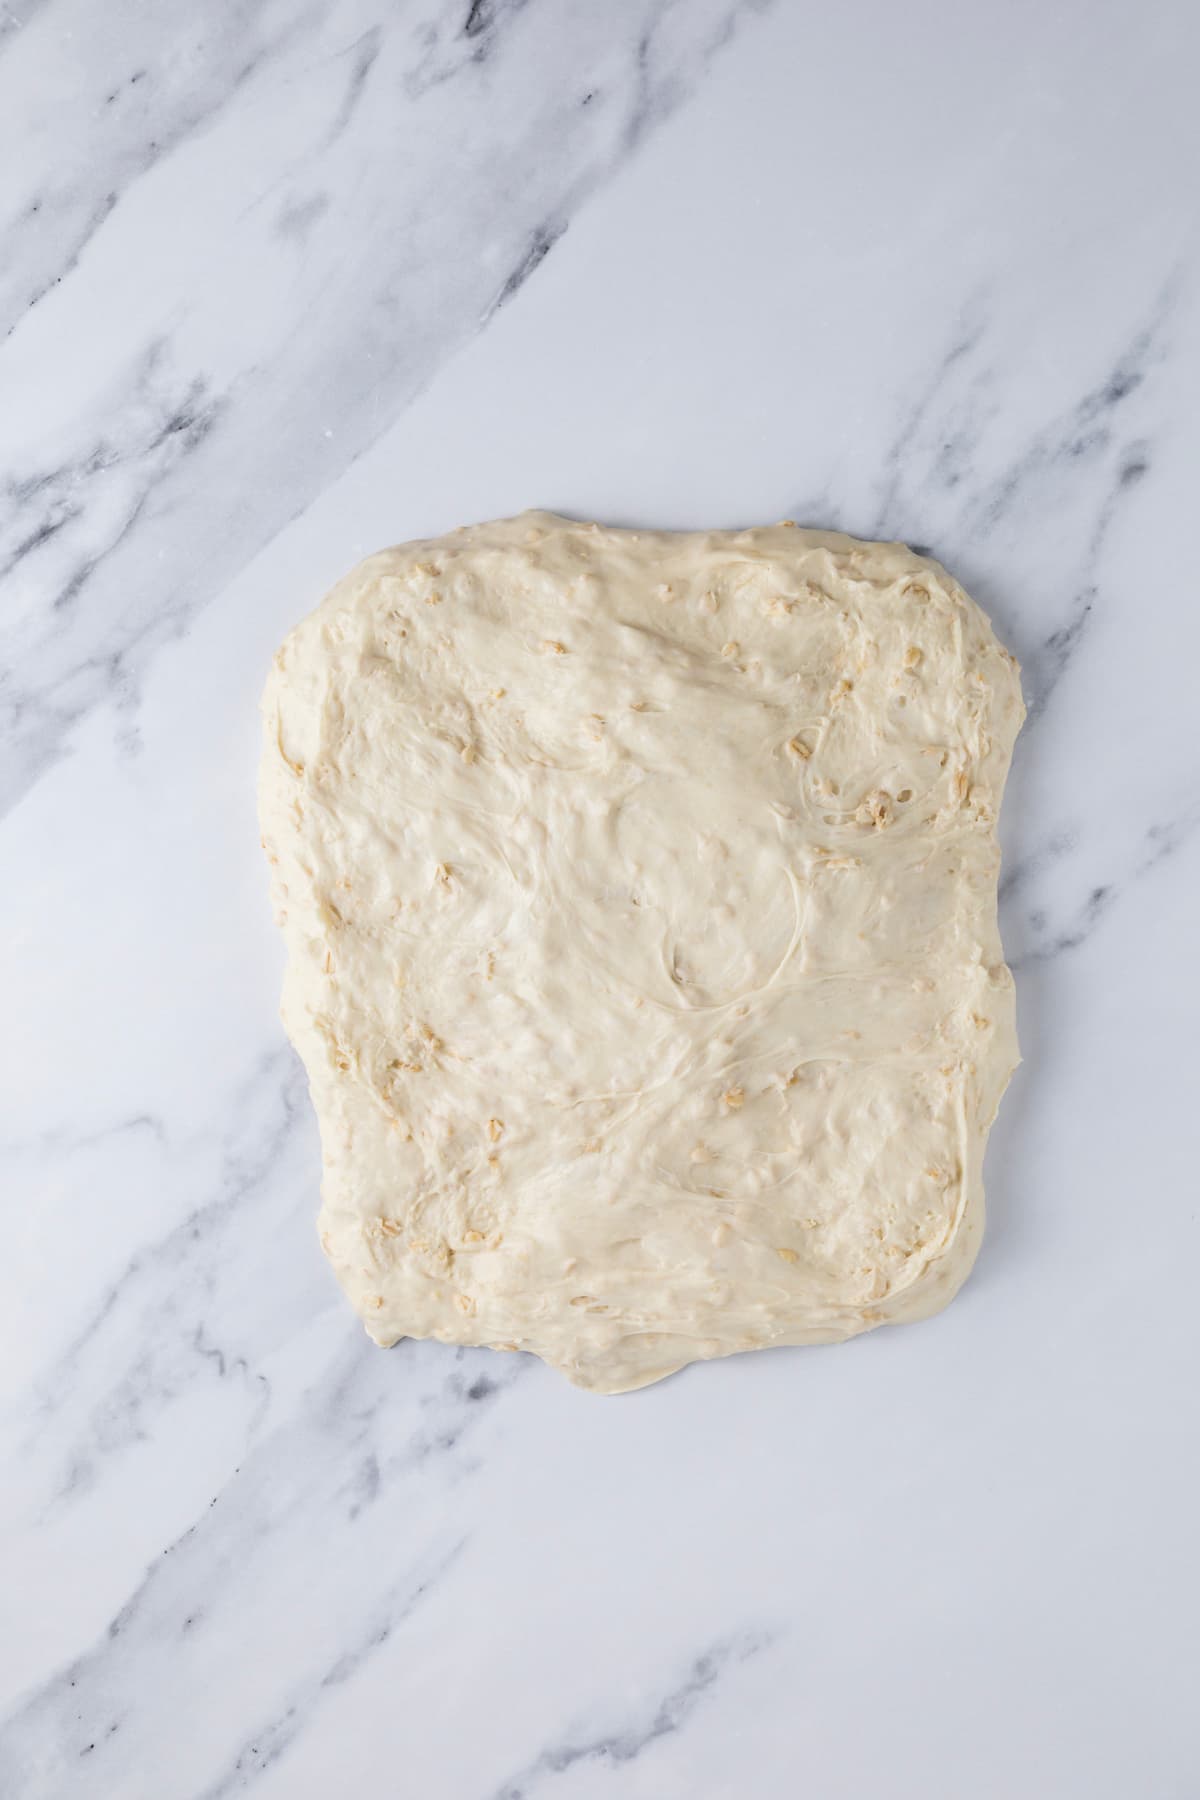
During the stretch and fold phase, you need to incorporate the rolled oats, ideally during the second or third set, allowing them to distribute evenly without weighing down the dough.
Over the course of four sets of folds, spaced 15 to 30 minutes apart, the dough will develop gluten and elasticity.
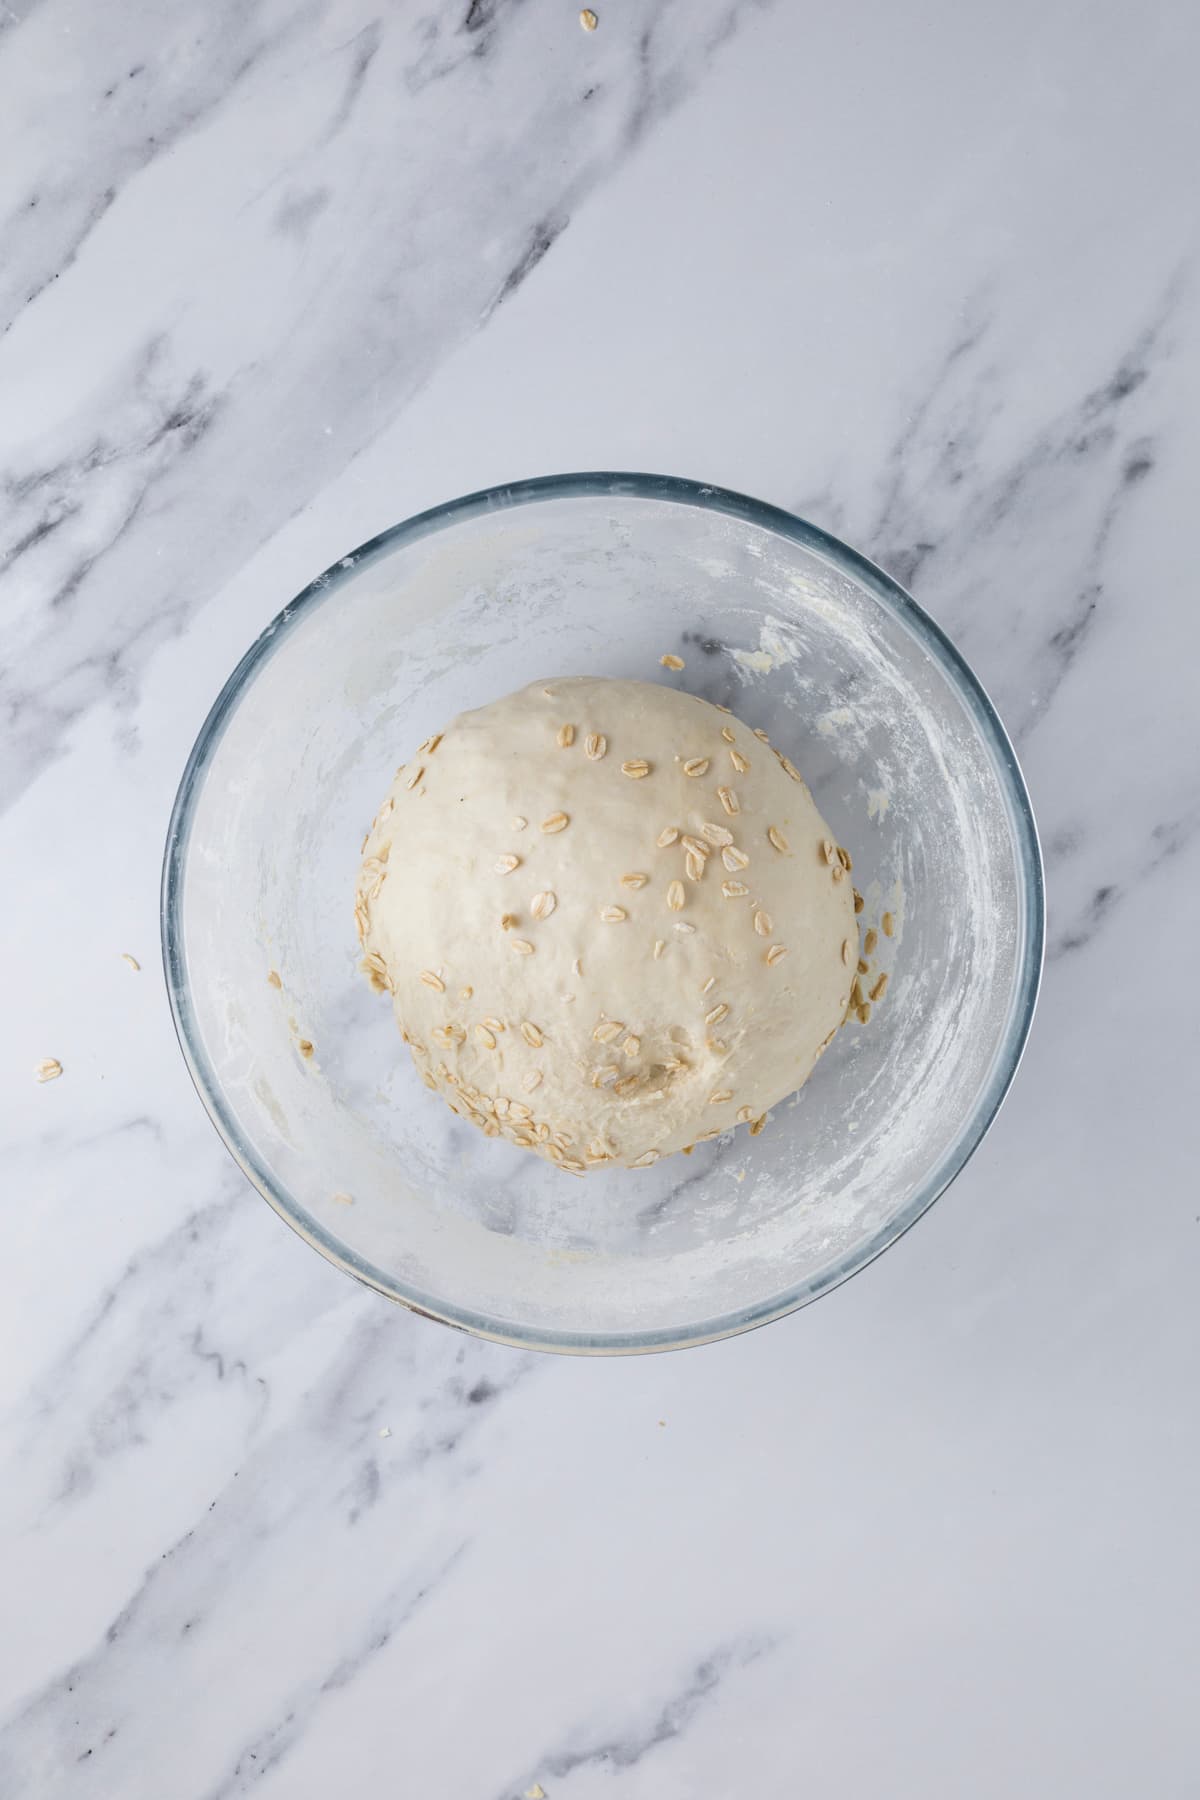
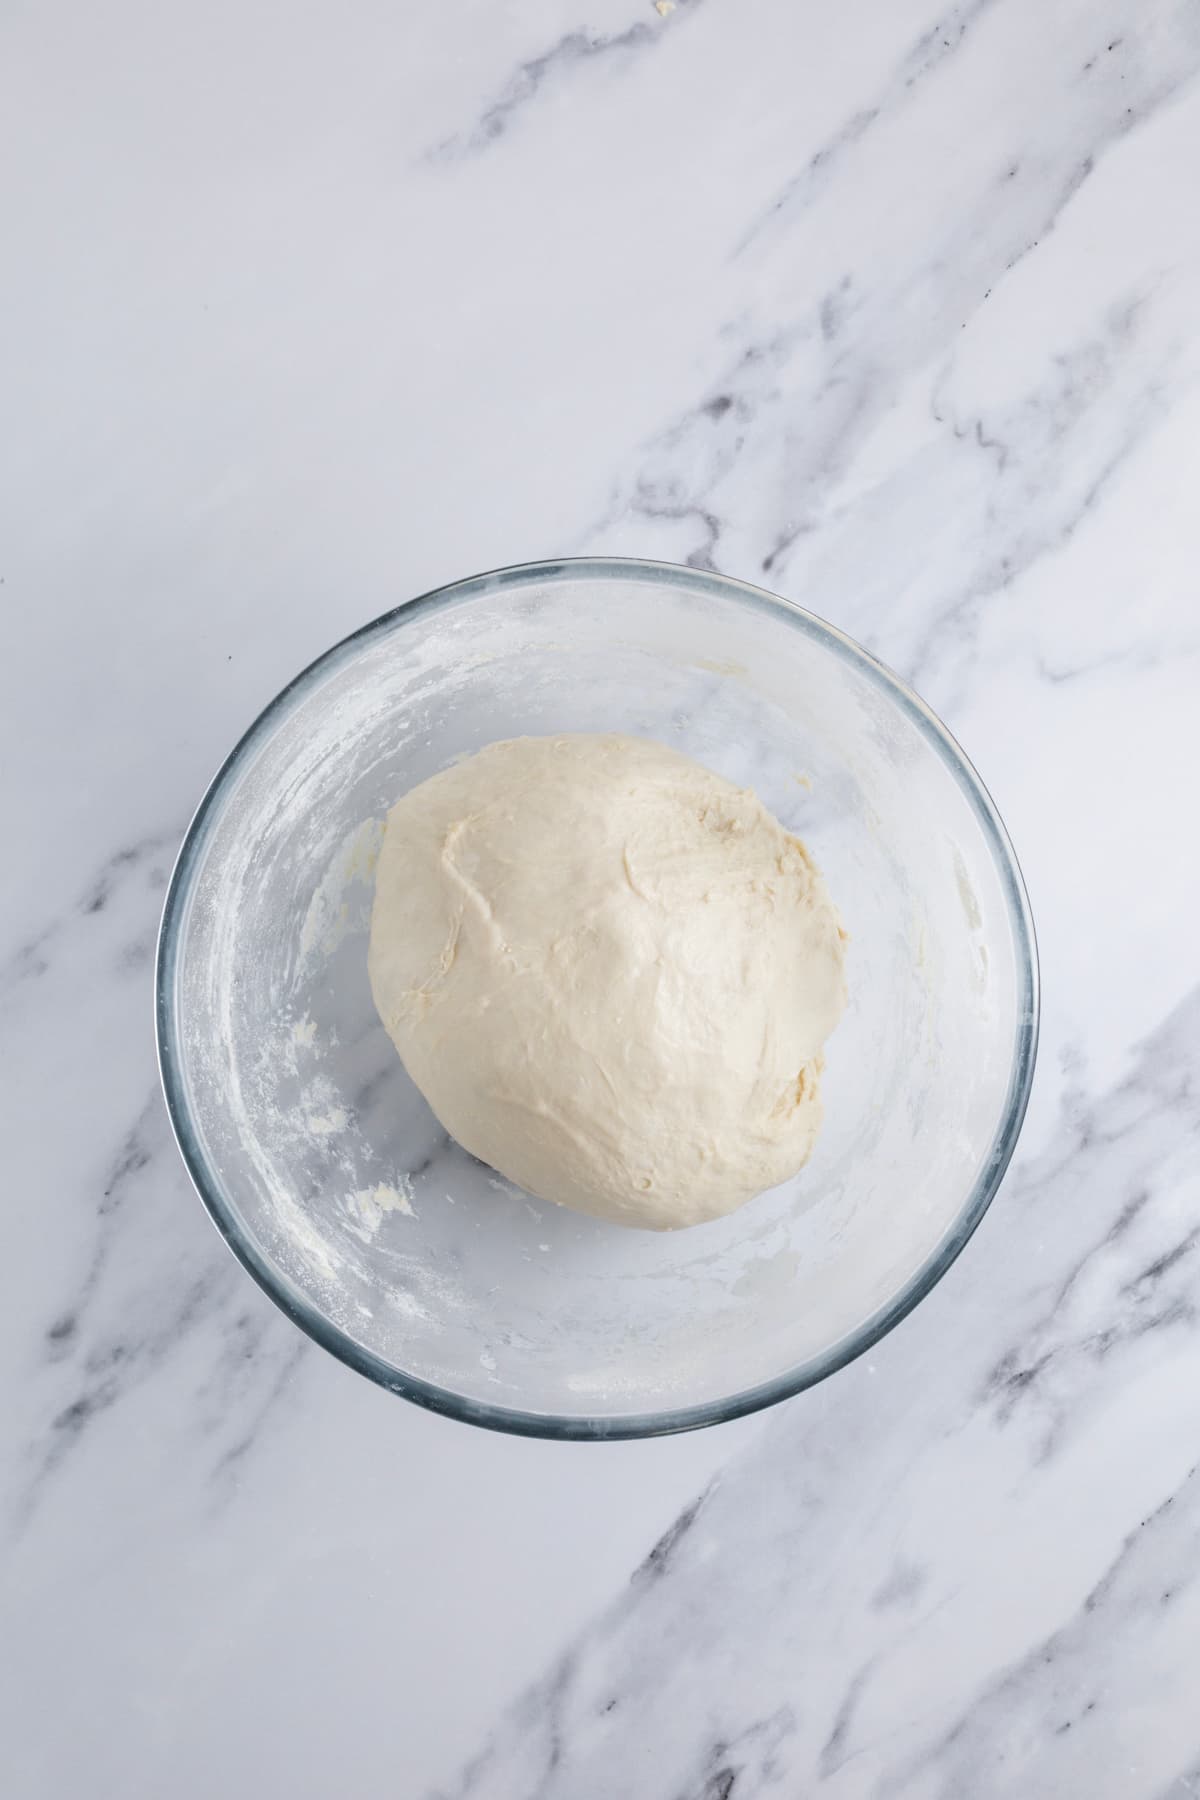
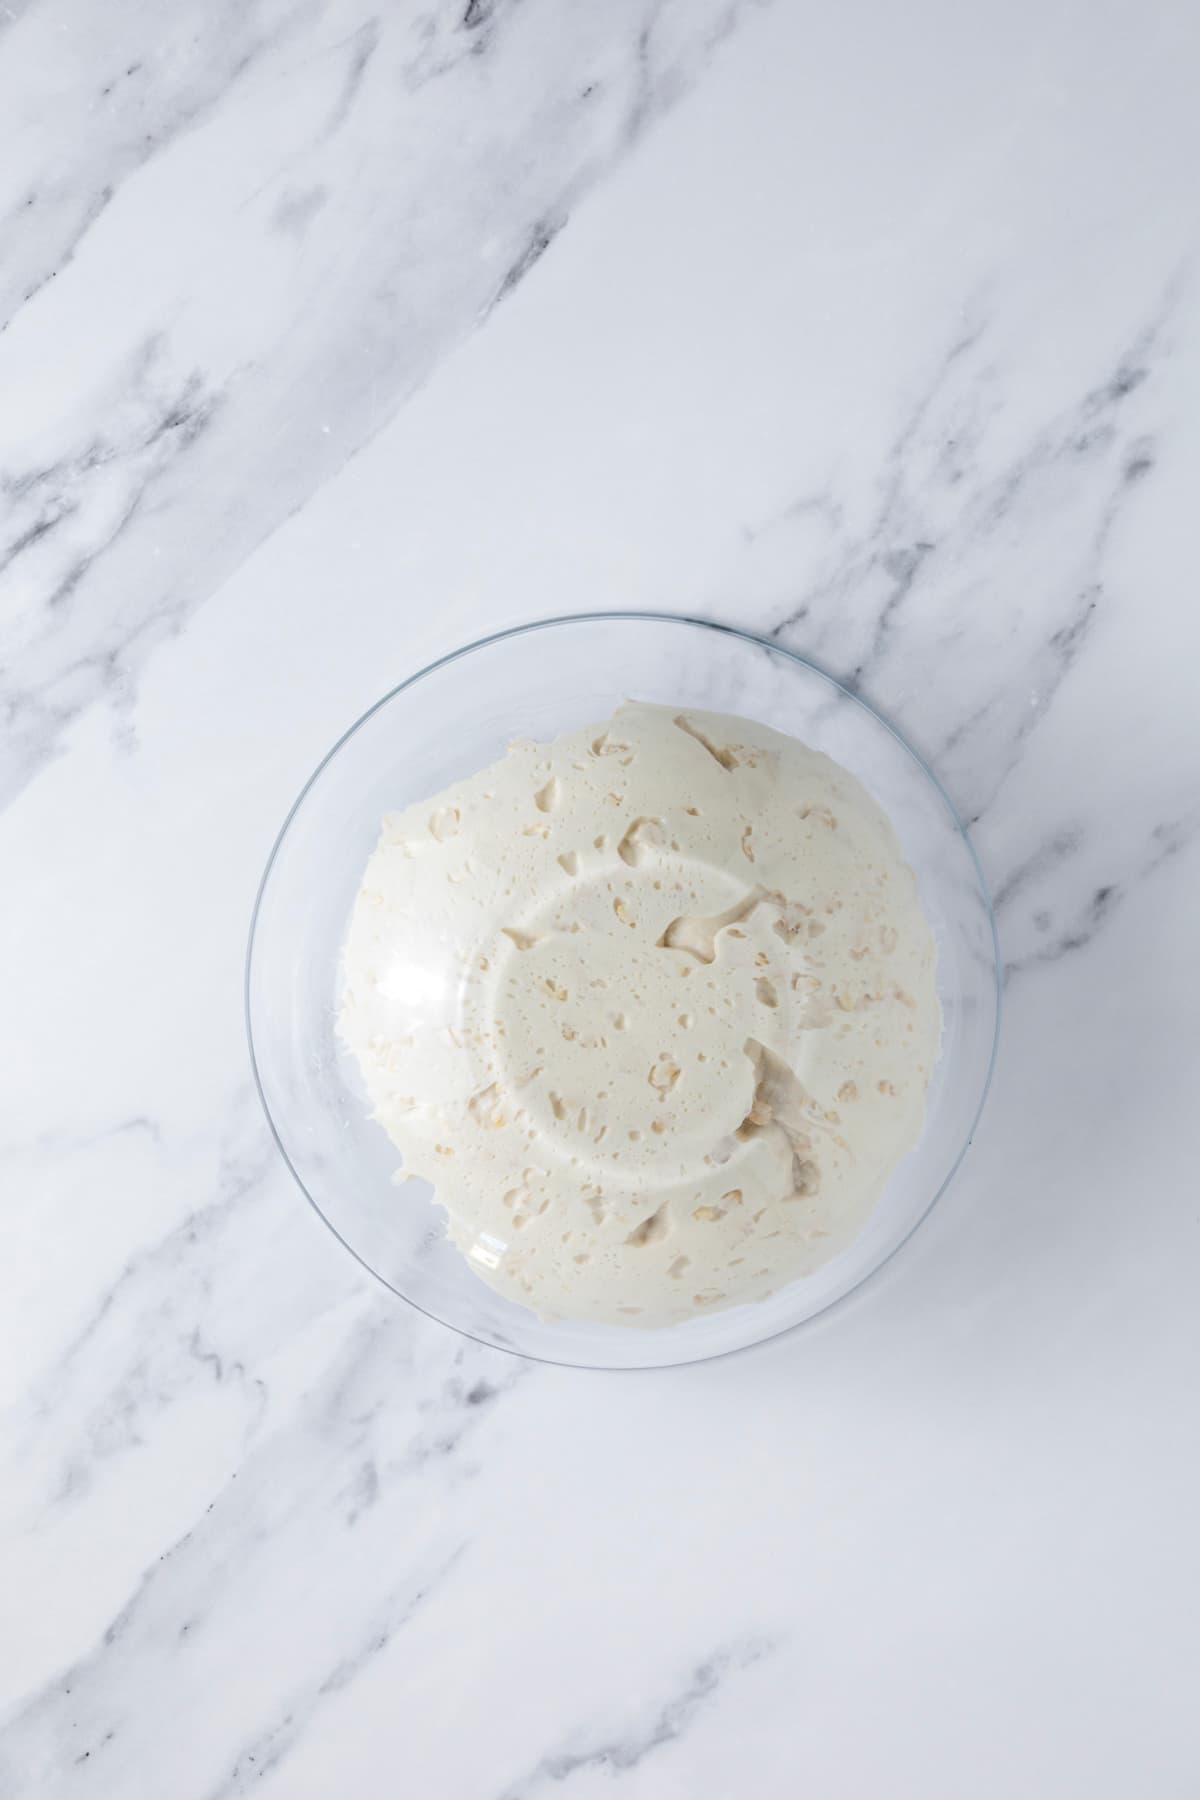
Once you’ve finished stretch and folds, cover the bread dough and let it bulk ferment at room temperature until it’s double. This dough is literally like a giant marshmallow at the end of bulk fermentation.
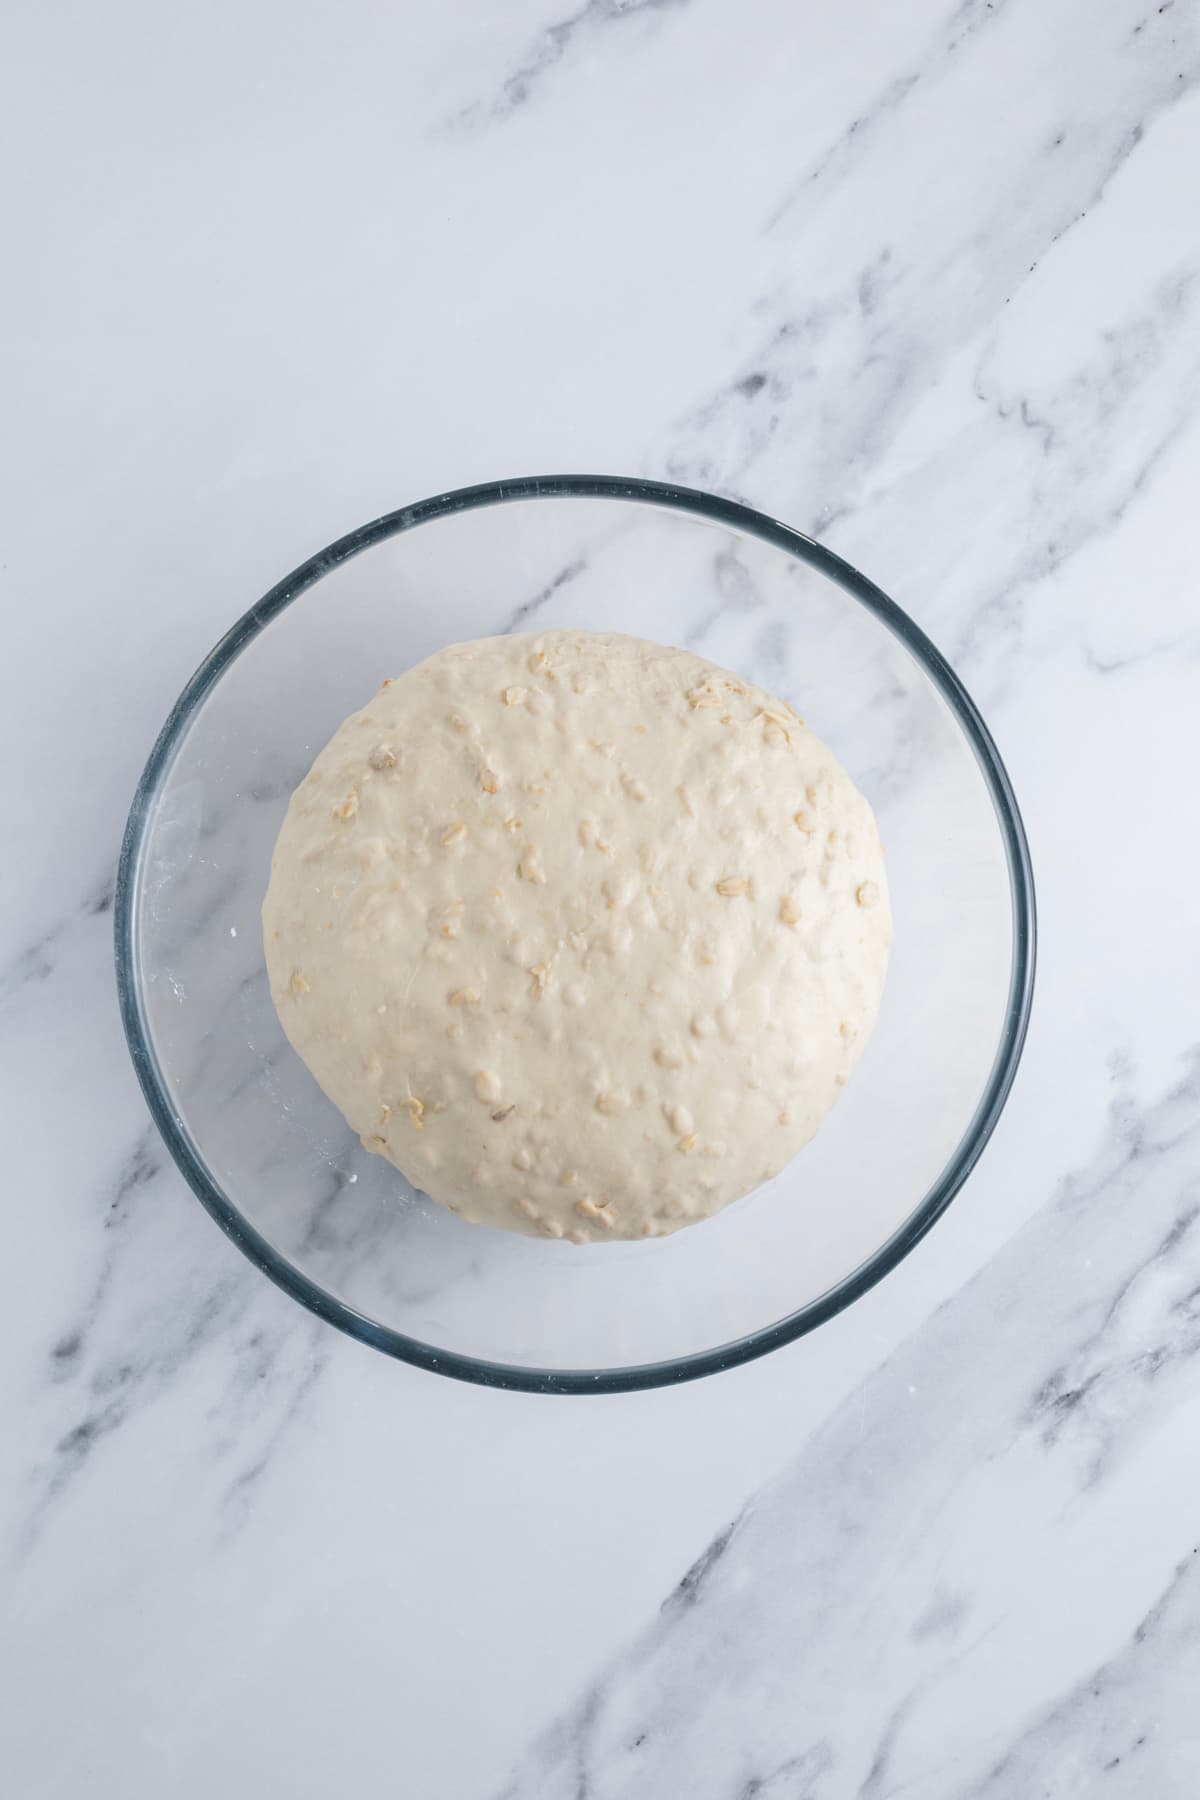
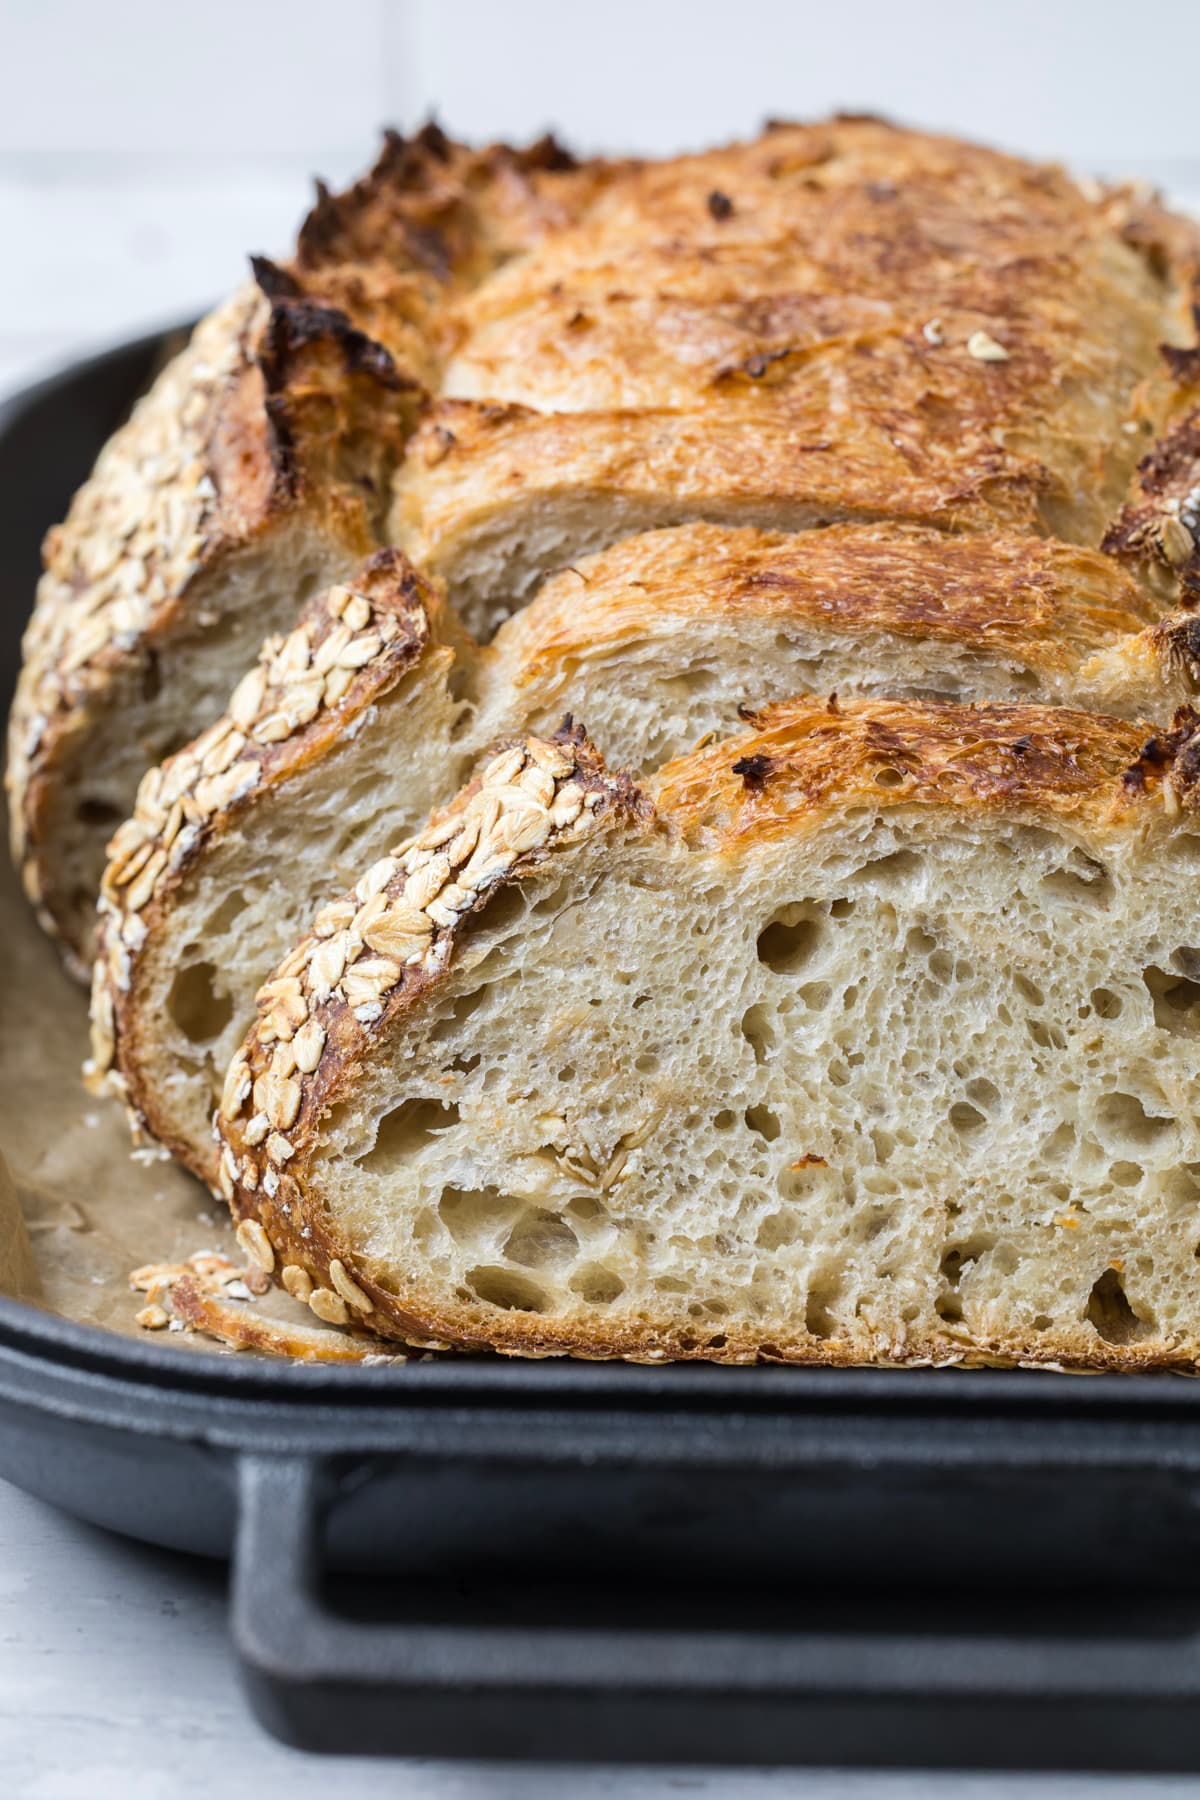
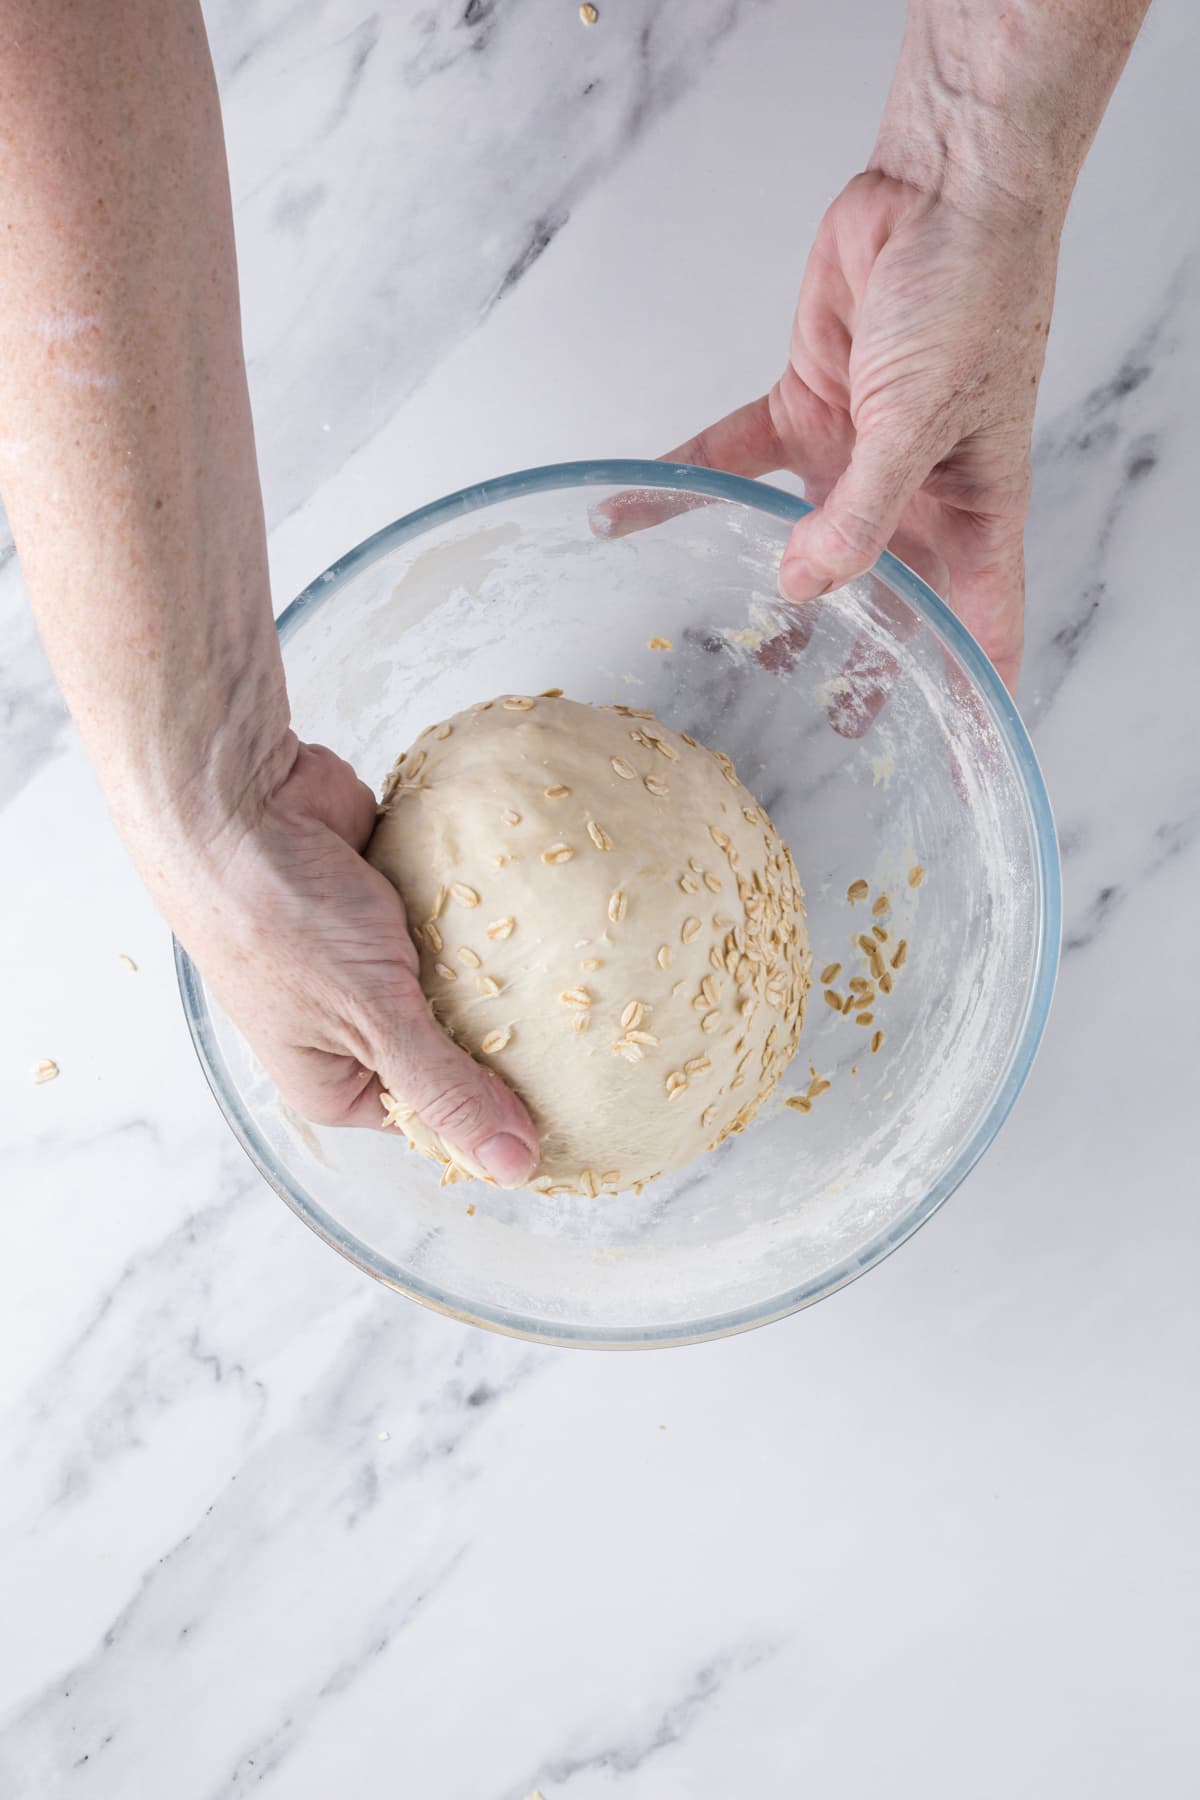
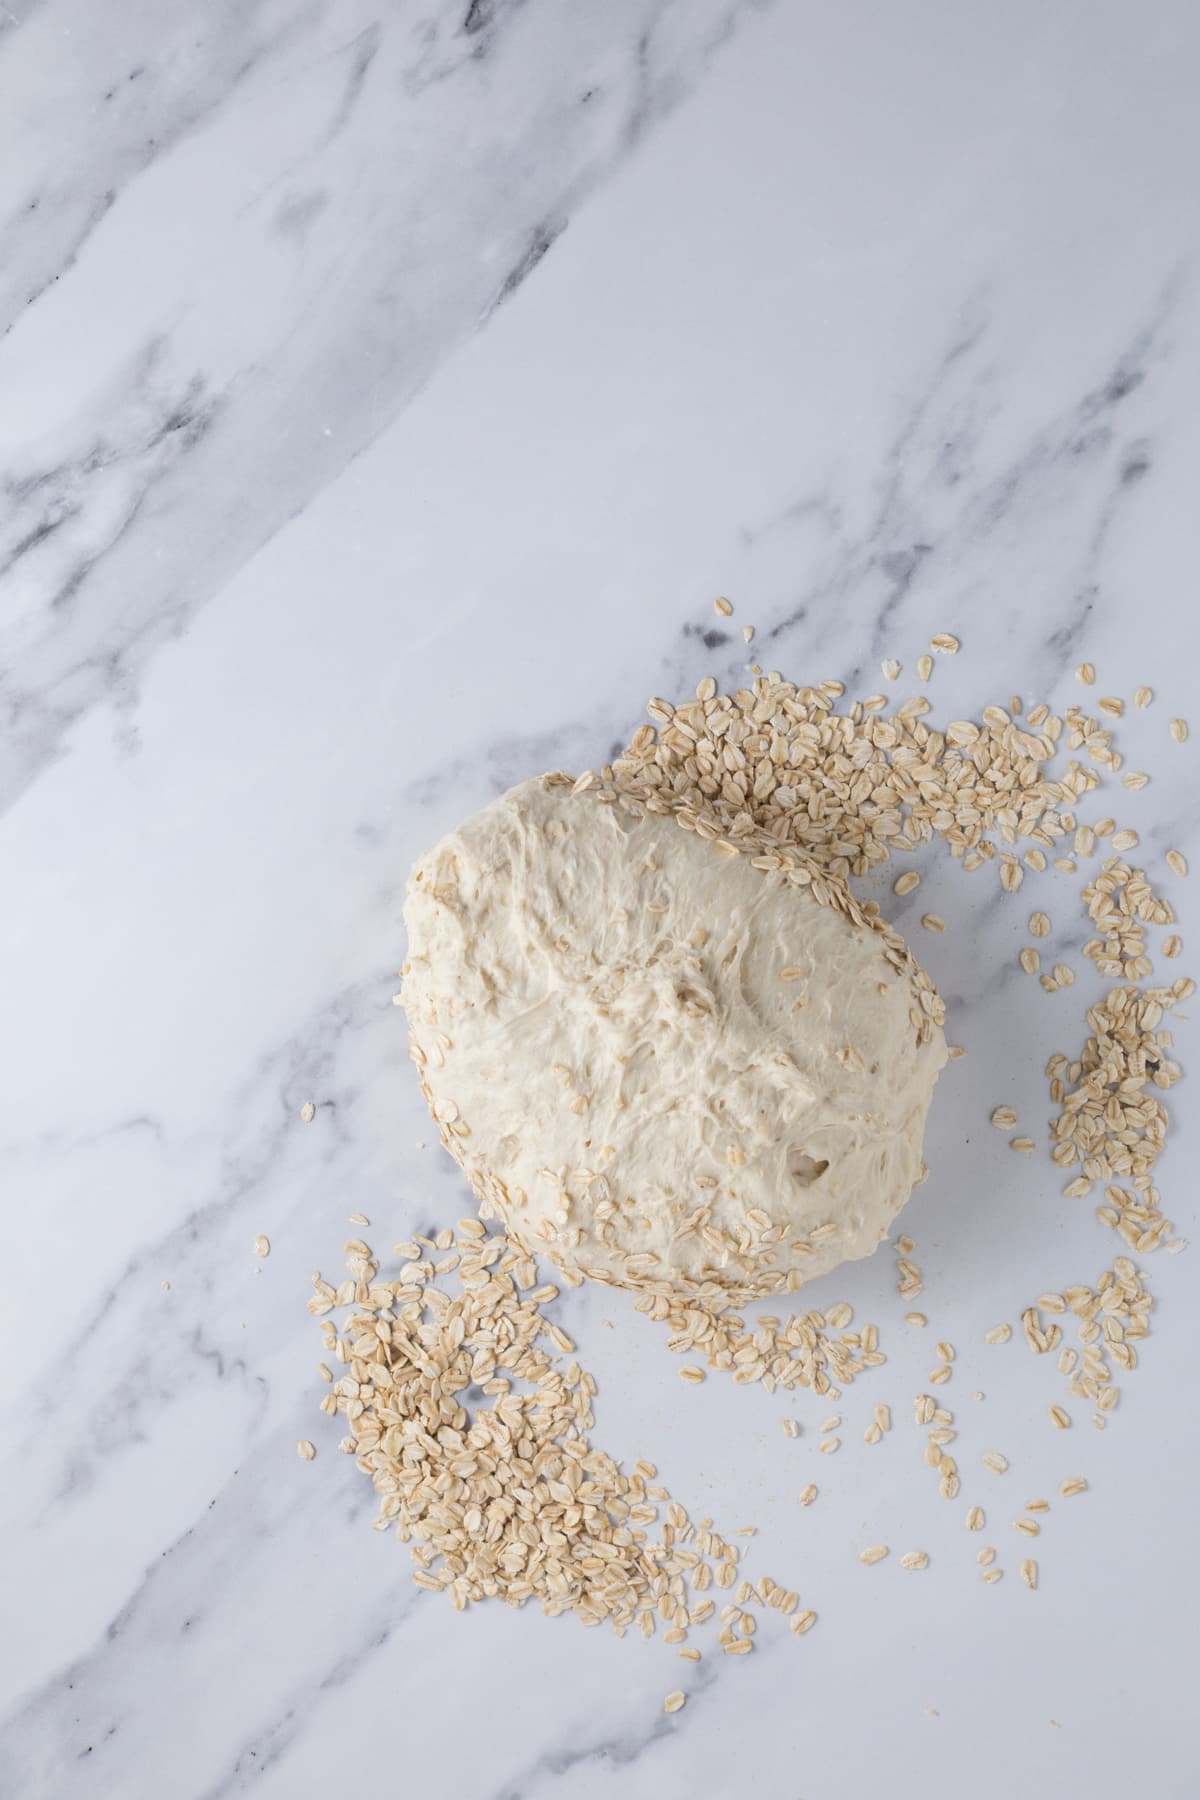
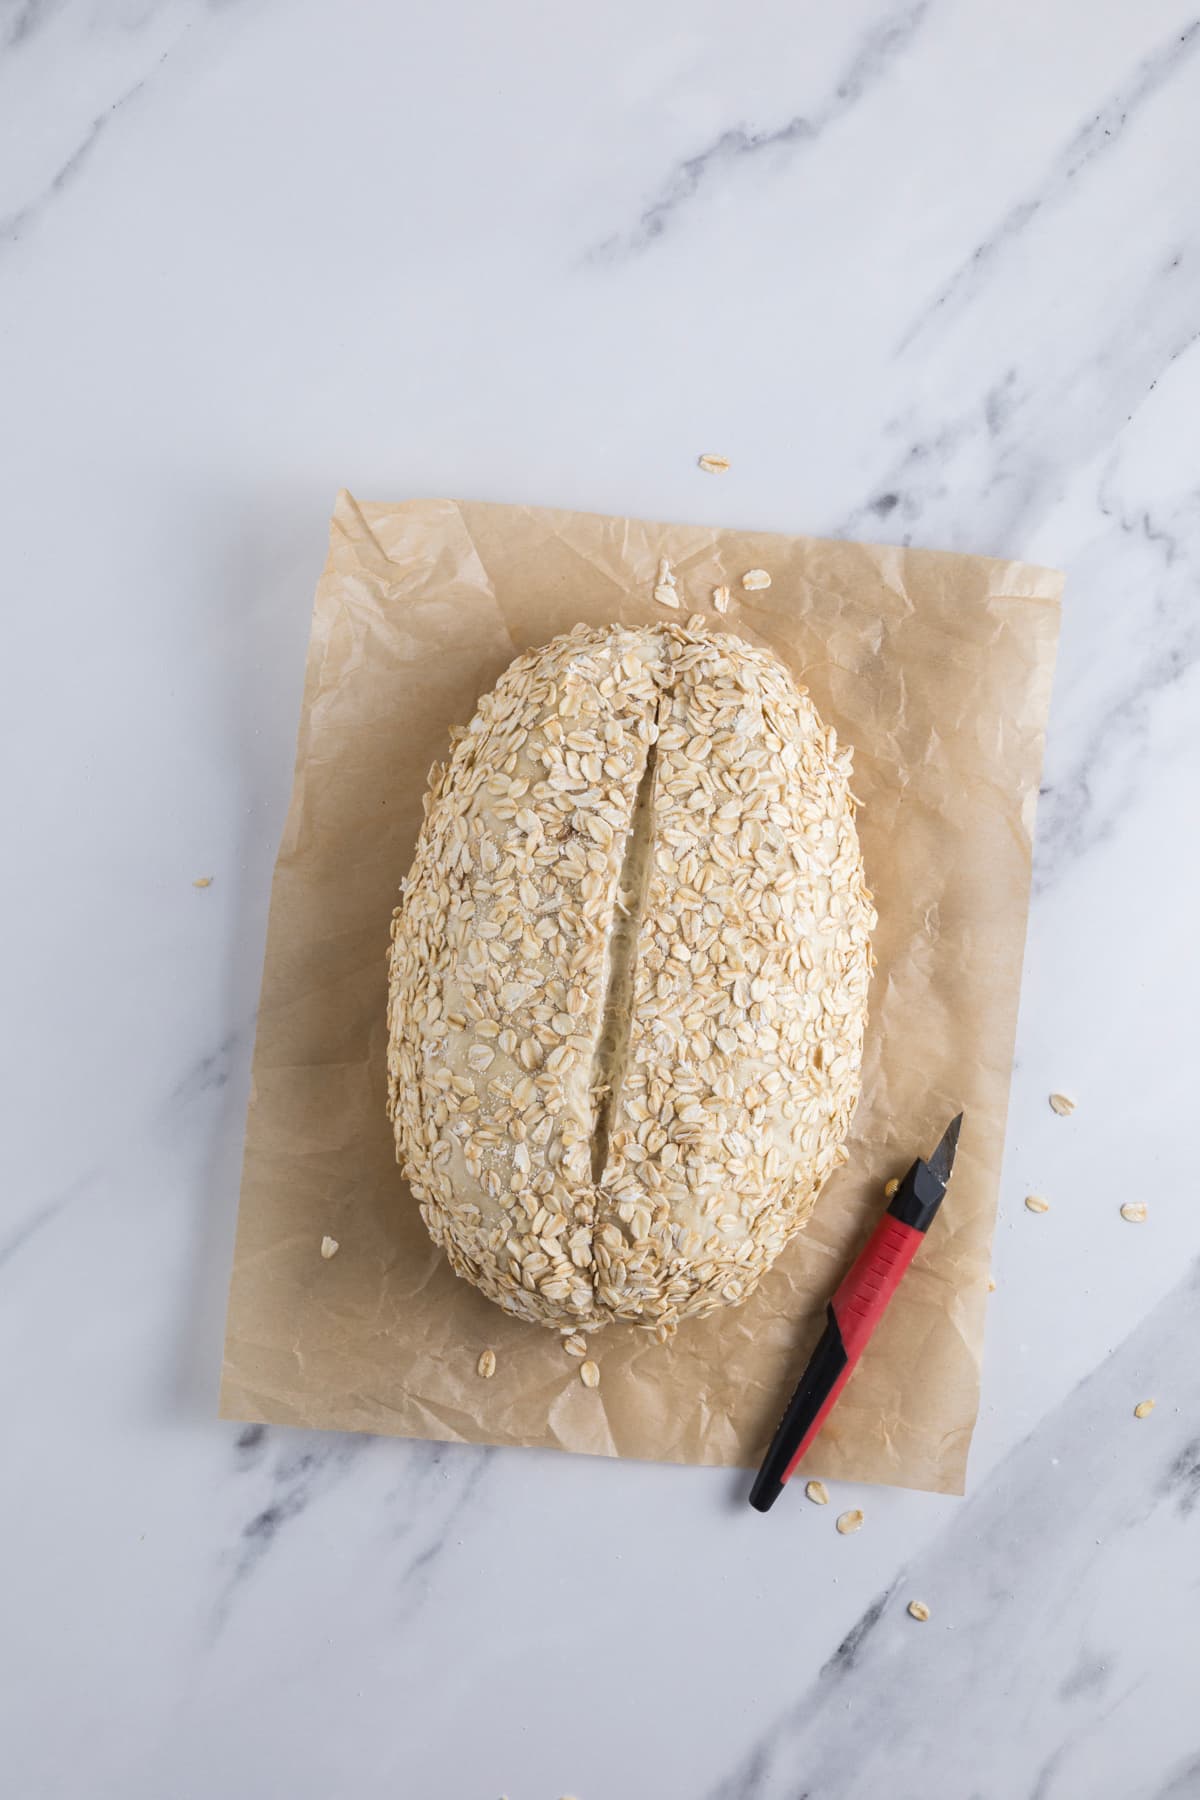
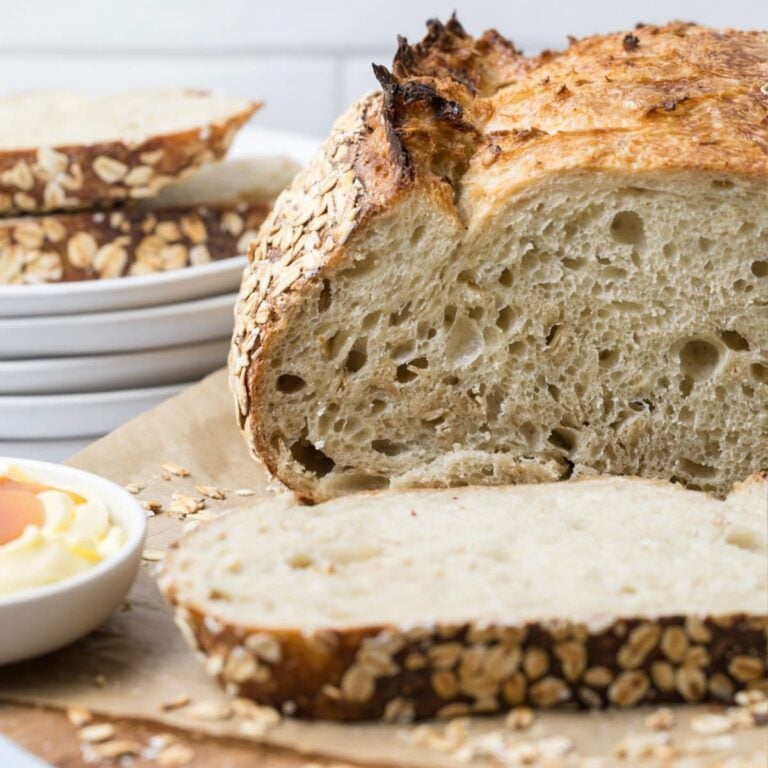
Once the fermenting process is done, you’ll need to shape the dough (I prefer a batard in this case). There are two ways you can add rolled oats to the top of the dough. I like to roll the shaped dough into a pile of rolled oats on the counter. But if you don’t want to do this, you can sprinkle the rolled oats onto the bottom of your banneton before placing the dough on top, seam side up.
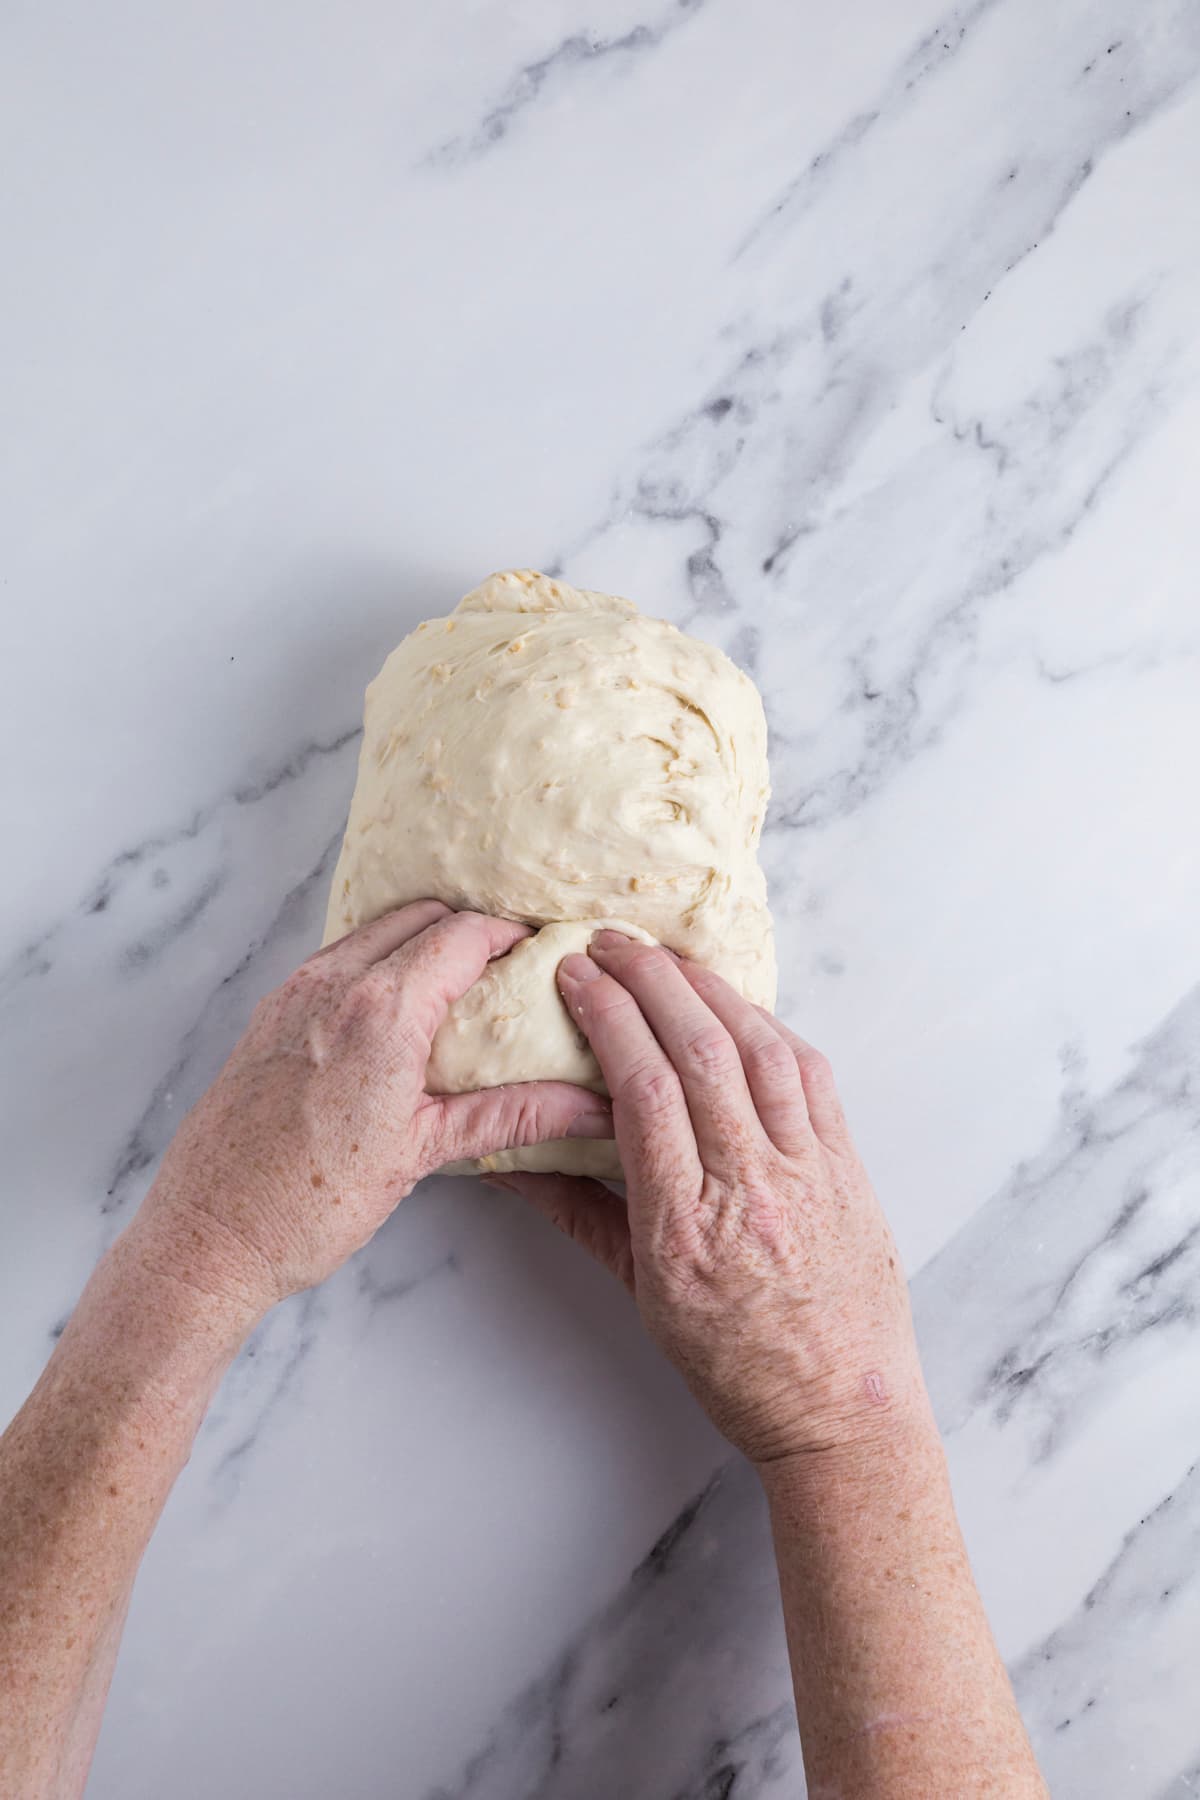
This second technique is how I started doing it when I first wrote this recipe, but now I like to roll the whole loaf in rolled oats and this is easier to do on the counter. In the photo below, I’ve rolled the top of the loaf in oats and placed it seam side down in the banneton, placing more oats on top (so you can’t really see the seam).
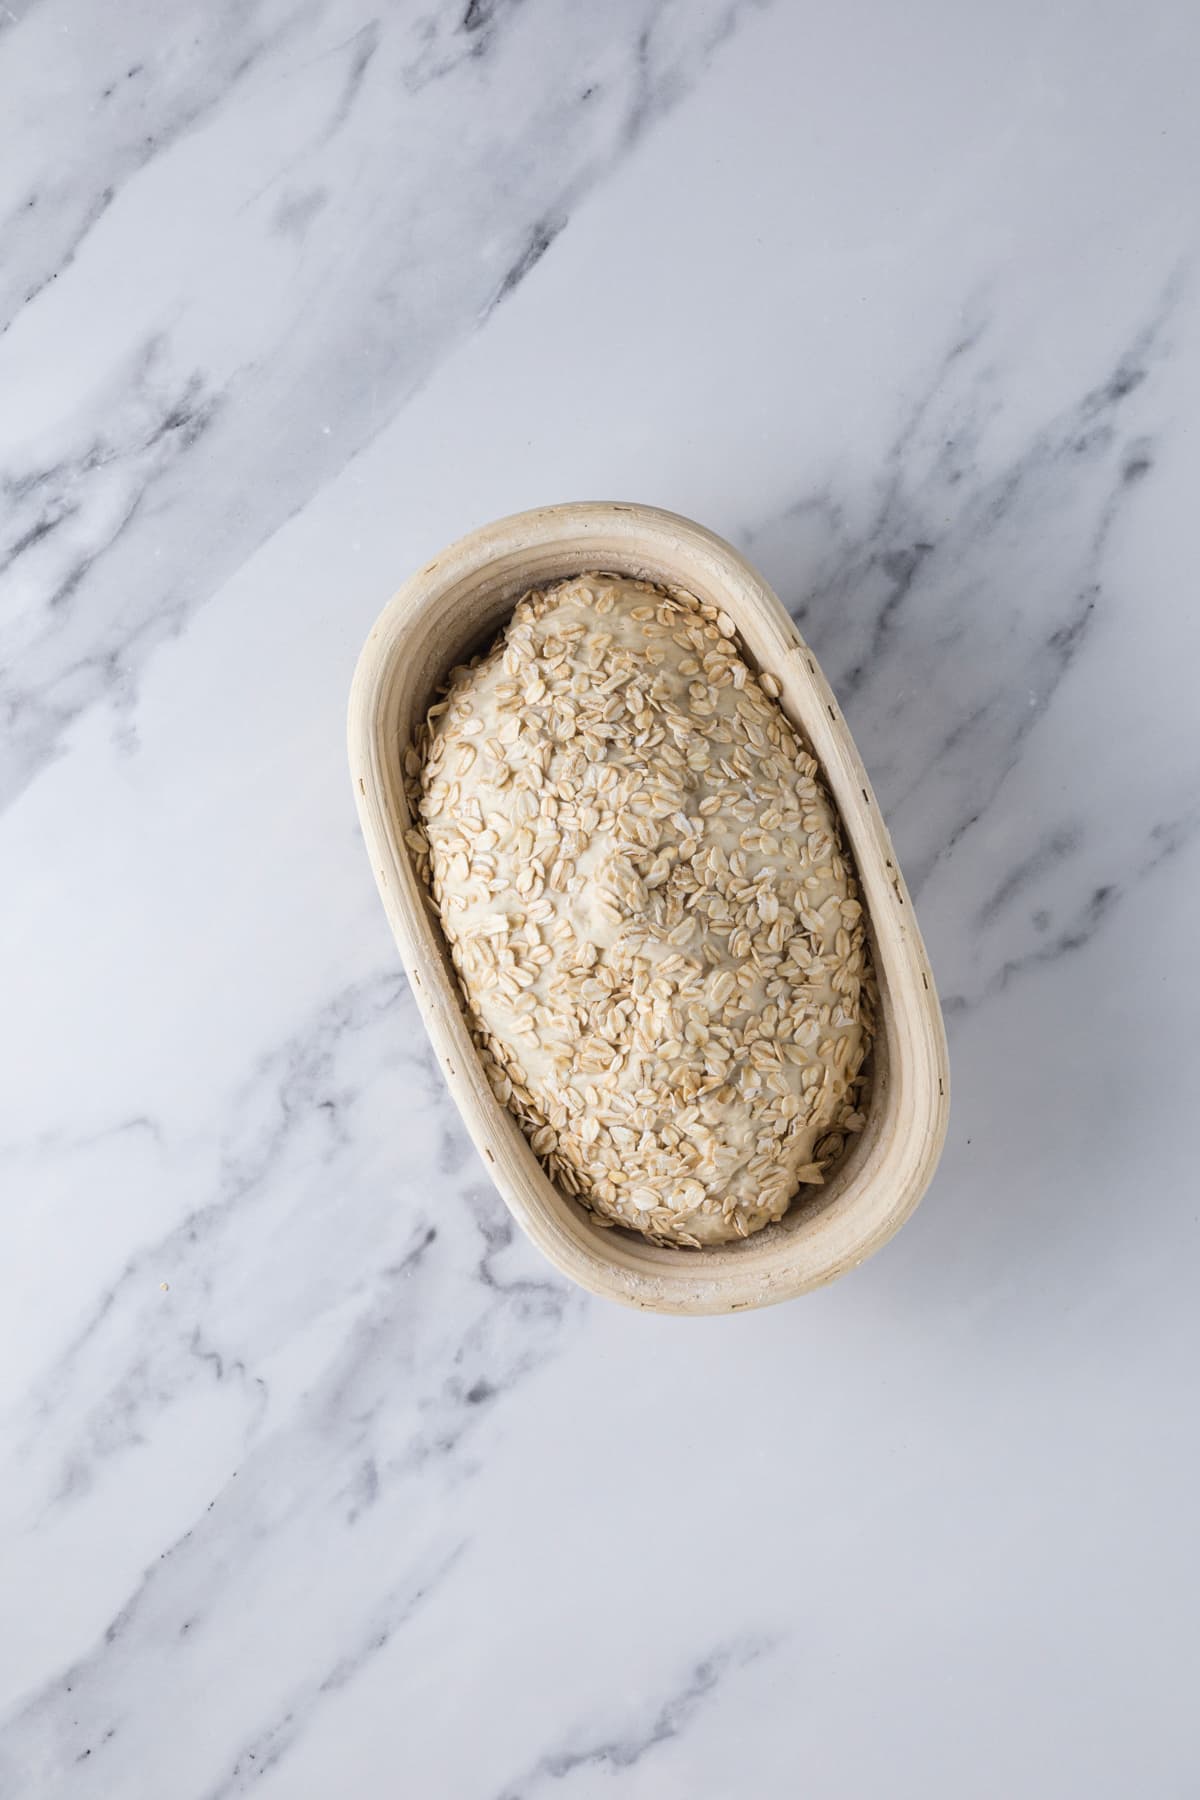
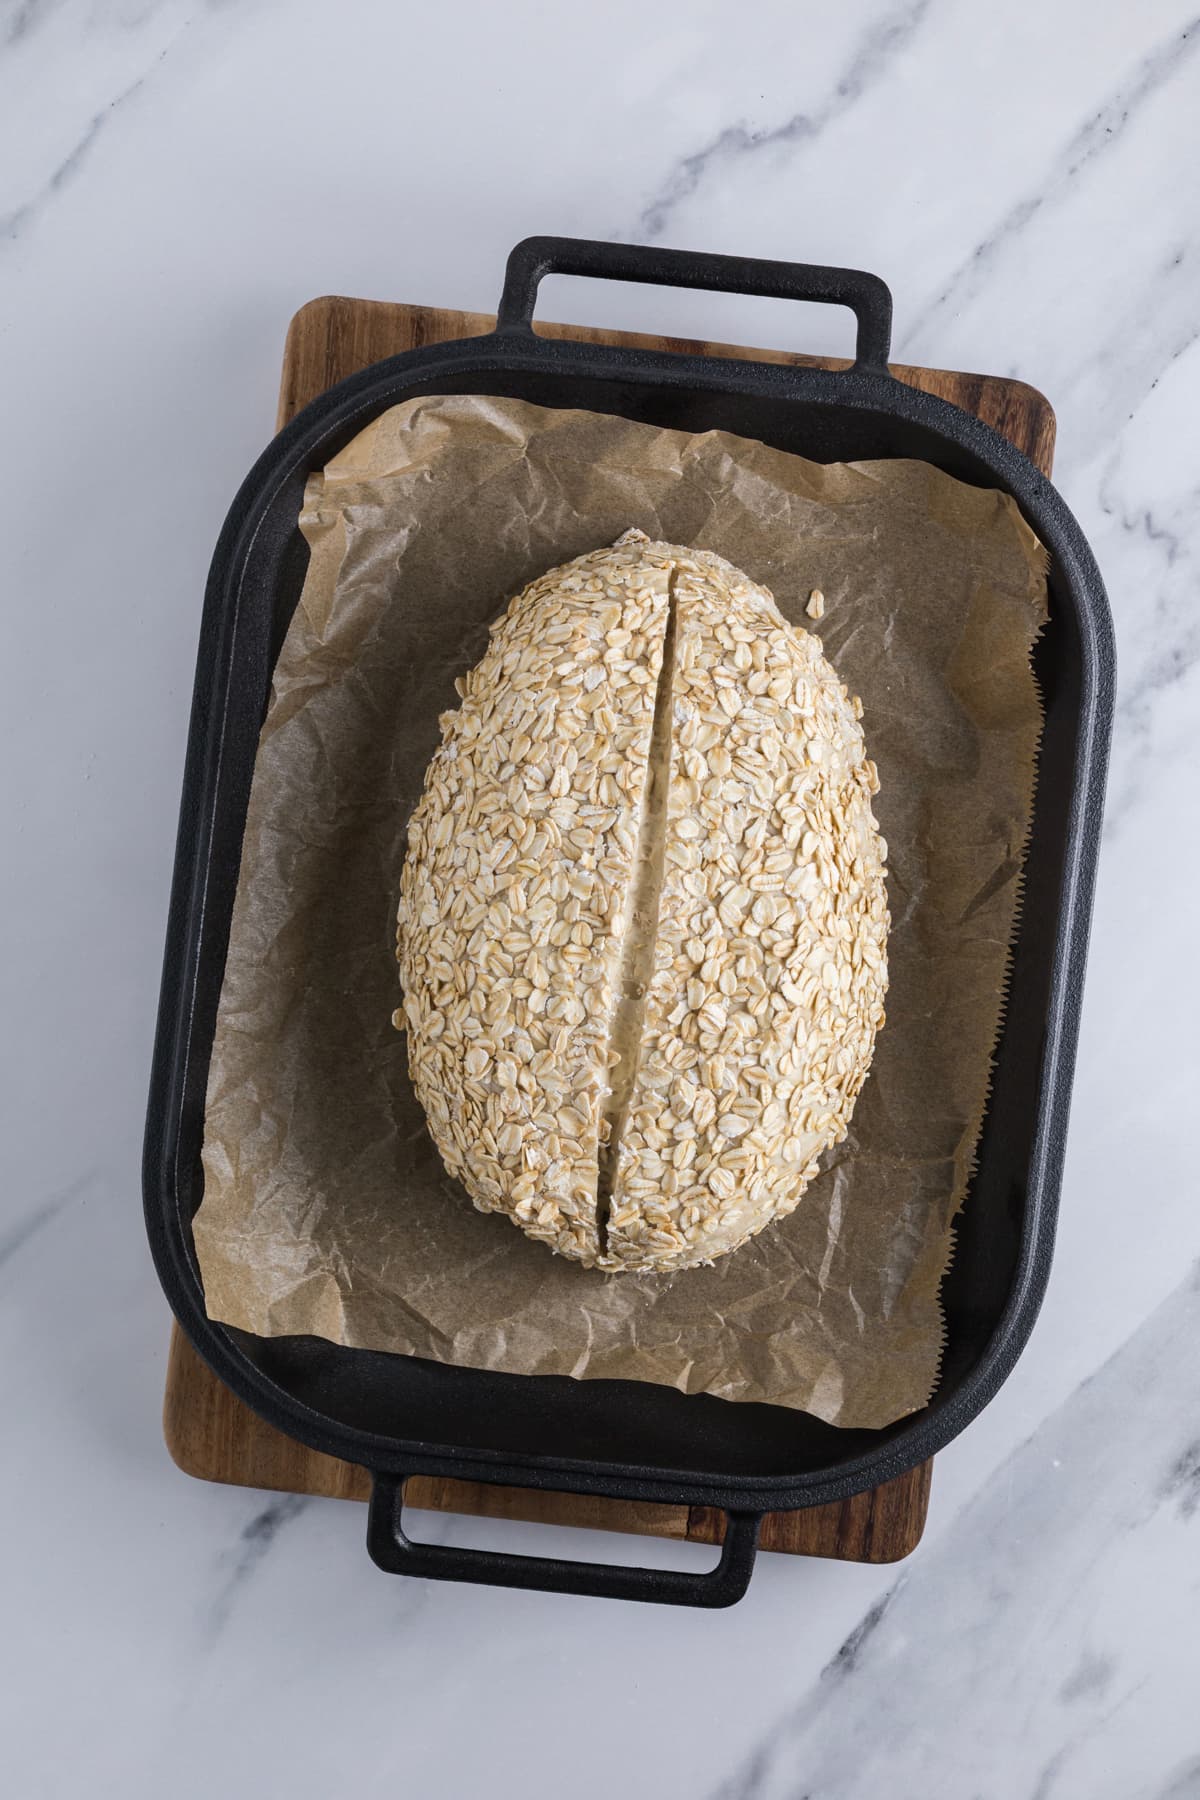
Once you’ve cold fermented the loaf in the fridge, you’ll need to transfer the cold dough into a preheated Dutch oven at 230°C (450°F) to encourage maximum oven spring.
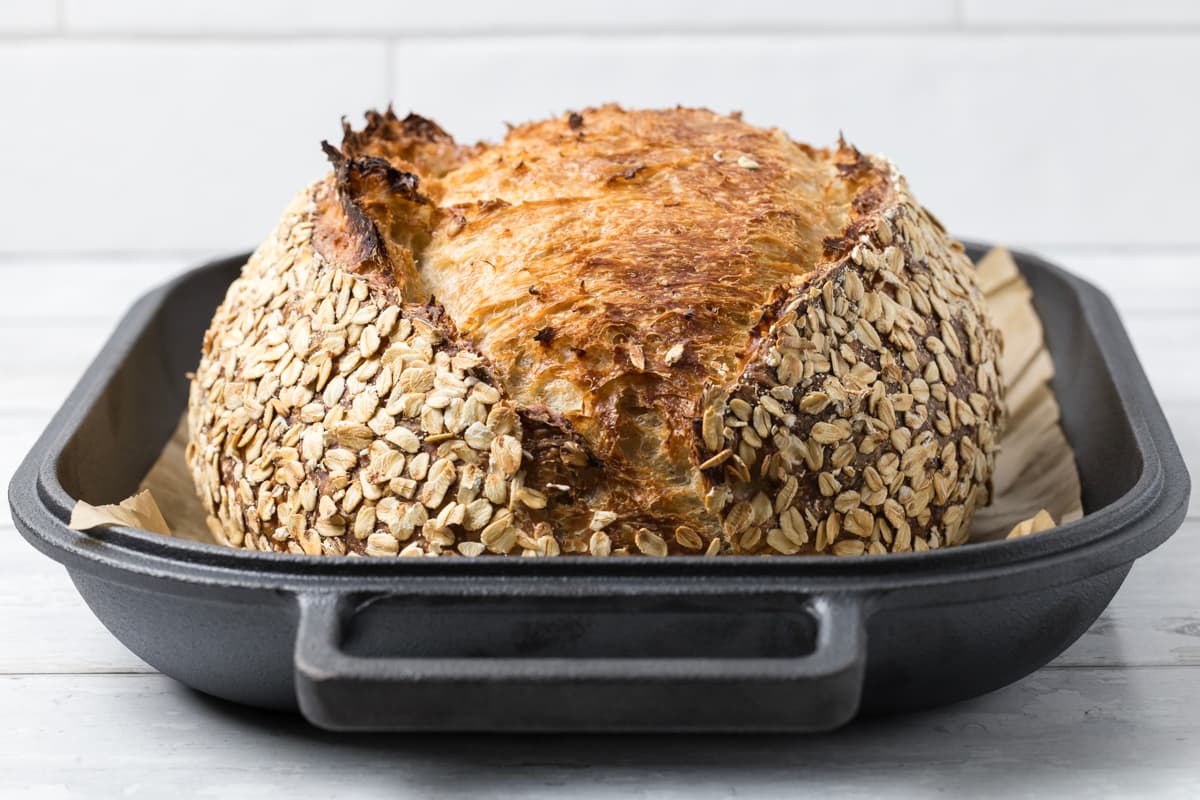
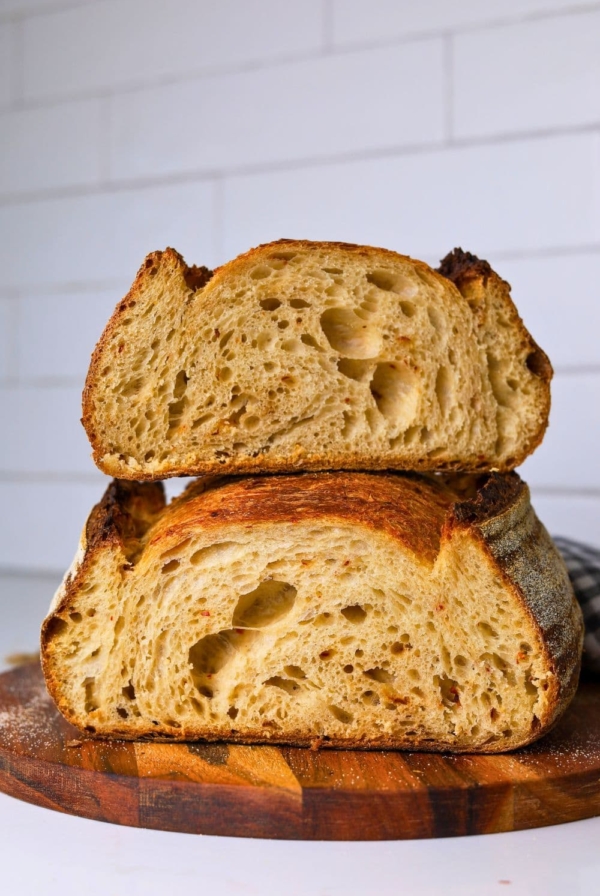
A simple score allows the loaf to expand naturally, while baking with the lid on traps steam for a crisp crust and open crumb. The lid is removed toward the end of the bake to achieve a rich golden finish at 210°C (410°F). Once baked, let the bread cool completely on a wire rack to allow the crumb to set, rewarding your patience with a beautifully textured loaf studded with nutty oats and rich sourdough flavor.
Kate’s Pro Tip
Bake In A Loaf Pan
This sourdough honey oat bread is perfect to bake in a loaf pan (I recommend a USA Pan 1.5 pound loaf pan). This makes it perfect for sandwiches and toast! It is a sweeter flavored bread than a plain sourdough loaf, however despite the honey flavors, it can still be paired with savory flavors like poached eggs and bacon – and it makes the most delicious grilled cheese (just like this sourdough sandwich bread)!
Baker’s Timeline
| TIME | PROCESS |
|---|---|
| 9 am | Premix and autolyse for around an hour, forming up the dough and leaving to rest for another 30 minutes before stretch and folds. |
| 11 am | 1st stretch and fold |
| 11.30 am | 2nd stretch and fold – add half the oats (you can of course add all the oats at once if you prefer). |
| 12 pm | 3rd stretch and fold – add other half of the oats. |
| 12.30 pm | 4th stretch and fold |
| 1 pm | Bulk fermentation at room temperature remembering that the honey will speed up fermentation. |
| 6 pm | Shape dough into a batard, roll the loaf into rolled oats and place into banneton and then into fridge for cold fermentation. |
| 9 am | Wake and bake! The next morning, you can get up, make a coffee and bake your honey oat sourdough loaf! |
Recipe Variations for Honey Oat Sourdough Bread
There are a few recipe variations for Honey Oat Sourdough Bread that you may enjoy. Why not experiment and see if you like them! You might also enjoy this sourdough maple oat sandwich loaf too!
I’ve kept the flour modifications at 100g because this will not affect the amount of water you use, nor the oven spring you are able to achieve.
- Honey Oat with Rye – Replace 100g of the Bread Flour with 100g of rye flour for a different flavor.
- Honey Oat with Wheat – Replace 100g of the Bread Flour with 100g of freshly milled wheat berries for a real hearty country sourdough taste.
- Honey Oat Sesame – Add some sesame seeds to the rolled oats when you add them to your banneton for a different flavor twist.
- Honey Muesli Loaf – you could really add some goodness to your bread and replace the rolled oats in the sourdough with your favorite toasted muesli for a delicious breakfast loaf. You could still top your loaf with plain rolled oats.
How To Store and Freeze
This loaf is absolute perfection to eat fresh, at least within 24 hours of baking. I like to store the leftovers from this loaf under a glass cloche for up to 3 days. It’s best to eat toasted if you’re eating it past 24 hours. You can freeze this honey oat sourdough loaf successfully by following these instructions for freezing sourdough bread.
Other Sourdough Recipes Using Honey


Honey Oat Sourdough Bread Recipe
Equipment
- Mixing Bowl
- Banneton
- Dutch Oven
Ingredients
- 50 g Sourdough Starter , Fed and Bubbly
- 500 g Bread Flour
- 50 g Rolled Oats, plus extra for topping
- 30 g Honey
- 350 g Water
- 10 g Salt
Instructions
- Fermentolyse:Weigh out your starter, water and honey in a glass or ceramic bowl. Mix them together so that the honey is dissolved in the water (or at least really well distributed).Then add your flour and salt and mix altogether with the end of a wooden spoon. The dough will be fairly shaggy and only just brought together (see photo).Cover the dough with cling film or a tea towel and let it sit for around an hour.
- Forming Up Your Dough:Work your way around the bowl, grabbing the dough from the outside, stretching it up and over itself until a smooth ball is formed. You shouldn't need more than about 20 folds to form the ball.Once the dough has formed into a smooth ball, pop the cling film back on and let it rest for 30 minutes.
- Stretch & Fold:You need to add the rolled oats to your dough during the stretch and fold phase. It's very easy to do! Try to add the oats around the second or third set of stretch and folds. So do your first set of stretch and folds with the dough as is and then add the oats on the second (or third) set depending on how your dough is behaving. Try to do around 4 sets of stretch and folds with around 15 to 30 minutes between each set.
- Bulk Ferment:Once you've finished your stretch and folds, cover the dough and let it bulk ferment at room temperature until it doubles. The time this takes will depend on the temperature in your home. (see notes)
- Shaping Your Dough:Once your dough has finished its first ferment, it's time to give it some shape and surface tension. I think this recipe lends itself to a batard however it's completely up to you what shape you would like.Before you place your dough into your banneton, add a generous sprinkling of rolled oats. Place your shaped dough on top of the oats, seam side up. The oats will stick to the top of your dough as it cold ferments (you can also roll the loaf in rolled oats on the counter top).
- Cold Ferment:Now your dough is in it's "shaping container" cover it loosely with a plastic bag or damp tea towel and place into the fridge. I use a large plastic bag to cover it – I just reuse it each time.Try to leave it in the fridge for a minimum 5 hours up to a maximum of around 36 hours. The longer you leave it the better your bread will be! A longer cold ferment creates beautiful blisters on your crust and a deeper sourdough flavour.
- Preparing To Bake Your Sourdough:Once you're ready to bake your sourdough, you'll need to preheat your oven to 230ºC/450ºF. Place your Dutch Oven into the oven when you turn it on so it gets hot. Try to preheat for around 1 hour to ensure your oven is super hot – but you know your oven so just adjust this time if you need to.Leave your dough in the fridge until the very last minute – placing a cold dough into a hot oven will give you a great "spring".
- Baking Your Sourdough:When your oven is at temperature. Take your sourdough out of the fridge. Gently place it onto a piece of baking paper.Gently score your bread with a lame, clean razor blade or knife. The oats will mean you can't get too artistic – a single slash or cross is perfect for this loaf.Carefully take your dutch oven out of the oven. Place the sourdough into the pot using the baking paper as a handle. Put the lid on and place into the hot oven. If you want to you can spritz your dough with extra water before you put the lid on.BAKE TIME:30 Minutes with the lid on at 230ºC/450ºF plus10-15 Minutes with the lid off at 210ºC/410ºFIf you're worried about the base of your bread burning, place a baking sheet on shelf underneath your Dutch Oven – it works!
- Finishing Your Bake:When you remove your dough from the oven, carefully remove it from the dutch oven as soon as possible and place on a wire rack to cool.
Notes
- Notes on Sourdough Starter –
This recipe is based on you having an active starter that you have fed a few hours before starting your bake. For information on whether your starter is ready, go here.
- Notes on Stretch & Folds –
If you are going to do the stretch & folds on your bench top, spray your surface with water mist rather than using flour.
- Notes on Bulk Fermentation –
If your home is warm then your dough will ferment a lot faster and could be done in as little as a few hours. If it’s colder, it will take longer, possibly overnight. I would recommend that you try to do your first few bulk ferments during daylight hours so that you can watch your dough closely.
Once you’re more familiar with the process – and the temperature of your home – you will be able to do overnight ferments.
You will know your dough is ready to move to the next stage when it has *just* doubled in size. It will be fairly wobbly and full of bubbles. You should be able to see large air bubbles under the surface of the dough.
You don’t want to let it go any further than doubled as it will be over fermented. If you want to do an overnight ferment, but your home is warm, consider using a little less starter (ie 25g).
Less starter means your dough will take longer to ferment and you will reduce the risk of over fermenting your dough. You’ll find more information on these topics here: When is my bulk ferment finished? What is the difference between cold ferment and bulk ferment? Why does the amount of starter matter?
- Notes on Baking –
If you’re worried about the base of your bread burning, place a baking sheet on shelf underneath your Dutch Oven – it works! If you’re worried about your bread not being cooked all the way through, turn the oven off and place your dough straight onto the oven rack. Leave the door ajar and let your bread rest there for a few hours. Remember not to cut into your loaf too soon – you’ll need to let it cool for at least a few hours (4-6 is best).
Nutrition
Nutrition information is automatically calculated, so should only be used as an approximation.
Like this? Rate and comment below!


Made this recipe and it was delicious. Will definitely make it again.
A few notes: this was an extremely dense dough and it was a very large bread. I do 500g loaves regularly but something about this was bigger and heavier than my others. When I remake it, I will split it into two smaller loaves
OMG, I got a picture perfect loaf! I I usually make whole grain sourdough but wanted to mix things up. I did use 100 g whole wheat flour. Can’t wait to cut into it!
Would it be okay to increase honey?
I made this. It’s beautiful and delicious. I’ll be making it again soon.
Delicious bread! I made it with half fresh milled wheat and it was the most beautiful loaf I ever made.
I made this bread for the first time a few weeks ago and I am now making 2 more loaves to share with family! It is so delicious when you toast it and top it with some butter! Thank you 10x for sharing such a wonderful recipe!
3 weeks in a row. Getting better every time. Double batch this week. Delicious.
Lovely bread and incredible taste. I split the dough in two after the bulk rise. I then baked for 20 minutes covered at 450 and 10 minutes uncovered at 410 and the bread came out at the perfect temp. we’ll be making again and again. I’ve also replaced honey with maple syrup and it was also very good.
This is the first time making this bread. It was nice and moist but I would like to taste more of the honey. Is it possible to increase the honey?
You can increase the honey if you want to.
Been baking sour dough loaves for two years now and decided it was time to start making them with added ingredients. This came out great. Husband said my best one yet.
Next time I will increase the amount of honey, divide it into two, and increase the cooking time a little bit.
I’m going to bake this today but want use loaf pans instead. Will I need to split in 2 loaf 9X5 loaf pans? And what will be the baking temperature and time differences to bake? Thank you!
Lovely and delicious! I made three loaves and they all turned out similarly. Thank you for teaching me sooo much!
Love that! Thank you, Julie!
Love this recipe. Am now making it in a loaf pan and substituting 100g whole grain spelt. It is sooo delicious plus the extravagance of local honey.
This is my favorite sourdough recipe at the moment! I’ve made it 6 or 7 times and it always comes out great!!
We LOVE to hear that, Vivian! Thank you for your comment. 🙂
Is the cold ferment necessary? Or could I just let it ferment on the counter at room temp (78 degrees F) for 3 – 4 hours?
You can skip the cold fermentation if you prefer and just proof on the counter. It will proof much faster on the counter though 🙂
Would it okay to increase honey?
Thank you!
Yes you can increase the honey if you want to 🙂 Something else you could do to increase the honey flavor is to brush the baked loaf with honey butter when it’s fresh out of the oven or serve it with this delicious cinnamon honey butter.
Worked beautifully first time and had a lovely oven spring!
Was such a well explained thorough recipe Thanks !!
This honey oatmeal is delicious. Very soft and chewy. I added 55gms of my own honey and will definitely make it again.
This was delicious! For 20% of my total flour, I used oat flour. Super good! I’ll put this one in the regular rotation.
This bread came out lovely! I doubled the recipe and shared a loaf with a friend. Definitely going to keep this in rotation. Thank you for sharing the recipe and instructions.
loved it, fabulous flavor and texture.
from Montreal
Allo kate
the taste is just perfect of this bread
I love your recipes
You said in this recipe that we can find at US pan…. the loaf pan 1,5.. I don’t see it
On your picture its seems to be like a Dutch oven.. isn’t?
Can you send me a picture of your complete pan on the picture and tell me where to find.. I tink it will be perfect
Hi Claudette! It’s lovely to hear from you 🙂 You can find the USA Pan I use here, it’s a lovely loaf pan. The cast-iron pan I’m using is this one 🙂 Kate xo
Thanks so much! Enjoy your week end!
Thank you for the heads up on this recipe via your newsletter. Decided to branch out from my normal sourdough and try it. An amazing loaf! Can’t stop eating it. Will become one of my regulars now!
Pillowy soft crumb and great crust on this loaf. My oats were only distinguishable on the crust but I appreciate the extra inclusion of grain and fibre. This is a terrific choice for an everyday loaf. We enjoyed ours with soup.
Fantastic recipe. Thank you so much! Quick ? Is it possible to substitute wheat flour in this?
So glad you love the recipe, you can definitely use some whole wheat flour if you want to. I recommend using 50% whole wheat 🙂