This post contains affiliate links. Please see our disclosure policy.

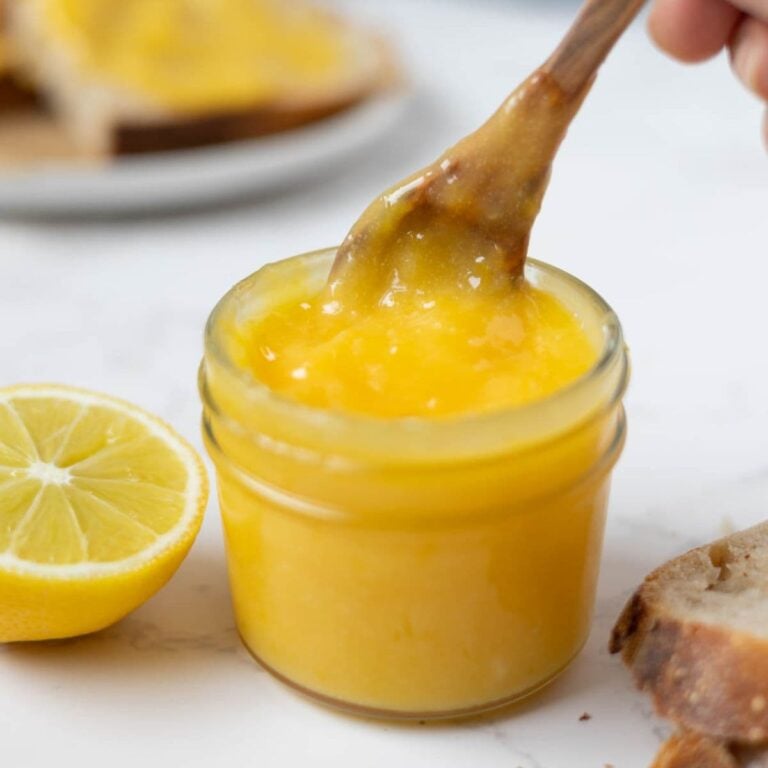
Creamy, tart, and luscious, this homemade lemon curd is such a delightful treat! With only a few ingredients and a bit of whisking, you’ll have a lovely spread that’s perfect on flaky biscuits or fresh sourdough. Honestly, it pairs well with so many baked goods, but it’s so tangy and delicious that you may end up eating it straight from the pan. And it makes for a great gift – I love how the bright yellow color of this lemon curd looks like sunshine in a jar!
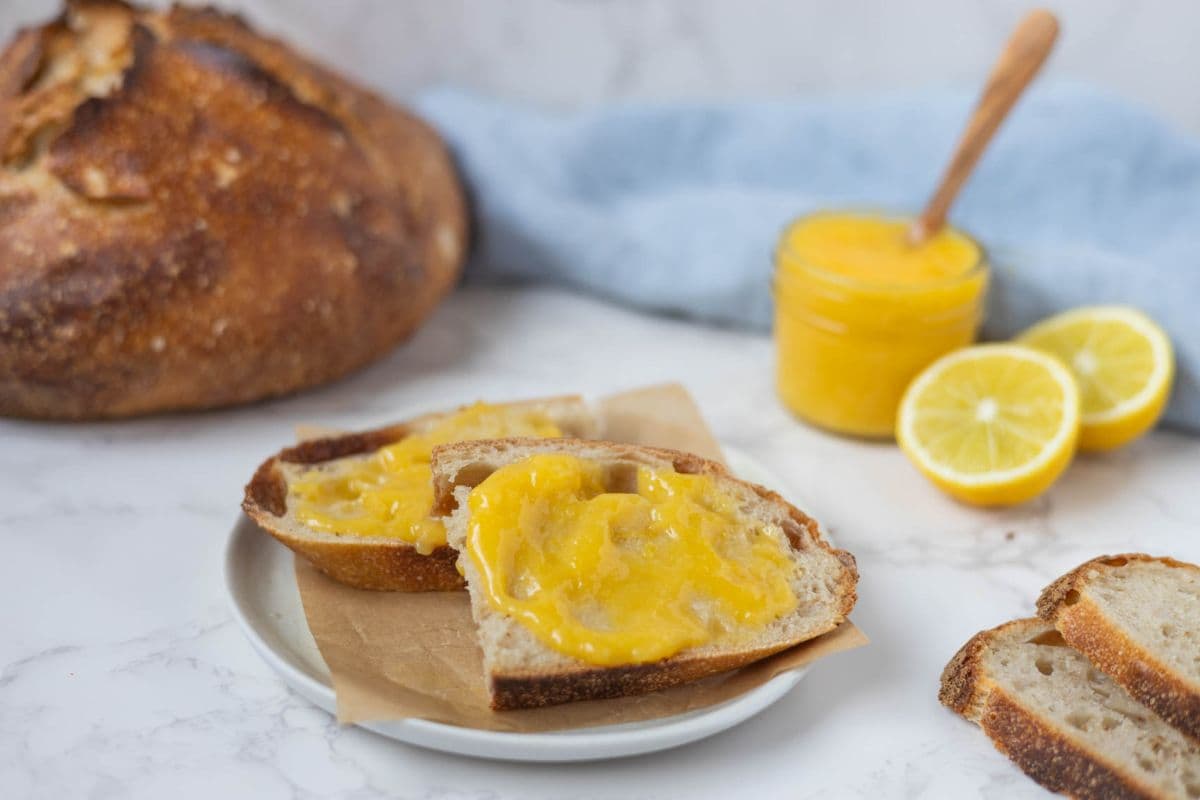
Table of Contents
Why you’ll love this recipe!

Just a Few Good Ingredients – Making lemon curd from scratch means no preservatives or additives, only a few quality ingredients. Use good eggs, butter, and fresh unwaxed lemons, and you’ll be blown away by how good this homemade version is compared to store-bought.
So Quick and Easy – I love how this lemon curd comes together quickly compared to a jam. You only need to heat the mixture for about 10 minutes to achieve a creamy, thick spread. I enjoy a bit of texture to my curd so I don’t bother running it through a sieve, which makes it even faster!
Use up Extra Ingredients – This is a fantastic recipe if you ever have extra lemons around. I grew up eating this every year as my mom would often bring home bags of lemons. It also works well if you have a recipe that only requires egg whites and you need to use up extra yolks.
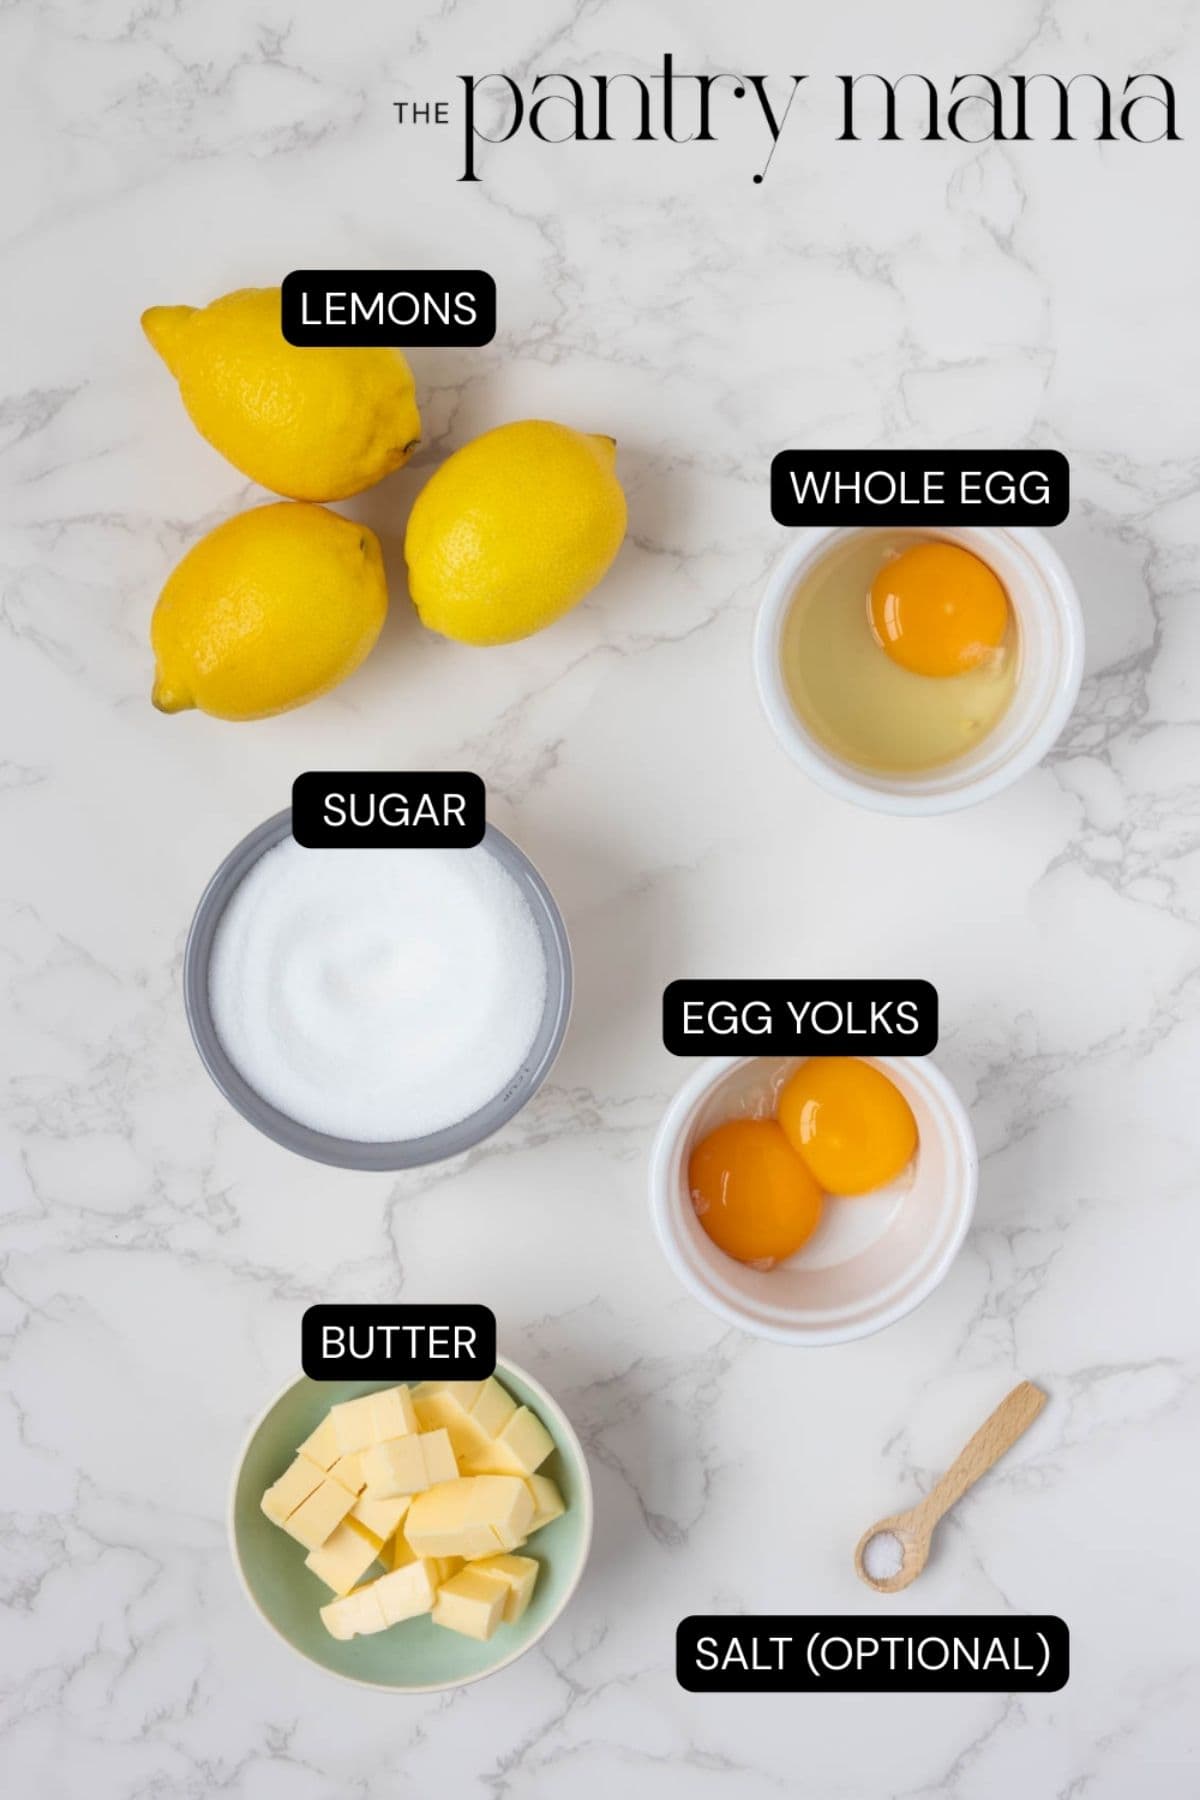
Ingredients
- Lemons – You’ll want fresh unwaxed lemons for this recipe as you’ll be using the zest and the juice. Give them a good scrub before zesting and avoid any blemished or bruised rind. Don’t use bottled lemon juice or your curd won’t have that bright and zesty lemon flavor.
- Sugar – I use regular white granulated sugar for this recipe to keep the pure lemon flavor.
- Eggs and egg yolks – I use one whole egg and two egg yolks.
- Butter – You’ll want to use a good high-quality butter since there are so few ingredients in this lemon curd. I use salted homemade butter so I don’t add extra salt, but if you’re using unsalted butter you may want to add a small pinch.
- Salt (optional) – Just a pinch, if you’re using unsalted butter.
How to Make Lemon Curd
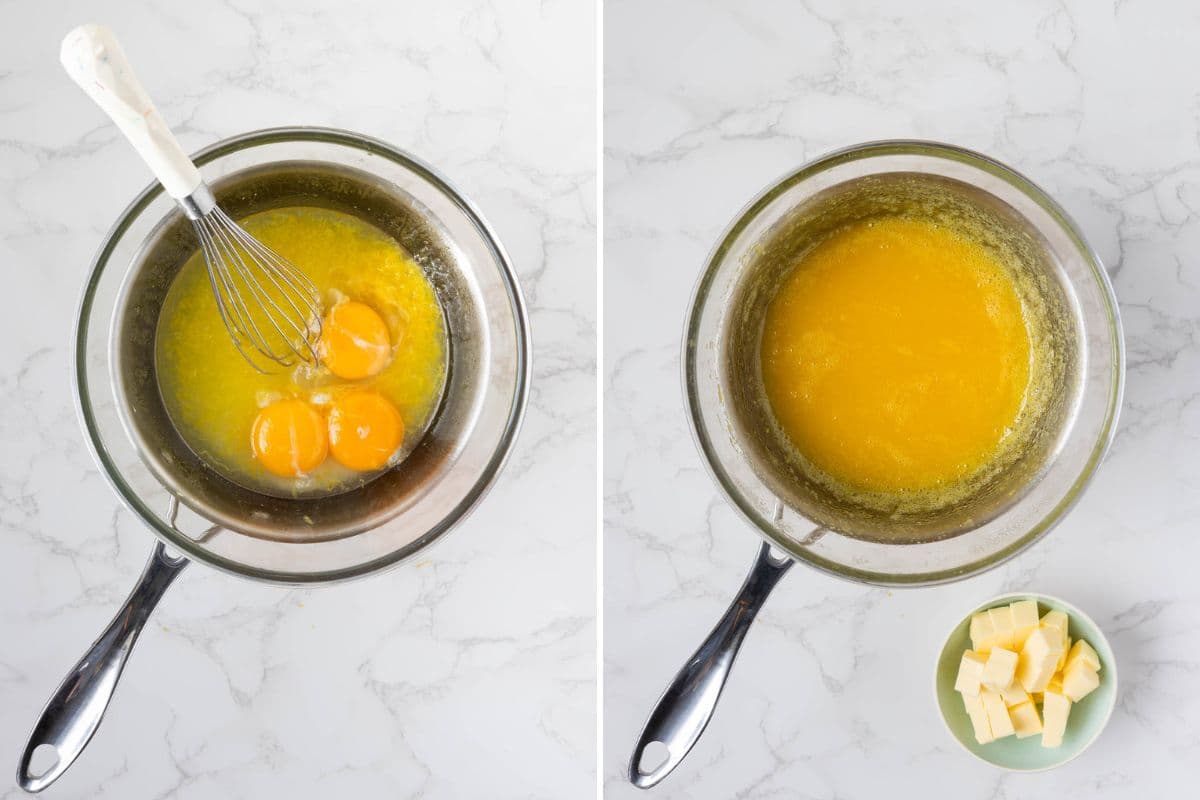
Fill a small saucepan with 1 to 2 inches of water and bring to a boil. Lower the heat slightly to a strong simmer.
While the water is heating, place the lemon juice and zest, sugar, egg, and egg yolks into a heatproof bowl that fits over the saucepan without touching the water.
Kate’s Pro Tip
Heatproof Bowl Tip
If you don’t have a heatproof bowl or double boiler, you can actually make lemon curd straight in the saucepan. Just keep the heat quite low so the eggs don’t cook and make sure to whisk continuously and get into the corners of the pan. It’s not quite as foolproof a method, but it does work! And if you end up with any lumps, make sure to press the curd through a sieve.
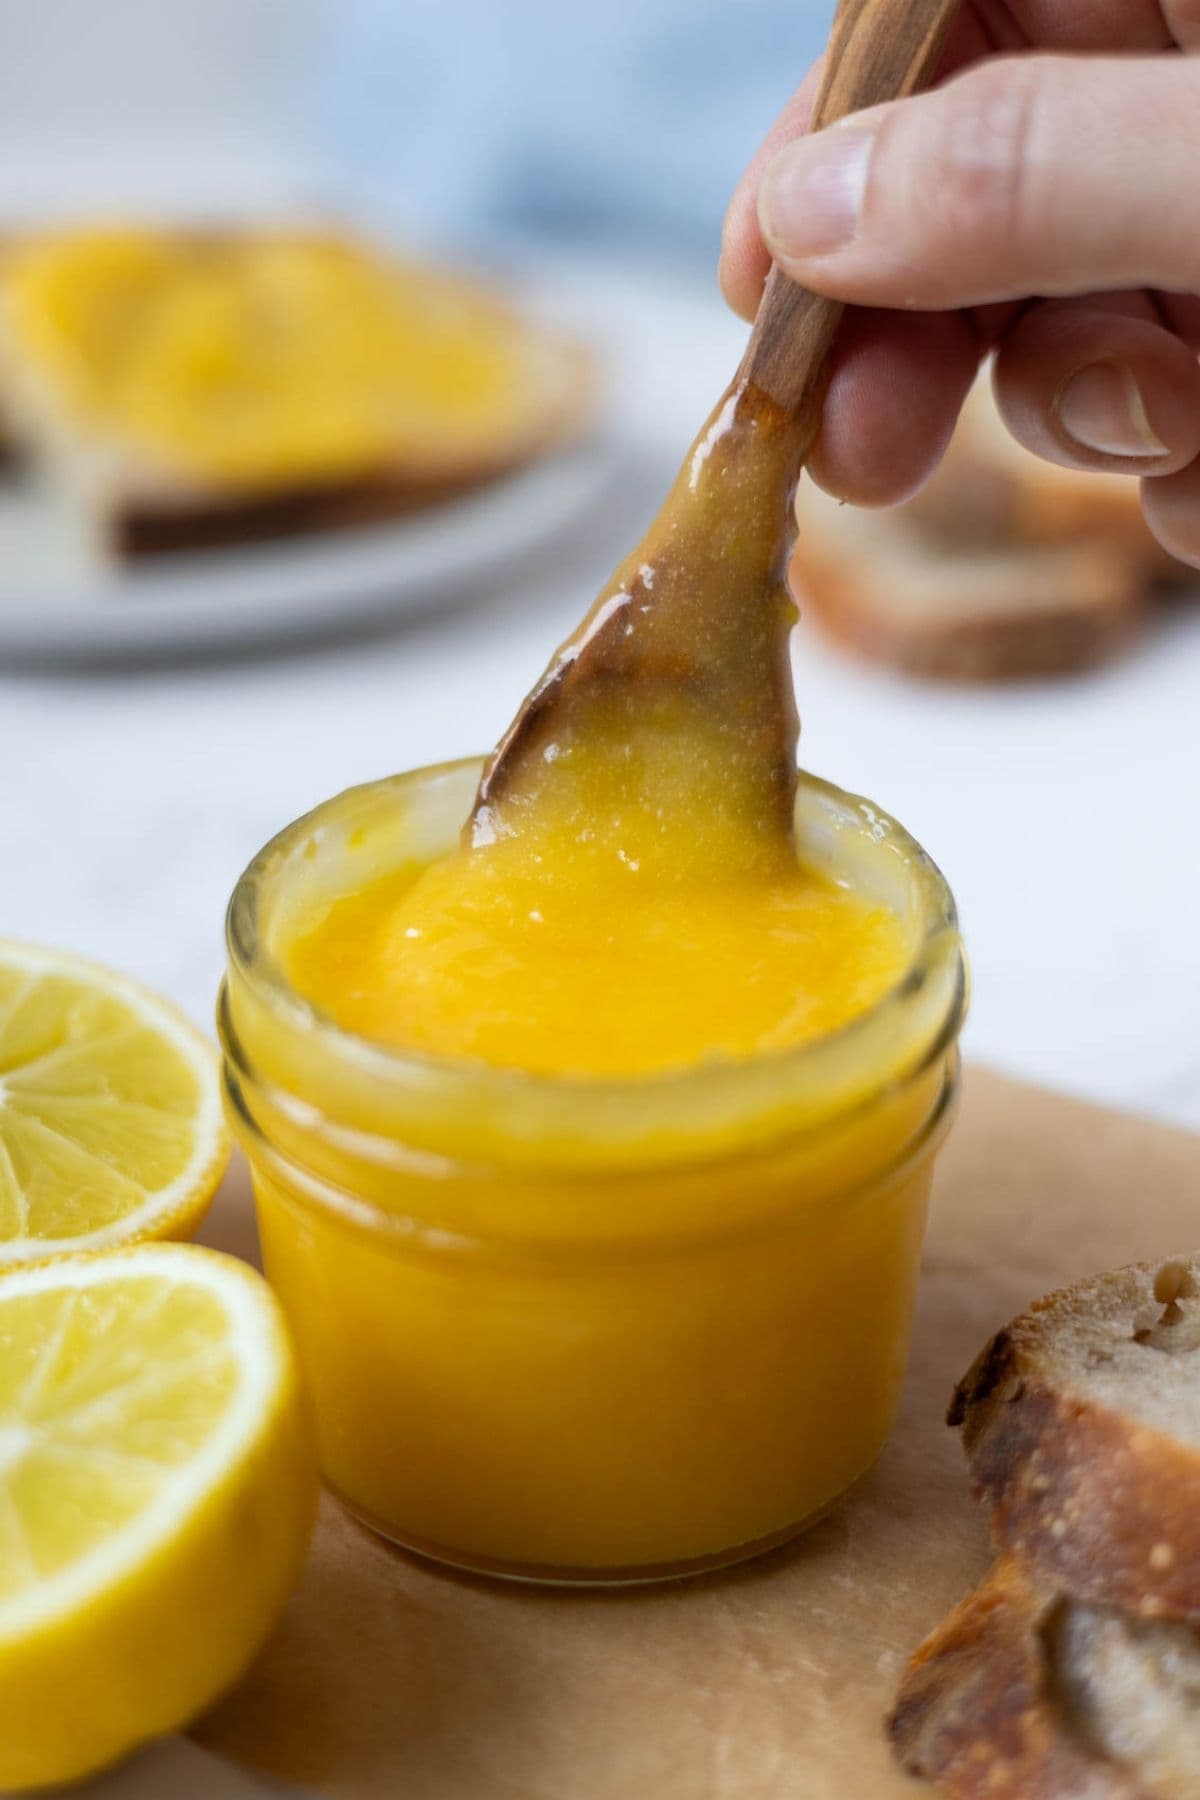
Whisk the mixture until thoroughly combined, then keep mixing as the lemon curd begins to thicken. You want to whisk fairly constantly so the eggs don’t get a chance to scramble. Keep going until the lemon curd thickens enough to coat the back of a spoon, about 10 minutes.
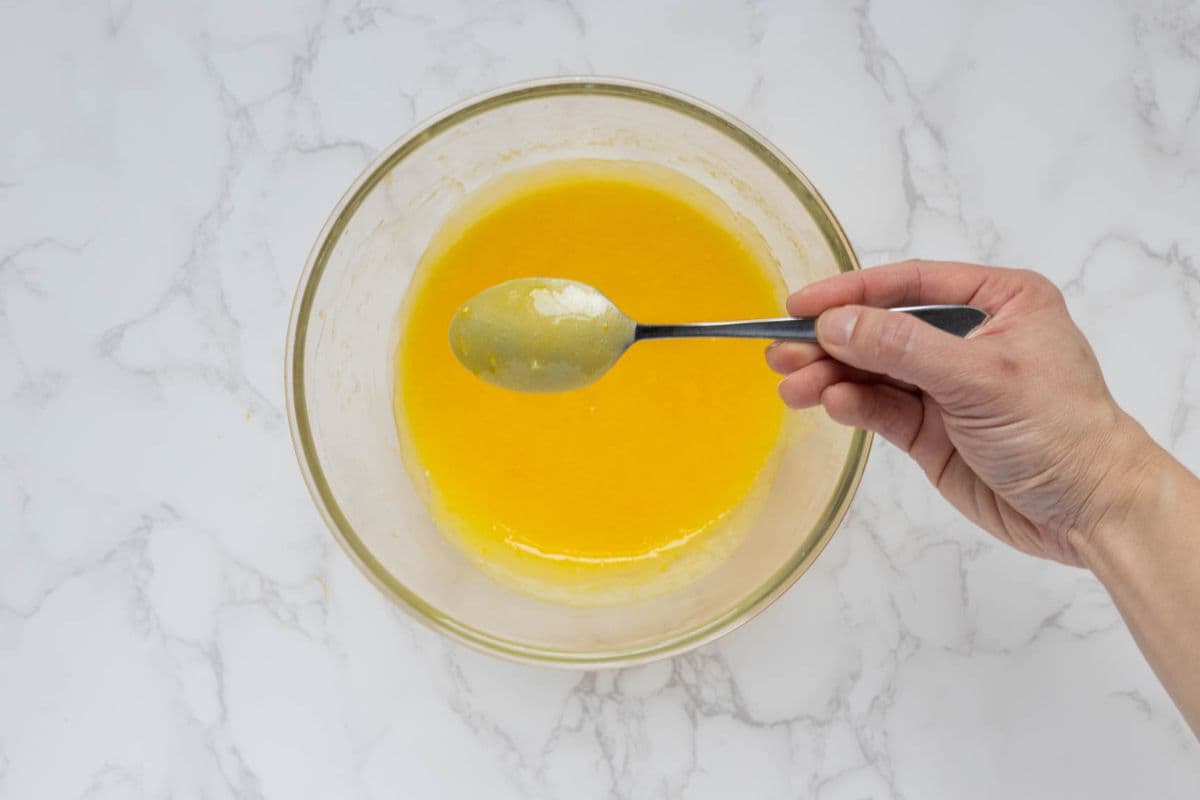
Turn off the heat and slowly add the cubes of butter, whisking as you go. Continue to whisk thoroughly until all the butter is incorporated and the lemon curd is nice and smooth. It should be fairly thick, but will thicken up even more as it cools.
Sometimes people like to run their lemon curd through a sieve or strainer, but I love the rustic feel and the bright notes from the lemon zest. Totally up to you!
You can store the lemon curd in any airtight container, but it will last longer in a sterilized jar. To sterilize your jars, pour boiling water inside and allow to sit for a few minutes before carefully emptying them out.
Once the curd is done but still warm, use a stainless steel jar funnel and ladle to carefully fill the jars, leaving around 1cm head room at the top of the jar. Place the lids on and seal immediately. Leave the jars on the counter to cool, then transfer to the fridge.
FLAVOR NOTES
Make it Your Own
My family prefers a very tart lemon curd, one that makes your mouth pucker up a bit in the best way! But if you want yours less sharp, you can leave out some of the zest or the juice.
Serving Suggestions
This lemon curd is fabulous on a buttery and flaky sourdough biscuit.
You could make a tangy and bright lemon version of a sourdough strawberry shortcake by adding in a layer of lemon curd alongside the strawberries and cream
Lemon curd on sourdough discard pancakes, sourdough waffles, or sourdough English muffins are breakfast favorites in my house.
A scoop of lemon curd on top of sourdough granola makes a fantastic breakfast or snack.
How To Store + Freeze
The sealed and sterilized jars should last about a month in the refrigerator and up to 2 weeks after opening.
You can freeze the jars, just make sure to leave headroom at the top for expansion. Thaw the jar in the fridge overnight and if you notice any changes in texture, give the thawed curd a good whisk.
Frequently Asked Questions
Yes, if you’re looking to cut down on sugar, you can reduce the sugar. If you’d like a sweeter curd, increase the sugar amount.
It does take some time for the curd to thicken, so be patient! Also, remember that the curd will thicken more as it cools. If you’ve cooked the curd well beyond 10 minutes and it’s still very thin, it could be that you had very large lemons (too much juice!) or small eggs so the balance was a bit off. You can thicken it by whisking an egg yolk and slowly drizzling it into the warm curd, continuously whisking as you go.
Yes, you can use 4 egg yolks instead of the 2 egg yolks and 1 whole egg. I love a thicker lemon curd so it’s scoopable and spreadable though!

Lemon Curd
Equipment
- Small Saucepan
- Heatproof Bowl (I use a glass Pyrex bowl) or double boiler
- Whisk
Ingredients
- 3 Lemons, zest and juice (about 120g juice)
- 150 g Sugar
- 1 whole Egg
- 2 Egg yolks
- 85 g Butter
- pinch Salt, if using unsalted butter (optional)
Instructions
- Fill a small saucepan with 1 to 2 inches of water and bring to a boil. Lower the heat slightly to a strong simmer.
- While the water is heating, place the lemon juice and zest, sugar, egg, and egg yolks into a heatproof bowl that fits over the saucepan without touching the water. Whisk the mixture until thoroughly combined, then keep mixing as the lemon curd begins to thicken. You want to whisk fairly constantly so the eggs don’t get a chance to scramble. Keep going until the lemon curd thickens enough to coat the back of a spoon, about 10 minutes.
- Turn off the heat and slowly add the cubes of butter, whisking as you go. Continue to whisk thoroughly until all the butter is incorporated and the lemon curd is nice and smooth. It should be fairly thick, but will thicken up even more as it cools.
- You can store the lemon curd in any airtight container, but it will last longer in a sterilized jar. To sterilize your jars, pour boiling water inside and allow to sit for a few minutes before carefully emptying them out. Once the curd is done, use a stainless steel jar funnel and ladle to carefully fill the jars, leaving around 1cm head room at the top of the jar. Place the lids on and seal immediately. Leave the jars on the counter to cool, then transfer to the fridge.
Nutrition
Nutrition information is automatically calculated, so should only be used as an approximation.
Like this? Rate and comment below!