This post contains affiliate links. Please see our disclosure policy.

These flaky sourdough biscuits will fill your kitchen with the most delicious aroma, not mention filling your belly with wonderful homemade comfort food. This is a sourdough recipe you’ll want to bake on repeat!

Why You’ll Love This Recipe!

These tall and flaky homemade sourdough biscuits are perfect to smother with homemade butter or even cultured butter. They really are the perfect side dish! They also make the tastiest breakfast sandwiches … and did I mention sourdough strawberry shortcakes?
Fantastic! They were great! These are the best biscuits hands down that I’ve ever made! Light, fluffy and the flaky layers were wonderful!
Thank you!!

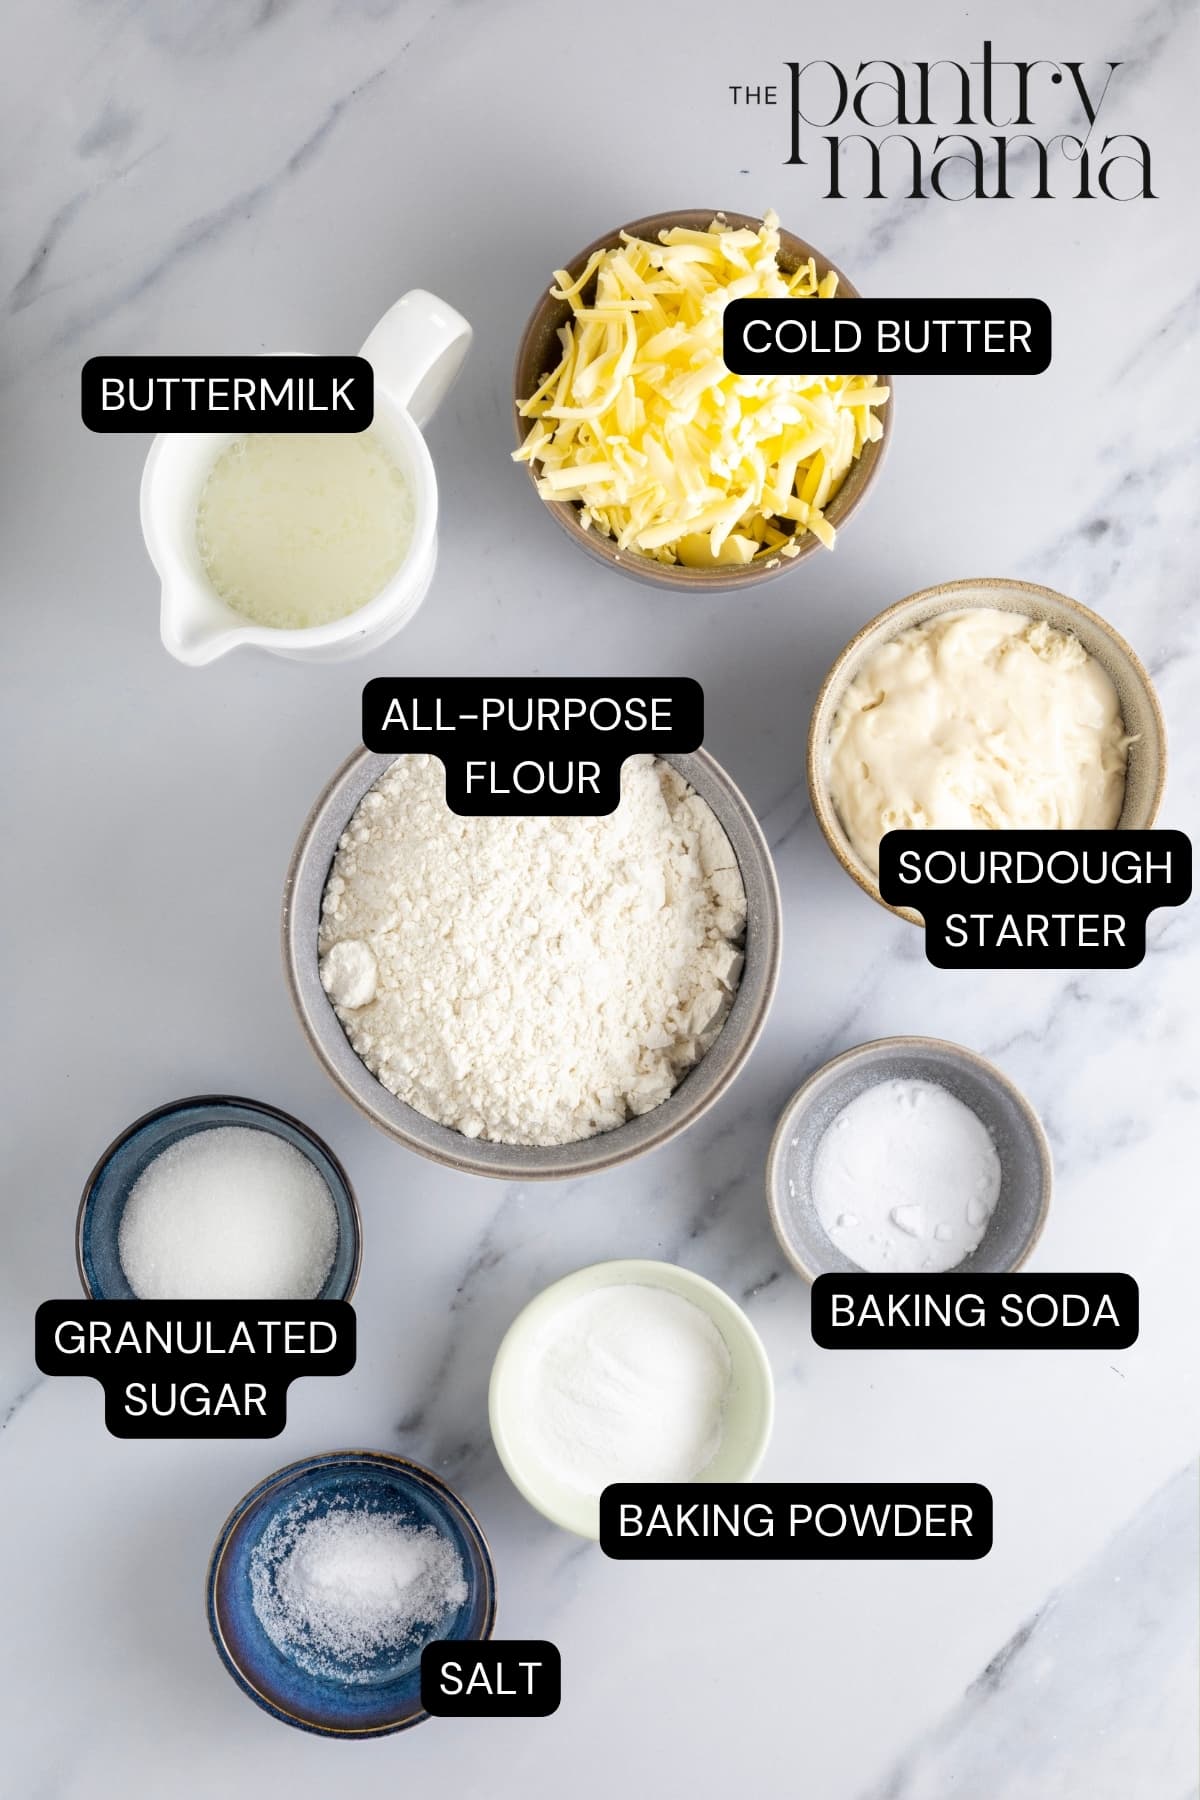
Ingredients
- All-purpose Flour
- Granulated Sugar – this is optional, skip it if you want to.
- Baking Powder and Baking Soda
- Salt
- Butter – No matter whether you use unsalted butter or salted butter, it needs to be very cold! I actually freeze my butter and then grate it on a box grater to make it easier to rub through the flour.
- Sourdough Starter or Sourdough Starter Discard – Depending on your preference, you can use either fed starter or sourdough discard, it doesn’t make too much difference in this recipe, they’ll both give your sourdough biscuits a nice tang! Make sure whatever you use is cold! Place it into the freezer for 15 minutes before you mix it into the flour and butter.
- Buttermilk – buttermilk will give you the best flavor and texture, but if you don’t have any buttermilk you can use whole milk with a dash of white vinegar. Let it sit at room temperature for 10 minutes before adding to your sourdough biscuit dough. I love adding the buttermilk from making cultured butter to these biscuits – it develops the beautiful fermented flavor even more!
- Egg – I like to egg wash my sourdough biscuits before they’re baked, this is optional though, so if you don’t want to use egg, you don’t have to.
How To Make Sourdough Biscuits
Making this flaky sourdough biscuits recipe takes very little hands-on time. My advice is to have everything ready before you start so that you’re not letting the butter warm up at all. I like to leave my butter in the freezer until right before I need it!
Preheat your oven to 220ºC (430ºF) and line a small round cake pan or baking dish with parchment paper. Grate the butter with a box grater (cheese grater) and set aside in the freezer until you’re ready for it.
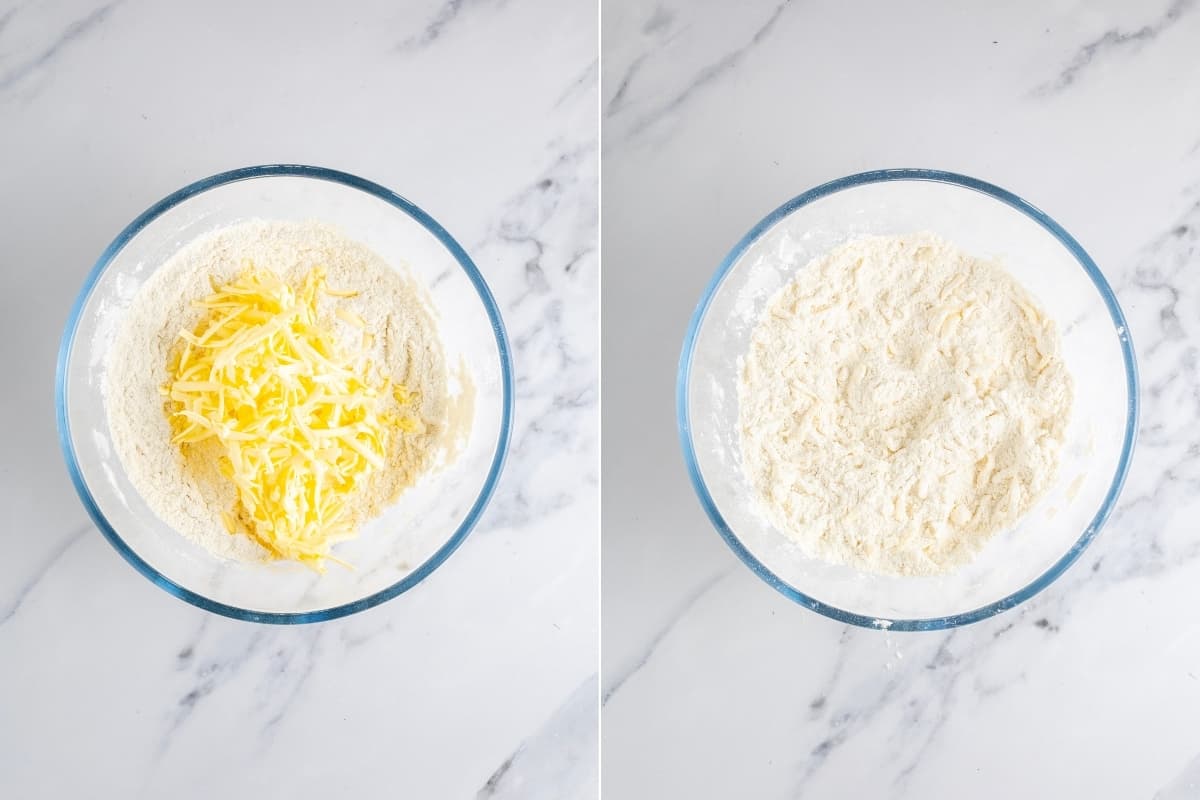
In a large bowl, place flour, sugar, baking soda, baking power and salt. Mix with a large spoon until well combined. Then take your butter out of the freezer and place into the bowl with the dry ingredients. Cut the cold butter through the flour. You can do this with a pastry cutter or bench scraper, but you can use your fingers if you prefer (but be fast as you don’t want the butter to melt). You could also do this step in a food processor.
Now tip the buttermilk and sourdough starter into the butter and flour mix (you don’t have to mix them together first). Stir them together with a rubber spatula until it’s a dry shaggy dough (I start with 80 grams of buttermilk and add a touch more if I need it).
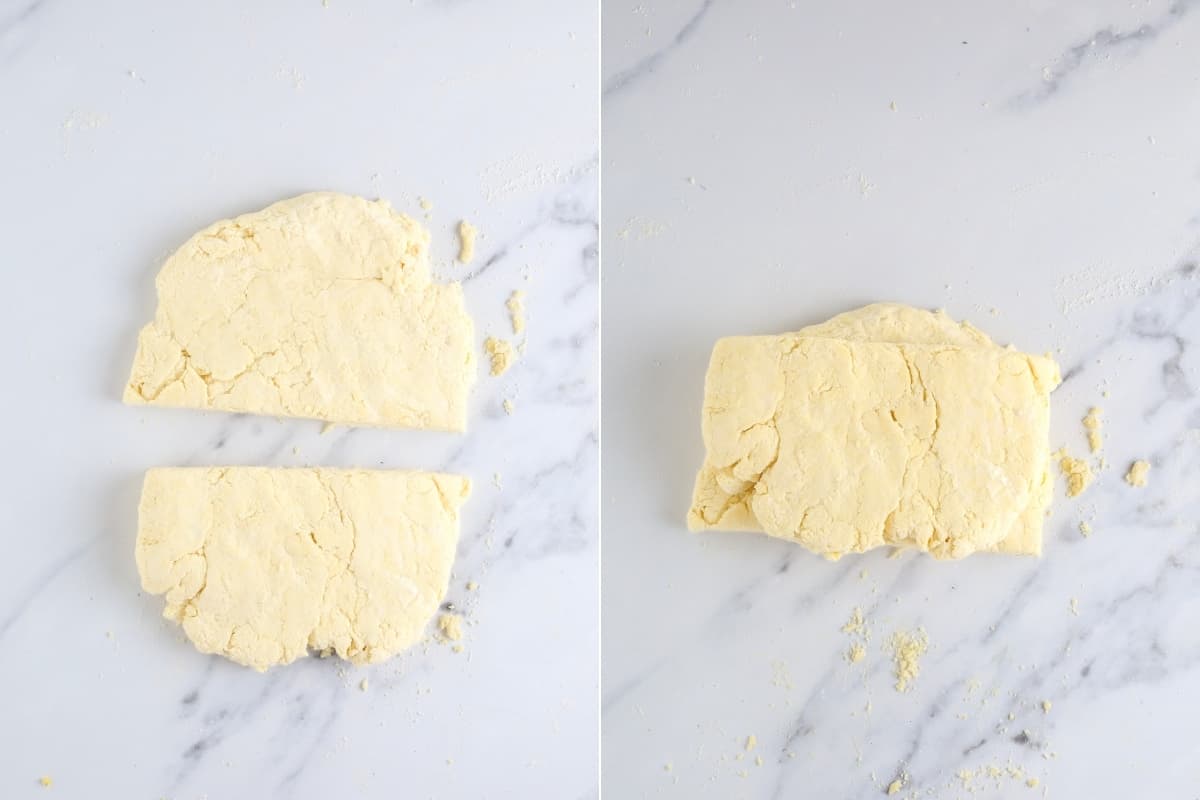
Tip the dough onto a lightly floured surface push it together so it forms a more cohesive dough. Just don’t let that butter warm up too much! You should be able to see the pieces of butter in the dough. Form the dough into a rough rectangle and cut it down the centre, stacking one piece on top of the other. Roll it out again and repeat the stacking process. You want to do this 3 to 4 times to ensure you get those flaky layers!
Gently roll the dough out into a thick rectangle around an inch thick (2.5 cm) and cut out rounds using a sharp biscuit cutter or a glass. You can push the scraps of dough together to cut out more sourdough biscuits. Try to stack the scraps of dough on top of one another so that they still get the flaky layers. This is something I’ve learned after making hundreds of sourdough biscuits over the past few years!

Kate’s Pro Tip
Tips for the Tallest Sourdough Biscuits
Don’t twist the biscuit or cookie cutter. Just push the cutter straight down and then back up. You really want something with a sharp edge, so a glass is better than a mason jar if you don’t have a biscuit cutter.
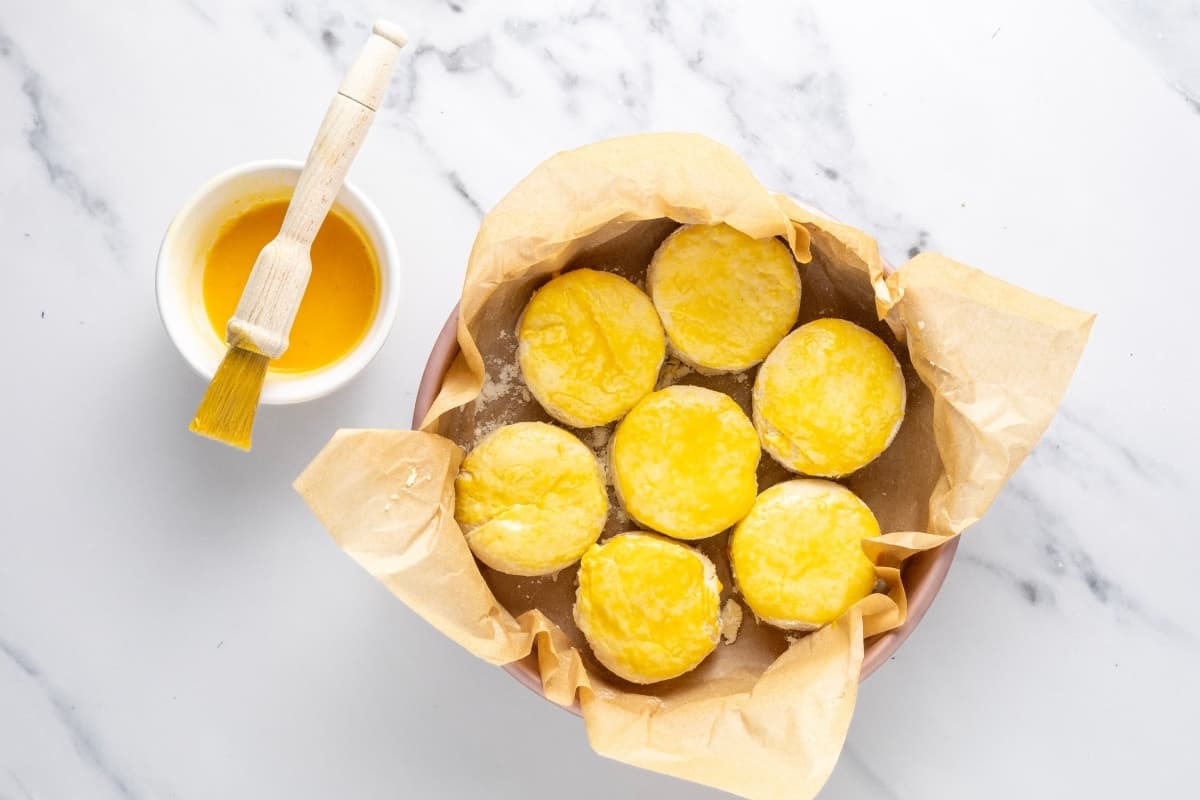
While the oven is preheating, place the pan of biscuits into the freezer. The colder you can keep them, the more flaky layers you’ll end up with! Place the biscuits into your prepared cake pan or baking dish, egg wash lightly and place into the oven at 220ºC (430ºF) for around 25 minutes (it will vary slightly depending on your oven). Remove when the sourdough biscuits are golden brown.
Kate’s Pro Tip
Cake Pan or Baking Dish
For the best rise, place the sourdough biscuits as close together as you can. I use a small 8-inch (20 cm) round cake pan to ensure the biscuits are almost touching. You can use a small cast-iron skillet or small square baking dish. It honestly makes such a big difference to the rise of your sourdough biscuits!
Serving Suggestions
You can really eat these biscuits in any way you choose … but here are some ideas:
- Enjoy them warm out of the oven with homemade butter and your favorite jam (I love serving them with strawberry jam or this quick orange marmalade).
- Use them for making the most delicious breakfast sandwiches.
- Serve them as a side dish for your favorite comfort foods like stews and soups. They are great to mop up sauces and gravy (hello sourdough gravy).
- Spread them with whipped honey cinnamon butter.

How To Store and Freeze
Room Temperature – Freshly baked sourdough biscuits are best enjoyed the day they’re baked, but they’ll keep well for up to 2 days if stored in an airtight container at room temperature. Allow biscuits to cool completely before storing. Place a paper towel in the container to absorb excess moisture and prevent the biscuits from becoming soggy.
Freezer Storage – Sourdough biscuits are one of my favorite make-ahead bakes. You can freeze the sourdough biscuits after you’ve cut them out. I even egg wash mine before I freeze them. The best thing to do is to snap freeze them on a tray and then add them to a resealable plastic bag and store in the freezer for up to 3 months. You can bake them from frozen in a preheated oven. Having homemade biscuits ready to go makes it easy to enjoy fresh baking without starting from scratch every time.
Frequently Asked Questions
While sourdough starter contains wild yeast, the only thing that the sourdough starter or sourdough discard does in this recipe is give the biscuits a more sour flavor. The main leavening agent for sourdough biscuits is actually baking powder and baking soda. The sourdough discard will give these homemade biscuits a beautiful, more complex flavor.
If your sourdough biscuits didn’t rise, the two most likely culprits are butter that wasn’t cold enough or an oven that wasn’t hot enough. For tall, flaky biscuits, the butter should be ice cold when it’s worked into the flour and remain cold until the biscuits go into the oven.
The flaky layers are created when the cold butter hits the hot oven, producing steam that lifts and separates the dough. If the butter warms up before baking, or the oven isn’t fully preheated it will simply melt instead of creating those light, flaky layers.
If your sourdough biscuits have more of a shortbready texture, rather than the flaky layers you’re wanting, it’s more than likely because the butter was too warm when it was added to the flour. You want the flour to coat the cold butter, rather than being melted together.
Honestly the dish you use to make sourdough biscuits make the biggest difference! When updating this recipe, I used a range of different sized dishes and I got the best rise when using a small, round cake pan where the biscuits are touching.


Sourdough Biscuits Recipe
Ingredients
- 250 g All-purpose Flour
- 10 g Sugar
- 15 g Baking Powder
- 3 g Salt
- 4 g Baking Soda
- 113 g Butter, (VERY COLD)
- 200 g Sourdough Starter, (or Sourdough Starter Discard)
- 80 – 100 g Buttermilk, (or milk)
Instructions
- Preheat your oven to 220ºC (430ºF) and line a baking sheet with parchment paper.
- Grate the butter with a box grater and set aside in the freezer until you're ready for it. It's really important that the butter is super cold!
- Place flour, sugar, baking power, baking soda and salt into a large mixing bowl. Mix with a large spoon until well combined.
- Take your butter out of the freezer and place into the bowl with the dry ingredients. Cut the butter through the flour. It's best to do this with a dough scraper or spatula, but you can use your fingers if you prefer (but be fast as you don't want the butter to melt – see notes on this).
- Now tip the buttermilk and sourdough starter into the butter and flour mix. Bring together with a rubber spatula until it's a dry dough (I start with 80g of buttermilk and add a touch more if I need it).
- Tip the dough onto a lightly floured surface and fold it gently until the dough comes together better. You want to create layers in the dough to give your sourdough biscuits that lovely flaky, buttery texture.
- Gently roll the dough out to around an inch thick (2.5 cm) and press out rounds using a sharp biscuit cutter or a glass. Don't twist the dough, just press straight down. My biscuit cutter is 2 inches across and I can make 7 biscuits out of the dough.
- Place the biscuits into a small baking dish or cake pan lined with parchment paper. If you like a really golden brown top, lightly egg wash your biscuits before placing them into the oven at 220ºC (430ºF) for around 25 minutes (it will vary slightly depending on your oven).
Notes
Nutrition
Nutrition information is automatically calculated, so should only be used as an approximation.
Like this? Rate and comment below!


Love this recipe. How does this dough freeze? Would love to make a few batches then vacuum seal freeze to have on hand ready to bake.
Are you able to freeze these for later? If so, at what step?
Can you make the night before and refrigerate until morning?
Fantastic! They were great! These are the best biscuits hands down that I’ve ever made! Light, fluffy and the flaky layers were wonderful!
Thank you!!
I do have a question. Can you freeze these once they’ve been cut before baking?
Thank you!
Thanks for all your knowledge 🙂
Is there a way to make this overnight?
At what point do we add the starter? I can’t seem to find where you add it. Thanks!
I subbed buttermilk with the half and half I had on hand and it still worked great! Love this recipe!
How can I long ferment this recipe?
Would it be okay to make these in the evening and leave in the fridge overnight?
I made this recipe, but a little different–I substituted the flour with Einkorn flour and then I totally forgot to add the sourdough starter and it still made a delightfully flakey, yummy biscuit! I can’t wait to taste it when I remember to add the sourdough starter😆
these look like scones rather than biscuits?
Scones and biscuits are different things depending on where you live 🙂 These are definitely biscuits 🙂
These came together fast and super easy. Very flaky and yummy
Can I let the dough sit in the fridge to ferment longer before baking? Looking to reduce gluten.
Great recipe! Any suggestions for making the dough ahead of time/ freezing?
What are the instructions for an overnight ferment? I need it to digest the gluten.
Does it matter if it is Bleached or Unbleached AP flour?
It’s always better to use unbleached flour 🙂
Can I freeze the cut dough and bake later?
Can bread flour be used in place of AP flour?
Yes you can, but they may not be as flaky 🙂
I am making the bread today. My problem is that I don’t know the metric system well enough to make it a simple recipe. Some of the recipes have the conversion to cups and tsp, tbsp, but not all.
Help please.
You don’t need to convert this one, just grab a scale and add the ingredients in the weights listed 🙂 No conversion necessary and so much quicker than using cups and tsp 🙂 Give it a try, it’s definitely a more accurate and easy way to bake 🙂
Looks much like a recipe I’ve used before without sugar. What happens if you leave out the sugar?
You can leave out the sugar if you prefer.
Best biscuits I’ve made. I did find the dough to be a bit too dry so added about 1 tablespoon of milk.
Super easy and tasty biscuit recipe