Beginner's Sourdough Baguette Recipe [easy step by step]
This post may contain affiliate links.
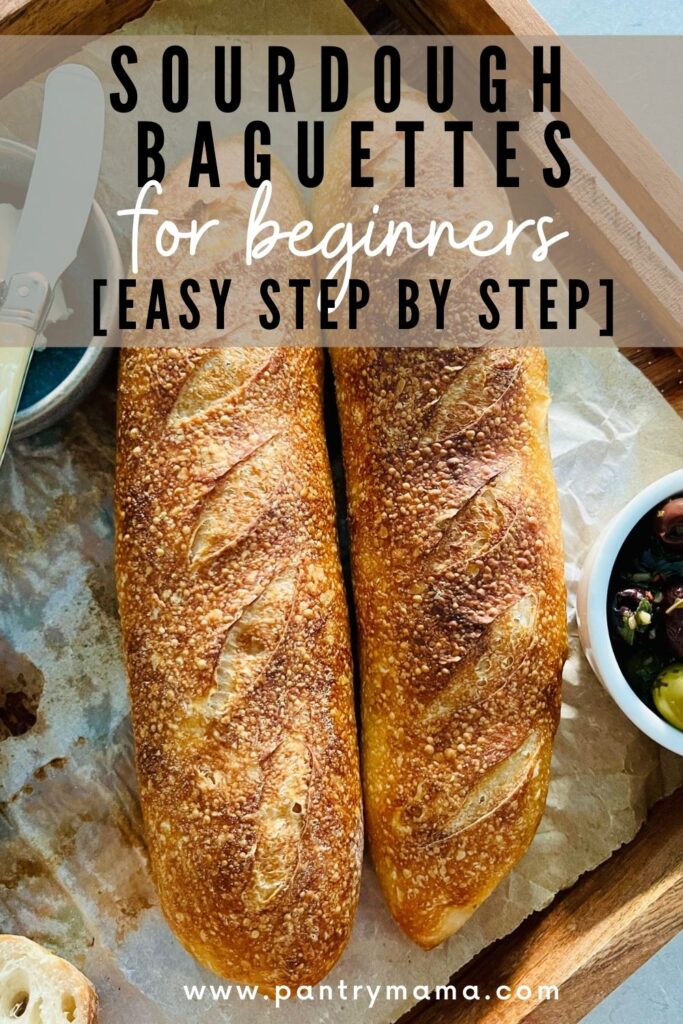
This beginner's sourdough baguette recipe features easy step by step instructions to make shaping a sourdough baguette really simple!
French baguettes are not traditionally made using sourdough starter, but the wild yeast really do give the most amazing flavor!
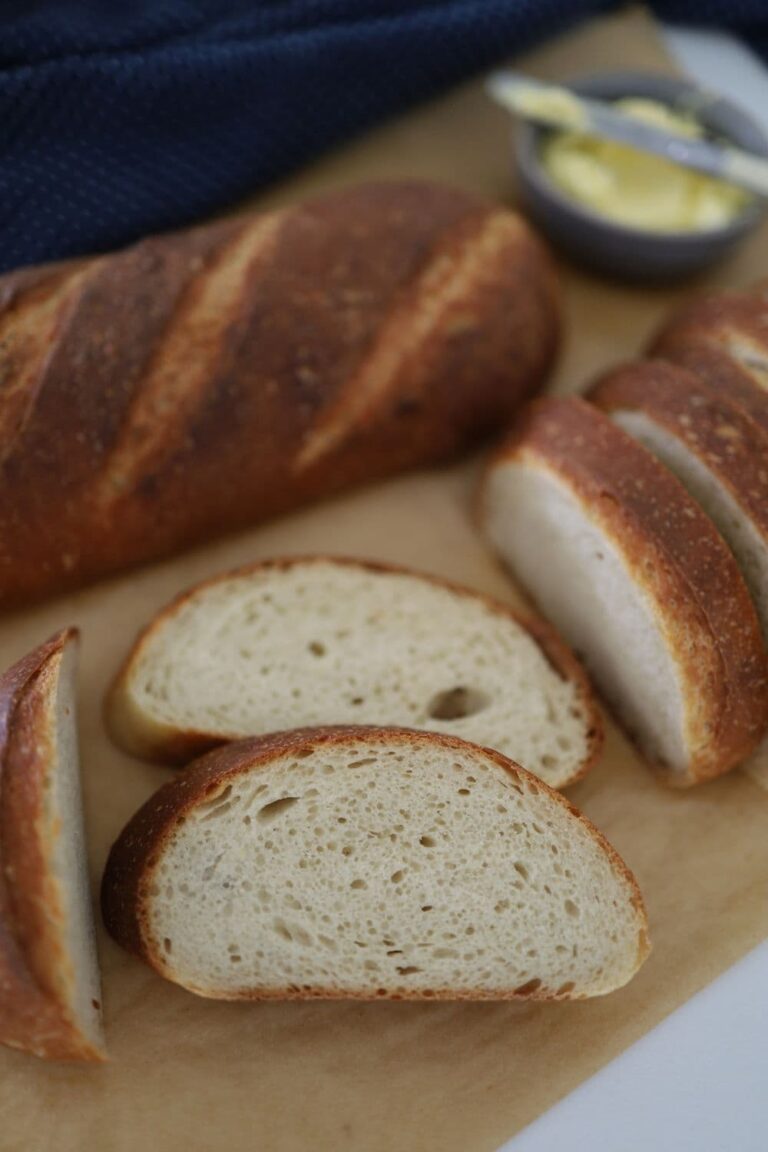
These sourdough baguettes have a crunchy crust with a soft, chewy interior. They are 67% hydration - I've made them a lower hydration to make them easy to shape, without losing any of the taste, flavor or texture.
You will need a bubbly, active sourdough starter to make this sourdough baguette recipe. This sourdough glossary is a great place to start to understand terminology associated with this recipe.
Why not make this delicious European cultured butter to serve with your sourdough baguettes or maybe this olive cream cheese spread is more to your taste.

Baguettes originate in France where they are traditionally made with yeast, rather than sourdough starter. The word baguette literally means wand or baton.
There are many stories that claim to be the reason baguettes were invented. Perhaps the funniest is that they were born from the need for soldiers in the Napoleonic war to have a loaf of bread that was easier to carry. Baguettes were said to fit down the soldier's trouser legs.
You can read this and many other funny stories about baguette history here.
Do You Need A Levain To Make This Sourdough Baguette Recipe?
Many sourdough recipes require a preferment or levain. I like to keep things super simple! I have chosen not to use a levain for this beginner sourdough baguette recipe.
In saying that, you do need to make sure your sourdough starter is super active and bubbly to ensure it has maximum leavening power. I recommend feeding your starter a few times before making this recipe to ensure it is really bubbly and happy.
If you feel your starter isn't up to the challenge - try these ideas to strengthen a weak sourdough starter.
How To Make Sourdough Baguettes [step by step]
Baguettes can be a little intimidating, but they don't have to be. Remember, they don't have to be perfect to taste amazing! And any leftover or stale baguettes you have will make amazing sourdough crostini or even this tasty sourdough garlic bread.
I've broken down the process as much as I can in the next few paragraphs, so you can see that it really doesn't have to be difficult.
I think the most overwhelming step can be the shaping of sourdough baguettes, but just take your time. This dough is lower in hydration than my simple sourdough recipe to make shaping the baguettes easier.
My biggest advice really is to take your time, don't get flustered and to remember that even if they are a little misshapen, they can still have a crispy crust and chewy interior, just like a good French baguette should. Looks are definitely not everything!
How To Make Dough For Sourdough Baguettes
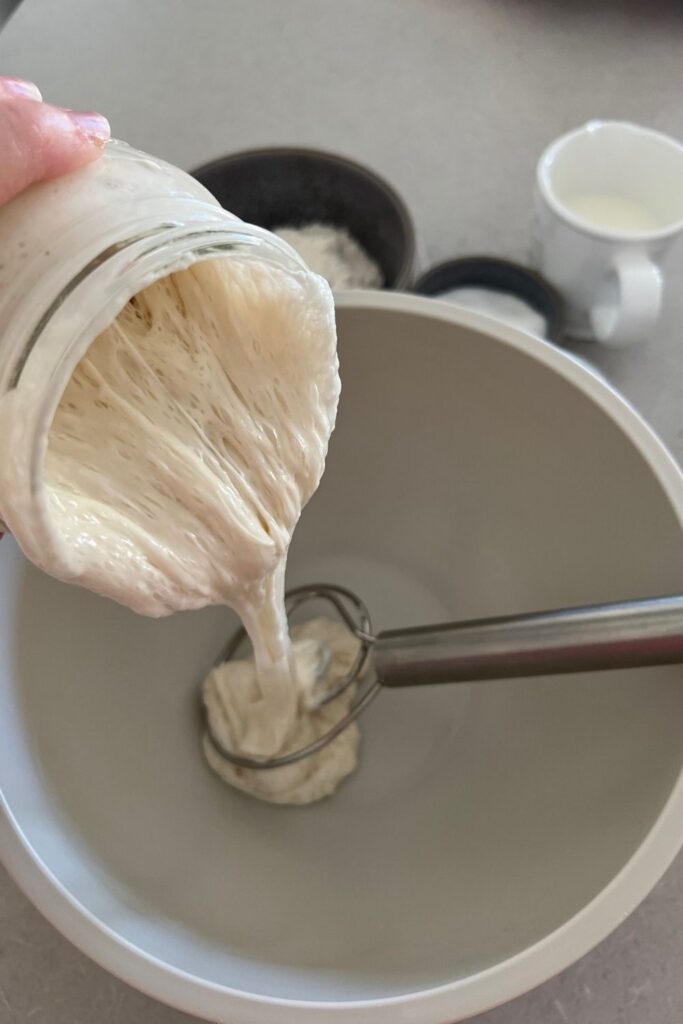
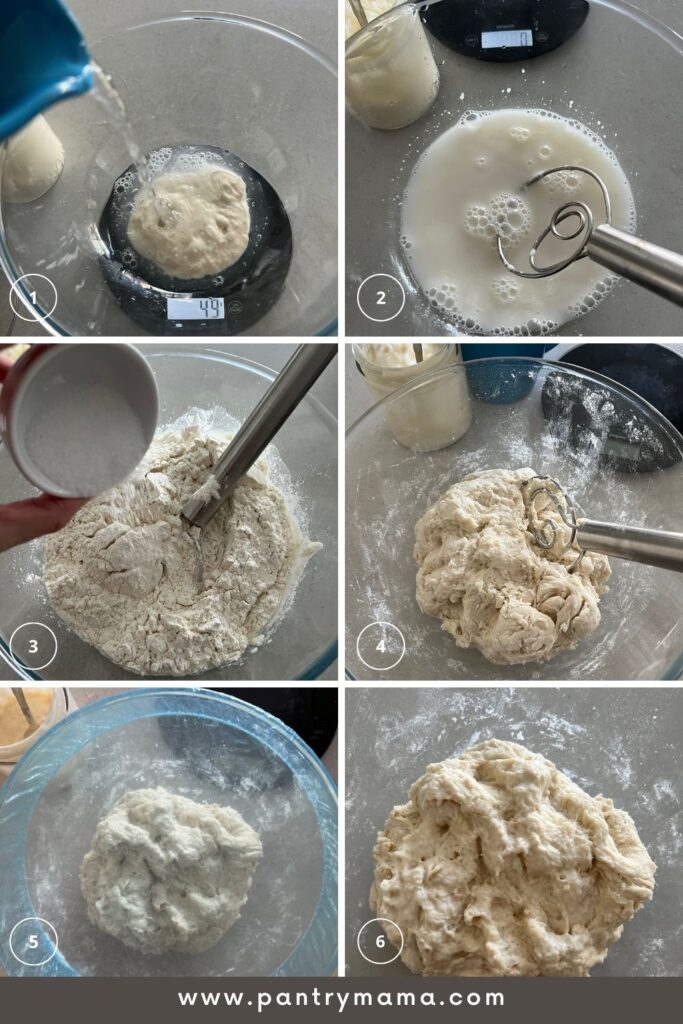
- AUTOLYSE - Weigh out your sourdough starter and water into a large ceramic or glass bowl.
This recipe is based on you having an active starter that you have fed a few hours before starting your bake.
Mix the water and starter together briefly. Then add your flour and salt and mix whole lot together to form a shaggy dough.The dough will be fairly shaggy and only just brought together. - Cover your bowl with cling film or a damp tea towel and let it sit for around 1 hour. It's ok if it's a little bit longer, it's not going to matter too much.
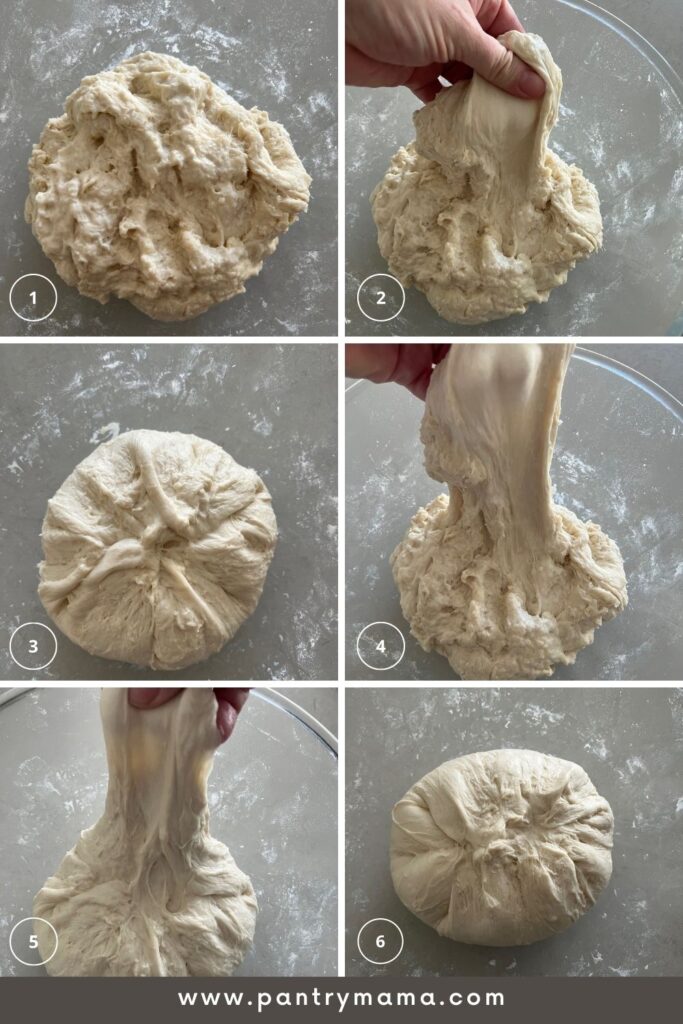
This process is called the "autolyse" and allows your flour to soak in all the water and become hydrated. You can see how the dough has changed in this photo. - FORMING UP THE DOUGH - After the dough has been through autolyse you need to bring it together into a ball. Work your way around the bowl, grabbing the dough from the outside, stretching it up and over itself, into the centre, until a smooth ball is formed.
You shouldn't need more than about 20-25 stretches to form the ball.You'll notice that the dough is fully hydrated after soaking all the water up. It will be fairly sticky but as you bring it into a ball, it will become smoother and shinier. It will feel slightly less wet than making regular sourdough bread. - Once the dough has formed into a smooth ball, pop the cling film back on and let it rest for 30 minutes.
- STRETCH AND FOLD - Over the next few hours you need to create some structure for your dough by "stretching and folding".
Aim to do around 4-6 sets of stretches and folds.For each set, stretch the dough up and over itself 4 times. Leave around 15 minutes in between each set. Again you do not have to be exact with time, but you need to do at least 4 sets over 2 hours. - BULK FERMENTATION - Once you've finished your stretch and folds, place the cling film or damp tea towel back over your dough and let it rest and ferment (a plastic cover is a better option for this stage).You are looking for the dough to rise around just under double. For baguettes, it is easier to shape them if you don't let the dough double completely.
This diagrams shows the starter being mixed along with other ingredients and the dough in autolyse.
This photo shows the dough through stretch and fold and going into bulk ferment:
How to Shape Sourdough Baguettes
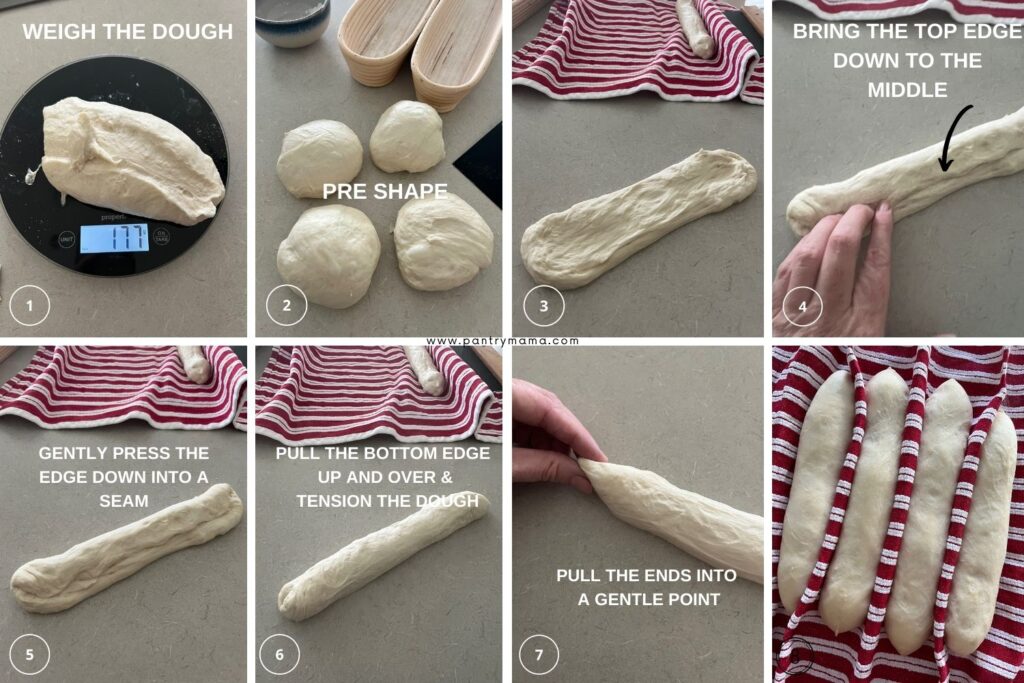
- Once your dough has finished its first ferment, it's time to shape your sourdough baguettes. Use a dough scraper to tip the dough onto the counter. You'll need to divide the dough into portions so you can make the baguettes. I like to use 175g to 200g of dough. This is a nice manageable size. You can make them bigger as your shaping skills get better.
- PRE SHAPE - pre shape each portion of dough into a round and allow to rest for 30 minutes while you organise the couche or heavy linen dish towel. You'll need to rub whatever you're using liberally with rice flour so the baguettes don't stick (you can find more details on this further down the post).
- Take a portion of dough and stretch it out so that it's a flat rectangle.
- Take the top edge of the dough and fold it into the middle of the dough, pressing gently with your fingertips or heel of your hand.
- Now pull the lower edge of the dough up and over and then use the counter to tension the dough into the baguette shape.
- Gently pull the ends into a point using your fingertips.
- Gently lift the baguette and place it into your shaping container or cloth and then shape the next baguette.
If you're finding shaping sourdough baguettes a little tricky, you might like this sourdough French Bread recipe - it has a super simple shaping technique, perfect for beginners!
How To Proof & Bake Sourdough Baguettes
- PROOFING - Allow the baguettes to sit at room temp for around two hours (but as always, this will depend on the temperature of your home). This allows them to rest while the sourdough yeast is still active.
- COLD FERMENT - Cover the baguettes (I put mine on a tray and into a plastic bag) and place them into the fridge for up to 36 hours. I tend to do a shorter cold ferment for baguettes - around 12 to 18 hours is perfect.
- PREPARING TO BAKE - Once you're ready to bake your baguettes, you'll need to preheat your oven to 230C/450F.
Place your Cast Iron Bread Pan into the oven when you turn it on so it gets hot. Try to preheat for around 1 hour to ensure your oven is super hot - but you know your oven so just adjust this time if you need to. - BAKE TIME - Now it's time to bake! When your oven is at temperature, take your baguettes out of the fridge. Gently place them onto a piece of baking paper.Make sure that you make the baking paper big enough to use the edges as a handle to lower the baguettes into your cast iron bread pan.
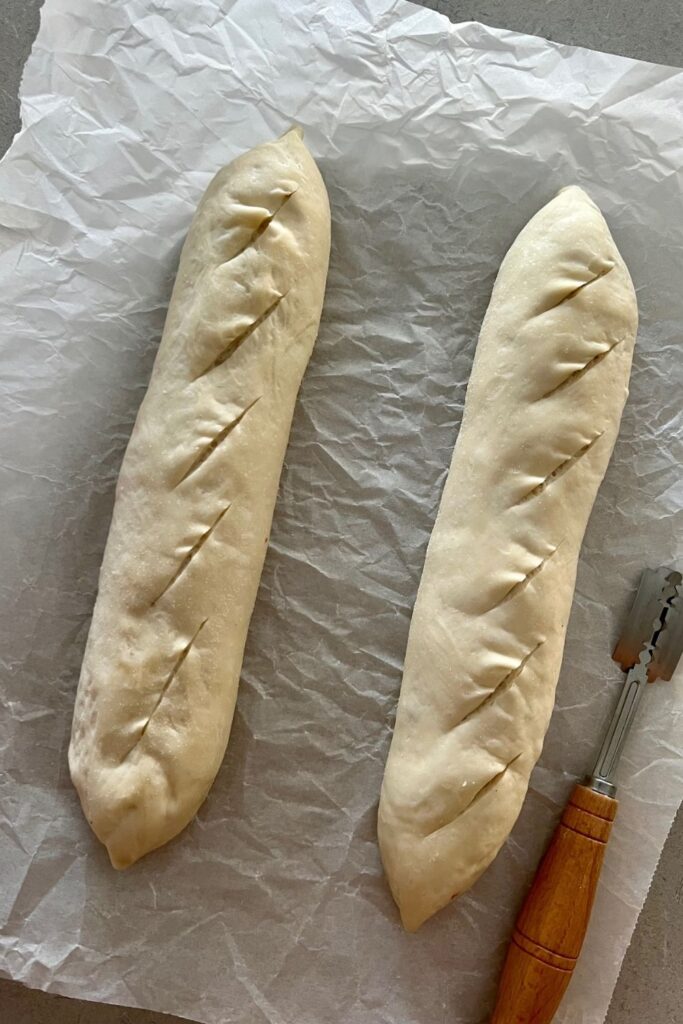
- Gently score your baguettes with a lame, clean razor blade or knife. You want to make short, sharp slashes that are almost vertical to the baguettes.
- Carefully take your dutch oven out of the oven. Place the baguettes into the pan using the baking paper as a handle (you can add a few cubes of ice or spray the dough with water if you like). Put the lid on and place into the hot oven.
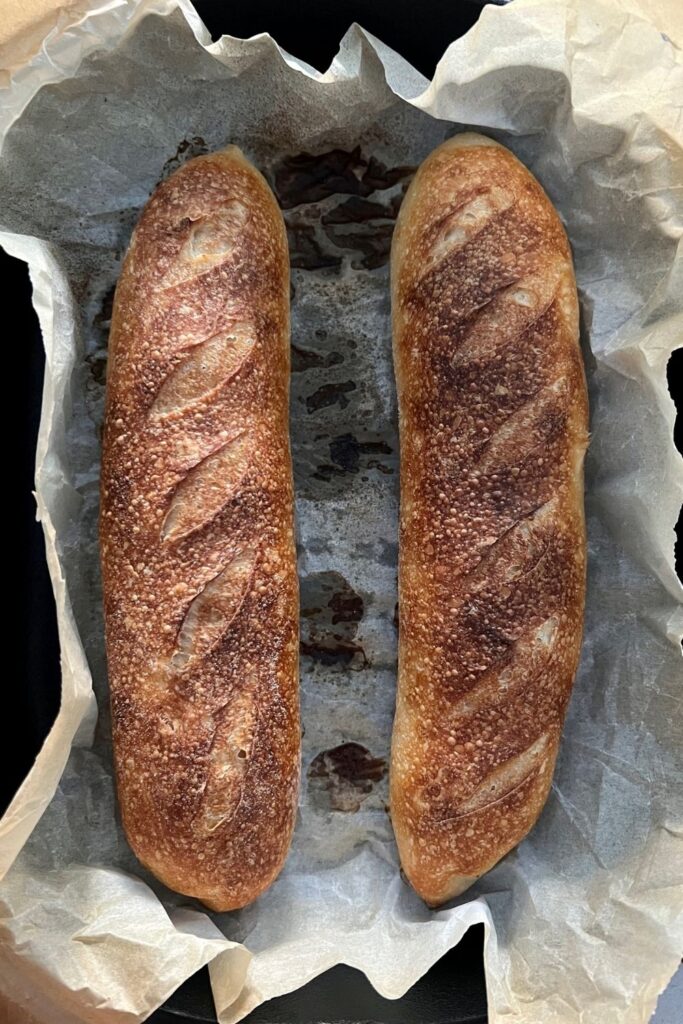
BAKE TIME: 15 Minutes with the lid on at 230C/450F plus 10-15 Minutes with the lid off at 210C/410F. - FINISHING THE BAKE - When you remove your baguettes from the oven, carefully remove them from the bread pan as soon as possible and place on a wire rack to cool.

Baker's Timeline for Sourdough Baguettes
Like any sourdough bake, you can tweak the timeline to suit your own needs. Here's the timeline I use when I make these baguettes at home. But you will need to consider the strength of your sourdough starter and the ambient temperature of your home.
You can find all the tips and tricks to creating a simple baker's timeline that suits any lifestyle in my book "Scheduling Sourdough".
| Time of Day | Step by Step |
|---|---|
| DAY 1 - 7pm | Feed sourdough starter 1:3:3 so it peaks when you wake up in the morning |
| DAY 2 - 7am | Autolyse dough, stretch and folds over next few hours |
| 10am | Bulk Fermentation (kitchen around 26C) |
| 4pm | Preshape, shape and place into shaping container |
| 5pm | Allow to proof for a few hours on the counter |
| 7pm | Place into fridge for the night. |
| DAY 3 7am | BAKE! |
Shaping Containers For Sourdough Baguettes
There are so many things you can use to shape and proof your baguettes in. You will see a few different things in my photos because I have experimented with so many things to work out which is really best when it comes to shaping and proofing sourdough baguettes.
Some of the ways which I have shaped and proofed this sourdough baguette recipe are:
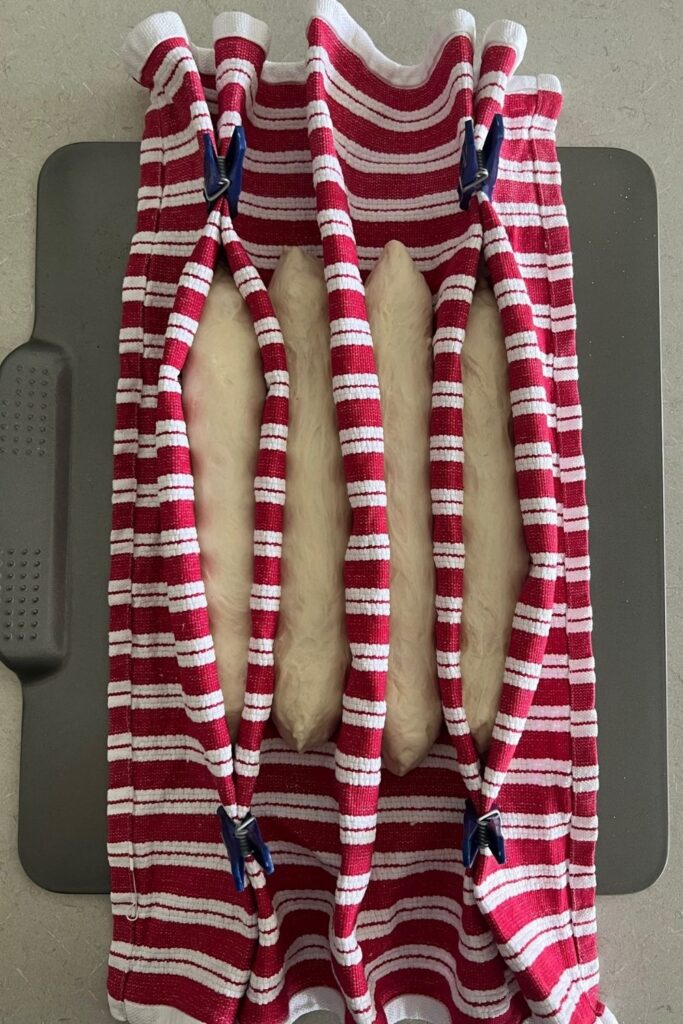
A heavy linen dish towel liberally dusted with rice flour (really rub it in). Lay the baguette on the towel and then form a pleat to separate the next baguette. I place the towel on a flat cookie sheet before I start so that the baguettes are easy to place in the fridge. I also use pegs to keep the pleats together (this helps the baguettes to keep their shape). This is a great DIY solution to a professional baking couche.
Baguette Proofing Basket / Banneton - you can purchase these in various sizing depending on how long you want to make your baguettes. Just make sure that you have a tray or pan long enough to bake these in. Baguette sized banneton baskets are good for longer cold proofing in the fridge.
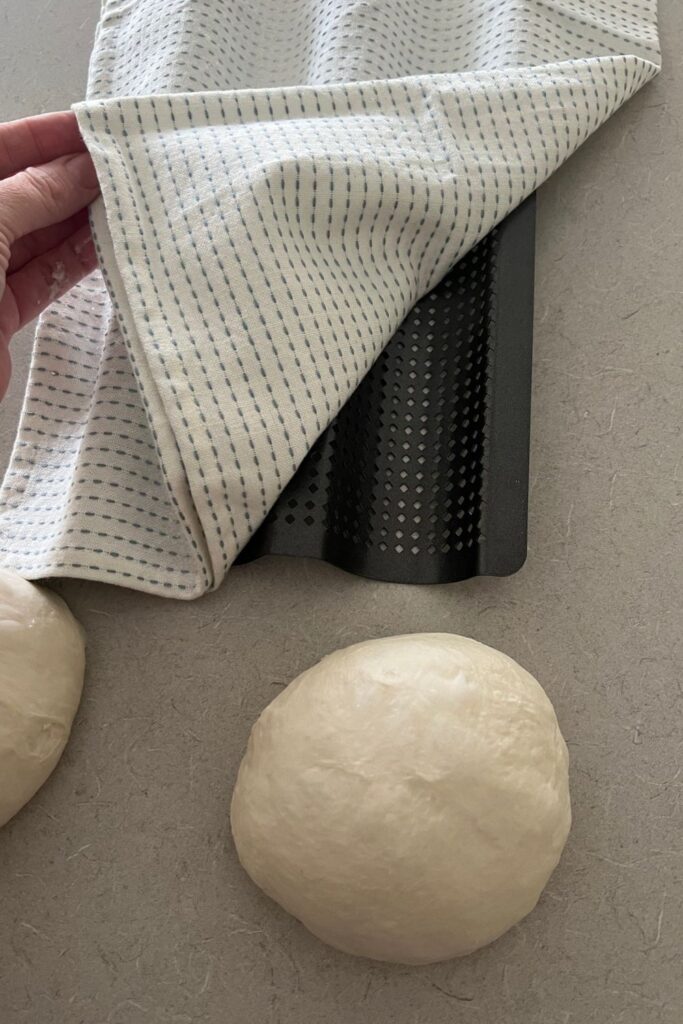
Perforated Baguette Tray - covered in a cotton dish towel - liberally rub the dish towel with rice flour before placing the baguettes on the top. You can then lift the dish towel with the baguettes off and tip them onto the tray when you're ready to bake.
Bake Sourdough Baguettes Without Covered Pan
In my experience, you'll get the most consistent result with this sourdough baguette recipe if you bake them in a covered cast iron bread pan. The covered pan allows the steam to be trapped inside, resulting in a crispy crust.
This is especially useful for beginners because you won't have a professional steam oven to bake in.
If you do not have a covered loaf pan big enough, or you wish to bake this sourdough baguette recipe uncovered in the oven, you'll need to do the following:
- Use a flat baking tray or cookie tray (no lip is best so the baguettes have room to bake).
- Use a piece of baking paper or parchment paper to ensure the baguettes don't stick to the pan.
- Preheat the oven to 230C/450F and allow it to get up to temperature.
- A few minutes before you place the baguettes into a hot oven, place an oven safe container with some ice onto the lowest rack in your oven.
- Bake the baguettes for around 15 minutes at 230C/450F with the ice/steam.
- Remove the container of ice (water) after 15 minutes and turn the oven down to 210C/410F and bake for a further 10 minutes or until the baguettes are crusty and golden.
Please exercise extreme caution when removing the tray of boiling water from the oven. It may have all evaporated after 15 minutes, but you really do need to be careful if it hasn't.
Troubleshooting Sourdough Baguette Recipe
While this is a beginner sourdough baguette recipe, sometimes things can go awry. There are some common issues that tend to come up with baguettes that I've outlined below. Even baguettes that aren't quite perfect make fantastic sourdough crostini!
- Dense / Heavy Baguettes - sourdough baguettes can be dense when they haven't been allowed to ferment or proof long enough. Once they are shaped, they need to be allowed to get a bit puffy. If they still feel heavy when you put them in the oven, you might find they don't spring up as much as you'd like.
- Misshapen / Burst Seams - if your sourdough baguettes burst in the oven or have weird misshapen parts that pop out this can be caused by poor shaping technique in that the seams have not been joined correctly. It can also be caused by under fermentation because the baguettes have too much energy when they hit the oven and burst their seams.
- Crust Is Not Crispy - if your baguette crust is not crispy, you might need to increase the amount of steam in the oven. You will get the best result by baking the baguettes in a covered pan, but as discussed above ice or water in the oven will also work for an uncovered bake. Crust is also affected by fermentation, so ensuring that your baguettes are adequately fermented is also important.
- Scoring Not Opening - if the scores or slashes in your baguettes don't open like you want them to, this can be caused by the angle you slash at, as well as fermentation. If the baguettes are over fermented, the cuts will not open up in the oven. The cuts need to be almost vertical to the baguettes.
Equipment for Making Sourdough Baguettes
It is possible to make sourdough baguettes without a lot of fancy equipment, but there are a few things that can ensure you have success.
Here are the items that I used to make my sourdough baguette recipe for beginners:
- Digital Scales
- Glass Mixing Bowl - allows you to see what's happening with your dough.
- Heavy Linen Dish Towel - this is an easy way to ensure that your baguettes don't lose their shape while they proof. You could also use a baguette shaped banneton or couche but I find a dish towel is a great option if you don't want to spend any money.
- Challenger Bread Pan - I have the most success baking baguettes in an enclosed cast iron bread pan. You can of course bake them without one (using a perforated baguette pan), but this has given me the best results. You could also use this Emile Henry Baguette Baker for a similar result. If you don't want to spend this much, you could also use something like Cusinart Bread Pan which is priced under $120 (and is very similar to the more expensive brands).
Frequently Asked Questions
No you don't need a steam oven to successfully bake sourdough baguettes. You can use a cast iron bread pan to mimic the conditions of a steam oven, or use ice on a tray underneath the baguettes. Both of these methods will result in successful sourdough baguettes.
There's really no perfect length for a baguette. Traditionally they are 60 to 70 cm long - but unless you have a very wide oven, this length is not practical for the home baker. My baguettes are around 30cm in length which is perfect for a beginner to shape. Perhaps not exactly traditional, but a realistic achievement for a home sourdough baker.
Dense baguettes are usually caused by under fermentation, under proofing or even poor shaping technique. If your sourdough baguettes feel heavy once they are baked, you will generally find that they are under fermented and you needed to leave them a little longer to proof once they are shaped.
Baguette refers to the actual shape of the loaf. Baguette literally translates to baton or wand in French. Sourdough refers to the process of leavening bread using wild colonised yeast rather than commercial yeast (as is traditionally used for French baguettes). Therefore, you can have sourdough baguettes as the sourdough refers to the method of leavening rather than the shape.

Sourdough Baguette Recipe
Equipment
- Mixing Bowl
- Digital Scales
- Baking Tray or Cast Iron Bread Pan
- Heavy Linen Dish Towel
Ingredients
- 250 g Bread Flour 100%
- 160 g Water 64%
- 50 g Sourdough Starter 20% (Fed and Bubbly)
- 6 g Salt 2% (increase or decrease according to your taste)
Instructions
- Please note - this recipe makes 2 x 175g baguettes with a little dough left over. If you want 4 baguettes, you can easily double, or even triple the recipe using the buttons on the top left of this recipe card.Autolyse - Premixing The DoughWeigh out your sourdough starter and water into a large ceramic or glass bowl. Glass is always good as you can see what's happening underneath your dough. This recipe is based on you having an active starter that you have fed a few hours before starting your bake.Mix the water and starter together briefly. Then add your flour and salt and mix whole lot together to form a shaggy dough. The dough will be fairly shaggy and only just brought together.
- Cover your bowl with cling film or a damp tea towel and let it sit for around 1 hour. It's ok if it's a little bit longer, it's not going to matter too much.This process is called the "autolyse" and allows your flour to soak in all the water and become hydrated. You can see how the dough has changed in this photo.
- Forming Up The DoughAfter the dough has been through autolyse you need to bring it together into a ball. Work your way around the bowl, grabbing the dough from the outside, stretching it up and over itself, into the centre, until a smooth ball is formed. You shouldn't need more than about 20-25 stretches to form the ball.You'll notice that the dough is fully hydrated after soaking all the water up. It will be fairly sticky but as you bring it into a ball, it will become smoother and shinier. It will feel slightly less wet than making regular sourdough bread.
- Once the dough has formed into a smooth ball, pop the cling film back on and let it rest for 30 minutes.
- Stretch & Fold - Creating StructureOver the next few hours you need to create some structure for your dough by "stretching and folding". Aim to do around 4-6 sets of stretches and folds. For each set, stretch the dough up and over itself 4 times. Leave around 15 minutes in between each set. Again you do not have to be exact with time, but you need to do at least 4 sets over 2 hours.
- Bulk FermentOnce you've finished your stretch and folds, place the cling film or damp tea towel back over your dough and let it rest and ferment (a plastic cover is a better option for this stage).You are looking for the dough to rise around just under double. For baguettes, it is easier to shape them if you don't let the dough double completely.See notes below for more info on this step.
- Shaping BaguettesOnce your dough has finished its first ferment, it's time to shape your baguettes. I've included step by step instructions here and you'll find visual instructions in the post above.Use a dough scraper to tip the dough onto the counter. You'll need to divide the dough into portions so you can make the baguettes. I like to use 175 to 200g of dough. This is a nice manageable size. You can make them bigger as your shaping skills get better.Preshape each portion of dough into a round and allow to rest for 30 minutes while you organise the couche or heavy linen dish towel. You'll need to rub whatever you're using liberally with rice flour so the baguettes don't stick (remember there are different options for shaping containers in the post above).
- Take a portion of dough and stretch it out so that it's a flat rectangle.
- Take the top edge of the dough and fold it into the middle of the dough, pressing gently with your fingertips or heel of your hand.
- Now pull the lower edge of the dough up and over and then use the counter to tension the dough into the baguette shape.
- Gently pull the ends into a point using your fingertips.
- Gently lift the baguette and place it into your shaping container or cloth and then shape the next baguette.
- ProofingAllow the baguettes to sit at room temp for around two hours (but as always, this will depend on the temperature of your home). This allows them to rest while the sourdough yeast is still active.
- Cold FermentCover the baguettes (I put mine on a tray and into a plastic bag) and place them into the fridge for up to 36 hours. I tend to do a shorter cold ferment for baguettes - around 12 to 18 hours is perfect.
- Preparing To BakeOnce you're ready to bake your baguettes, you'll need to preheat your oven to 230C/450F. Place your Cast Iron Bread Pan into the oven when you turn it on so it gets hot. Try to preheat for around 1 hour to ensure your oven is super hot - but you know your oven so just adjust this time if you need to.Remember there are alternatives to baking in a cast iron bread pan in the notes of the main post.
- Bake Time!Now it's time to bake!When your oven is at temperature, take your baguettes out of the fridge. Gently place them onto a piece of baking paper. Make sure that you make the baking paper big enough to use the edges as a handle to lower the baguettes into your cast iron bread pan.Gently score your baguettes with a lame, clean razor blade or knife. You want to make short, sharp slashes that are almost vertical to the baguettes.Carefully take your dutch oven out of the oven. Place the baguettes into the pan using the baking paper as a handle (you can add a few cubes of ice or spray the dough with water if you like). Put the lid on and place into the hot oven. BAKE TIME:15 Minutes with the lid on at 230C/450F plus10-15 Minutes with the lid off at 210C/410F
- Finishing The BakeWhen you remove your baguettes from the oven, carefully remove them from the bread pan as soon as possible and place on a wire rack to cool.
Notes
- Recipe Weights: This recipe makes 2 medium sized baguettes. If you'd like to make more you can easily double or even triple this recipes. It scales very easily using the buttons on the recipe card.
- Notes on Flour: This recipe is written using strong Bread Flour. Bread flour has a higher protein content than All Purpose flour. If you choose to use All Purpose flour you may have a different result because of this. You can read more about the differences between All Purpose Flour and Bread Flour here.
- Notes on Sourdough Starter: This recipe is based on you having an active starter that you have fed a few hours before starting your bake. For info on how to make a sourdough starter, go here.
- Notes on Stretch & Folds: If you are going to do the stretch & folds on your bench top, spray your surface with water mist rather than using flour. You can leave the dough in the bowl if you want to. Wet your hands to stop the dough sticking - although it shouldn't be too sticky. It will get less sticky as you do your stretches and folds. For more information on how to do stretch and folds, go here.
- Notes on Bulk Fermentation: If your home is warm then your dough will ferment a lot faster and could be done in as little as a few hours. If it's colder, it will take longer, possibly overnight.
I would recommend that you try to do your first few bulk ferments during daylight hours so that you can watch your dough closely.
Once you're more familiar with the process - and the temperature of your home - you will be able to do overnight ferments. You will know your dough is ready to move to the next stage when it is just under double. Remember that shaping baguettes can be tricky so you don't want to let your dough over ferment. You'll find more information on these topics here:
When is my bulk ferment finished? What is the difference between cold ferment and bulk ferment? Why does the amount of starter matter?
Nutrition




Thanks for sending this out - I am giving it a try today/tomorrow(!) With summer temps warming up, I invented a cool water bath for my bulk ferment (dough in a smaller bowl, floating in a bigger bowl or any vessel filled with cool water). I hope that gives me a full 8-9 hours away at work, without over proofing , before doing the shaping tonight.
I have check the recipe over and notes and you simply state "bread flour" I tend to use part brown and white but I assume you mean only white here? In my experience brown requires more hydration. Thanks
Yes, just white bread flour 🙂 I don't recommend whole wheat flour when making sourdough baguettes.
Just amazing recipe ! Easy delicious baguettes ! Thank you so much for that recipe !! I have one question: if I want to freeze those baguettes, I can of course cook them, let them cool and freeze them, but is there a way (if it is appropriate) to freeze them uncooked, thaw them and cook ? If yes when would it be the best moment to do so, afeter the Cold fermentation ? Thanks again !!
I have the exact question! Waiting for a response...thx
This recipe is amazing! I wanted a quick crusty bread to throw together during the work week. I mixed the dough/did my stretch and folds after work starting at 5:00 in the evening. then let it bulk rise overnight (it was colder in my home), shaped in the morning before work, and popped into the oven when I got off. I loved how it was a smaller recipe perfect for a one meal bread!
I notice, in comparing the simple sourdough bread recipe with the baguette recipe, the ingredient amounts are the same if using the same quantity of flour--*except* the baguette uses twice as much starter. Is this correct? If so, why does the baguette need so much more starter proportionally?
Thanks for sharing! I was only able to get one large baguette for this recipe but overall easy to make!
Nice site , came here looking for guides for Baguette/Banette/Ficelle ideas ... been sourdough baking our house needs since 2017 ... many thanks ... looking forward to honing these breads :]
I used basic sourdough recipe as I changed my mind midstream.
I assume it will still work?
Also, would like to know if I can let it finish rising after cold fermentation?
Yes it will still work. You can let it rise after cold fermentation, but it will take some time and you might risk over fermentation 🙂
Just baked these baguettes, they turned out so light. I open baked them for 15 min at 240 Celsius and 13 min at 210 Celsius. I was actually looking for a recipe for smaller baguettes, because I haven't made baguettes before and I loved the outcome so much, I think I will be making these on repeat.
This recipe is great! Actually, I have been following your recipes as a guide for a couple years now. I love making sourdough bread because of how easy you have made it. Thank you!
Mine turned out perfect!! Thanks so much for an easy-to-follow recipe. I divided mine into 3 small loaves and open baked with a pan of water below. My question is how to store to save the crispness.
Never give up! Everything was great until I took them out of the fridge. Flat sad deflated looking things. Put them in the oven and out came glorious golden risen baguettes! I guess this is why this is my go to bread page....discard sandwich bread and rolls coming up next 😁