This post contains affiliate links. Please see our disclosure policy.

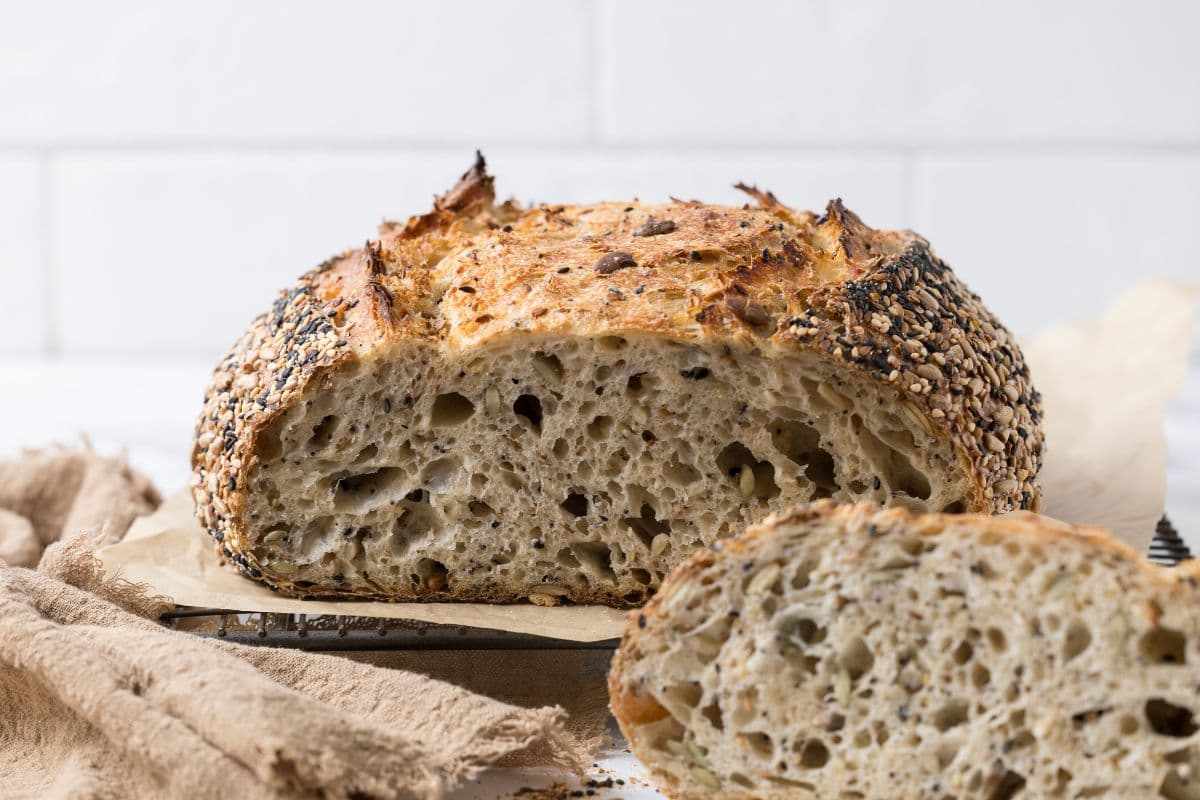
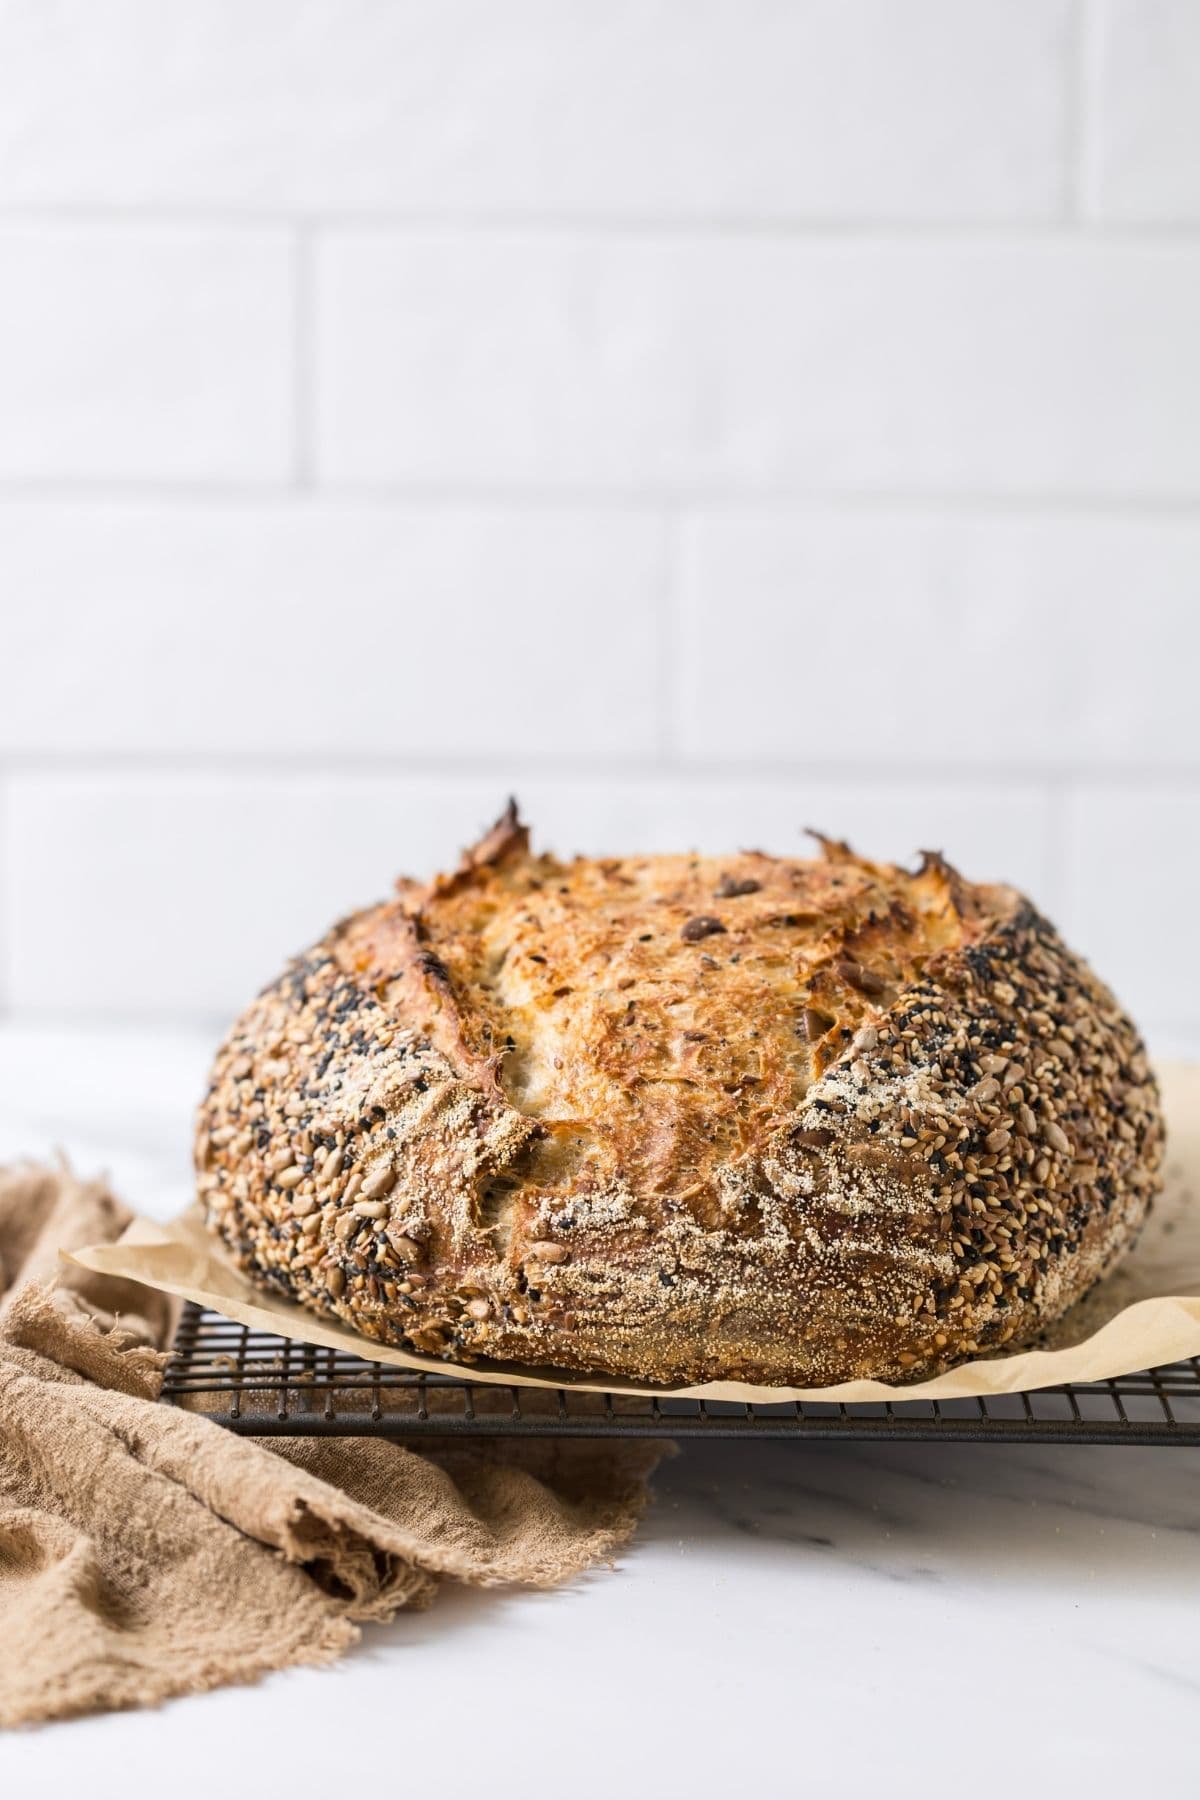
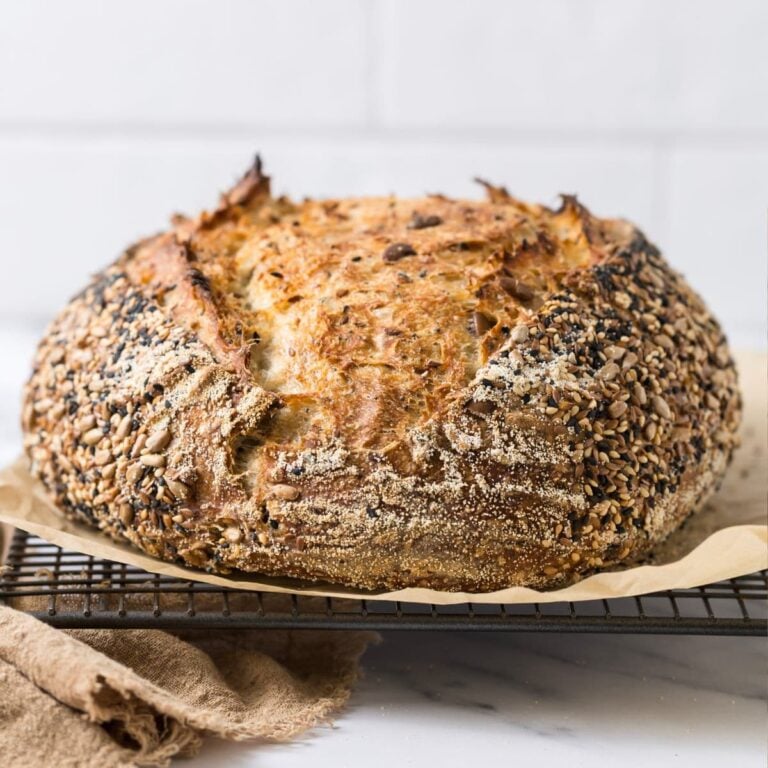
Filled to the brim with grainy goodness, this easy multigrain sourdough bread recipe is everything you want in grainy bread. It’s totally customisable so you can add the seeds and whole grains you love to eat, you can even add whole wheat flour if you prefer it. There really is something so wholesome about multigrain bread. Perhaps something we didn’t love as kids, becomes somewhat of an adult treat. The smell of this hearty loaf baking is just out of this world!
Why You’ll Love This Recipe
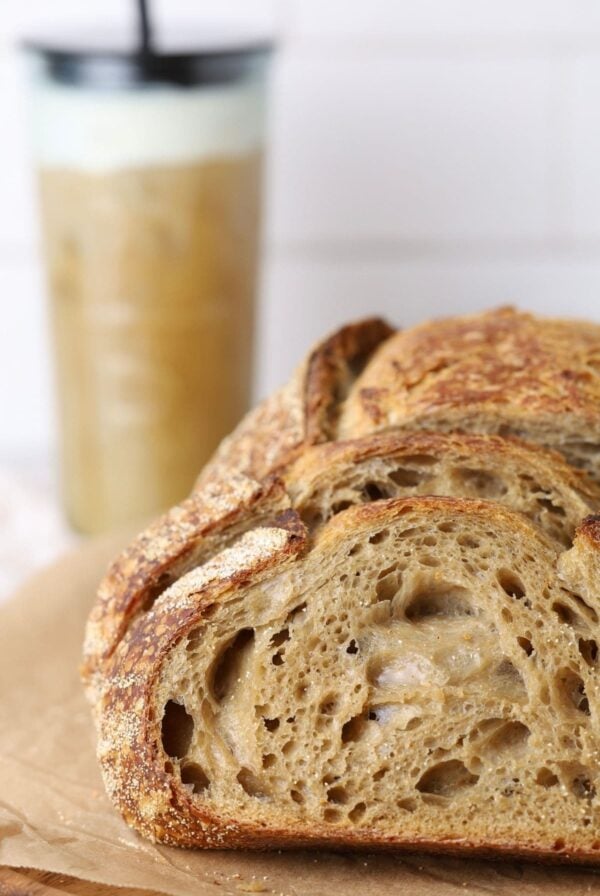
- Perfect Ratio – I worked over a number of weeks to perfect the ratio of grains to bread flour to ensure that this sourdough bread maintains a soft, fluffy crumb, a crispy, chewy crust and a big pop of oven spring – even jammed with all that grainy goodness!
- Loads of Grains – Multigrain bread can be defined as bread made with 2 or more types of grain (source). This means that you really only need 2 types of grains (for example you could use wheat flour and rolled oats), however most breads using the “multigrain” title will contain more than 2 grains and also include some seeds as well.The sourdough multigrain bread in this recipe could be classified as more of a seeded multigrain sourdough bread due to the inclusion of seeds.
I love this recipe. It is going to be on my regular rotation from now on. Simple and delicious and very very seedy. Right now I’m eating it slathered with butter and drizzled with hot honey. Even my hubby is a fan (and he is not a fan of other seed bread recipes I’ve experimented with) so that’s saying something. Great job on this!
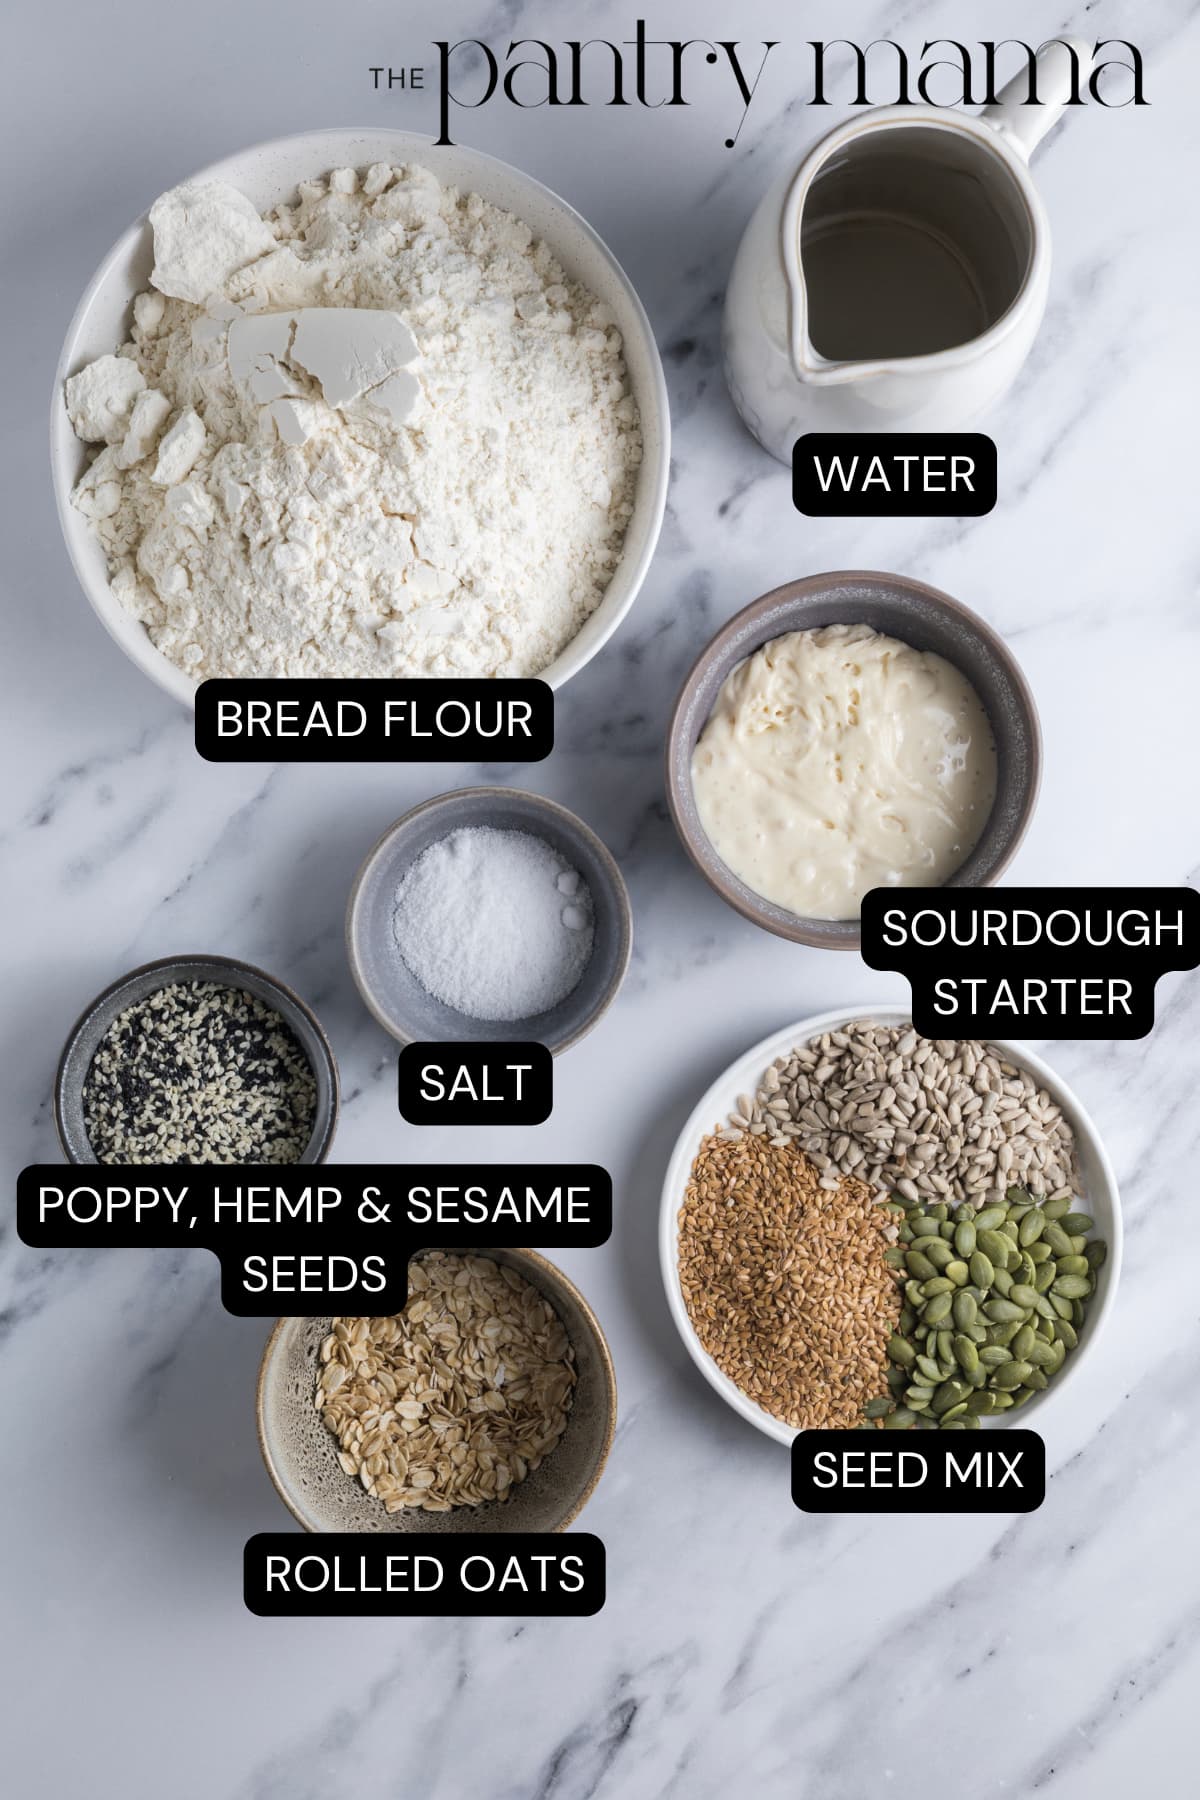
Ingredients
- Seeds – You can use any combination of grains and seeds you’d like. Aim for around 100 to 150g of whole grains and seeds. It’s a great way to use up those random packs of seeds lurking in your pantry! There’s really no hard and fast rules for the grains you can inlclude. Some other whole grains and seeds you could include are pumpkin seeds, sunflower seeds, flax seeds, sesame seeds, poppy seeds, quinoa, cracked wheat and steel cut oats.
- Sourdough Starter – active sourdough starter is best for this recipe. I’ve used 100g of fed and bubbly sourdough starter.
- Bread Flour – You can use whole wheat flour in this loaf if you prefer. I recommend not using more than 50% whole wheat flour, along with the different types of grains and seeds. Halving the amount of bread flour and replacing with whole wheat flour may not give you the oven spring you like. If you are having trouble with the oven spring when using whole wheat flour, you might consider adding some vital wheat gluten for a boost to your bread dough.
- Water
- Salt
- Whole Rolled Oats
- Seeds – You can use any combination of grains and seeds you’d like. Aim for around 100 to 150g of whole grains and seeds. It’s a great way to use up those random packs of seeds lurking in your pantry! There’s really no hard and fast rules for the grains you can inlclude. Some other whole grains and seeds you could include are pumpkin seeds, sunflower seeds, flax seeds, sesame seeds, poppy seeds, quinoa, cracked wheat and steel cut oats.
How To Make Multigrain Sourdough Bread
This sourdough recipes is fairly easy, even if you’re a beginner sourdough baker. The recipe follows the same sequence as my simple sourdough loaf recipe, just with the inclusion of soaked seeds. I have documented the entire process here, as well as in the recipe card at the bottom of the page.
You’ll need an active sourdough starter that has been fed and is at it’s peak to make this multigrain bread recipe successfully. I have used a kitchen scale to weigh out all ingredients accurately.
Soaking the Seeds
Before you start this bake, you’ll need to soak your seeds and oats in about 100g of water. Only soak pumpkin, sunflower, flax and oats (not poppy seeds, sesame seeds, chia seeds etc). Leave them to soak for around an hour.
Kate’s Pro Tip
Tips for Soaking Seeds
Soaking the seeds ensures that they don’t burn but I feel that it also helps them to incorporate into the dough much more easily too. I find that if you don’t soak the seeds, they will absorb some of the moisture from your dough once they are incorporated and this can make your dough harder to work with as it will be a lower hydration.
If the seeds do soak up some of the water in your dough, it will result in a tougher crust and a smaller crumb. Of course, the bread will still be delicious, but if crust and crumb are important to you, then I highly recommend soaking the seeds. Just remember to drain them before adding to the dough as you don’t want to have a sloppy dough with too much hydration.
Making the Dough
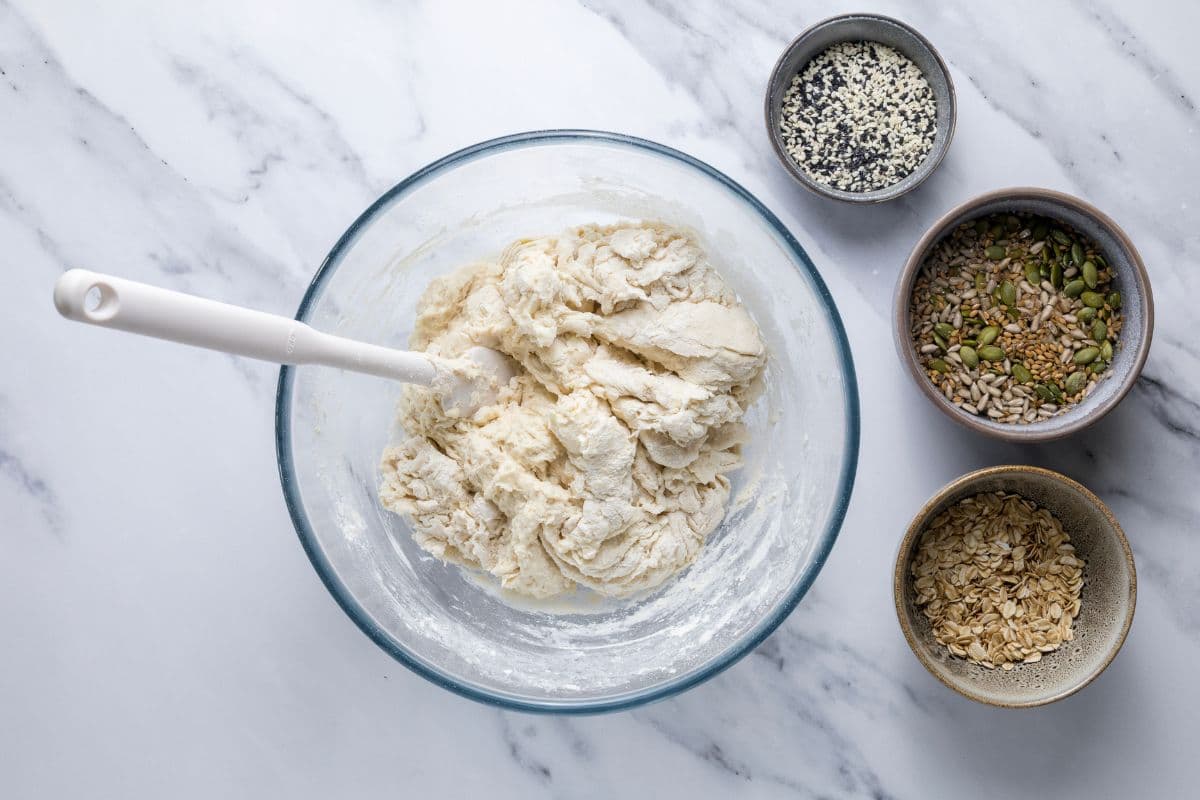
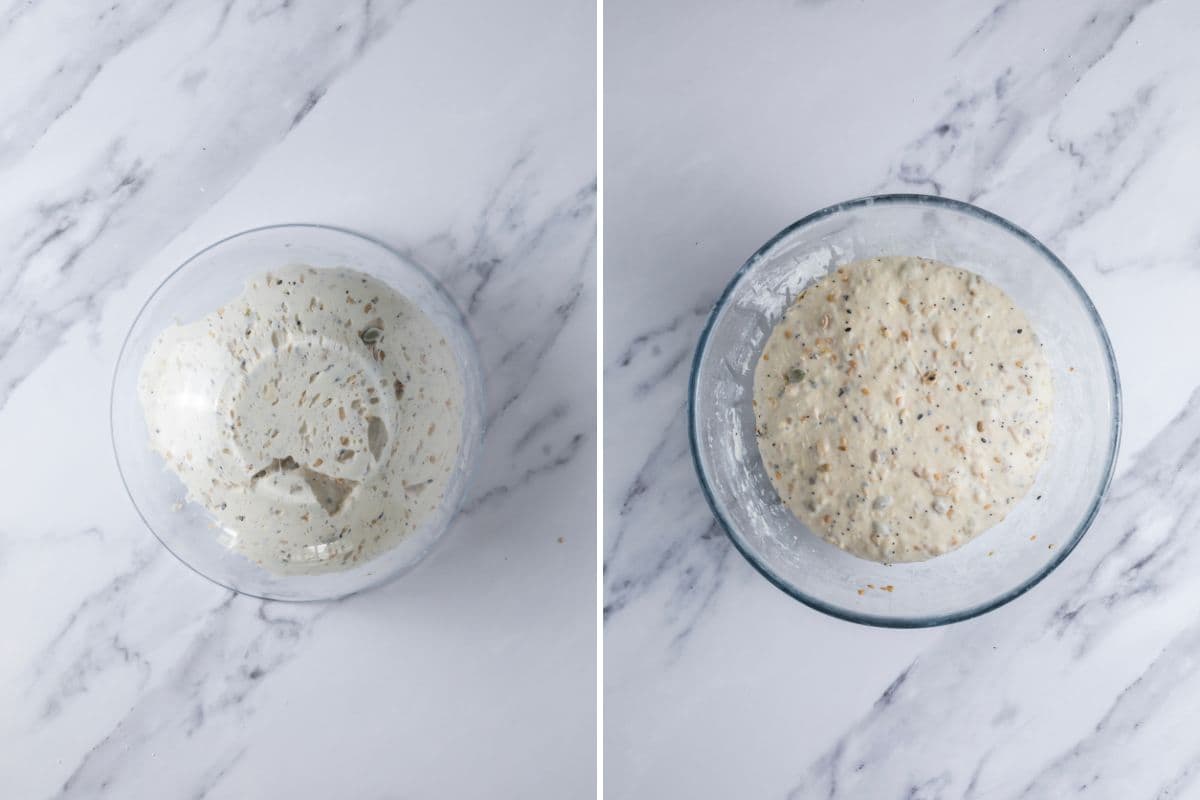
Weigh out your sourdough starter and water into a large bowl. Mix the water and starter together briefly. Then add your flour and salt and mix altogether to form a shaggy dough. Cover and allow the dough to rest for around an hour (this is the fermentolyse).
Adding The Seeds
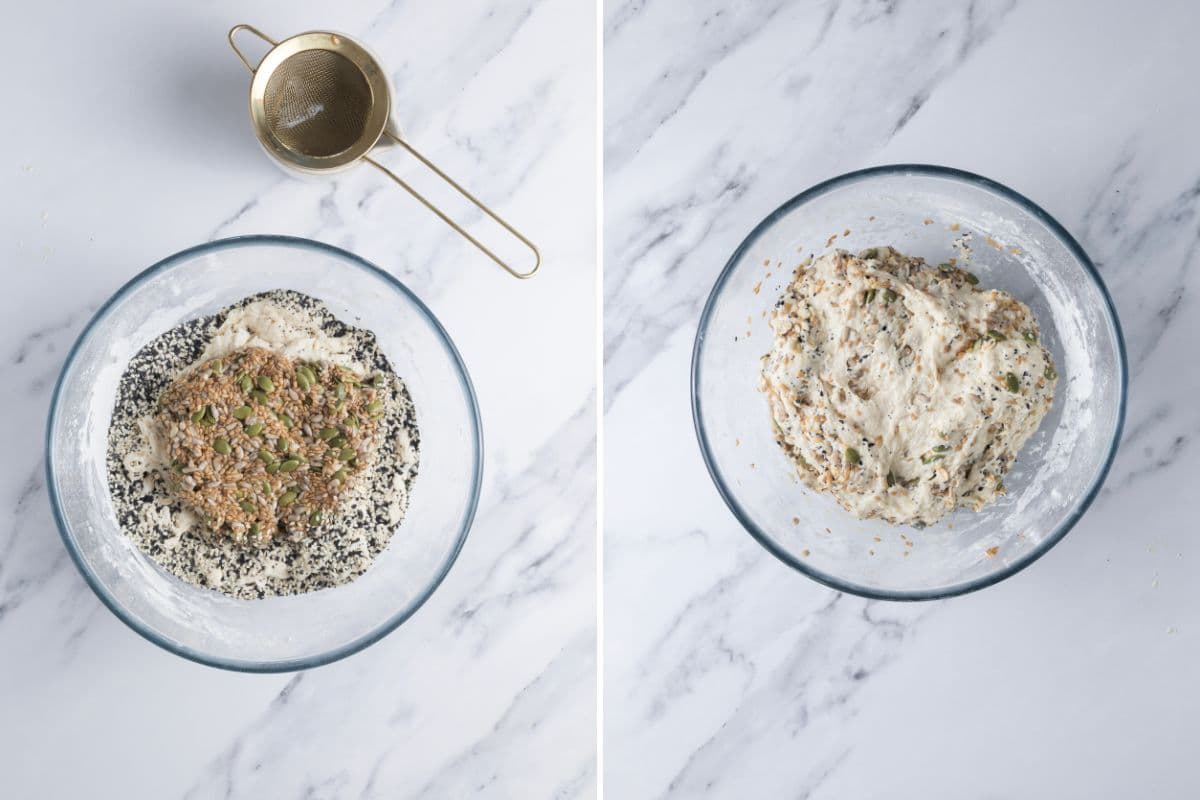
Now drain off your seeds. I like to pour them into a sieve and let the water drain into the sink, then let them sit for a minute or too to ensure they aren’t too wet.
Put all the drained seeds and oats into the middle of the bowl and work your way around, folding the dough over the seeds and oats and incorporating them into the dough. Don’t worry if your seeds haven’t worked through the dough fully, they will be evenly distributed when you complete the stretch and folds. Once the dough has formed into a ball, cover again and let it rest for 30 minutes.
Stretch & Folds
Over the next few hours you need to create some structure for your dough by “stretching and folding”. Aim to do around 4-6 sets of stretches and folds. For each set, stretch the dough up and over itself 4 times. Leave around 15 minutes in between each set. You do not have to be exact with time, but you need to do at least 4 sets over 2 hours.
Bulk Fermentation
Once you’ve finished your stretch and folds, place the plastic wrap or damp tea towel back over your dough and let it bulk ferment at room temperature until it has doubled (you can read more about understanding when bulk fermentation has finished).
Shaping Your Dough
Once your dough has finished its first ferment, it’s time to shape it and give it some surface tension.
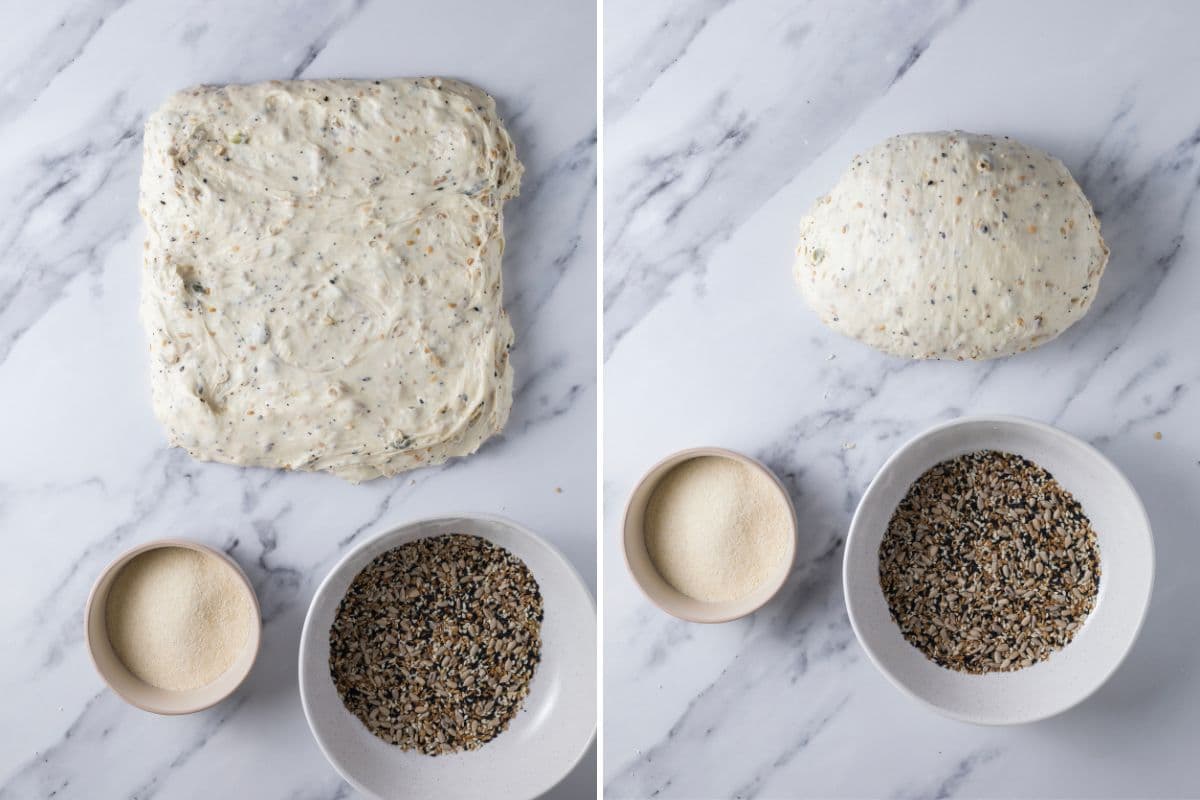
Ease the dough out of the bowl. You want it to land upside down on your counter so that the smooth top of the dough is on the countertop and the sticky underside is facing up. This will make it easier to shape.
You want to pull the edges of the dough into the centre and then flip it over so that the sticky side is now underneath. Using the stickiness, gently pull the dough into a tight ball. Alternatively you can shape into a batard (this is the shape I usually go with).
Topping with Seeds
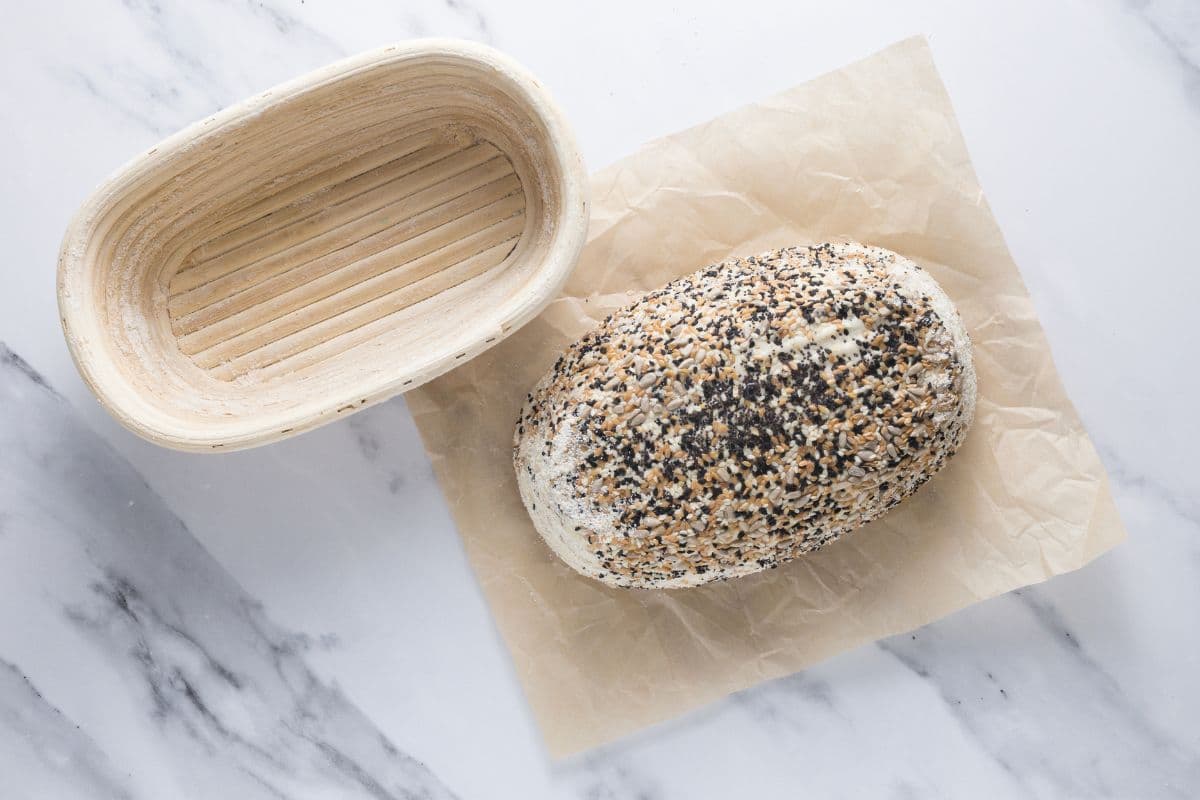
You will need a banneton to put your dough into. If you do not have a banneton, then a bowl or basket lined with a floured tea towel is perfectly fine. Make sure your bowl isn’t too big though, you want your dough to retain some shape. You can also check out these banneton alternatives.
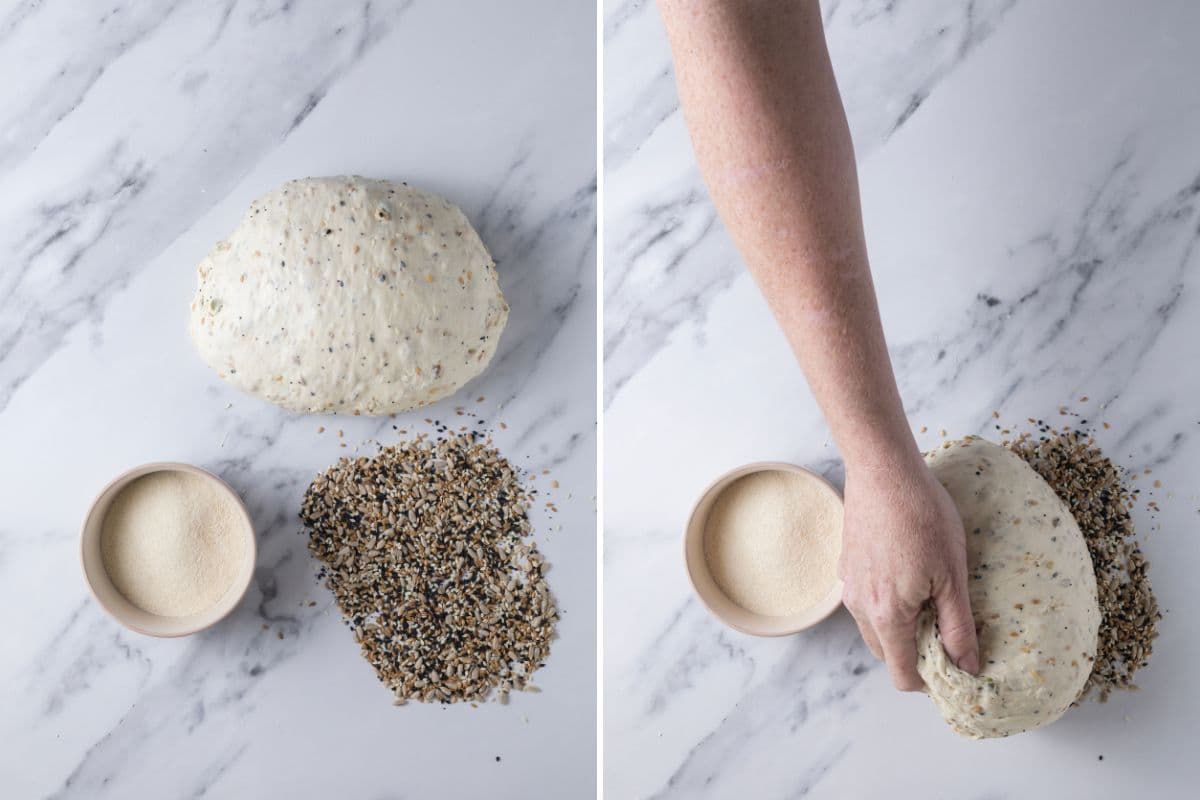
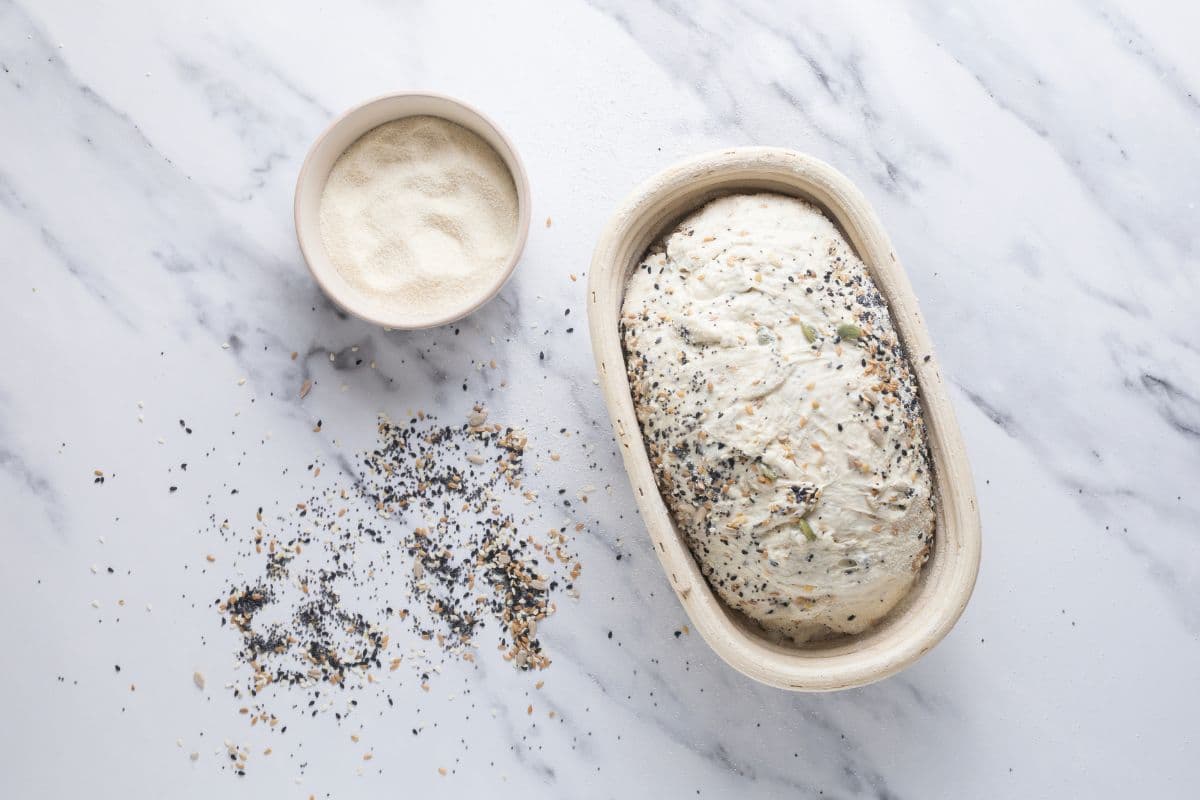
Before I place the dough into the banneton, I roll the top of the dough in a mixture of seeds (generally the same as what I’ve put inside the loaf). I then place it seam side up in the banneton. If you’re not confident enough to roll the shaped loaf in seeds, just place them in the bottom of the banneton and the dough will stick to them when you place it on top.
Cold Ferment
Now your dough is in it’s “shaping container” cover it loosely with a plastic bag or damp tea towel and place into the fridge. I use a large plastic bag to cover it – I just reuse it each time. It’s not totally essential to cover it – you can place it in the fridge uncovered if you’d prefer.
Try to leave it in the fridge for a minimum 5 hours up to a maximum of around 36 hours. The longer you leave it the better your bread will be! A longer cold ferment creates beautiful blisters on your crust and a deeper sourdough flavour. It will also ensure your dough forms a skin which makes it easier to score. For this multigrain bread, I highly recommend leaving your dough in the fridge for 36 hours – it creates the most amazing flavor!
Score and Bake
Once you’re ready to bake your sourdough, you’ll need to preheat your oven to 230ºC/450ºF. Place your loaf onto a piece of parchment paper and gently score your bread with a lame, clean razor blade or knife. Scoring can be tricky with a seeded loaf, so a simple slash is enough.
Carefully take your dutch oven out of the oven. Place the sourdough into the hot Dutch Oven using the baking paper as a handle. Put the lid on and place into the hot oven.
If you’re worried about the bottom of the bread burning or being too chewy, place a baking sheet on shelf underneath your Dutch Oven – it works!
BAKE TIME:
30 Minutes with the lid on at 230ºC/450ºF plus
10-15 Minutes with the lid off at 210ºC/410ºF
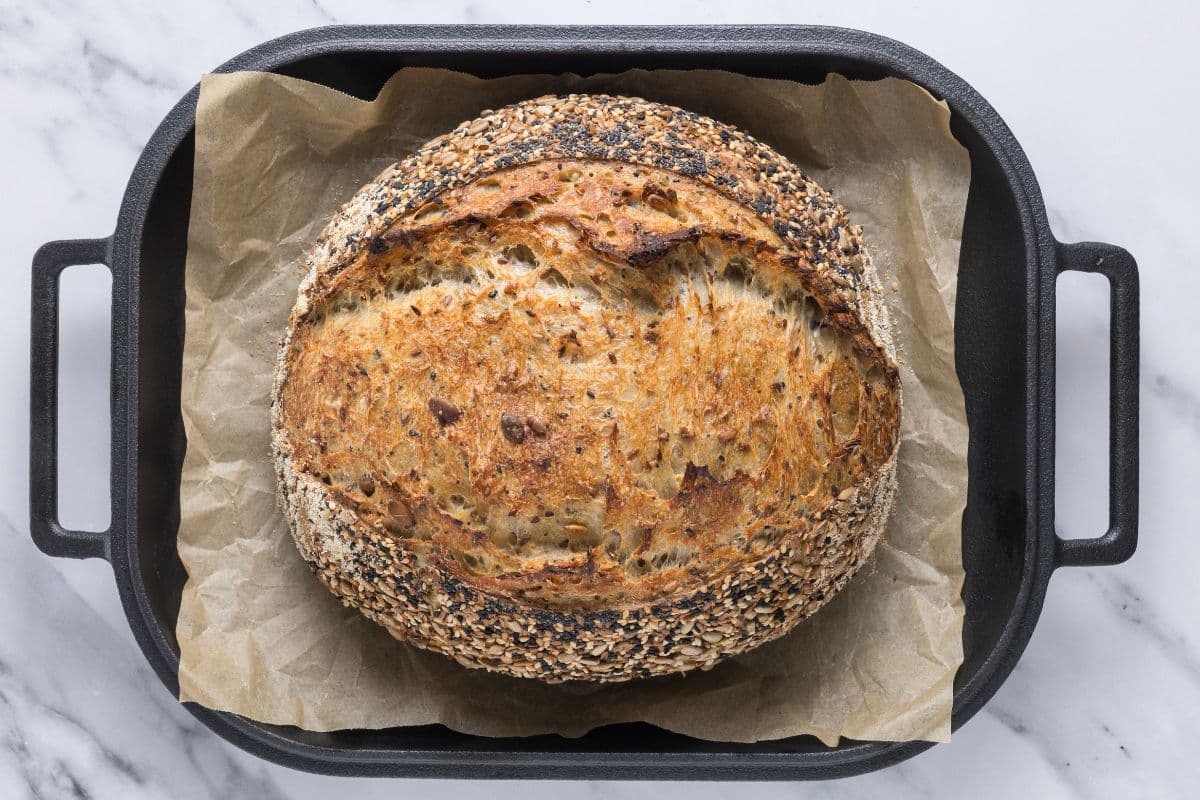
When you remove your dough from the oven, carefully remove it from the dutch oven as soon as possible and place on a wire rack to cool.
And if you love all things whole grain and seedy, why not try making these seedy sourdough crackers or this whole wheat rye sourdough loaf or sourdough oatmeal loaf. They’re all tried and tested in The Pantry Mama Kitchen!
Baker’s Timeline for Multigrain Sourdough Bread
This is a sample baker’s timeline that you could use for this multigrain sourdough loaf. You can adjust it to suit your own schedule or you can learn how to create your own baker’s timeline for sourdough here.
DAY 1
1.00pm – Feed sourdough starter
5.00 pm – Premix and Autolyse (this is also a great time to soak your seeds)
6.30pm – Form into a smooth ball. Rest for 30 minutes.
7.00pm – Perform 4-6 sets of stretch & folds over next 2 hours.
9.00pm – Cover and leave on bench overnight for bulk ferment if temp right.
DAY 2
6.00am – Shape & lift into banneton/bowl & into the fridge.
2.00pm – Place into a hot oven and bake until golden brown.
7.00pm – finally cut into delicious sourdough and slather with cultured butter!
Serving Ideas for Multigrain Sourdough Bread
This multigrain sourdough bread can easily be used where you would use a normal white loaf. It is soft and fluffy and makes the most delicious cold cut sandwiches.
I love to eat it toasted in the mornings with lashings of peanut butter and jam. It’s fantastic topped with poached eggs and hollandaise sauce or a big dollop of my tomato chutney!
I love making my toddler multigrain sourdough toast for breakfast because I feel good giving him all those extra seeds in his morning meal. He’s quite happy to eat this – unlike my older kids who prefer this oatmeal sourdough bread.
How To Store and Freeze
Like most sourdough bread, this multigrain sourdough loaf is best eaten within 24 hours of baking. Allow it to fully cool at room temperature before slicing with a good quality bread knife (check out my favorite sourdough bread knife).
It also freezes really well! Place the cooled loaf into a ziplock bag (much easier than plastic wrap) and then place in the freezer for up to 3 months. Thaw at room temperature in the bag to ensure you retain the moisture in the crumb at room temperature.
Frequently Asked Questions
You don’t have to, however if you don’t soak them, they can take on some of the water in the dough which can affect the hydration. This will ultimately change the texture of your bread an have an effect on the crust and crumb.I recommend soaking and then draining the seeds if you have the time. You will be rewarded with better sourdough.
The seeds will not affect the bulk fermentation time, so long as you don’t use more than 20% weight overall (you can read about baker’s percentages here). You can treat bulk fermentation just as you normally would with a plain sourdough loaf. If you would like to learn more about judging when bulk fermentation is finished, you can read this handy guide.
As a general rule, you should leave sourdough to cool and rest for at least 90 minutes once it’s been removed from the oven. This allows the cooking process to finish and the steam to settle. If you do not wait, you risk a gummy crumb and a sticky knife. Ideally, you should let the bread cool for around 6 hours, particularly if using rye flour.
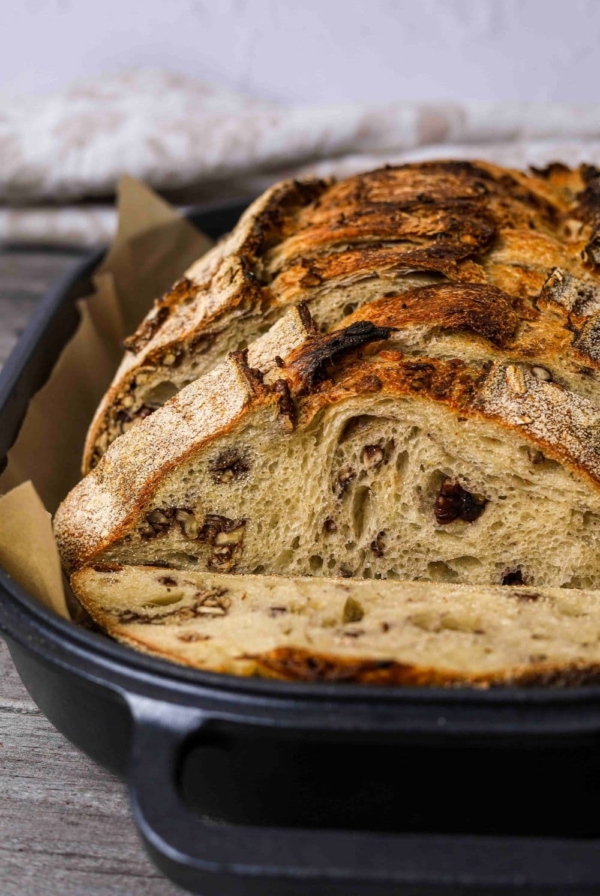
I have 3 boys and it can be hard to get them to eat a really seedy bread. I developed this Sourdough Oatmeal Bread as a kind of “invisible multigrain” sourdough to get them to eat a bread with more nutrient dense ingredients. Try it – I promise you’ll love it – and so will they! Don’t add the oats on the outside of the bread if you are trying to disguise it.
Easy Multigrain Sourdough Recipe
Equipment
- Mixing Bowl
- Banneton
- Dutch Oven
Ingredients
- 100 g Sourdough Starter, Active and Fed
- 500 g Bread Flour
- 350 g Water
- 10 g Salt
- 25 g Rolled Oats
- 25 g Pumpkin Seeds
- 25 g Sunflower Seeds
- 25 g Flax Seeds
- 10 g Hemp Seeds
- 10 g Sesame Seeds
- 10 g Poppy Seeds
- Additional Seeds of choice for topping your sourdough.
Instructions
- Before You Start: Before you start this bake, you'll need to soak your seeds and oats in about 100g of water. Only soak pumpkin, sunflower, flax and oats (not poppy seeds, sesame seeds or hemp). Just leave them for around an hour. They will soak up all of the water in this time.
- Autolyse: Weigh out your sourdough starter and water into a large ceramic or glass bowl. Mix the water and starter together briefly. Then add your flour and salt and mix altogether with a silicone dough scraper. The dough will be fairly shaggy and only just brought together (see photo).Cover your bowl with cling film or a damp tea towel and let it sit for around 1 hour.
- Adding Your Seeds:After the dough has been through autolyse you will need to add your seeds. If there is still water sitting in the bowl of seeds, drain it off. The seeds will be quite wet but this will help them incorporate into the dough.Put all the seeds and oats into the middle of the bowl and work your way around, folding the dough over the seeds and oats and incorporating them into the dough.Don't worry if your seeds haven't worked through the dough fully, they will be evenly distributed when you complete the stretch and folds.Once the dough has formed into a ball, pop the cling film back on and let it rest for 30 minutes.
- Stretch & Folds:Over the next few hours you need to create some structure for your dough by "stretching and folding". Aim to do around 4-6 sets of stretches and folds. For each set, stretch the dough up and over itself 4 times. Leave around 15 minutes in between each set. You do not have to be exact with time, but you need to do at least 4 sets over 2 hours.
- Bulk Ferment:Once you've finished your stretch and folds, place the cling film or damp tea towel back over your dough and let it rest and ferment (see notes).
- Shaping Your Dough:Once your dough has finished its first ferment, it's time to form it back into a ball and give it some shape and surface tension. You'll need to flour your counter top with rice flour for this (we use rice flour because it has no gluten). Try to be quite sparing with the rice flour, you only need a very light dusting.Use a silicone dough scraper to gently ease the dough out of the bowl. You want it to land upside down on your counter so that the smooth top of the dough is on the countertop and the sticky underside is facing up. This will make it easier to shape.You want to pull the edges of the dough into the centre and then flip it over so that the sticky side is now underneath. Using the stickiness, gently pull the dough into a tight ball.
- Adding Topping:You will need a banneton to put your dough into. If you do not have a banneton, then a bowl or basket lined with a floured tea towel is perfectly fine. Make sure your bowl isn’t too big though, you want your dough to retain some shape. You can also check out these banneton alternatives.Before I place the dough into the banneton, I roll the top of the dough in a mixture of seeds (generally the same as what I've put inside the loaf). I then place it seam side up in the banneton. If you're not confident enough to roll the shaped loaf in seeds, just place them in the bottom of the banneton and the dough will stick to them when you place it on top.
- Cold Ferment:Now your dough is in it's "shaping container" cover it loosely with a plastic bag or damp tea towel and place into the fridge. I use a large plastic bag to cover it – I just reuse it each time. It's not totally essential to cover it – you can place it in the fridge uncovered if you'd prefer.Try to leave it in the fridge for a minimum 5 hours up to a maximum of around 36 hours. The longer you leave it the better your bread will be! A longer cold ferment creates beautiful blisters on your crust and a deeper sourdough flavour. It will also ensure your dough forms a skin which makes it easier to score. For this multigrain bread, I highly recommend leaving your dough in the fridge for 36 hours – it creates the most amazing flavor!
- Preparing to Bake:Once you're ready to bake your sourdough, you'll need to preheat your oven to 230ºC/450ºF. Place your Dutch Oven into the oven when you turn it on so it gets hot. Try to preheat for around 1 hour to ensure your oven is super hot – but you know your oven so just adjust this time if you need to. Leave your dough in the fridge until the very last minute – placing a cold dough into a hot oven will give you a great "spring".
- Scoring Your Sourdough:Now it's time to score! When your oven is at temperature, take your sourdough out of the fridge. Gently flip your dough out onto a piece of parchment paper so that the seeded top is facing up.Make sure that you make the baking paper big enough to use the edges as a handle to lower to dough into your Dutch Oven.Gently score your bread with a lame, clean razor blade or knife. At minimum a large cross is sufficient, but you can get as artistic as you like (although it can be hard with a seeded loaf). Try to score it fairly deep to ensure the dough opens up.
- Baking Your Sourdough:Carefully take your dutch oven out of the oven. Place the sourdough into the pot using the baking paper as a handle. Put the lid on and place into the hot oven. If you want to you can spritz your dough with extra water before you put the lid on.If you're worried about the base of your bread burning, place a baking sheet on shelf underneath your Dutch Oven – it works!BAKE TIME:30 Minutes with the lid on at 230ºC/450ºF plus10-15 Minutes with the lid off at 210ºC/410ºF
- Finishing Your Bake:When you remove your dough from the oven, carefully remove it from the dutch oven as soon as possible and place on a wire rack to cool.
Notes
- Notes on Sourdough Starter
This recipe is based on you having an active starter that you have fed a few hours before starting your bake. Check out my guide for how to know when your starter is ready. - Notes on Stretch & Folds
If you are going to do the stretch & folds on your bench top, spray your surface with water mist rather than using flour. - Notes on Bulk Fermentation: If your home is warm then your dough will ferment a lot faster and could be done in as little as a few hours. If it’s colder, it will take longer, possibly overnight. I would recommend that you try to do your first few bulk ferments during daylight hours so that you can watch your dough closely. Once you’re more familiar with the process – and the temperature of your home – you will be able to do overnight ferments. You will know your dough is ready to move to the next stage when it has *just* doubled in size. It will be fairly wobbly and full of bubbles. You should be able to see large air bubbles under the surface of the dough. You don’t want to let it go any further than doubled as it will be over fermented. If you want to do an overnight ferment, but your home is warm, consider using a little less starter (ie 25g). Less starter means your dough will take longer to ferment and you will reduce the risk of over fermenting your dough. You’ll find more information on these topics here: When is my bulk ferment finished? What is the difference between cold ferment and bulk ferment? Why does the amount of starter matter?
- Notes on Baking
If you’re worried about the base of your bread burning, place a baking sheet on shelf underneath your Dutch Oven – it works! If you’re worried about your bread not being cooked all the way through, turn the oven off and place your dough straight onto the oven rack.
Leave the door ajar and let your bread rest there for a few hours.
Remember not to cut into your loaf too soon – you’ll need to let it cool for at least a few hours (4-6 is best).
Nutrition
Nutrition information is automatically calculated, so should only be used as an approximation.
Like this? Rate and comment below!


I see this was asked a couple of times but never replied to. Is the 100g for soaking the seeds part of the 350g? 100g for the seeds and 250 for the loaf or 350g for the loaf and an additional 100g (not listed in the ingredients) to soak the seeds?
Hi Christina, you need to drain the water off the seeds before adding them, so no, they are not part of the 350 g of water added during the initial dough mix. So you would add 350 g of water with the flour and then add 100 g of water to the seeds, let them soak and then drain them before adding to the dough 🙂 Hope that helps xx
Does the recipe need to be changed to bake in a loaf tin?
Not at all, you can just pop it into a loaf pan and bake. I do recommend covering the loaf pan with another pan on top 🙂