This post contains affiliate links. Please see our disclosure policy.

This easy overnight sourdough bread recipe uses a small amount of starter to ensure your dough doesn’t over-ferment while you sleep. This is a flexible sourdough bread recipe that lets you mix the dough in the evening, let bulk fermentation happen overnight, shape in the morning and bake when it suits your schedule. It really is sourdough bread for busy schedules!

Table of Contents
- Why You’ll Love This Recipe!
- Ingredients
- What is Overnight Sourdough Bread?
- Can I Put Overnight Sourdough in the Fridge?
- Remember:
- Instructions for Baking Overnight Sourdough Bread
- The Amount of Starter Matters!
- Baker’s Timeline for Overnight Sourdough Bread
- How To Store and Freeze
- Frequently Asked Questions
- Overnight Sourdough Bread Recipe
Why You’ll Love This Recipe!
Fits Into Busy Schedules – This recipe uses an overnight bulk fermentation which means less hands-on time during the day. This makes it perfect for busy weekdays, working full time, parents, and anyone that doesn’t have time to dedicate to sourdough babysitting! This recipe is for real life!
Beginner-Friendly – This overnight sourdough bread recipe is perfect for beginner bakers who need a simple rhythm that allows them to bake with confidence and intention.
Long Fermentation – Unlike many sourdough recipes with easy schedules, this overnight sourdough recipe does not sacrifice fermentation time. Mix the dough in the evening and let fermentation do the heavy lifting while you sleep. This loaf has flexibility and flavor built into the schedule!
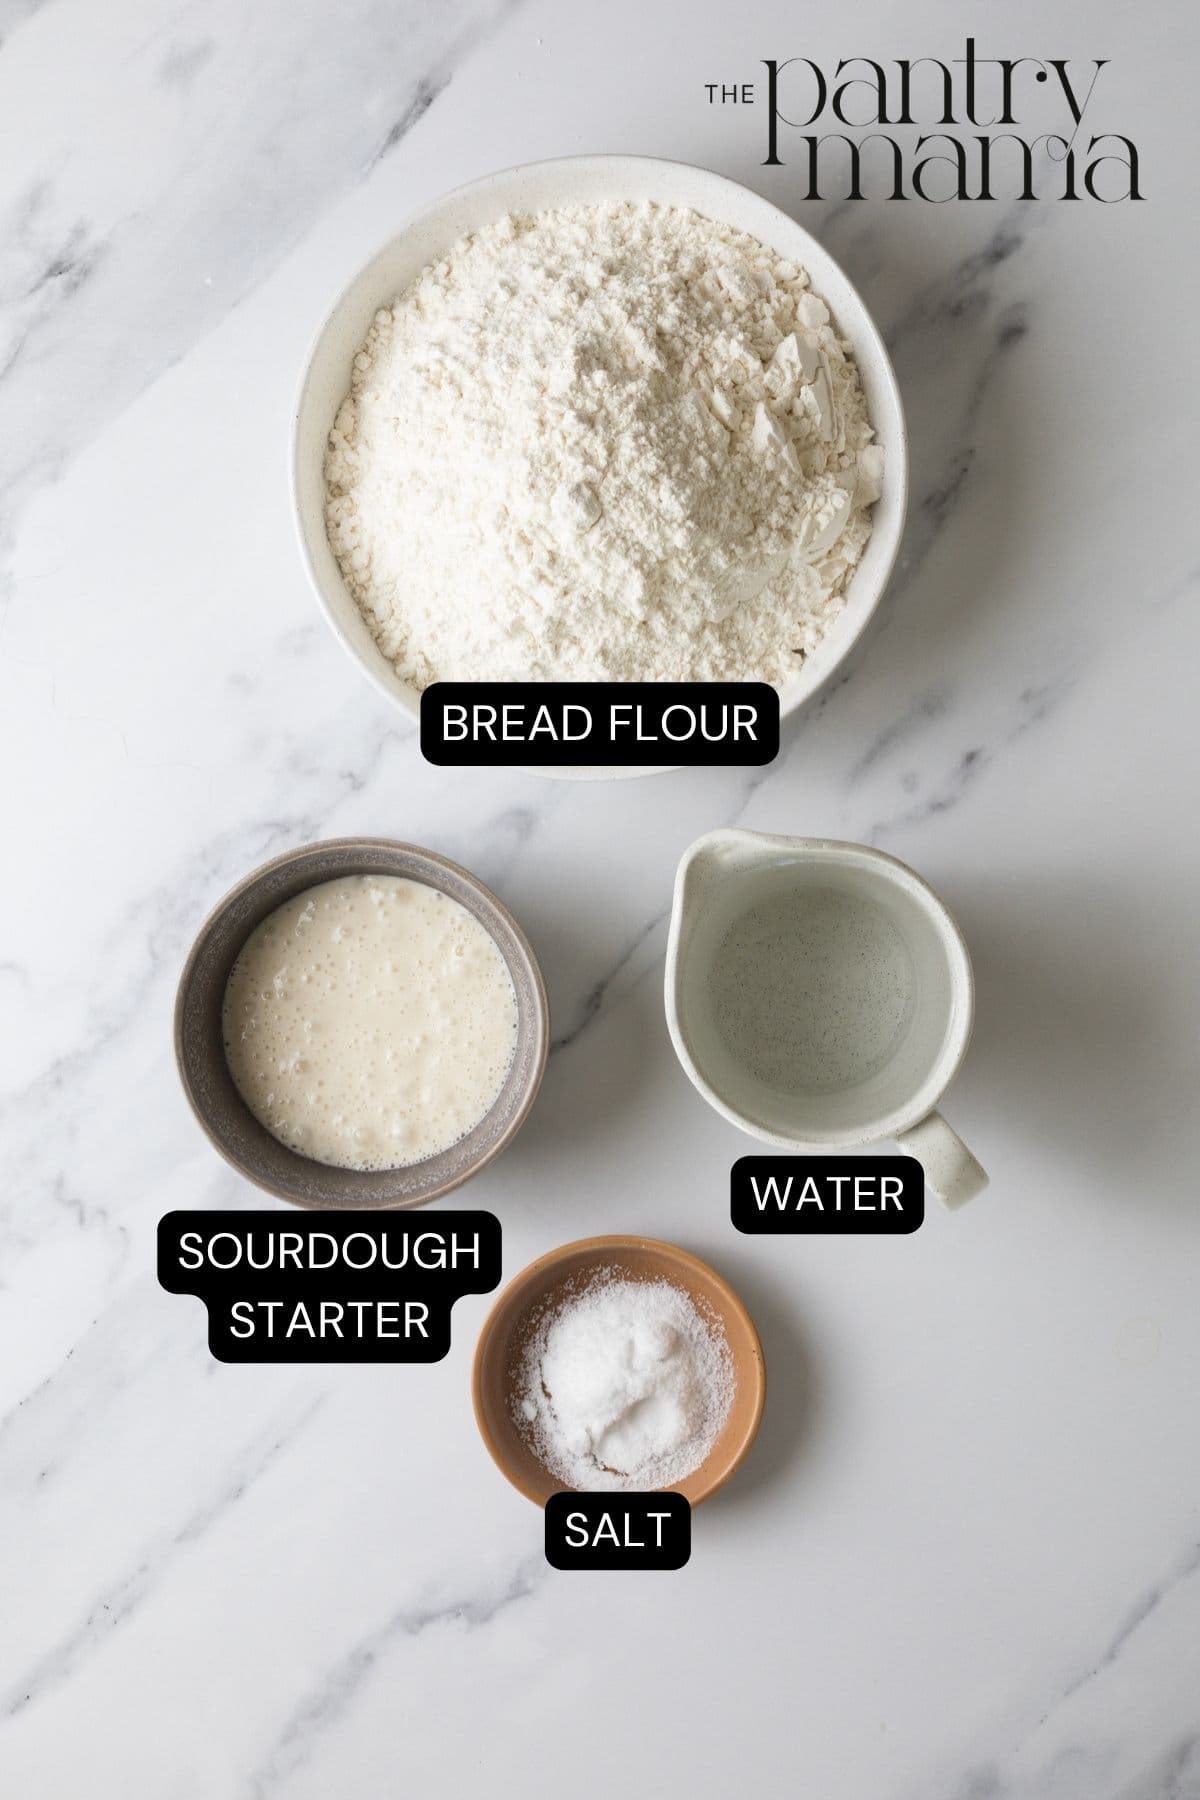
Ingredients
- Water
- Sourdough Starter – You’ll need an active sourdough starter that has been fed in the morning to create this recipe successfully.
- Bread Flour – I recommend using high protein bread flour to make this overnight sourdough bread recipe, rather than all-purpose flour.
- Salt
What is Overnight Sourdough Bread?
Overnight sourdough bread usually means the dough is mixed in the evening and bulk fermented overnight at room temperature, then shaped the next morning. It’s then placed into the fridge for cold fermentation, providing a deep sourdough flavor. The most important things you need to adjust for successful overnight fermentation are:
- amount of sourdough starter you use – you need to use a smaller amount of starter to ensure that your bread does not over ferment when being left out overnight. I recommend 10% or in this recipe 50g.
- the temperature you’re leaving your dough at – I recommend leaving your dough out overnight when the temperature is around 21ºC (69.8ºF) or less. If your room temp is higher than this, you’d need to reduce the starter amount further or try to find a cooler spot in your home. If it’s really cold, you’ll need to use a little more sourdough starter.
Can I Put Overnight Sourdough in the Fridge?
The overnight bulk fermentation must be done at room temperature. This is because bulk fermentation refers to the time during which the dough rises, ideally to double.
Once the dough has completed bulk fermentation, it is shaped and placed into a banneton or shaping container. You can place the shaped dough into the fridge for cold fermentation, where the good bacteria continue to work while the wild yeast go to sleep. The dough can cold proof until you’re ready to bake.
Kate’s Pro Tip
Remember:
Bulk fermentation occurs at room temperature.
Cold fermentation happens in the fridge.
Read more about bulk fermentation vs cold fermentation in this guide.
Instructions for Baking Overnight Sourdough Bread
Making overnight sourdough bread is really a simple process. I encourage you to read through the whole process though, so you’re familiar with it before starting your dough. Remember sourdough is a very forgiving process! I’ve provided a summary of instructions below. Specific ingredient amounts and detailed instructions are provided in the recipe card at the bottom of the post.
This simple overnight sourdough bread recipe is based on my simple sourdough bread recipe that has helped thousands of beginner bakers launch their sourdough journey!
Feed Your Sourdough Starter
This overnight sourdough bread recipe has been written to start the process in the early evening, so you will need to feed your sourdough starter in the morning (ideally before you leave the house for the day). I recommend using a 1:3:3 ratio so that you can leave your starter for around 8 hours and have it peak when you get home from work. You can read more about sourdough starter ratios and how to feed your sourdough starter. Always use a kitchen scale when feeding your sourdough starter.
Kate’s Pro Tip
The Amount of Starter Matters!
Lower amounts of sourdough starter take longer to ferment the dough, so use less starter for a longer overnight ferment.
How Much Starter Should I Use for Overnight Sourdough?
I recommend starting at 50 grams of sourdough starter. If it’s particularly cold then you can increase the starter to 75 grams or even 100 grams. Adjust the amount of starter based on your kitchen temperature.
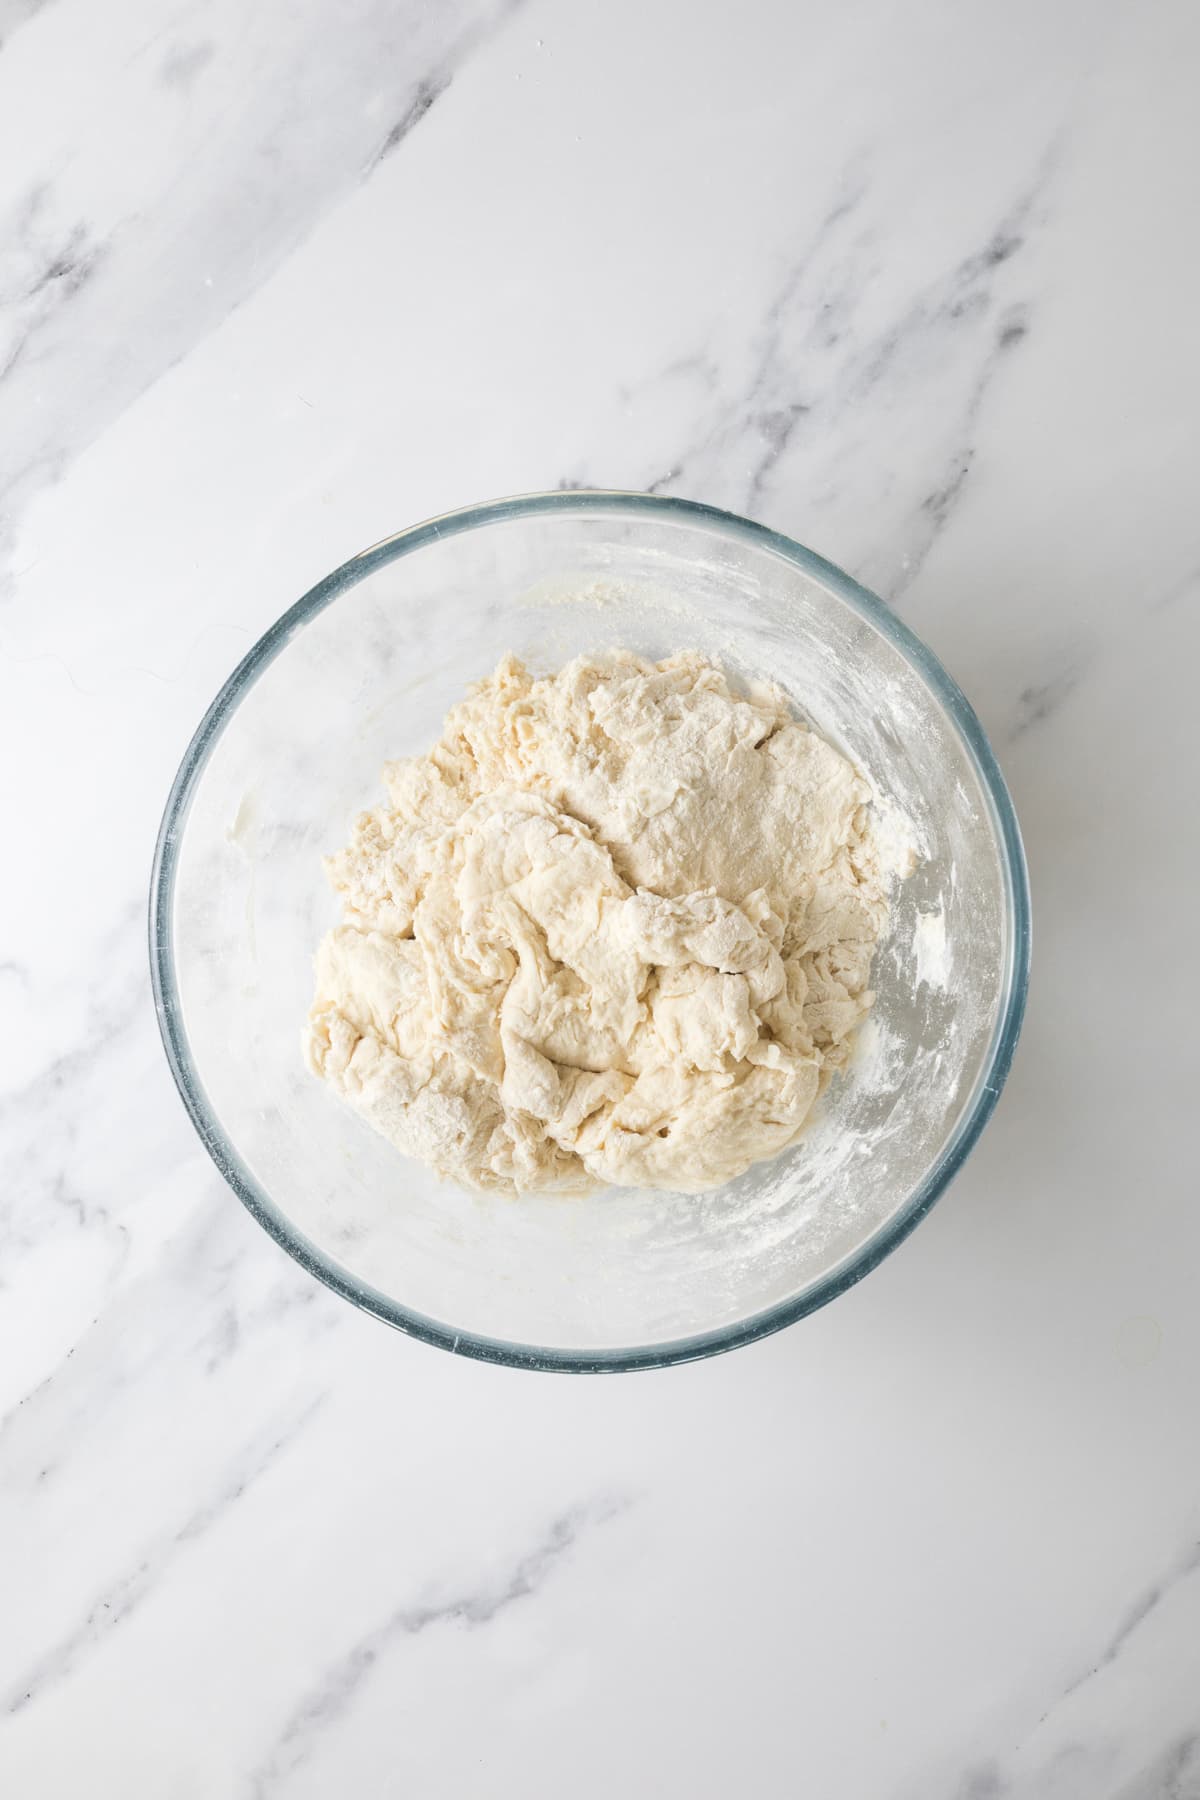
Fermentolyse
When you’re ready to start, weigh out your sourdough starter and water into a large mixing bowl, mixing together before adding your bread flour and salt and mix whole lot together to form a shaggy dough. Cover your bowl with an elastic food cover or plastic wrap and let it sit for around 1 hour.
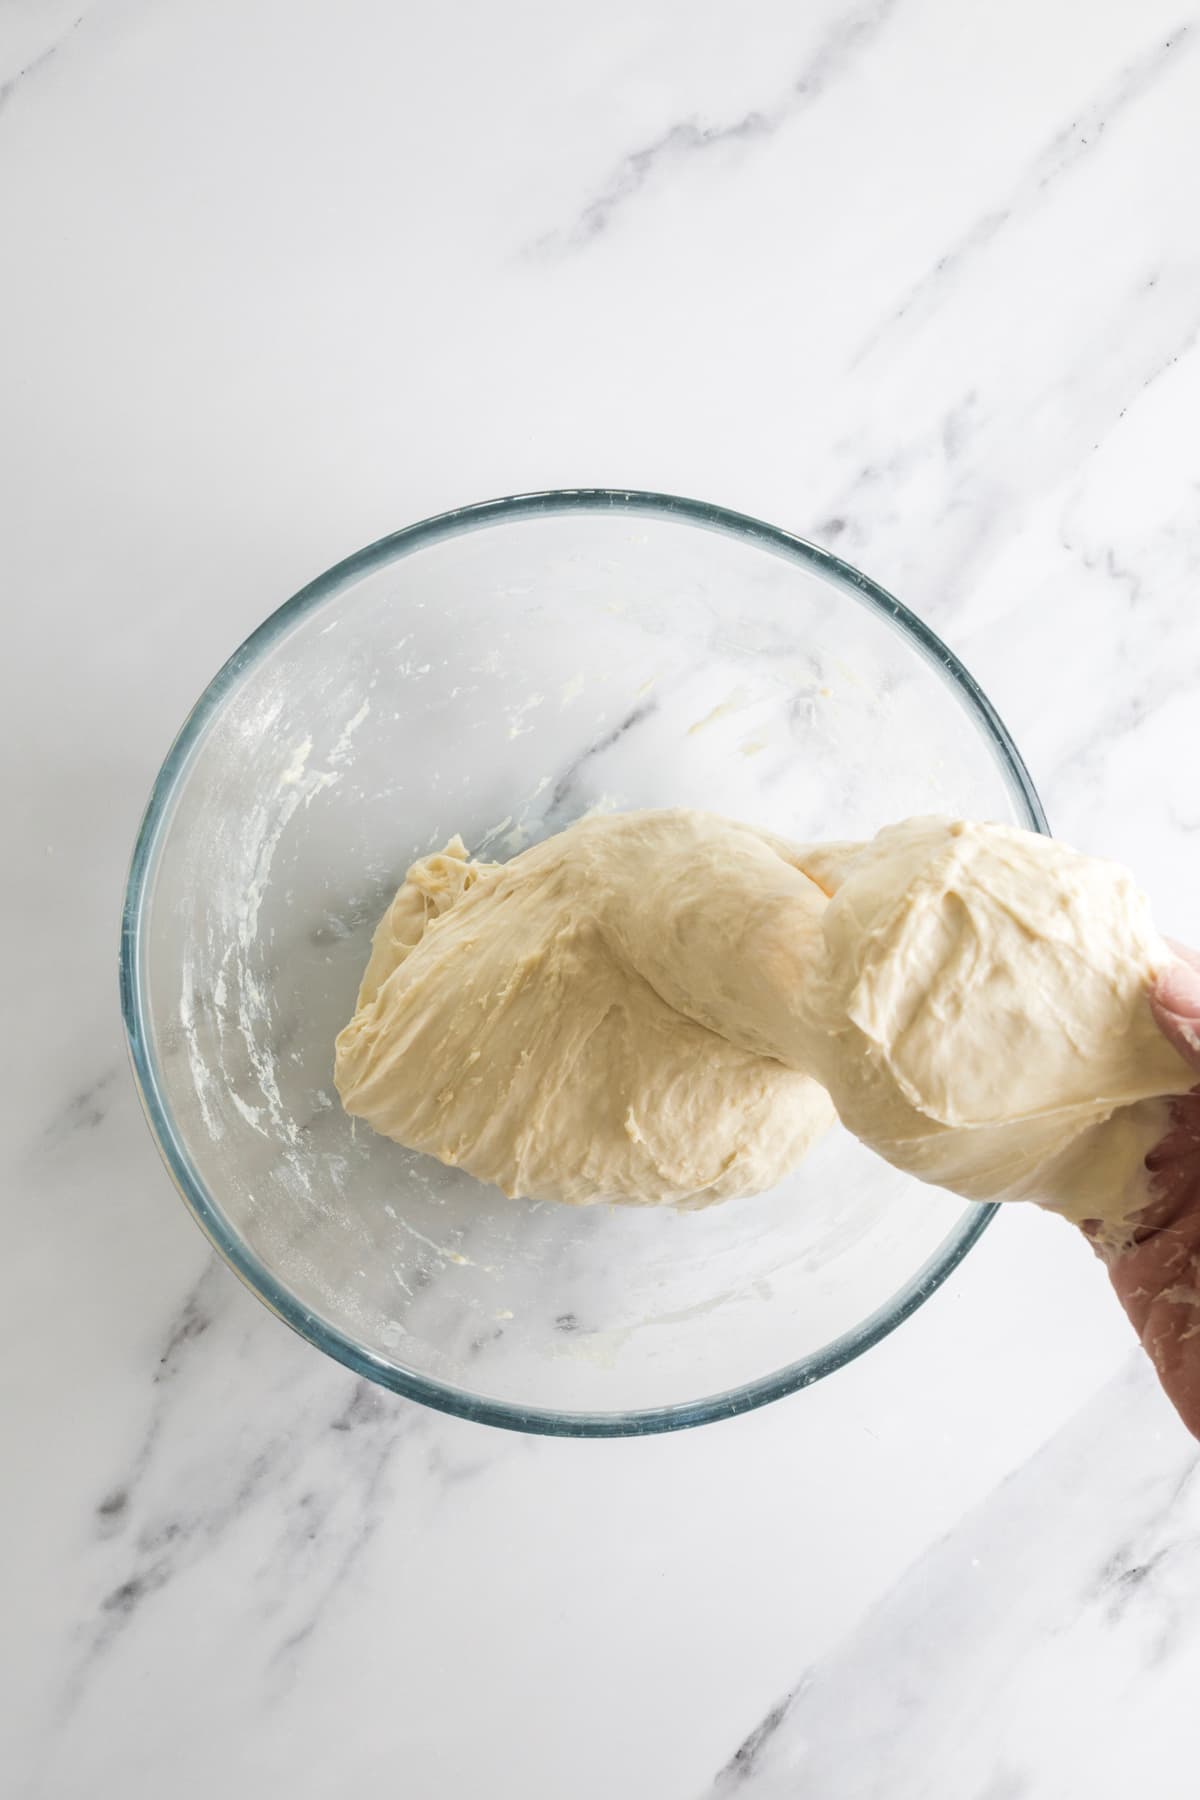
Stretch and Folds
Over the next few hours you need to create some structure for your dough by “stretching and folding”. You should aim to do around 4-6 sets of stretches and folds. You want the dough to have a strong gluten network before you leave it to rest overnight. A strong gluten structure will ensure that the dough is able to hold all of the beautiful gas bubbles the yeast in your dough produce.
Bulk Fermention
Once you’ve finished your stretch and folds, cover the dough with a plastic cover and allow the dough to double overnight (I have included a sample timeline further down). It’s really important to get the temperature right when leaving the dough overnight because you’re not going to be able to check it – hopefully you’re sleeping! Check out this guide to understand when bulk fermentation is finished.
Shaping The Dough
When you get up in the morning, your dough should be ready to be shaped. Use a dough scraper to gently ease the dough out of the bowl (your hands work just fine if you don’t have one). You want it to land upside down on your counter so that the smooth top of the dough is on the countertop and the sticky underside is facing up.
REAL LIFE RESET
If your dough isn’t ready to shape in the morning, give it more time to double. The clock is a guide but your dough gets the final say. Keep a record of how much starter you used so you can increase it for next time.
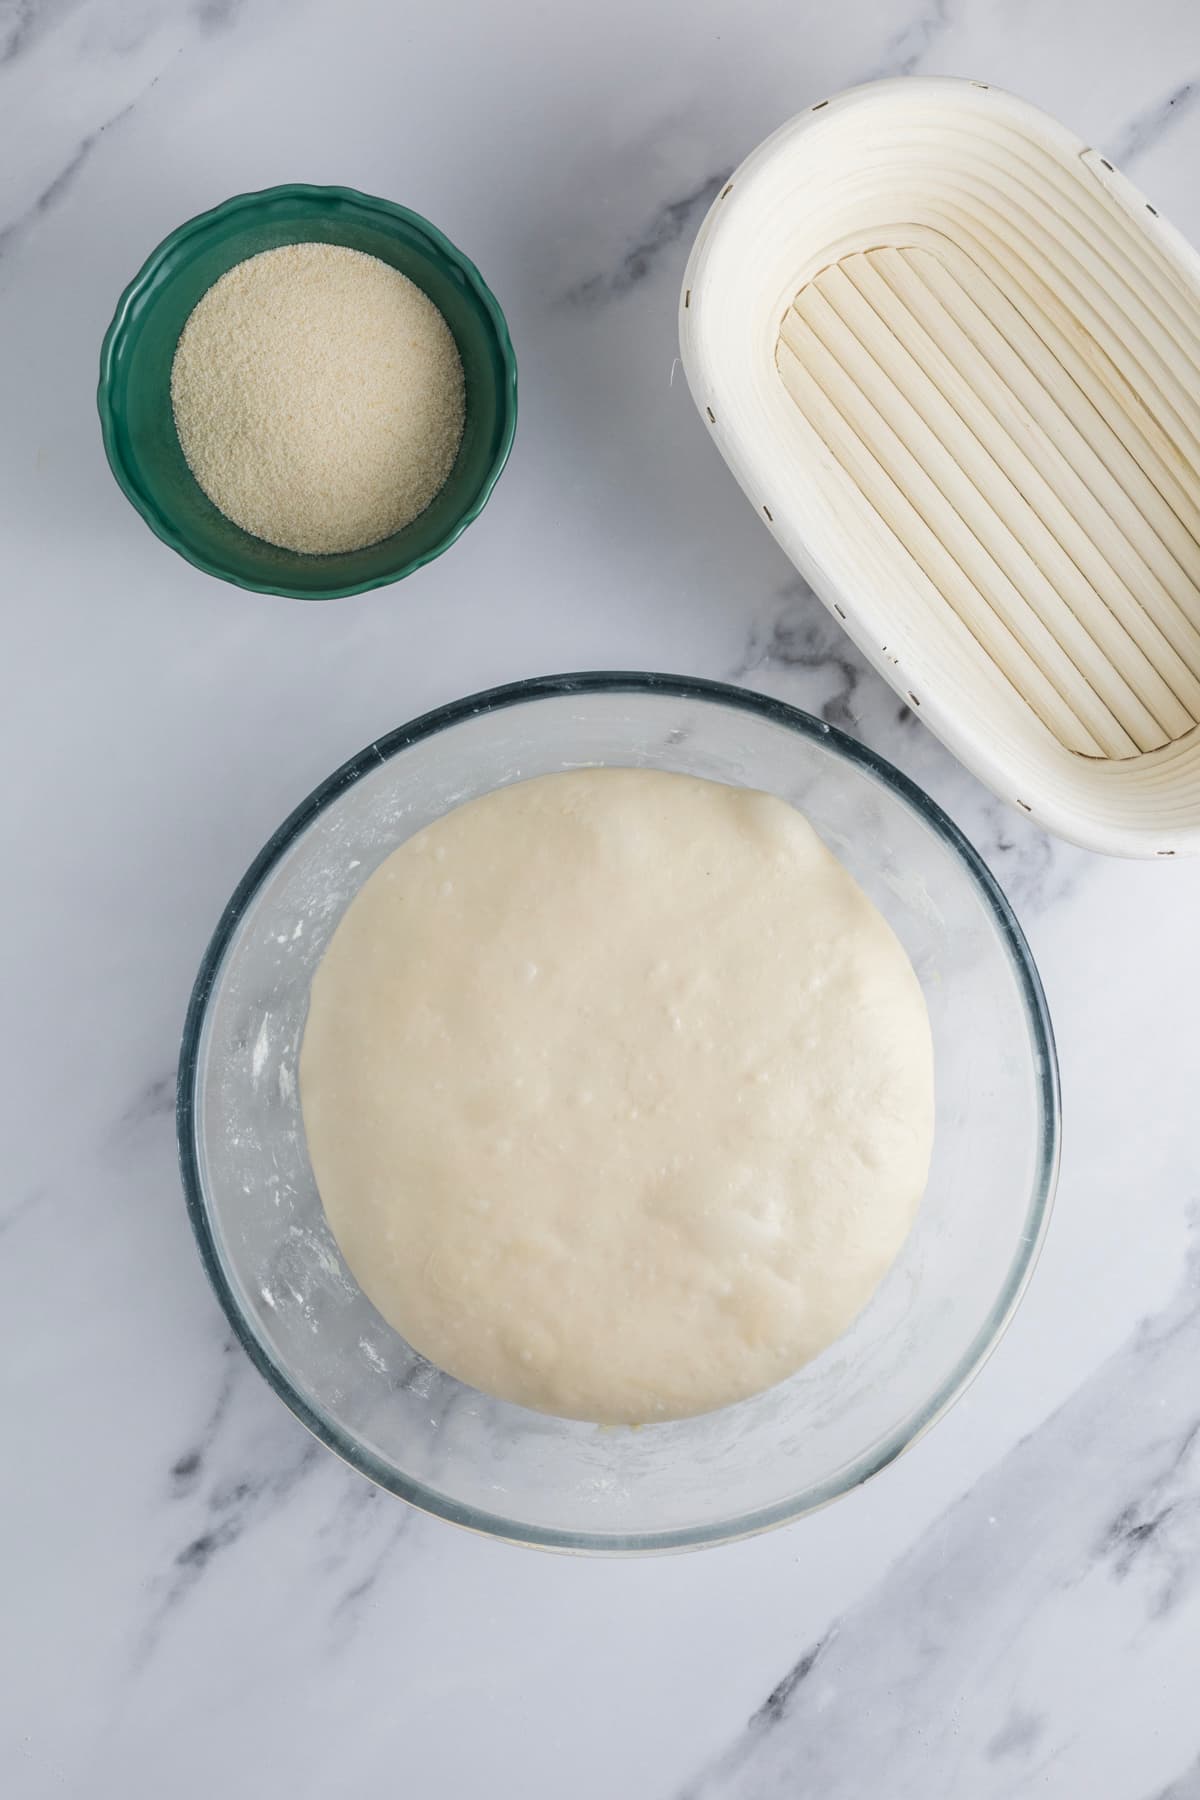
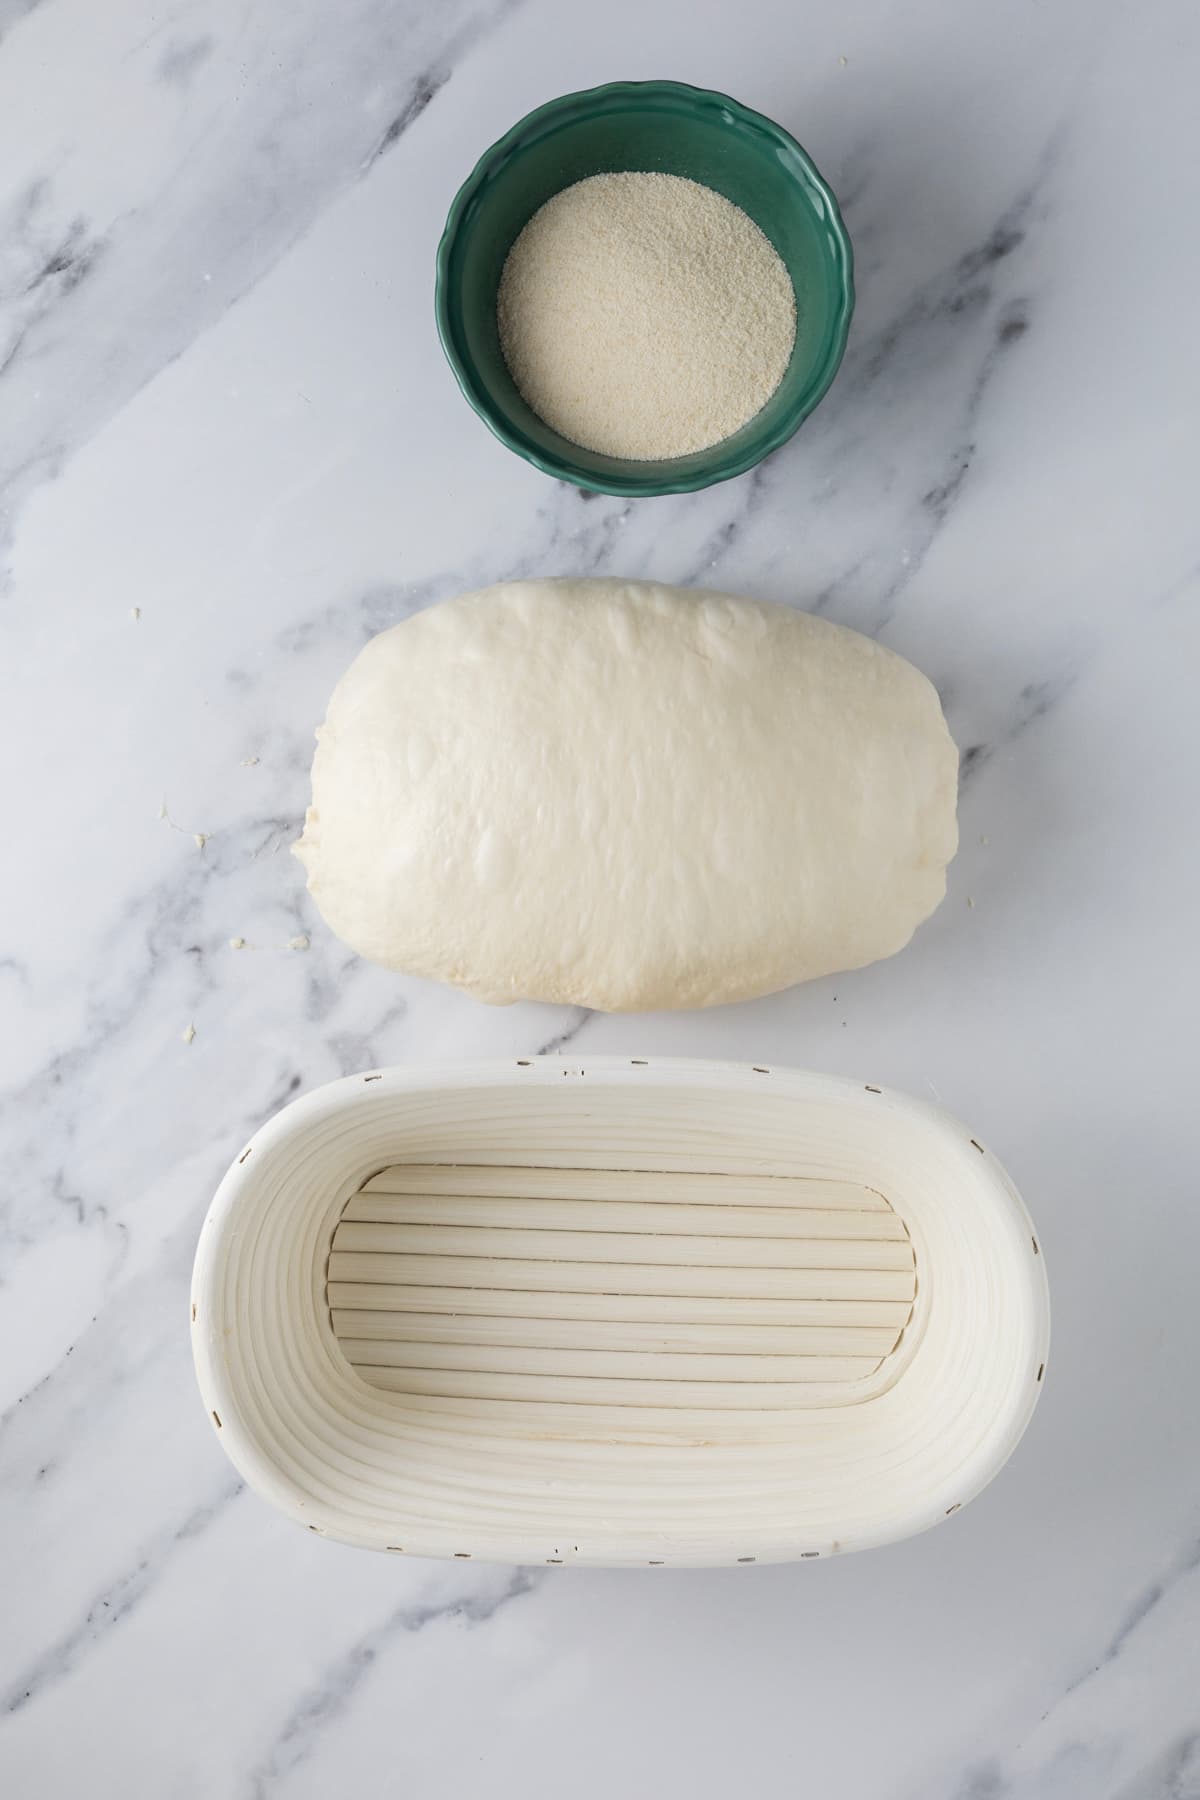
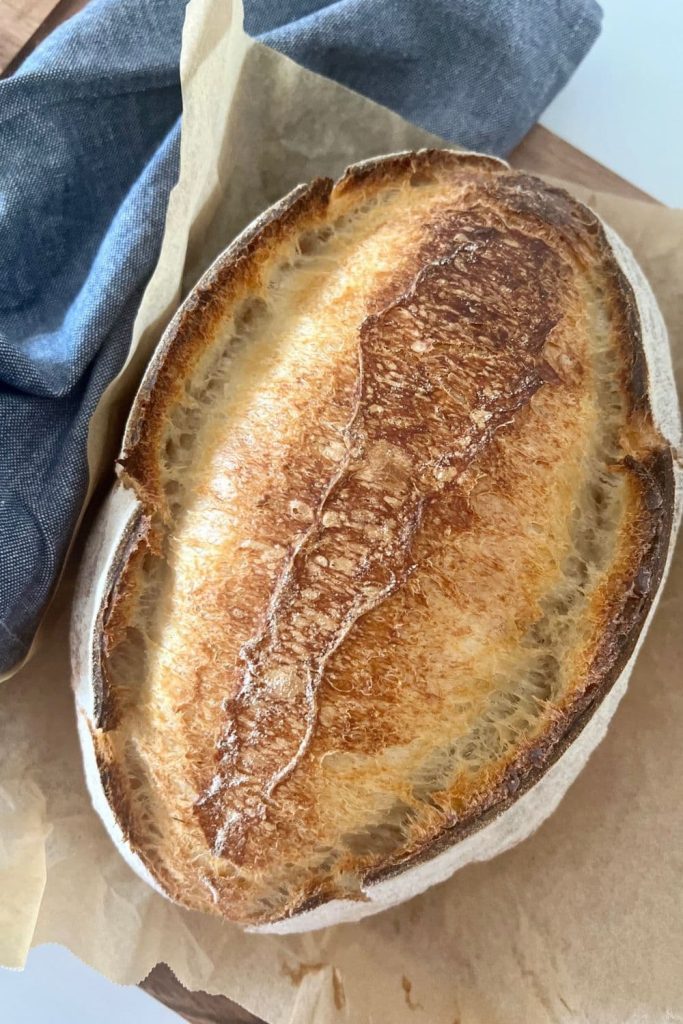
Shape your dough into whatever shape works best for you. I have shaped this overnight sourdough bread into a batard. Place your shaped dough into a banneton or bowl, seam side up. Stitch the base of the dough if you need to. I use semolina flour to ensure that the dough doesn’t stick to the banneton.
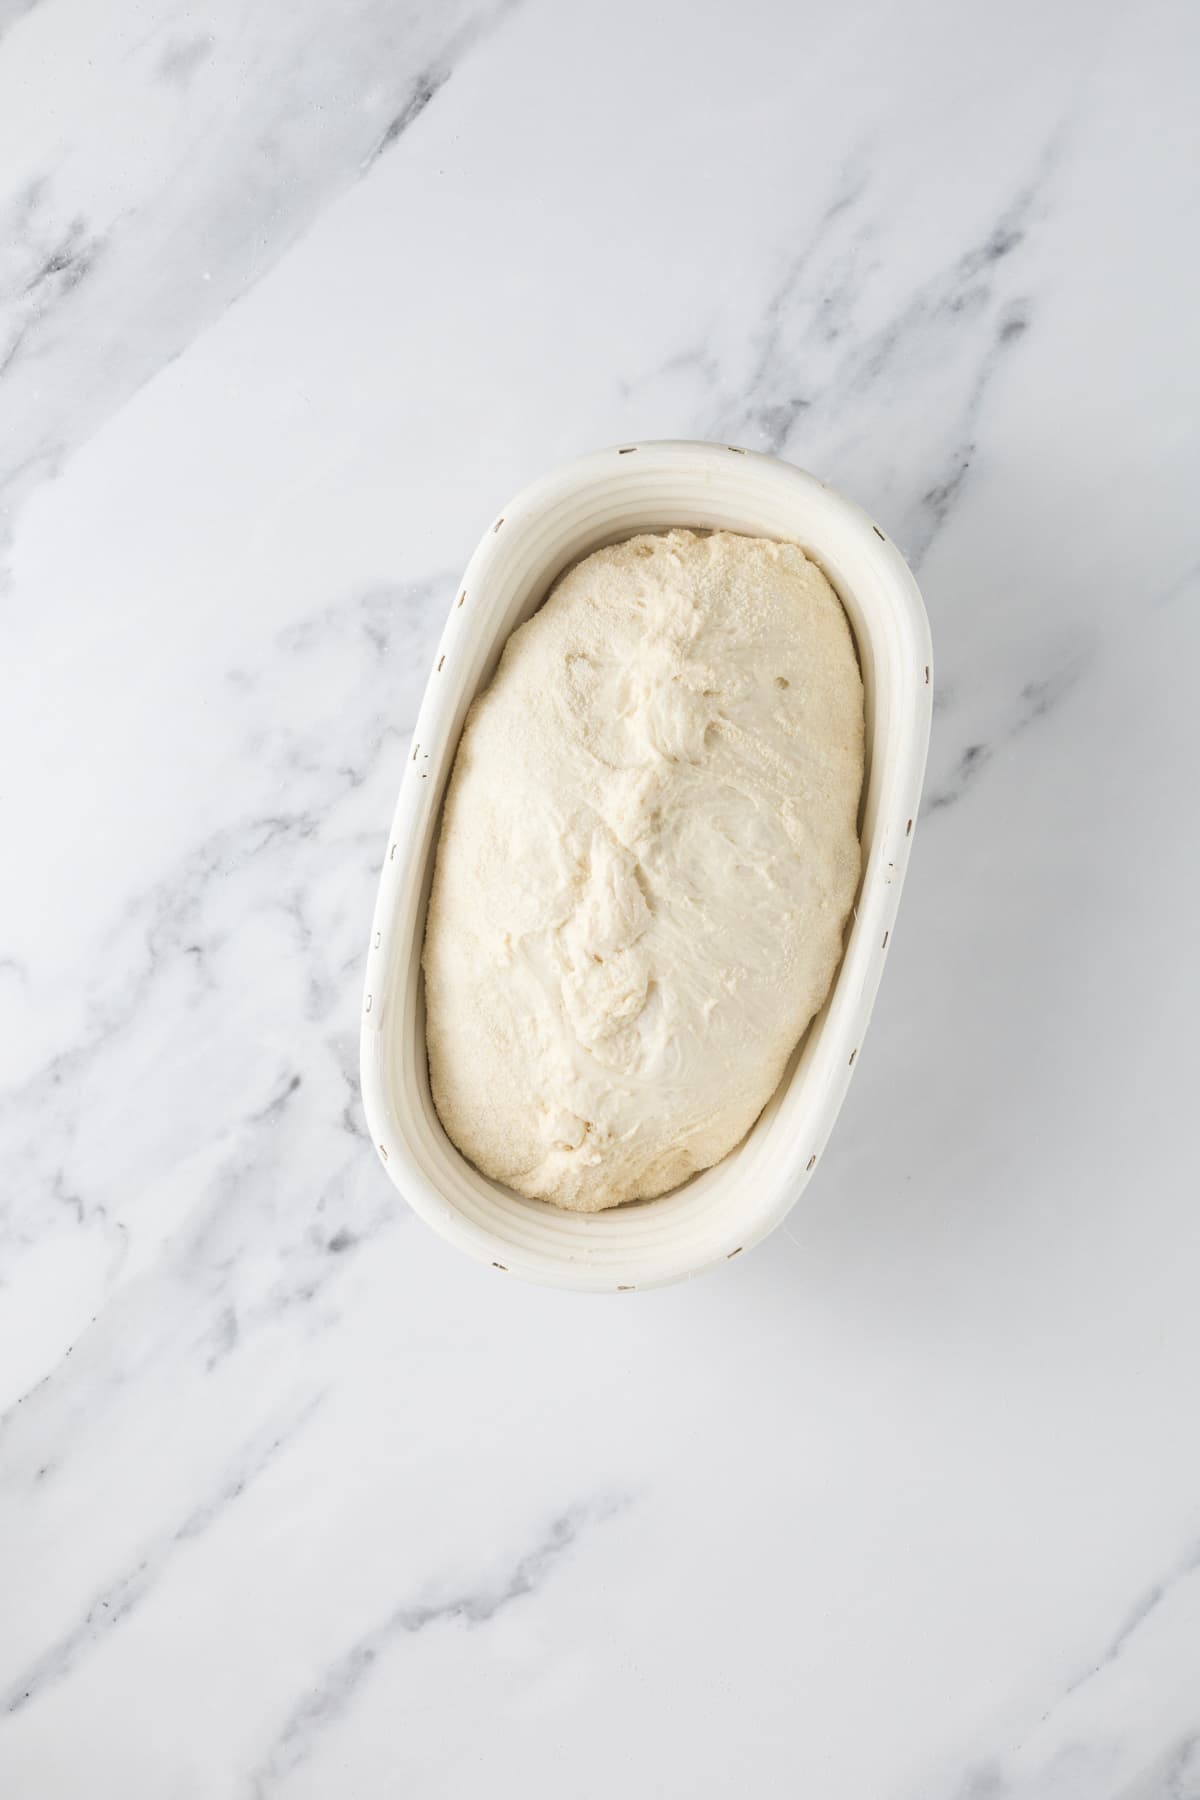
Cold Ferment
Cover the dough and place it into the refrigerator for cold fermentation. Try to leave it in the fridge for a minimum 5 hours. If you’re following my timeline below, you’ll leave it in the fridge for around 10 to 11 hours.
If you don’t want to put the dough in the fridge for a cold ferment, you can leave it to proof on the counter for a little while. You do need to be careful not to let it over-ferment. Ideally, you want the temperature to be on the cooler side (no more than 21ºC / 69.8ºF). Let the dough relax into the banneton.
Bake
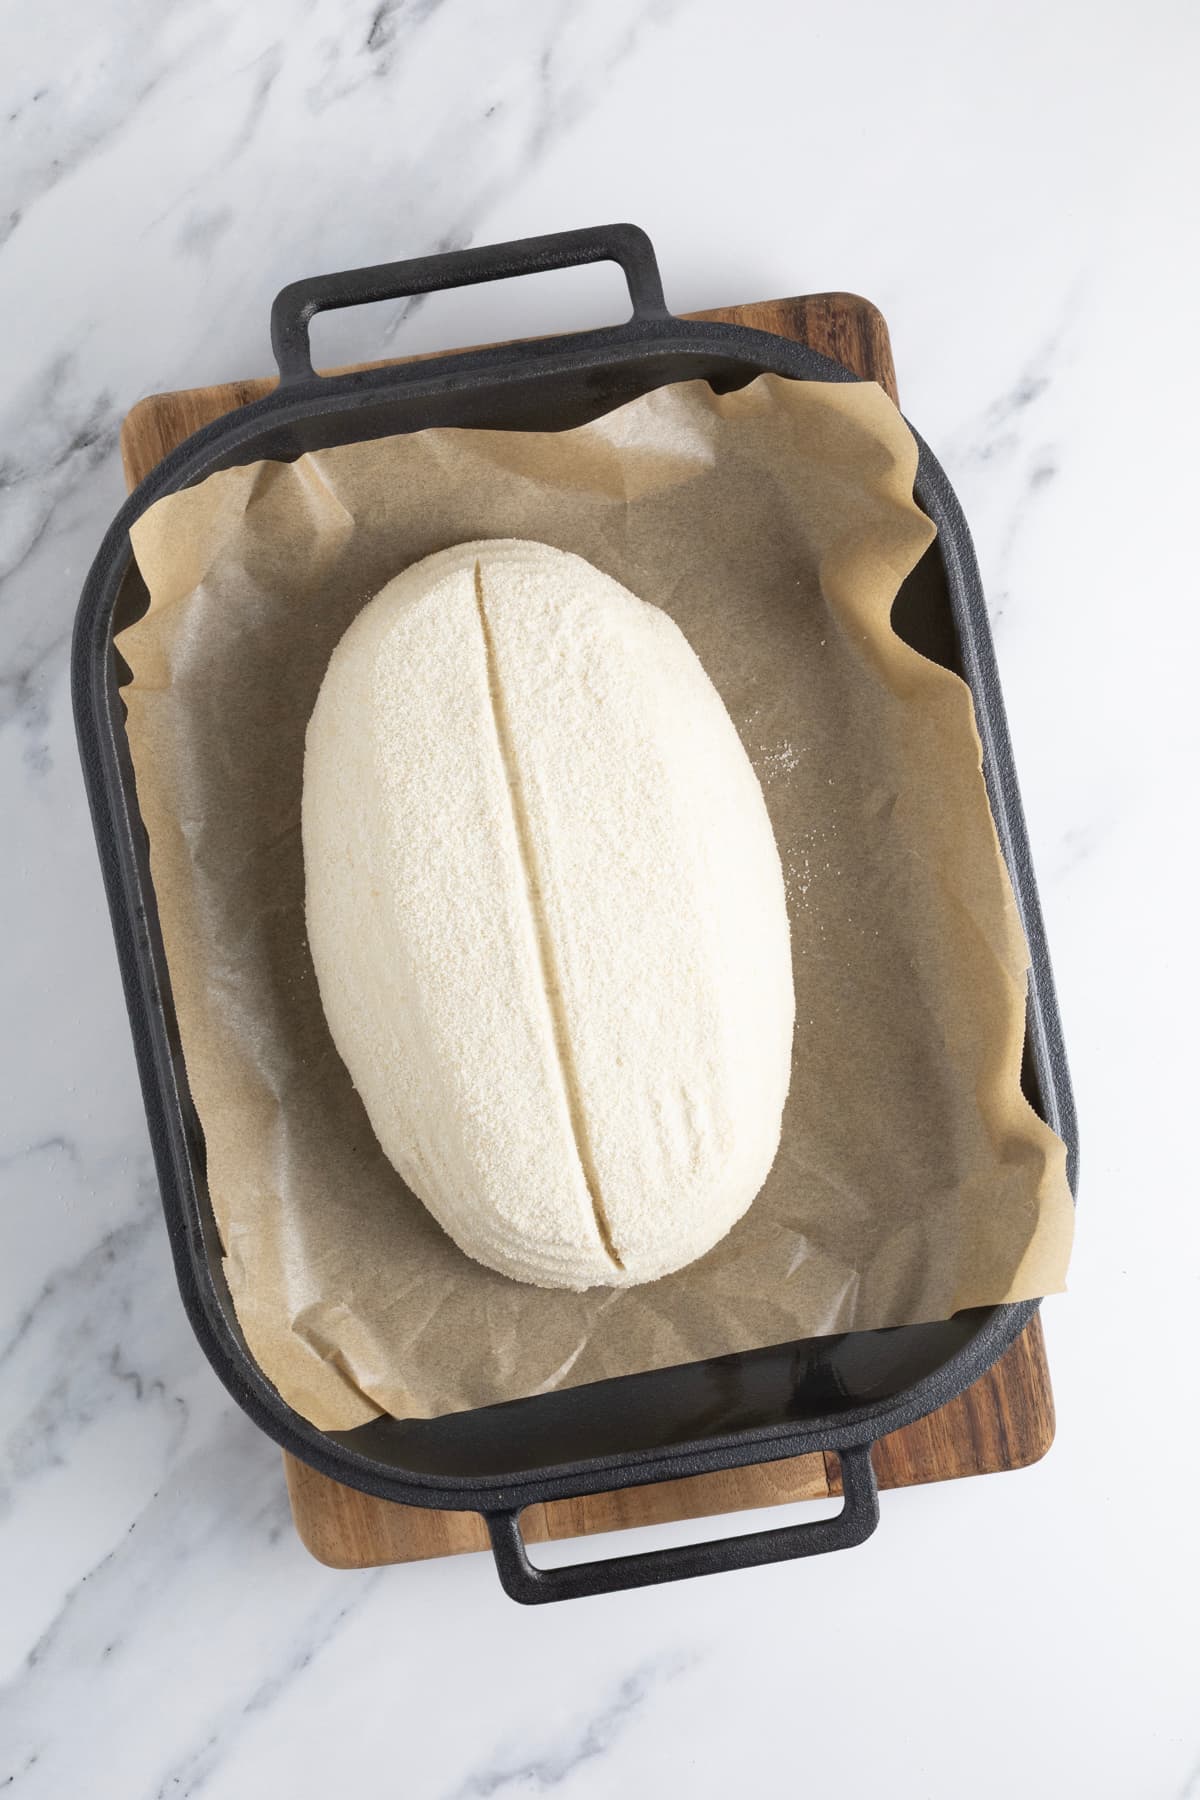
Once you’re ready to bake your sourdough, you’ll need to preheat your oven to 230ºC/450ºF. When your oven is at temperature, take your sourdough out of the fridge. Gently place it onto a piece of parchment paper.
Gently score your bread with a clean razor blade or knife and then carefully place the sourdough into your Dutch oven using the parchment paper as a handle. Put the lid on and place into the hot oven.
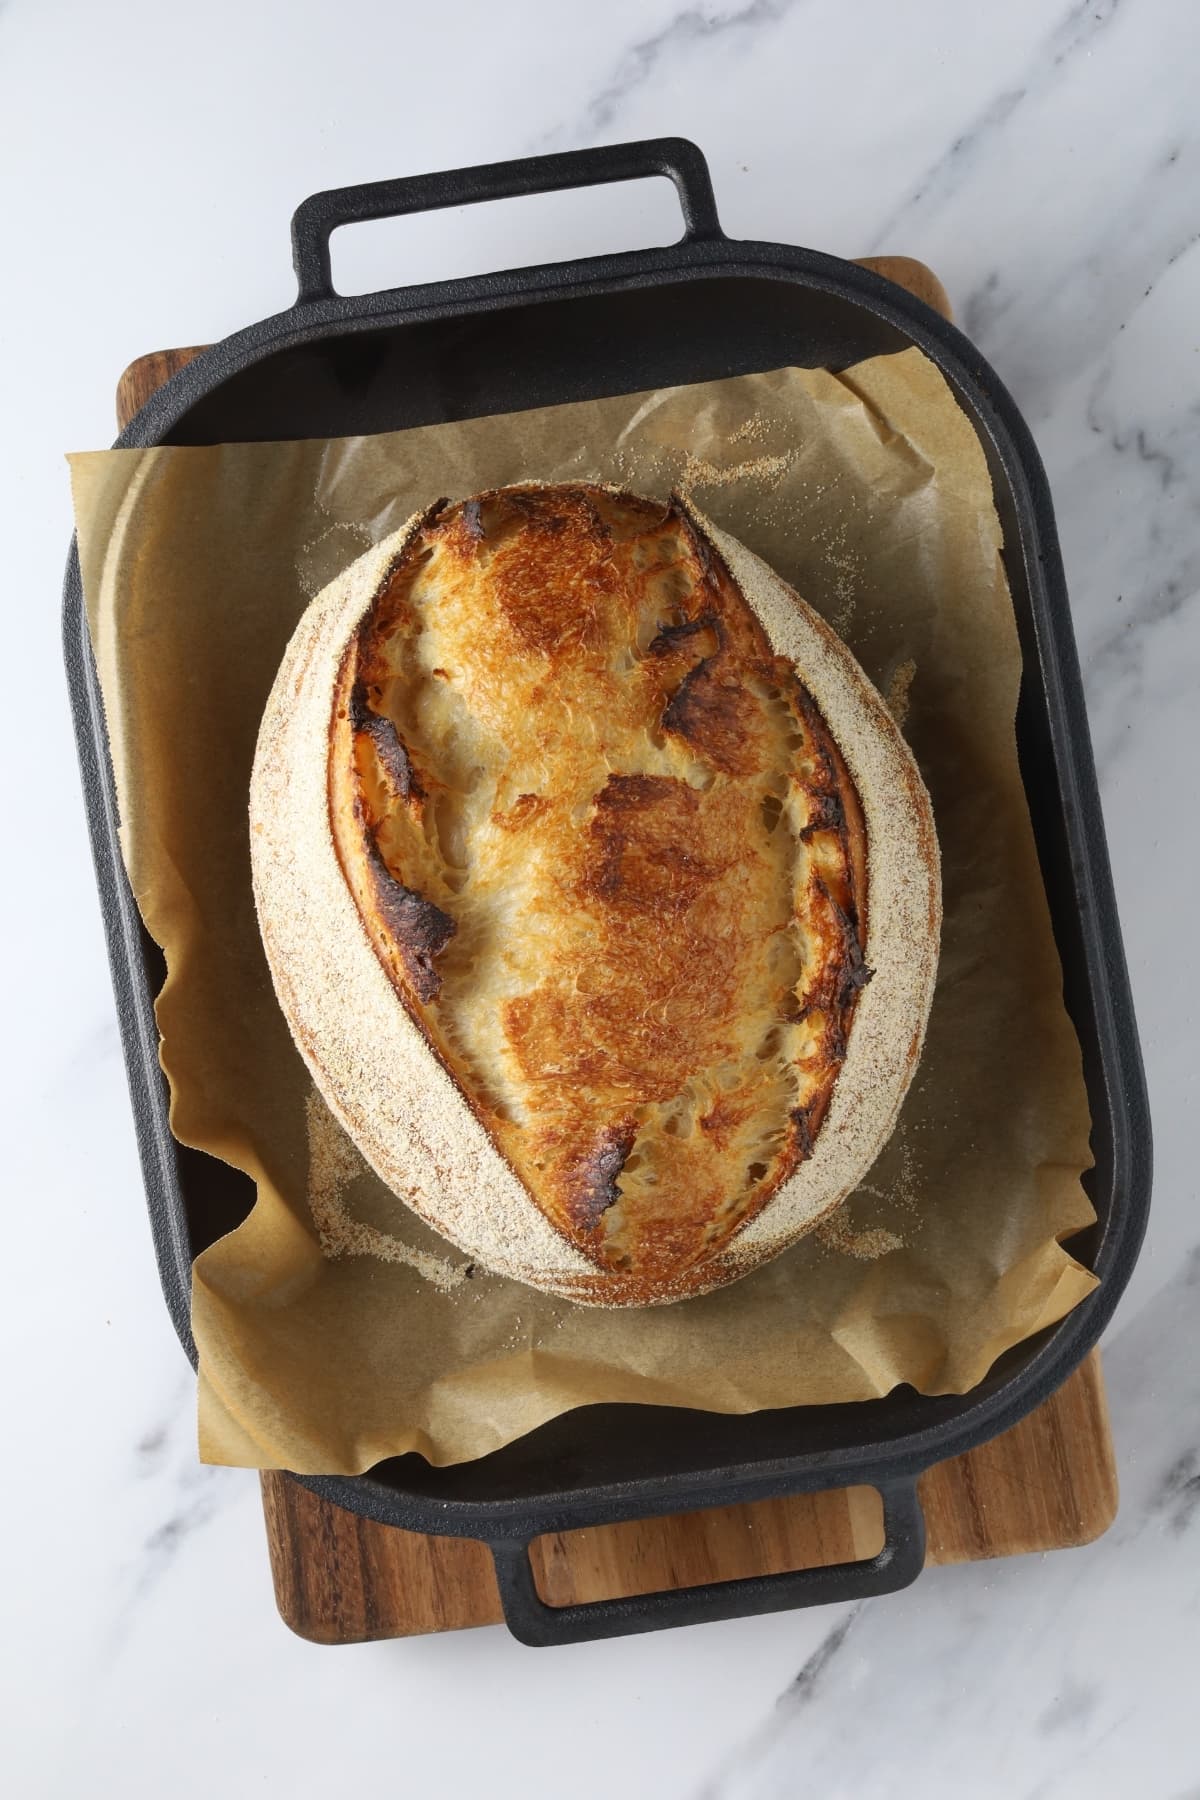
Bake the bread for 30 minutes with the lid on at 230ºC/450ºF, then remove the lid and bake for a further 10-15 minutes at 210ºC/410ºF. When you remove your dough from the oven, carefully remove it from the oven as soon as possible and place on a wire rack to cool.
Baker’s Timeline for Overnight Sourdough Bread
This sample baker’s timeline for making overnight sourdough bread is perfect if you’re out of the house most of the day. It utilises your sleeping time to ferment the sourdough bread. You don’t have to do the cold ferment, you could bake it that morning, but if you like the extra flavor the cold ferment brings, you can bake it when you get home for the evening.
DAY 1
| TIME | PROCESS |
|---|---|
| 7 am | Feed sourdough starter (1:3:3 to ensure delayed peak). |
| 6 pm | Premix and Fermentolyse (while I cook dinner) |
| 9 pm | Perform 4-6 sets of stretch & folds over next 2 hours. |
| 11 pm | Cover and leave on bench overnight for bulk ferment (temp needs to be less than 21ºC). |
DAY 2
| TIME | PROCESS |
|---|---|
| 7 am | Shape & lift into banneton/bowl & into the fridge. Let it cold ferment all day. |
| 6 pm | Get home from work and pre-heat your oven. |
| 6:30 pm | Bake your overnight sourdough bread. |
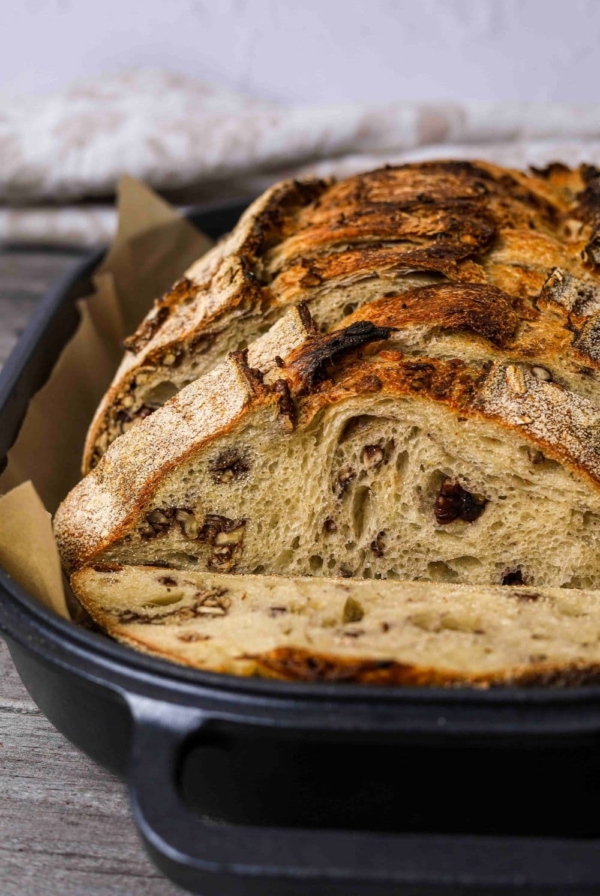
You could use this overnight sourdough bread schedule for other sourdough recipes like multigrain sourdough bread, honey oat sourdough bread and jalapeño cheddar sourdough bread.
SCHEDULE SAVER
Want to bake in the morning? Shape and do a shorter cold proof while the oven preheats.
Need to leave the house? Shape and put the dough in the fridge until you’re ready to bake.
Want to bake after work? Cold proof during the day and bake in the evening. Then you’ll have fresh sourdough for breakfast the next day!
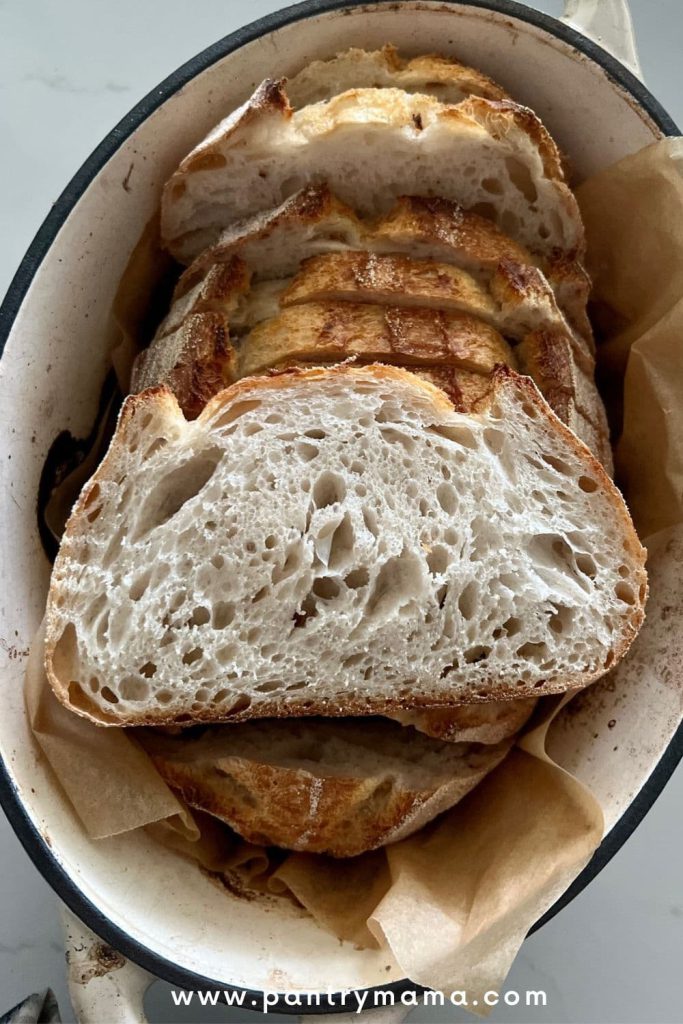
How To Store and Freeze
This loaf is absolute perfection to eat fresh, at least within 24 hours of baking. I like to store the leftovers from this loaf under a glass cloche for up to 3 days. It’s best to eat toasted if you’re eating it past 24 hours. This loaf freezes really well when following these instructions for freezing sourdough bread.
Frequently Asked Questions
You absolutely can leave your sourdough starter out overnight after feeding it, particularly if you are going to bake with it the next day. I highly recommend feeding it a higher ratio to prolong it’s peak and ensure that it’s ready for the you in the morning.
If you let sourdough sit out too long, whether it’s during bulk fermentation or during proofing, it will over ferment and turn into a soupy mess. Dough that has over fermented is runny, sticky and very hard to shape. It will collapse when scored and be very disappointing.
This overnight recipe facilitates longer fermentation by using a small amount of starter. Lower percentages of sourdough starter and long fermentation times create a deeper, more sour flavor in your bread. If you don’t like this flavor, you may need to explore a timeline provides a shorter fermentation time.
If you want to make a same day sourdough loaf, you would need to increase the amount of sourdough starter you use, as well as create a warmer temperature to facilitate a much faster bulk fermentation.
Yes, once the dough is shaped, you can proof the dough on the counter or in the freezer while you preheat the oven and bake it straight away.


Overnight Sourdough Bread Recipe
Equipment
- Basic Kitchen Scale
- Mixing Bowl
- Dutch Oven
Ingredients
- 350 g Water
- 50 g Sourdough Starter
- 500 g Bread Flour
- 10 g Salt
Instructions
- Fermentolyse – Premixing The DoughWeigh out your sourdough starter and water into a large mixing bowl – whatever you have in the cupboard is fine! Mix the water and starter together briefly. Then add your flour and salt and mix whole lot together to form a shaggy dough.
- Cover your bowl with an elastic food cover or plastic wrap and let it sit for around 1 hour. It's ok if it's a little bit longer, it's not going to matter too much.
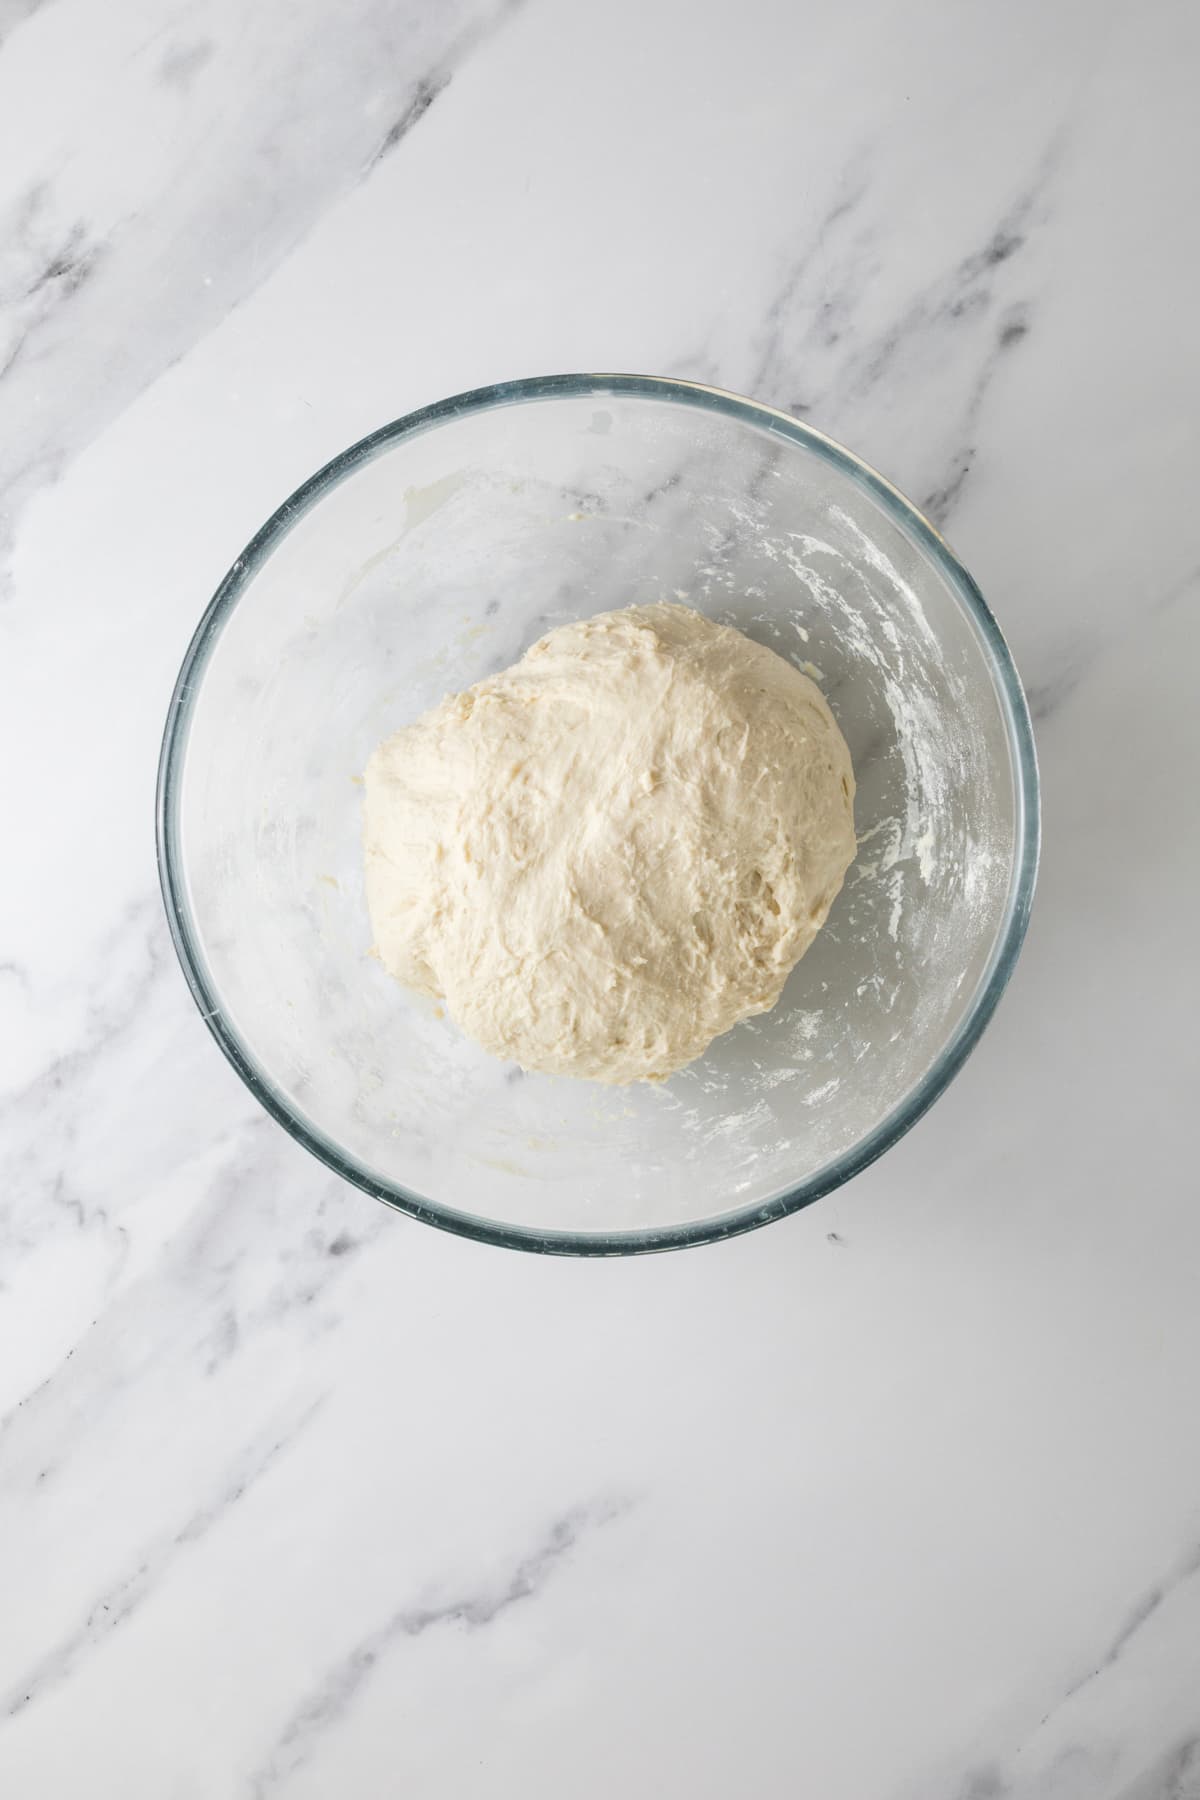
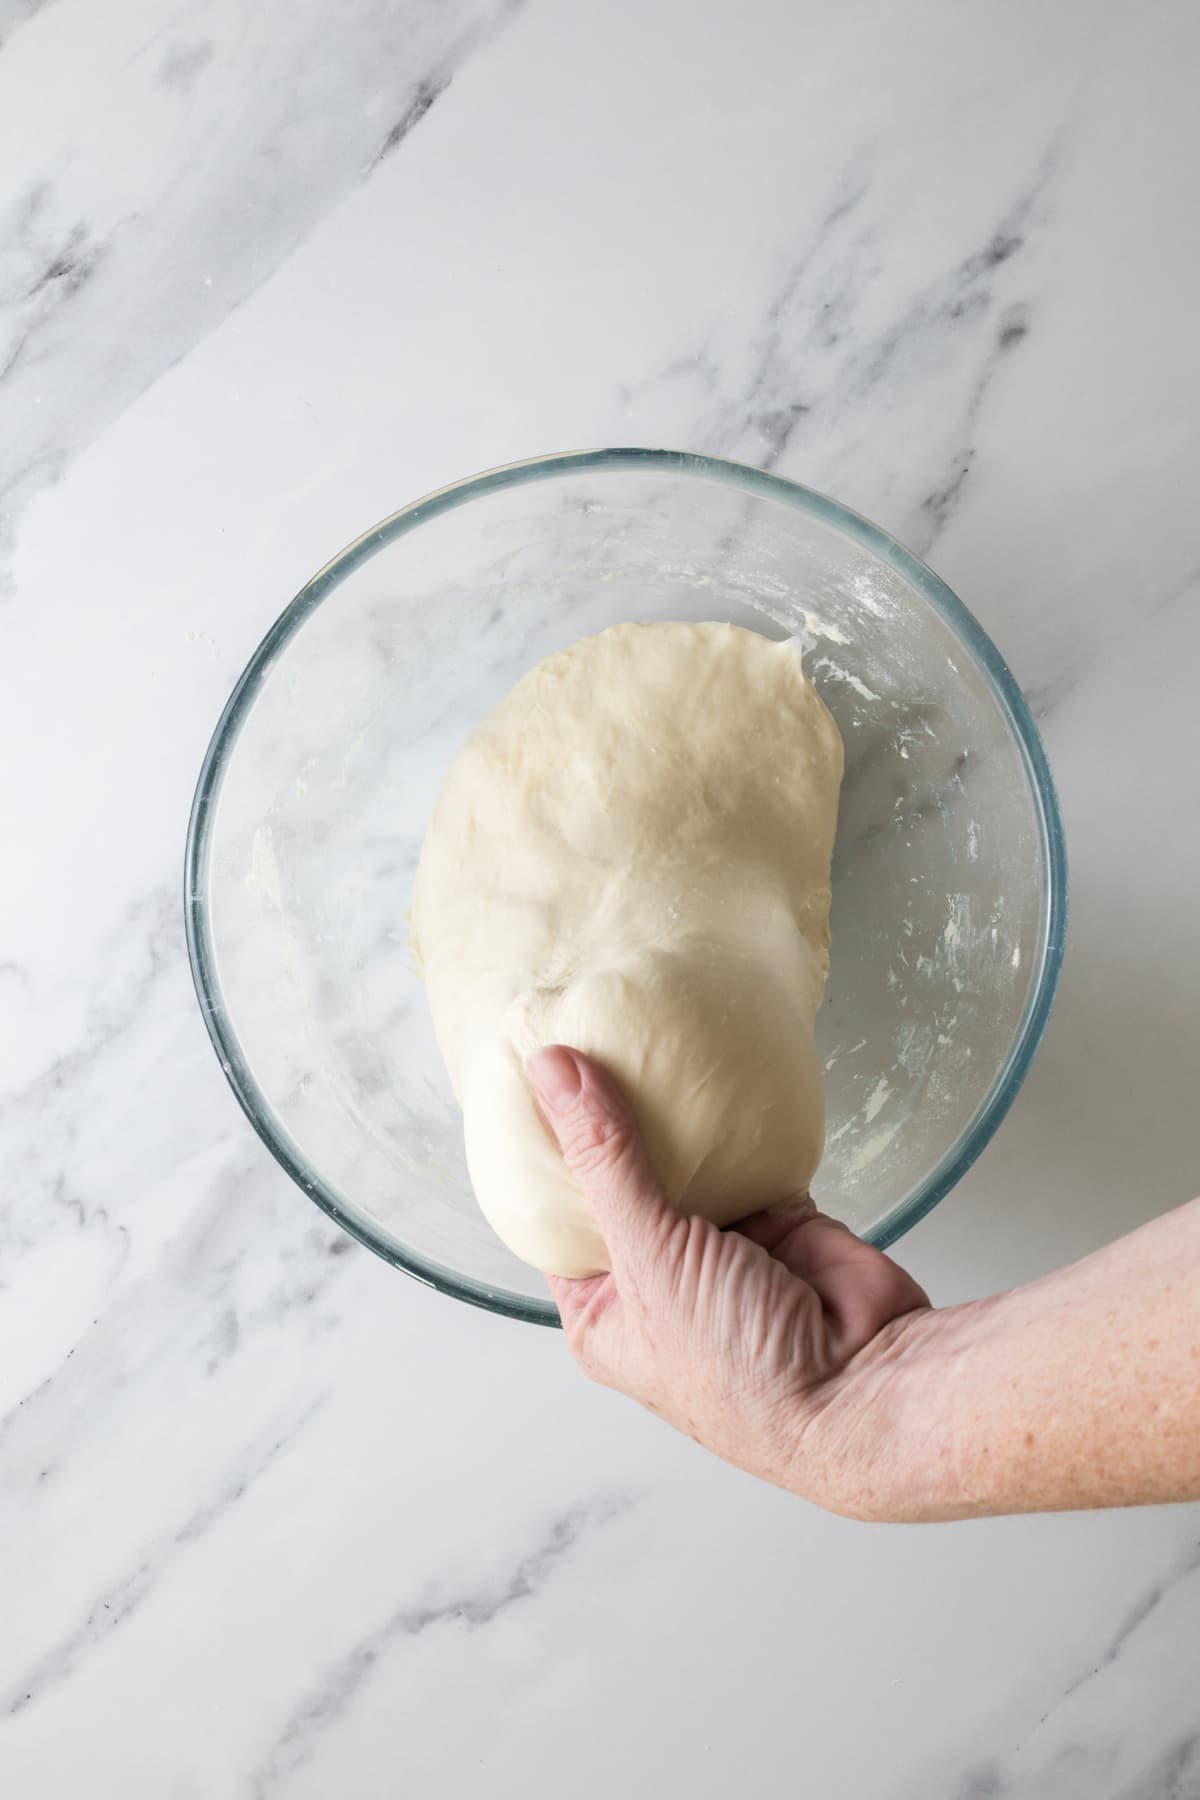
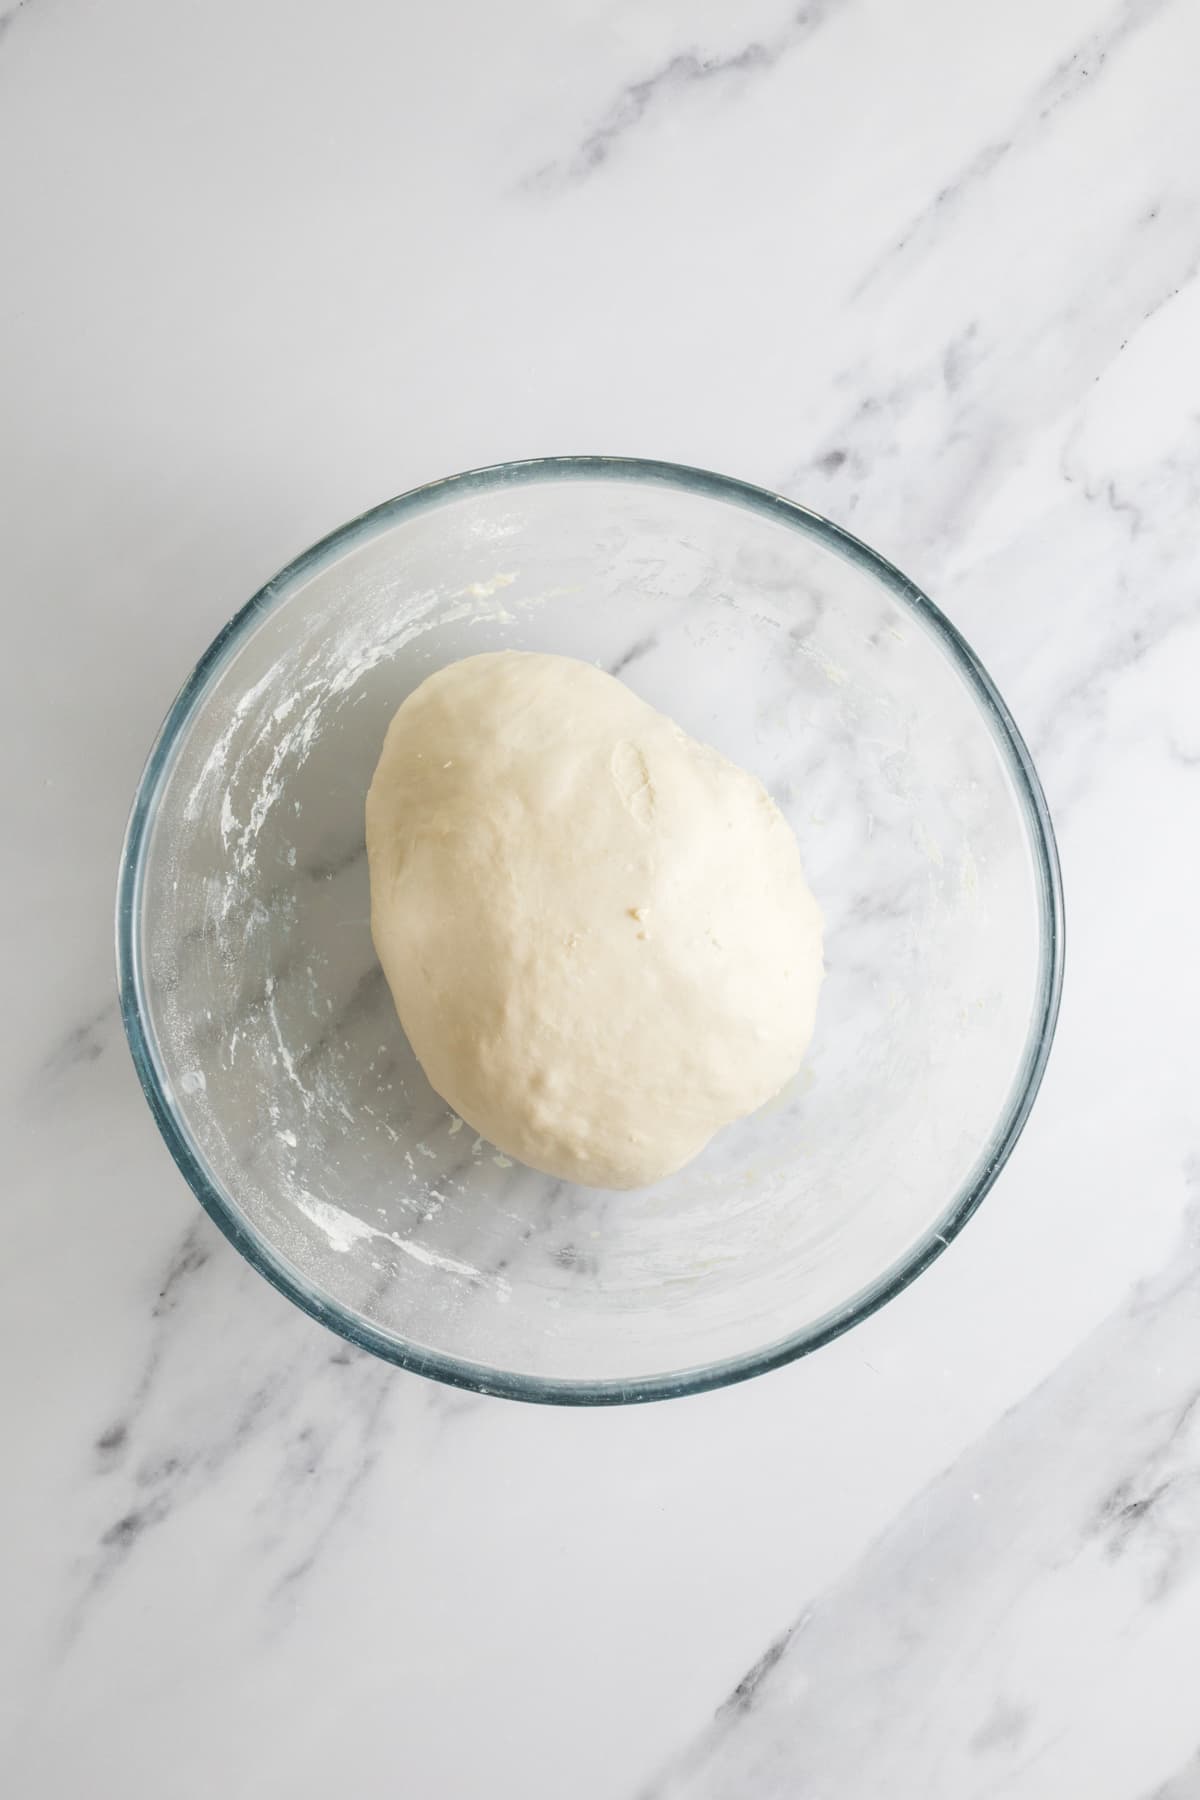
- Forming Up The DoughAfter the dough has been through fermentolyse you need to bring it together into a ball. Work your way around the bowl, grabbing the dough from the outside, stretching it up and over itself, into the centre, until a smooth ball is formed. You shouldn't need more than about 20-25 stretches to form the ball. Once the dough has formed into a smooth ball, pop the cover back on and let it rest for 30 minutes.You'll notice that the dough is fully hydrated after soaking all the water up. It will be fairly sticky but as you bring it into a ball, it will become smoother and shinier.
- Stretch & Fold – Creating StructureOver the next few hours you need to create some structure for your dough by "stretching and folding". Aim to do around 4-6 sets of stretches and folds. For each set, stretch the dough up and over itself 4 times. Leave around 15 minutes in between each set. Again you do not have to be exact with time, but you need to do at least 4 sets over 2 hours.
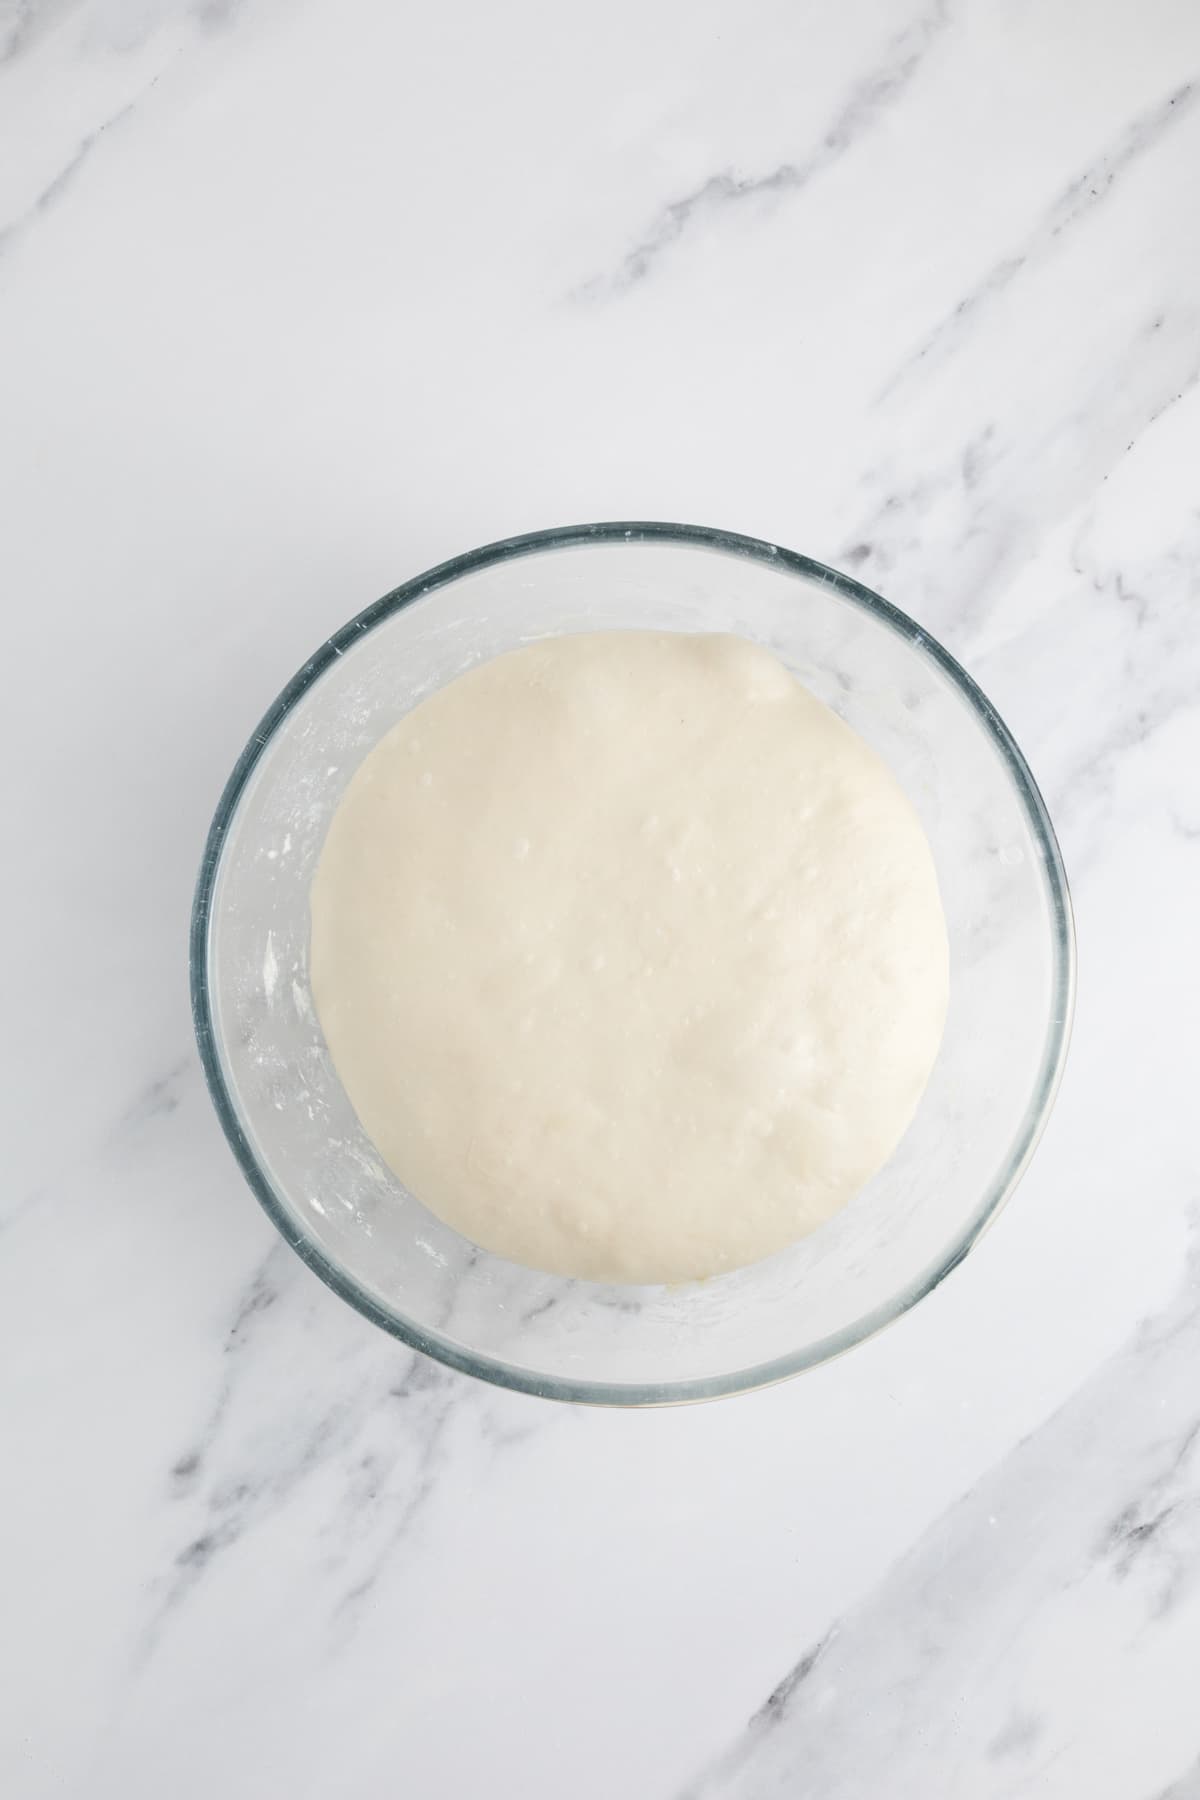
- Bulk FermentOnce you've finished your stretch and folds, cover the dough with a plastic cover and allow the dough to double overnight (I have included a sample timeline for you to follow so that you can bulk ferment overnight in the post above).
- Shaping The DoughOnce your dough has finished its first ferment, it's time to shape it into either a boule or a batard. Use a dough scraper to gently ease the dough out of the bowl (your hands work just fine if you don't have one). You want it to land upside down on your counter so that the smooth top of the dough is on the countertop and the sticky underside is facing up. This will make it easier to shape.
- Placing Into A Proofing ContainerOnce the dough is shaped, place it into your proofing basket or container smooth side down, so your seam is on the top.If you're using a cloth or tea towel in a bowl it's ok to put your dough with the smooth side up. Just make sure the dough is tight.Lift your dough around the edges to pop a little more rice flour if you feel it needs it. Just try to handle the dough as little as possible and be really gentle as you really want to preserve all the gases and air bubbles that have formed during your bulk ferment.
- Cold FermentNow the dough is in its "shaping container" cover it loosely with a plastic cover and place into the fridge. Try to leave it in the fridge for a minimum 5 hours. If you're following my timeline above, you'll leave it in the fridge for around 10 to 11 hours.Counter ProofIf you don't want to put the dough in the fridge for a cold ferment, you can leave it to proof on the counter for a little while. You do need to be careful not to let it over ferment. Ideally, you want the temperature to be on the cooler side (no more than 21ºC). Let the dough relax into the banneton (no more than 2 hours). You could even pop it in the freezer while your oven preheats if you do want to bake it straight away.
- Preparing to BakeOnce you're ready to bake your sourdough, you'll need to preheat your oven to 230ºC/450ºF. Place your Dutch Oven into the oven when you turn it on so it gets hot. When your oven is at temperature, take your sourdough out of the fridge. Gently place it onto a piece of parchment paper. Score your dough.Carefully take your Dutch oven out of the oven. Place the sourdough into the pot using the parchment paper as a handle. Put the lid on and place into the hot oven. BAKE TIME:30 Minutes with the lid on at 230ºC/450ºF plus10-15 Minutes with the lid off at 210ºC/410ºFWhen you remove your dough from the oven, carefully remove it from the oven as soon as possible and place on a wire rack to cool.
Notes
- Notes on Flour: This recipe is written using strong Bread Flour. Bread flour has a higher protein content than All Purpose flour. If you choose to use All Purpose flour you may have a different result because of this. You can read more about the differences between All Purpose Flour and Bread Flour here.
- Notes on Sourdough Starter: This recipe is based on you having an active starter that you have fed a few hours before starting your bake. For info on how to make a sourdough starter, go here.
- Notes on Stretch & Folds: If you are going to do the stretch & folds on your bench top, spray your surface with water mist rather than using flour. You can leave the dough in the bowl if you want to. Wet your hands to stop the dough sticking – although it shouldn’t be too sticky. It will get less sticky as you do your stretches and folds. For more information on how to do stretch and folds, go here.
-
You will know your dough is ready to move to the next stage when it has *just* doubled in size. It will be fairly wobbly and full of bubbles. You should be able to see large air bubbles under the surface of the dough.
You don’t want to let it go any further than doubled as it will be over fermented.
If you want to do an overnight ferment, but your home is warm, consider using a little less starter (ie 25g).
Less starter means your dough will take longer to ferment and you will reduce the risk of over fermenting your dough. You’ll find more information on these topics here:
When is my bulk ferment finished? What is the difference between cold ferment and bulk ferment? Why does the amount of starter matter? - Notes on Bulk Fermentation: If your home is warm then your dough will ferment a lot faster and could be done in as little as a few hours. If it’s colder, it will take longer. I recommend using this overnight sourdough bread recipe in cooler temperatures, as if it’s too warm the dough will over ferment while you’re sleeping and you’ll wake up to a bowl of soupy dough!
Nutrition
Nutrition information is automatically calculated, so should only be used as an approximation.
Like this? Rate and comment below!


this is the BEST BREAD I have ever made in my whole sourdough making life! it was so soft and delicious! I’m trying to lose weight and count my calories but I’m confused with your nutrition panel. is it saying 100g of bread is 1,851 calories? regardless of the answer, which sounds unbelievable to me, since that’s more than my whole calorie allowance for the whole day…
I’m so glad you love the recipe Emily. For some reason, it’s giving you the calories for the whole loaf, I’ll try and fix it. It’s always best to weigh your slices and do the calculation 🙂 But yay! I’m so glad you found your go to recipe 🙂 xx
This recipe is GREAT! I used to make the tartine country sourdough bread and it took three days every time. This recipe, I start before dinner (6pm) and I’m done in 2.5 hours, if I do 4 stretch and folds in an hour. Making for the third time right now. I double the recipe to get 2 loaves and cut and freeze for my family to eat throughout the week. I make it in my stand mixer which has worked well. So so so glad to have found this recipe!
Hi there Kate! I began my Sourdough journey in 2020 and then stopped in 2022. I started again in October. I had a very lively starter at peak yesterday evening and I needed an overnight solution and found you! What a slice of luck! I decided to doing an open bake batard on a marble slab I bought in 2021. Apart from not closing off the ends properly when I shaped the dough it turned out superbly. Best loaf since I returned. I will definitely use this approach again.
Many thanks
James
I followed a few recipes before but none of those worked for me. I tried this over the weekend and turned out pretty good for me. I think the dough was a little but over fermented but the bread had a good spring and it is pretty soft. I will try this recipe a few times to make it work for me. thanks for the detailed description.
I’m new to sourdough bread and I see that many recipes like this one uses a Dutch Oven. I googled so see about buying one and discovered they come in different sizes. I searched this recipe and cannot discover what size to get. I suggest adding that information to the notes and equipment section.
You can find all the information on the Dutch Ovens I recommend here.
Just made the best sourdough ever with this recipe! I love that you can start it the night before and (after the overnight rise) have several hours of cold proofing the next day and still have it ready for dinner.
I’ve never been a baker, just a few cookies from time to time. Your article has very helpful information for a newbie to sourdough bread making. I really appreciated the detailed time line with options and what to expect at each stage. The pictures were also really helpful to compare with while following your time line. I am gaining confidence in the process.
delicious. great flavor and crust
This is my go to recipe for a country style sourdough bread. I have been making a few changes in flour used and also the shapes and it comes out perfect.
can you use standmixer for dourfough as find hard to do stretch and folds
Hi Lynette, Absolutely! Kate does that frequently. You can read about her tips for that here.
This is a great guide, my first wheat sourdough bread, I normally bake mixed flour, 2/3 wheat, 1/3 rue wholegrain. it is a lot smoother and turned out fantastic.
This worked so well for me! Thank you so much! I was so worried it might overproof but while it more than doubled, it was domed on top with lots of bubble from the sides but shaped beautifully! Will definitely be making this recipe a lot!
Gave my husband the Sourdough Sidekick for Father’s Day for his Friday Night Pizza making – lucky for me he makes a bit extra starter for me, AND I found this recipe! Baked 2 loaves last week (1st time using your recipe) and it was so god, I’ve got 4 loaves bulk fermenting for tomorrow!
Thanks – this was my second adventure in sourdough, the first was a complete failure and I would have quit while I was behind had I not found your recipe!