
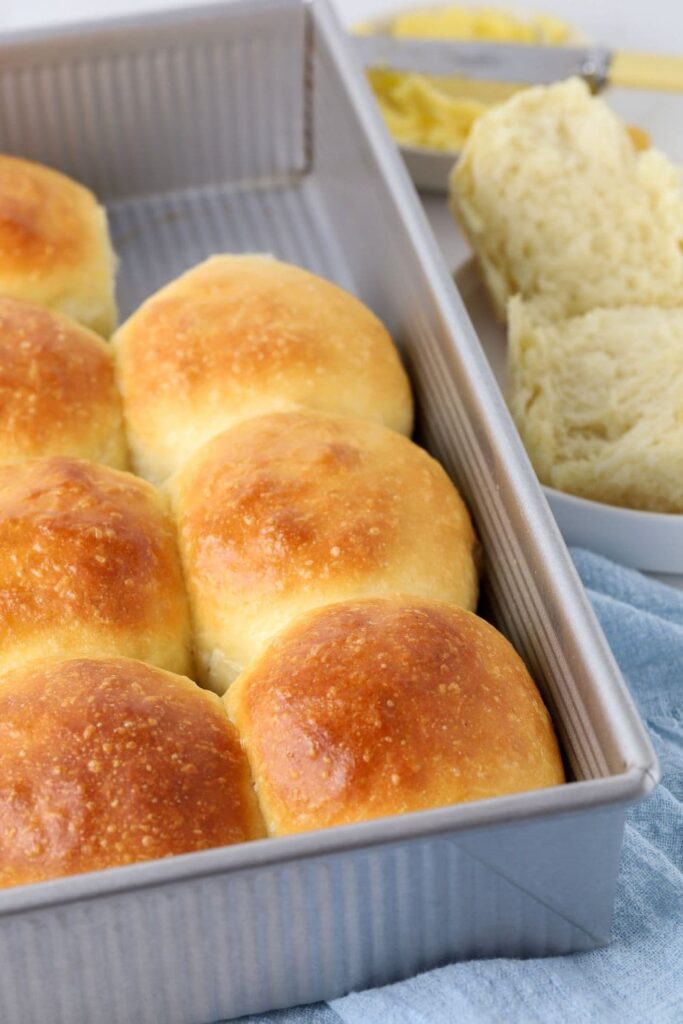
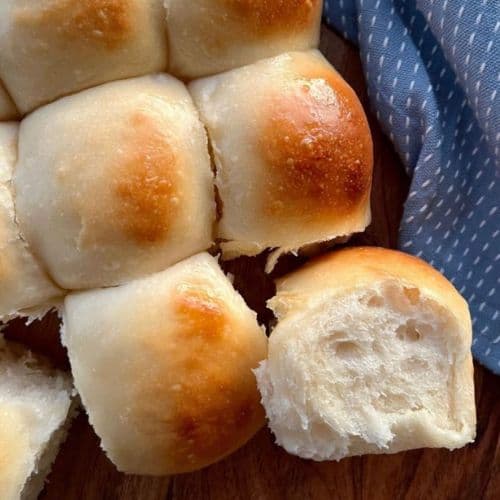
These soft sourdough dinner rolls are light, fluffy and slightly sweet, with a buttery golden top and pillowy pull-apart centre. They’re naturally leavened with active sourdough starter, no commercial yeast and no eggs required. They are just as perfect for a weeknight dinner as they are for Thanksgiving or Christmas.
You can make them on an overnight schedule or adjust the timing to suit your day, making them an easy way to put warm homemade sourdough rolls on the table without spending the whole day in the kitchen.
This post contains affiliate links. Please see our disclosure policy.
Why You’ll Love This Recipe!
- Soft + Fluffy – These naturally leavened dinner rolls have a pillowy, pull-apart centre with a soft golden crust. They’re slightly sweet but still versatile enough to serve with almost any meal.
- Choose Your Size – You can choose to make these sourdough dinner rolls whatever size you’d like. I find that this recipe makes around 12 rolls at 80 g (I use a scale to ensure all the dough balls are all the same size). Alternatively, you could make 18 rolls at 50 g.
- No Eggs – unlike many sourdough dinner roll recipes, this recipe doesn’t use eggs in the dough or as an egg wash on the top of the rolls. This is great if you have egg allergies.
- Flexible Schedule – Make the dough overnight, or adjust the timing to suit when you want the rolls on the table.
Ingredients
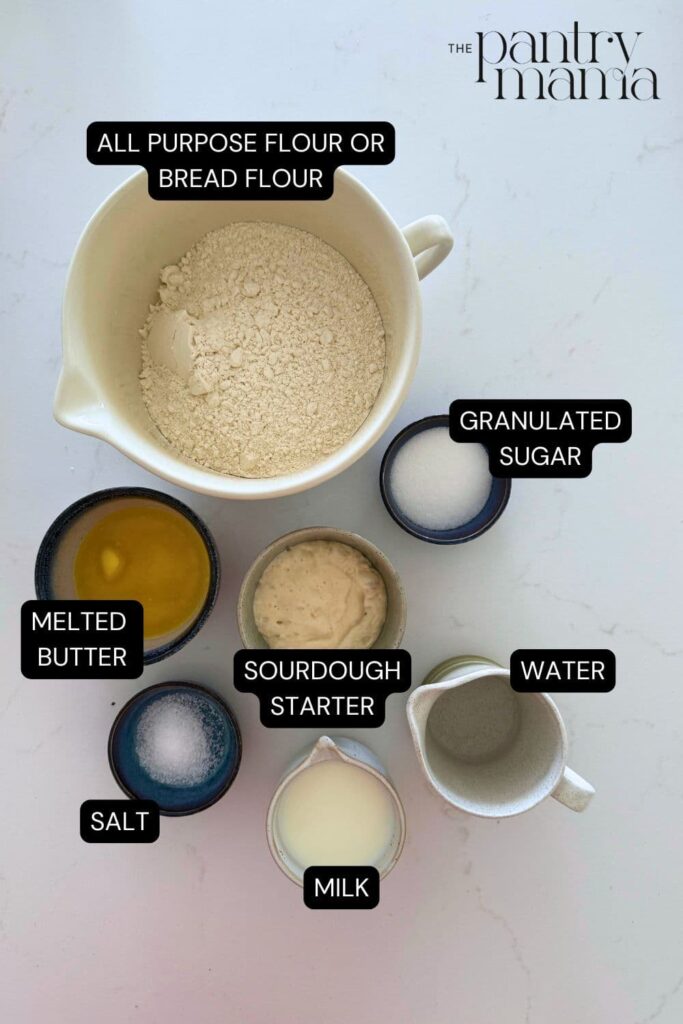
- Whole Milk – I’ve tested this recipe with whole milk and 2% and it works equally as well. You can also substitute buttermilk if you prefer.
- Water – room temperature water is best, but using warm water will get the wild yeast in your starter activated more quickly. Just be careful not to make it too warm or you’ll end up with soupy dough.
- Sugar – You can reduce the sugar if you want to but it will change the composition and flavor of the rolls. They are meant to have a slight sweetness to them.
- Salt
- All Purpose Flour – You can use bread flour for this recipe, but all purpose is better. You’ll get a softer roll as the protein content is generally lower. They will still be soft if you use bread flour, but will have a slight chew to the bite. If you want to use whole wheat flour, I recommend using this recipe for whole wheat sourdough dinner rolls.
- Sourdough Starter – You’ll need active sourdough starter to make this recipe. Feed your starter well before you plan to make these so that it’s bubbly and at peak, ready to rise your dough!
- Butter – I’ve used salted butter, melted and cooled, but as always you can use unsalted butter if you prefer.
Recipe Testing Notes

Over the years, I’ve tested this recipe multiple times, plus it’s a recipe that I make on a very regular basis for my own family. When I first started making these sourdough dinner rolls, I would mix the dough to a dry, shaggy dough and then let the dough rest for around 30 minutes before I kneaded it. I’ve tested it without this rest and there’s no noticeable difference in the texture of the rolls, so I no longer do it this way.
How To Make Sourdough Dinner Rolls
I’ve used a stand mixer with a dough hook attachment to create soft and fluffy dinner rolls, but you can absolutely knead this by hand if you prefer. These soft sourdough dinner rolls have been created using parts of my sourdough sandwich bread – it’s another soft sourdough recipe you might enjoy.
To start the recipe, you’ll need to add all of the ingredients to the bowl of your stand mixer (I do like to dissolve the sugar into the milk and butter first). Knead with a dough hook until the dough is silky, slightly tacky, and pulls away from the bowl. This usually takes about 3 to 8 minutes depending on your mixer. I recommend not adding extra flour, just keep kneading until it comes together. Extra flour will alter the texture of the cooked rolls.
Once the dough has been sufficiently kneaded, cover it and let it rise at room temperature. Because this is an enriched dough containing milk, butter and sugar, it will ferment more slowly than a lean sourdough bread dough. Look for the dough to increase by around 75–100%, feel aerated and slightly domed, and jiggle gently when you move the bowl.
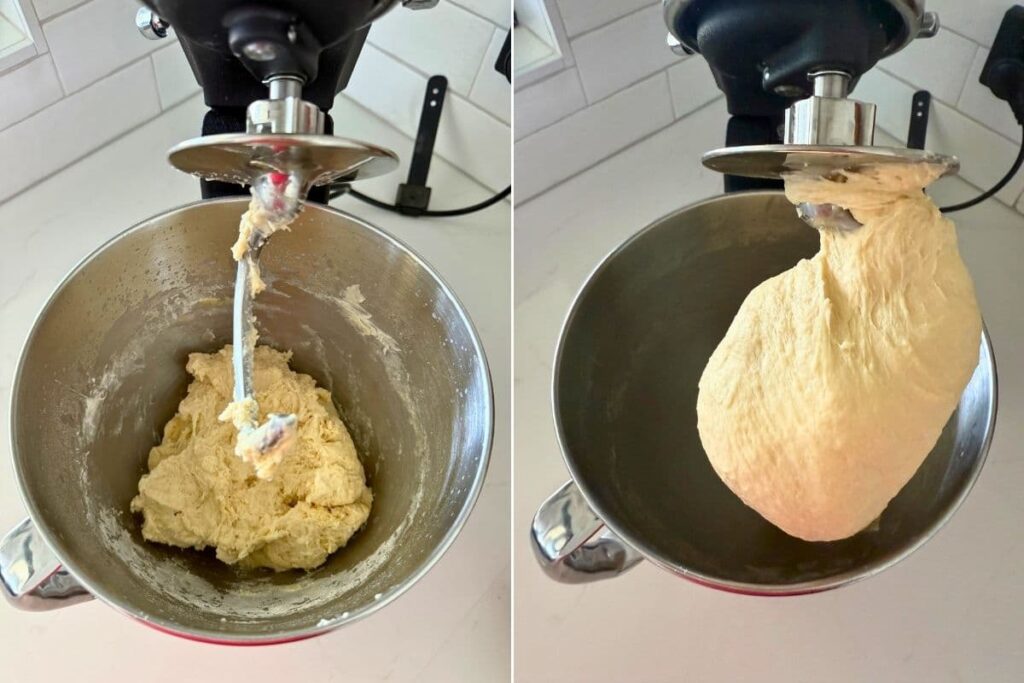
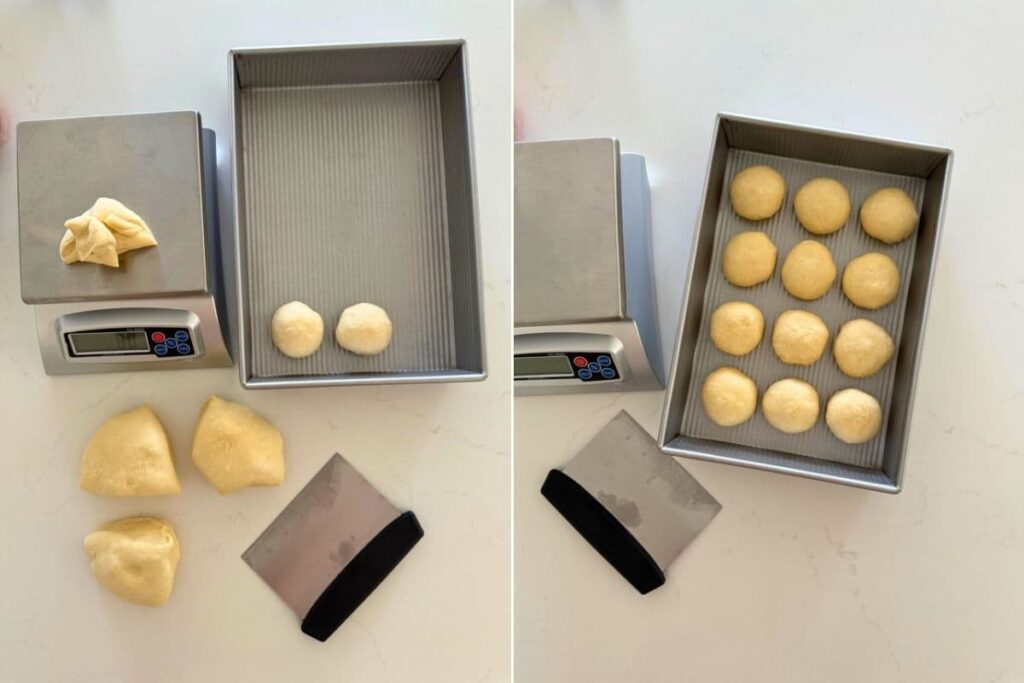
When you’re ready to shape the sourdough rolls, you’ll need to divide it into 12 equal pieces (a kitchen scale helps here for consistency), and gently shape into balls. I’ve chosen to make 12 rolls at 80 grams each. The smaller you make the rolls, the more you’ll get out of each batch of dough.
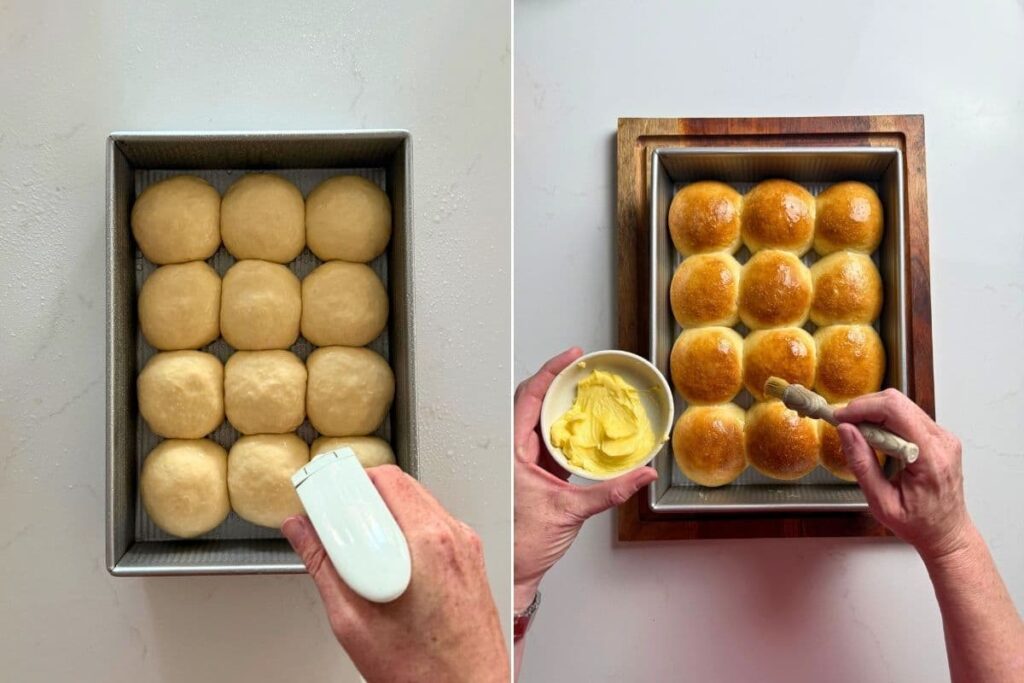
Create surface tension on each of the dough balls by rolling them in a circular motion on the counter top and using a cupping motion to pull the dough towards you. This surface tension helps to ensure they rise properly and helps them to maintain their shape through the proofing and baking process. Arrange them in a parchment-lined baking pan or greased dish.
For a flatter, wider roll, space them a little apart in a 9 x 13-inch baking pan (like you can see in the photo below). For taller, pull-apart rolls, use a smaller baking dish and ensure they are touching before you allow them to proof.
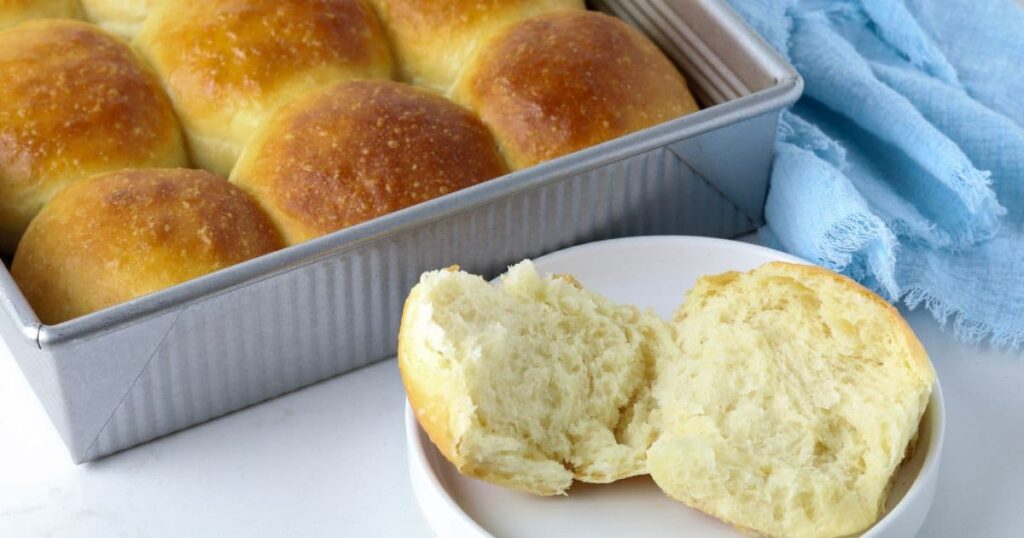
Once they’re shaped, it’s time to cover and set them aside for the second rise (this can take quite a while given that it’s an enriched dough). The shaped rolls should be noticeably larger, touching one another and feel light, soft and puffy. Gently press one with a fingertip. The indentation should slowly spring back rather than bouncing back immediately.
When you’re ready to bake the rolls, spray them with water, then bake at 180°C (350°F) for 25 to 30 minutes or until golden brown. For a soft, shiny finish, brush with melted butter while still warm, then let cool slightly before serving.
You might also like to try these sourdough buttered knot rolls, sourdough discard rolls or these sourdough skillet rolls with honey thyme butter. These sourdough cheese and garlic dinner rolls are also popular!
Baking Timelines
This recipe has 100 grams of active sourdough starter – you can reduce the amount of starter if you wish to ferment the rolls overnight. The dough is an enriched dough so it will take longer to ferment than a lean dough. It’s perfectly safe to ferment them at room temperature overnight with milk in the dough. Read more about creating a sourdough baking timeline.
I’ve created 2 baking timelines for you – one for a same day bake and another for an overnight schedule. Remember the role of temperature here. You’ll need to keep the dough quite warm for the same day bake.
Overnight Timeline
| TIME | PROCESS |
|---|---|
| 1 pm | Feed your sourdough starter with a 1:1:1 ratio for a faster rise. |
| 8 pm | Mix and knead the dough. |
| 9 pm | Bulk ferment the dough at room temperature overnight (remember this is enriched dough so it will take a while to bulk ferment). |
| The Next Morning | |
| 7 am | Shape the rolls and allow them to proof for a few hours before you bake them. Remember you want them to be light and puffy. |
| 1 pm | Bake the rolls. |
Same Day Timeline
| TIME | PROCESS |
|---|---|
| The Night Before | |
| 7 pm | Feed your sourdough starter a 1:5:5 ratio so that it peaks the next morning. |
| The Next Morning | |
| 7 am | Mix and knead the dough. |
| 3 pm | Shape the rolls and allow them to proof somewhere warm. You want the rolls to be light and puffy before you bake them. |
| 5.30 pm | Bake ready for dinner. |
These timelines are a guide only. Your dough may ferment faster or slower depending on the strength of your starter and the temperature of your kitchen.
Kate’s SCHEDULING TIP
Want To Pause These Dinner Rolls Overnight?
Once the rolls are shaped, cover them and place them in the refrigerator overnight. When you’re ready to bake, take them out and allow them to finish their second rise at room temperature.
Don’t bake them straight from the fridge unless they are already fully proofed. They should feel soft, light and puffy before going into the oven. If they still feel firm or dense, give them more time. Baking under-proofed rolls can leave them gummy and heavy in the centre.
Serving Suggestions
These tender sourdough dinner rolls are perfect just on their own – seriously try not to eat them all at once! They will be the stars of your Thanksgiving table, alongside some of these other sourdough Thanksgiving recipes!
But just in case you need some inspiration, these are some of the ways that we use them in our home:
- Instead of plain butter, brush them with whipped herb butter after baking and serve with your fave Italian dish.
- Fill them with leftover Thanksgiving turkey or Christmas ham and a generous dollop of tomato chutney.
- Perfect accompaniment to your favorite soup.
- Serve instead of sourdough tortillas or taco shells next time you make pulled pork.
When serving them at the table, I like to place a linen cloth or tea towel into a basket, pop the buns in it and then cover them with the cloth to keep them warm. You could even place a wheat pack that’s been heated in the microwave in the bottom of the basket before placing the cloth on top. This will keep the rolls soft and warm.
How To Store + Freeze
Room Temperature – Store these sourdough dinner rolls in an airtight container on the counter for up to 3 days. They won’t be super fresh after the first 24 hours but you can warm them a little in the microwave to freshen them up.
Freezing – These sourdough dinner rolls freeze really well. Place the cooled rolls into a ziplock bag (I prefer not to pull them apart if I’m going to freeze them). Seal the bag and place into the freezer.
When you’re ready to use the rolls, allow them to thaw on the counter in the resealable plastic bag. If you want to serve them warm, wrap the thawed rolls in aluminum foil and place into a warm oven for around 20 minutes. You can brush with melted butter just before you serve if you want to. Once warm, pull them apart.

Sourdough Dinner Rolls
Equipment
- Stand Mixer
- Digital Scales
- Baking Pan or Dish (9" x 13")
Ingredients
- 200 g Milk, (whole milk, warm)
- 50 g Butter, (melted)
- 80 g Water
- 40 g Granulated Sugar
- 10 g Salt
- 500 g All Purpose Flour
- 100 g Sourdough Starter, (active, fed and bubbly)
Instructions
- Add the milk, melted butter, water, sugar and salt to the bowl of your stand mixer. Mix the ingredients together using the whisk attachment so that the sugar and salt are dissolved and the butter is mixed through the milk.
- Now add your flour and sourdough starter to the bowl. Use your dough hook attachment to knead the dough until it becomes silky and slightly tacky. It should come away from the sides of the bowl.
- Bulk Ferment:Once the dough is sufficiently kneaded you need to let it ferment and rise. You can leave it in your stand mixer bowl for this (saves washing up) or you can transfer it to another bowl if you like. Cover the bowl with plastic or a damp dish towel and let it bulk ferment at room temperature. You want it to come to just under double.
- Once your dough has risen you need to divide it into 12 equally weighted pieces and shape into balls. This recipe will give you 12 rolls around 80 grams in weight.Arrange the dough balls onto a parchment lined pan or baking dish. They need to be just touching each other in the pan. You could also choose to bake these as individual rolls (space them further apart on a baking tray).
- Second Rise:Cover the pan with a dish towel and allow the rolls to double in size. It will generally take around 2 hours for them to double – but of course will take longer if your house is cold (ideally you want to put them some place warm).
- Baking The Rolls:Preheat your oven to 180ºC (350ºC)Once the oven is warm and the rolls have doubled, spray the rolls liberally with water.Place the rolls into the oven and bake for around 30 minutes. Take them out of the oven and brush immediately with melted butter (this is completely optional but it makes the sourdough dinner rolls lovely and soft).Allow them cool on a wire rack for around 10 minutes before serving.
Notes
Nutrition
Nutrition information is automatically calculated, so should only be used as an approximation.
Like this? Rate and comment below!











Is one tablespoon of salt correct?
I’m a novice baker. I attempted this twice and both times, the dough remained sticky in the mixer. I alternated between Speed 1-2 on a KitchenAid. First time I kneaded up to 10 mins and 2nd time I kneaded for 15 mins and both times, the dough remained sticky.
I let it bulk ferment overnight and it doubled in size but it was way too sticky to shape into balls. Any insights on what could have gone wrong would be really appreciated. Thank you!
My dough didn’t dubbel overnight. Any help?
Hi! How long do you bulk ferment?
I loved this recipe! It makes a really lovely dough and is easy to put together. It took a lot longer to bulk ferment and proof, and it didn’t get as poofy as I was anticipating. But I think it’s just because our house is so cold. It got good oven spring anyway, and they’re delicious. My husband gave it an A++ 😂
Can I shape these after the bulk ferment, then put them in the fridge over night, then in the morning do the second rise before baking?
Has anyone doubled this recipe?
It’s probably better to make each batch separately right?
Any reason why I have no luck just using half the recipe? I don’t get first rise. Any help?
If I make the roll, let them rise and decide not to cook them right away, how long can they stay in the refrigerator? Thank you!
About 8-12 hours or so.
These are the best rolls I have made! Have you ever put them in the fridge after shaping and then bring them out to bake? I’m sure it would work.
Hi Sarah, That should work! They can stay in the fridge for around 24 hours before baking.
Please help! I mixed these up last night around 7 and cut the starter in half so I could form then this afternoon. They barely rose in all that time. Wondering if I kneaded the dough too much? I did it by hand.
Hi!! I am trying to make these rolls but they aren’t rising, not sure what I’m doing wrong. I did try warming the milk a little so that it mixed better with the butter, I also tried it with cold milk. It’s been about 10 hours and they haven’t risen at all. I also left one overnight and it didn’t rise. Hoping to get some advice!! I use lots of your other recipes and have no issues.
If freezing after first rise how long do you suggest it would take them to unthaw and then do second rise?
Kate doesn’t generally recommend freezing these rolls unbaked. It’s better to bake them, cool and then freeze. If you freeze them unbaked, it’s really hard to judge when they are thawed and proofed enough to bake. You find her tips for freezing the rolls here
I need help!! I followed the directions exactly as written. My starter passed the float test so I know it was ready. My dough would not rise and they came out dense 🙁
The float test isn’t a great indication of starter readiness for baking. You will find better ways to ascertain this here.
With the dinner rolls, you really want to make sure they are super puffy and soft before you bake them. They take longer than you might think to proof, so when you make them again, make sure you really allow them puff up prior to baking.
Can you give me guidelines of how long and at what speed you knead your rolls at? I know it might be different but I would love some more guidelines !! I really want to make these work! I made them today and kneaded at medium speed for 6 minutes and they are not rising very much. I made bread with the same starter and it rose great. So I’m thinking I must not have kneaded it long enough? Thanks so much!
If using a stand mixer for these, Kate uses a KitchenAid and kneads at speed 2 for around 2 minutes and then speed 1 for around 2 minutes. That usually yields a soft, elastic dough.
These are so tasty! My only issue the outside were crispy and the insides didn’t cook all the way. I started with a cold oven and baked 40 minutes because the tops weren’t golden at 30 minutes. I would love any suggestions. Thank you!
These need to be really soft and puffy when you put them in the oven 🙂 That’s the secret to great sourdough dinner rolls 🙂 xx
I actually use this recipe for my cheese and bacon buns. Just brush with warm milk and cover in about 2 cups of grated tasty cheese and a cup of cubed bacon before putting in the oven. I added tin foil on top about 20 mins in just to stop the cheese from burning and leave them for am extra 10 mins (so 40mins altogether). They are the best cheese and bacon bun I’ve ever eaten, and actually works out a lot cheaper than buying them at the bakery or shops. Highly recommend!
I want to make for Thanksgiving, can I pre-bake the rolls and reheat them the next day?
Hi Lisa, You can, but they’re best fresh, or frozen and then reheated when it’s time to eat.
What would be the reason that my rolls tasted lemony?
Hmmm I’m not entirely sure as there is no lemon in the recipe. Might be your sourdough starter 🙂
My house is about 72 degrees all the time. Is this a dough that can proof overnight at that temp?
That is getting a little warm, however I would give it a try. You could do a late mix and knead and it should be ok, especially given it’s an enriched dough which can take longer to ferment than a lean dough. If you find it over ferments, try reducing the amount of starter you use 🙂
I’m looking forward to making these rolls. Is there a way to do the lion’s share of the dough-making the day before and bake the next evening. I’m not sure where in the process to chuck the dough in the fridge for a nap. THANK YOU for sharing your wisdom about all things sourdough.
Hi Bonnie, You can add them to the fridge after the second rise (step 6 in this recipe). They’ll be okay in there for up to 24 hours. Just bring them to room temperature before baking.
Thank you for the update. We enjoyed these rolls over the weekend (the dry-run before Thanksgiving) and I’m certain we’ll have them on our table. I should have read through all of the comments before posting.
If im making them for dinner is it okay to refrigerate them for a few hours before baking? If so, should I do it after BF or after shaping?
You can refrigerate after shaping. Just don’t refrigerate more than 24 hours, and bring to room temperature before baking.
Can I use buttermilk instead of whole milk?
Yes you can use buttermilk instead of milk.
I’m confused about the “overnight” bulk fermenting option. The sample baking timeline suggests and overnight bulk. However, the blog post also discusses reducing the starter amount for a longer ferment. It also links to another sourdough post in which Kate specifically states wanting the starter to be at 50g for an overnight bulk. Should I plan an overnight bulk using this recipe as-is (100 g) or try reducing? TIA!
You’d really need to look at temperature and strength of starter. If you are mixing and kneading later at night, the bulk fermentation should be ok with 100g as long as it’s not too warm. This is an enriched dough so that can take longer to bulk ferment than a lean dough.
Hi!! If I’m making multiple batches and I want to put the second dozen into the preheated oven should I reduce the baking time? Thanks!
You can leave the baking time, just watch them for the last 10 minutes to ensure they don’t get too brown.
Should I use warm milk and water for this recipe? I use 115°F water for other sourdough recipes. No mention of temperature is made here.
You can use warm milk if you prefer, I generally sit it out at room temp for a little while so it’s not icy cold, but you can warm it up if you prefer 🙂
I plan to make ahead and freeze for Thanksgiving Dinner. Can you please advise as to dimensions of baking tin you use? Thank you!
My dough proofed over night in 69-70 degrees for a good 9-10 hours and never really rose. I used very active starter and also made 2 loaves at the same time that got very puffy. I went ahead and formed the rolls and let them set out and proof again for another almost 6 hours and they never got puffy. What could I be doing wrong? My melted butter did congeal when it hit the cold milk and I wondered if that could mess it up. Should you warm the milk first?
These were SO good! The only change I made to the recipe was baking them at 375F in a preheated oven. The dinner rolls were amazing, thank you for sharing the recipe!
wonderful rolls! I have two comments – One is to make sure your milk is room temp or slightly warm. Novice cooker me I added melted butter to cold milk and, well, it wasn’t melted butter anymore. Two is that my rolls were nicely brown at 30 minutes but when I took them out they were far from being fully cooked. I promptly tossed them back in for 15 minutes with foil on top. I had a wonderful 1st and 2nd rise so it was *almost* perfect!
Hi, thank you for a lovely recipe. Is it better to bulk ferment, shape and freeze, defrost, do 2nd rise and bake……OR Complete entire process, including bake, and then freeze. I have so much going on for TG, that I want to make this 2 days in advance if possible. Thanks again.
These rolls are best when you bake then freeze. 🙂
Would I be able to leave these in the refrigerator for 2 nights after shaping or would you suggest freezing them?
I would bake them and then freeze them rather than leaving them in the fridge for 2 nights 🙂
Tight on time/oven space…
Would you let them proof longer and put in a hot oven or less proofing time and into a cold oven?
You can put them into a hot oven if you prefer, yes just make sure they are very puffy before putting them in and reduce baking time a little 🙂